Thursday, December 25, 2008
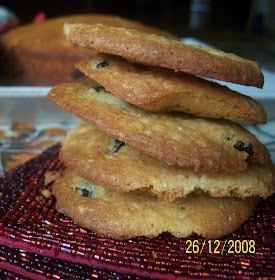
White Chocolate, Cherry and Oatmeal Cookies
I have been baking a Christmas cake for the past two years and it has become nice way to bring in the holiday spirit - right from marinating the fruit to baking it on Christmas Eve. This was the first time in the last eight years we weren't at the our friend's house in Chennai for Christmas - but the cake still managed to please new friends. And the special part of baking it this year was that a couple of months back I got to meet my friend in London who had given me this recipe some years back. We have only been emailing each other for almost 8 years now so it was wonderful to actually get to meet her!
This year, I also baked some cookies - adapted this recipe which was itself adapted from this one
from Smitten Kitchen who adapted it from Cook's Illustrated. I love crispy cookies much more than the chewy ones so I loved the idea of these. They are actually not so much crispy rather than this kind of absolutely gorgeous vehicle to transport some rich chocolate and oatey goodness into your mouth!! I did away with the sea salt and reduced the oatmeal, threw in some dried cherries and Voila! - absolutely delicious cookies. I had to stop myself from eating the dough while waiting for the first batch to cook :)
Sending these cookies to Neivedyam's Cookie Baking Event which is being hosted by Sharmi.
Ingredients:
Flour - 2 cups
Oats - 1 cup (I used quick cooking oats)
Baking powder - 3/4 tsp
Baking soda - 1/2 tsp
Butter - 200gms
White chocolate(chopped) - 170 gms
Egg -1
Vanilla essence - 1 tsp
Dried cherries - 50gms
Sugar - 1 cup
Method:
1. Cream the butter and sugar in a large bowl till smooth.
2. Put the chopped chocolate into a glass bowl and place it inside a bowl of heated water and microwave in 30 second intervals till melted and smooth.
3. Beat the egg and add to the creamed butter and sugar mixing lightly till combined.
4. Sift the flour with the baking powder and baking soda and then add gradually to the egg mixture.
5. Add the vanilla essence and the melted chocolate to the bowl and combine with a wooden spatula.
6. Refrigerate the mixture for about half an hour so that it can be shaped into balls - do not skip this step!
7. Pre heat the oven to 180C (350F), cut butter paper to size and spread on a baking tray.
8. Shape the cookie dough into balls, flatten slightly and place on the baking tray atleast 2 inches apart (they will spread and flatten as they bake). Don't handle the cookie dough for too long since the chocolate and butter will start melting.
9. Bake for 15 minutes. Remove the butter paper with the cookies on it and set aside to cool. They are very fragile before they cool so don't try to remove them from the butter paper when hot.
10. Bake more batches in the same way till the dough is used up.
Saturday, December 13, 2008
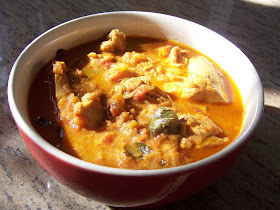
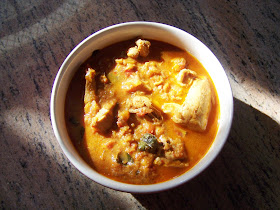
Kozhi Vartha Curry
Secrets and scoops, clothes and coffee, wisdom and wine - girlfriends share it all. And what better way to do all this than over a long, lazy lunch on a lovely winter's day?! A mid week holiday is one of the best things to happen to a working woman trying to juggle half a dozen things. So when one came my way last week I started thinking of all the chores I could finish - the gas ordering, buying winter clothes, claims, bank work.
Midway I paused and thought to myself - life is too short to let a whole day pass by without enjoying it. I decided to spend time with my daughter and do something for myself too. Called up the usual suspects - girlfriends I have made in the past one year and who have become really good friends. Two of them couldn't make it but two others did. R's daughter is my daughter's best friend so she came along too and they had a ball while the three of us chatted and caught up over lunch.
I planned some simple home food - Sambar, cabbage porial, steamed rice and salad. I decided to make a spicy chicken curry. Kozhi Vartha Curry seemed to be the perfect dish to go with the Tamil meal, so I dug out my trusted recipe - it is heavily (very heavily) adapted from Sanjeev Kapoor's recipe and I have found it works best for me. Kozhi means chicken in Tamil, Vartha refers to frying the chicken pieces.
It turned out quite fiery and had the right amount of sourness to make it a perfect accompaniment to the steamed rice. The sambar ended up being slurped out of bowls in true non-South Indian style :) - the same as this one but with pumpkin in it.
It was one of those really nice afternoons when you really don't know how time passes - we discussed everything under the sun - school admissions (trying), the terrorist attack (outrageous and tragic), the Faberge exhibition on at the National Museum (fabulous), Dostana(terrible), the new Bond movie (disapoointing), pending book lists (long) - and before we knew it it was 5 pm!
I'm glad I picked the lunch over chores - my inbuilt guilt mechanism ensured I finished my chores over the weekend. So what would you have chosen - hope my story encourages some of you to treat yourself sometimes!
Kozhi Vartha Curry
Ingredients:
Chicken - 800 gms cut into 12- 14 pieces
Marination:
Red chilli powder - 1/2 tsp
Turmeric - pinch
Yoghurt - 1/2 cup
Salt - 1/2 tsp
Masala paste:
Ginger - 2 " piece
Garlic - 6-8 cloves
Red chillies - 4
Oil - 1/2 tbsp
Curry leaves - 5-6
Onions - 2 chopped fine
Tomatoes - 3 chopped fine
Coriander powder - 1 tsp
Crushed black pepper - 1/2 tsp
Garam masala - 1/4 tsp
Tamarind pulp - 2 tbsp or a juice extracted from a marble size ball.
1. Clean the chicken and marinate in yoghurt, red chilli powder, turmeric and salt mixture for atleast 2 hours.
2. Grind the masala ingredients to a smooth paste adding water as needed.
3. Heat oil in a heavy bottomed pan and add the curry leaves and the chopped onions and saute for 4 minutes on low.
4. Add the chicken pieces along with the marinade and masala paste and fry on high for 5-7 minutes allowing each side to sear till it turns a bit brown before turning it over.
5. Add the chopped tomato and fry till it is mushy, then add the coriander powder and salt and fry for about 2 minutes.
6. Add 1 cup water and bring to boil, reduce flame and cook covered for about 12-15 minutes till the chicken is tender.
7. Adjust the salt, add the tamarind pulp and cook for another 5-6 minutes.
8. Add the garam masala and crushed black pepper and remove from flame - serve with steamed rice.
Notes: the recipe is quite spicy, reduce a couple of chillies if you like it less spicy.
I also removed a couple of pieces from the marinade and grilled it for about 20 minutes at 180C - it was well flavoured and juicy.
Wednesday, December 3, 2008
Carrot & Mustard Bread
It's funny how certain things you buy seem to acquire a vibe or a kind of reputation attached to them. Like that dress which you seem to be perpetually running late in or spilling things on or the car which always seems to be getting into scrapes while the other one you owned only reminds you of all the lovely, long road trips you have taken.
Of course, it could be that you always spend time looking for matching earrings for that particular dress, which is why you run late or you love wearing a particular dress for lazy lunches - and if you're anything like me that's a guaranteed recipe for splotches and stains!. And of course we took more road trips as a cozy couple and handed over the car to a driver when the kid came along!!
Inspite of all the rational explanations, these things seem to stick in our mind. The same thing happened with a lovely loaf tin my friend picked up for me when she saw a dealon while shopping. This was in June and immediately after that I somehow simply stopped baking! It had everything to do with the fact that I went back to full time work in July, but of course I blamed it on the poor loaf tin.
The best way to break that jinx? - bake something in it! So, I brought out my Sara Lewis book and saw this lovely Carrot & Mustard bread. I started quite late (around 7.30pm) and realised later it would only become colder as time wore on - definitely not ideal bread baking time. But I just can't seem to give up an idea once it takes hold, so I soldiered on. The yeast was fine and bubbled over, but when I kneaded the bread and left in a warm oven, it really didn't rise as much as it normally does. So I left it for almost an hour and 45 minutes before the second proofing. Kneaded it again and shaped the dough into three small buns and one oblong loaf.
30 minutes later it had not risen much at all and I was really sleepy and didn't think it was going to rise much anyway, so popped it into the oven to bake after glazing it. It baked quite beautifully and the glaze made it a nice golden top. But the inside of the bread, though cooked, was not the lovely spongy texture I look forward to....I guess, now that it's winter, I should stick to baking in the day when its a bit warmer. Or maybe it was the fact that I had used whole wheat flour instead of "granary flour" and plain flour instead of "strong white flour" and did not change the proportions. The flavours of the carrot and mustard were excellent though - definitely worth a second attempt.
Ah, well, atleast now the jinx has been broken and I can stop blaming the loaf tin........on the other hand, maybe I can blame the loaf tin for the bread!*evil grin*
This loaf of carrot bread specially to dear Cooker who is hosting this month's edition of JFI - where the ingredient is the Carrot. Jihva for Ingredients (JFI) is the brainchild of Indira and is probably one of the longest running Indian food blog events. Thank you Cooker for extending the last date!
Carrot & Mustard Bread
Recipe adapted from Sara Lewis's The Bread Book
Ingredients:
Wheat flour (atta) - 200gm (approx 2 1/4 cups)
Refined flour (maida) - 150gm (approx 1 3/4 cups)
Water - 200ml (1 cup)
Dried active yeast - 3 tsp
Sugar - 1 tsp
Honey - 1 tsp
Mustard - 2 tbsp
Carrots - grated, 1 cup
Salt - 1 tsp
Butter - 2 tbsp
Egg yolk - 1
Method:
1. Warm up the water, dissolve the sugar in it and when lukewarm add the yeast to it. Keep aside for about 15 minutes till it bubbles and froths.
2. In a large mixing bowl, mix the flours with the butter, rubbing till it resembles breadcrumbs.
3. Add the salt, honey, mustard, grated carrot and the yeast mixture and knead for 10 minutes to a smooth dough.
4. Cover with an oiled clingwrap and set aside in a warm place for about an hour or till it doubles in size.
5. Knead again and shape into an oblong loaf or form into a thick rope and twist from one side like a corkscrew.
6. Put into a greased loaf tin (I used a 1 litre loaf tin for the loaf and made the rest of the dough into three small rolls) and set aside for another 30 minutes till it rises to the top (depending on the height of the tin).
7. Pre heat the oven to 200C, brush the egg yolk mixed with 1 tbsp water on to the top of the loaf and then bake for about 30-35 minutes. If the top is browning too much after the first 15 minutes, cover with foil and continue baking.
8. Remove from oven, the bread should sound hollow when tapped. Remove from tin carefully and keep on wire rack to cool.