Showing posts with label cookies. Show all posts

Saturday, January 7, 2012

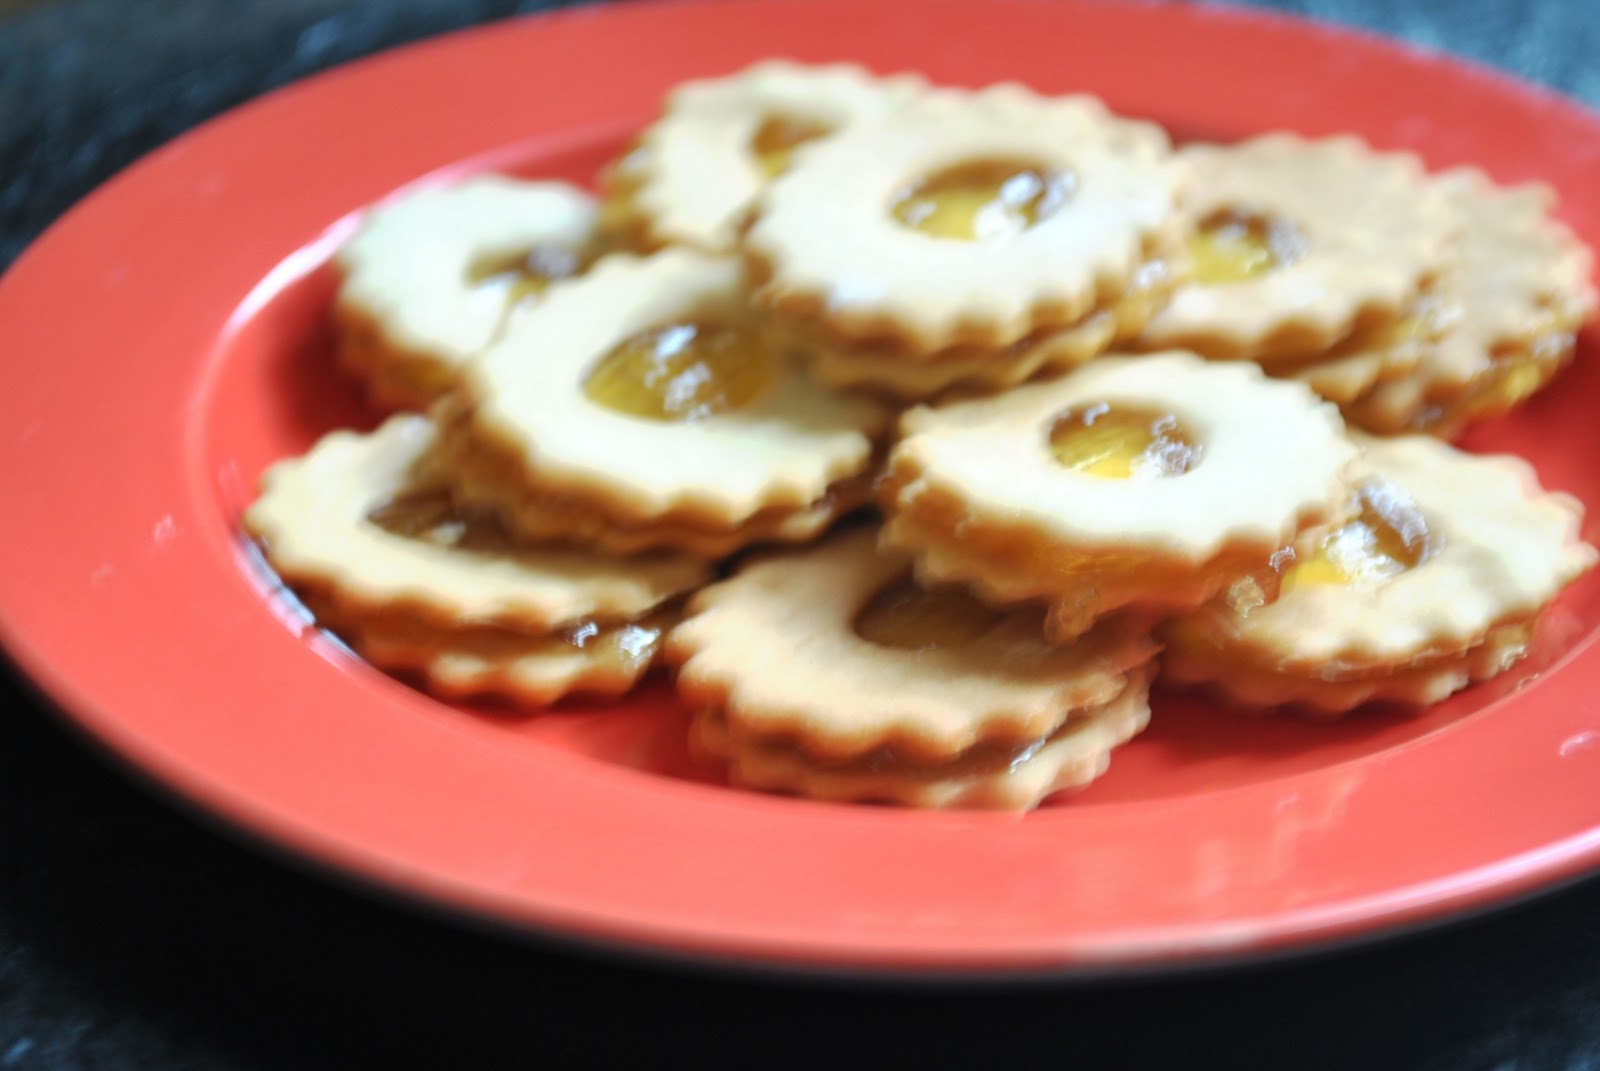
Jam Sandwich Cookies (Jim Jams)

 My niece and nephew are visiting from Mumbai for the Christmas hols and its been great fun having them here. The lil' one at 3 is a complete delight and my 6 year old daughter is thrilled to have someone younger than her. My niece is now 12 and she has grown into such a poised, mature girl :) Its always nice catching up with SIL as well. \

The kids were asking for cream biscuits (which is what we call cookies in India) the other evening so I asked them whether they wanted to bake jam biscuits. My niece was especially thrilled at the idea since she wants to learn to bake. So, I gave her the ingredients and she measured them out, kneaded and rolled and very painstakingly applied the jam gently on the cooled cookies before sandwiching them. She was so pleased with the biscuits, she couldn't stop beaming. K was suitable adoring of her elder cousin and even forgot to even ask to taste the batter at every stage.

I divided the dough into two parts, one part went into making the jam cookies and the other we mixed in candied fruit (Tutti Frutti) into the dough and made cookies from it. I had rolled out the jam cookie dough a tad too thin than needed so it was a bit crisper than needed. You could also cut out the cookies after making a roll of the dough - but the dough might be a bit too soft for that. I did cut out the dough for the Tutti Frutti cookies and they were thicker.
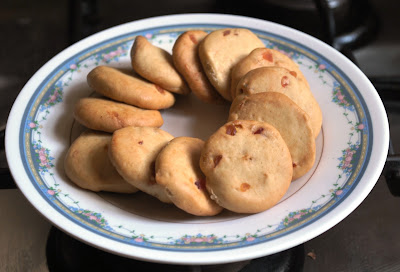


The Jam cookies were a hit with the kids - which one of us didn't like those jam filled biscuits!!And they did exactly what I used to = first took apart the biscuits, licked the jam from both sides and then ate the biscuits! Somethings never change :)

 Jam Sandwich Cookies

Flour - 1 1/2 cups plus more for dusting and kneading
Salt -  a pinch
Egg - 1 (can omit, use 2 tbsp milk and 1 tsp baking powder)
Butter - 1/2 cup
Castor Sugar - 1/2 cup
Vanilla extract - 1 tsp
Milk - 1 -2 tbsp (as required)

Jam - any jam, I used pineapple - about 1/4 cup

1. Cream butter and sugar together till shiny. Add and egg and then beat till fluffy.
2. Sieve flour and salt together and then gently fold into the egg mixture.
3. Add vanilla extract and gently mix together to form soft dough, If too dry, add about a tbsp or two of milk. If too sticky, add flour one tbsp at a time till you are just able to form a rough ball of dough.
4. Wrap the dough in cling film and chill in the refrigerator for about an hour till firm.
5. Sprinkle flour on the work platform and roll out the dough into a rectangle about 1/2" inch high.
6. Cut with a cookie cutter, remove the uncut versions, form into ball and roll out again. Repeat till the dough is exhausted.
7. This step is optional, if you have a small cookie cutter or a tiny bottle top, you could cut out holes in half of the cookies to form a window for the jam to be seen on top.
8. Pre heat the oven to 180C, arrange the cookies in batches on a greased baking tray, leaving some space in between.
9. Bake for 10-15 minutes, depending on the thickness of the cookies and number of cookies on the tray - start checking after 6 minutes to ensure they are just cooked and don't get burnt. Remove when tops are firm and just starting to change colour.
10. Remove. cool and bake next batch. Once all the cookies are baked and cooled, spread jam on the the flat side of the cookies without holes on top and cover with the cookies with holes. Press gently and store in piles in an airtight container.

Wednesday, December 21, 2011

Milk Chocolate Macadamia Biscotti for Christmas


 Biscotti is a crisp (some would say hard) biscuit of Italian origin,traditionally enjoyed  (in Italy) with a wine or orange juice and in places outside Italy with a steaming cup of coffee. The word Biscotti describes its preparation - it is derived from the Latin word biscoctus which means "twice cooked/ baked". It describes foods which were cooked / baked twice so that they lasted longer and could be used to feed soldiers or travellers on long journeys and during wars. Their origin being the town of Prato, they are known as Biscotti di Prato; but they are also commonly called "cantuccini" in Tuscany and Sicily.

The traditional recipe only uses flour, sugar, almonds and eggs while not incorporating butter or yeast. The dough is baked in slabs and when fresh and warm cut into slices and baked once again till crisp. Recent recipes have started incorporating other nuts like hazelnuts, pistachios, pine nuts; baking powder and butter have also been included along with flavourings in the form of almond or vanilla extract and some spices like anise and cinnamon.

I love my cookies a bit crisp and crunchy and don't much prefer the soft ones, so I have always wanted to bake Biscotti. Never got around to doing it though until now. The thought of baking them twice and the fear of them crumbling while cutting them into slices after the first round of baking made it a little daunting, but it was actually all very smooth when I did get around to baking it.

I used milk chocolate (I had a large Cadbury Dairy Milk Fruit and Nut slab a friend had gifted my daughter and she - like me- doesn't always prefer "things" coming in between her chocolate. So I decided to cut it up into chips and use it in the biscotti. I also had some macadamia nuts lying from my trip to Australia and decided to use those as well. I adapted this recipe from Canadian Living.

I had my daughter's best friends over when I was making this so the tiny hands all wanted to shape the logs and they did a good job! My oven couldn't accomodate 14" logs, so I just divided the dough into 3 parts and made three smaller logs. The kids couldn't wait for the logs to be baked and then cool a bit so we could cut slices and I had a tough time restricting how much of the freshly baked logs they could consume - LOL! The slices cut quite easily with a serrated knife - you have to take care to use firm strokes to cut and not linger too much. The middle part of one of the logs was crumbling a bit, but there were a lot of takers for the crumbs, so I didn't have a problem with that :)

The Biscotti came out beautifully flavoured, not too sweet and with just the right amount of crunch from the nuts. They were crisp and made for a lovely snack with just the right amount of hardness. This is definitely a recipe to repeat since it has become a favourite in our house - none of my other cookies have won such all round approval satisfying the picky husband (when it comes to sweets) and the savoury liking daughter.


I have also baked my Christmas Cake with the kids - the one which I have been doing for many years and it is luscious with all the dried fruit inside - I sliced one portion and am dousing the other round cake with small spoons of orange juice till it is ready to be eaten on Christmas. I have another batch of dried fruit soaking with which I am going bake another Christmas cake when my niece arrives and we will have that one for New Year with friends and family. This is a different recipe I'm going to be using for the first time, lets see how it turns out. Have you baked your Christmas Cake - try this recipe here, its easy and you will love the flavour! If you haven't soaked dried fruit, ust steam the fruit for about 7-8 minutes gently in orange juice or rum and rest for 30 minutes, before proceeding with the recipe. Recipe here

Now back to the Biscotti.


 Milk Chocolate Macadamia Biscotti
 Ingredients:

Butter - 1/2 cup, softened
Sugar - 3/4 cup
Eggs - 2
Flour - 2 cups
Baking powder - 1.5 tsp
Salt - 1/4 tsp
Almond Essence - 1 tsp
Vanilla Extract - 1 tsp
Macadamia Nuts - 1/2 cup, chopped (can replace with almonds)
Milk Chocolate chips (I used milk chocolate bar chopped up into small pieces) - 2/3 cup

Method:

1. Cream the butter and sugar in a bowl, beat till smooth and shiny.
2. Add the eggs one at a time and beat well.
3. Mix in the almond essence and vanilla extract into the egg mixture
4. In another bow, sieve the flour and baking powder together. Add to the egg mixture and combine with a light hand till it comes together into a soft dough.
5. Add the chopped nuts and the milk chocolate pieces and mix into the dough.
6. With your hands, divide the dough into 2 or 3 parts, depending on the size of your oven/baking tray.
7. Shape each part into a log about 10-12" long and place on a greased baking tray, then flatten slightly while still leaving the edges rounded, making each long about 3-4" wide. Use flour while shaping the logs in case they are sticking to your hands.
8. Pre heat the oven to 180C and bake for 25-20 minutes, till the tops are just turning golden and the logs are firm. Cool for 10 minutes
9. Cut the logs with a serrated knife diagonally in a firm, swift motion into 1/2" slices each.
10. Stand the slices upright in a baking tray and bake at 180C for 20 minutes, till dry and crisp and base is slightly browned.

Tuesday, December 21, 2010

White Chocolate, Oatmeal and Macadamia Nut Cookies

I picked up a bag of macadamia nuts on my trip to Australia earlier this year and apart from eating some of the nuts as is, it has been sitting in my pantry quite untouched. I remembered the nuts while looking for a new recipe to try this week - when I spend time baking a couple of Christmas cakes and my daughter is nagging me to bake the Gingerbread People - I figure, in for a penny, in for a pound! Last year I had made these scrumptious White Chocolate, Cherry and Oatmeal Cookies, so I thought I could use macadamia nuts in the recipe instead. This combination is apparently a classic as well - the creamy white chocolate contrasting well with the nuts.


I dropped teaspoonfuls of the cookie dough and they came out a little thin and crunchy - thats how I like my cookies. If you like them softer and bigger, then you can drop more batter at a time and / or take them out 2 minutes earlier. The cookies will be soft to touch when they are done (and may look like they are undercooked) but they will harden a little as they cool. As long as they are pale brown on top and can be removed carefully with a spatula, they are fine. And no, for those who wonder, you cannot taste the oatmeal in the cookies. These cookies are lovely and crumbly, crisp outside and soft inside and nutty all over - one of the best I have made at home!

Wishing you a Merry Christmas and a very Happy New Year!


White Chocolate, Oatmeal and Macadamia Nut Cookies
Flour - 1.5 cups
Oatmeal - 1/4 cup (I use quick cooking oats and run them for half a minute in the mixer)
Baking powder - 1 /2 tsp
Baking soda - 1/2 tsp
salt - 1/4 tsp

Unsalted Butter - 110 gms (1/4 lb) - if frozen, bring to room temperature by microwaving at 10 second intervals, till just soft
Castor sugar - 1/4 cup
White Chocolate - I used Lindt - 100gms, chopped
Egg - 1
Vanilla essence - 1 tsp

Macadamia Nuts - 1 cup, toasted and chopped

1. Put the chopped chocolate into a glass bowl and place it inside a bowl of heated water and microwave in 20 second intervals till melted and smooth. Or put the chopped chocolate into a steel bowl and then place inside another bowl of water and heat gently over a low flame till it melts. Don't let the water come to a boil.

2. Cream the butter and sugar for about 2-3 minutes till it is smooth and shiny.

3. Beat the egg separately and add to the creamed butter and sugar along with the vanilla essence. Beat on medium till mixed in - about -2 minutes.

4. Sift together the flour, oatmeal, baking powder, baking soda and salt. Gently combine into the creamy butter sugar mixture - one third at a time - and run the blender on slow till just combined.

5. Pre heat the oven to 170C/325 F. Add the cooled and melted white chocolate and the macadamia nuts and combine well with a wooden spatula.

6. Grease a baking tray and dust with flour. Drop teaspoonfuls of the cookie batter leaving enough space for them to spread and flatten when they bake. A small tray will be able to accomodate only 5 cookies at a time.

7. Bake for 20 minutes at 170C. Remove and transfer carefully to a tray and leave to cool and harden. Store in an airtight container.


And for all those who love Nigella's cooking (and even those who don't!) - Maison Cupcakes is beginning a new event called Nigella Forever. "Each month there will be a theme and you can blog about any of Nigella’s recipes which fit in this theme.  The opening theme is “Seasonal Sensations”, "deliberately loose and fancy free so that as many of you get into the Nigella swing of things from the outset.
This month you can cook or bake anything Christmassy, anything celebratory for New Year, do party canapes or even wintery comfort food for snow days". 
Knowing the number of recipes I have cooked (and posted here) from her book, I am definitely going to enjoy this event.

Saturday, August 14, 2010

Chocolate Chip Cookies


My daughter has been asking me to bake cookies with her for the past couple of weeks now. I finally remembered yesterday to buy the unsalted butter I like to use for baking as well as spied on some chocolate chips in the local store. So, of course I had to make chocolate chip cookies!

I had seen some really amazing look choco-chip cookie in Nigella Express, but really there was chocolate *and* chocolate chips *and* cocoa powder as well as 2 cups of sugar in it and 125gms of butter. So, I decided to take the recipes I have used before and tweak it a bit - after all cookies are quite forgiving. I usually use a ratio of 1:2 for the butter to flour ratio and one egg for this amount is usually enough - don't like the smell when I put more than that- in fact for sugar cookies, I use only the egg white.

I added oats to the cookies to add some fibre, since I haven't used whole wheat flour in it. I powdered the oats though before adding it to the batter - my daughter (like many young kids) sometimes hates different textures in one food and I wanted her to enjoy her first home made chocolate chip cookie.

The cookies were rich and dark with the lovely bite of chocolate chips - they were soft and chewy too. I like my cookies crisp so I am going to experiment some more to see how I can make them crisper - would baking them for more time burn them? time to find out!


Chocolate Chip Cookies


Flour - 1 1/4 cup
Rolled Oats - 1/2 cup (I powdered it)
Baking powder - 1/2 tsp
Baking Soda - 1/2 tsp
Cocoa powder - 1 tbsp

Brown Sugar - 1 cup
Butter - 1/2 cup (about 60gms)
Egg - 1
Milk - 1 tbsp
Vanilla essence - 1 tsp
Chocolate Chips - 3/4 cup

Makes 15-18 cookies.

1. Cream butter and sugar together till smooth and shiny - 3 minutes with an electric mixer.
2. Add the egg, milk and vanilla essence and beat for another 3 minutes.
3. In another bowl, mix together the flour, baking powder, baking soda, cocoa powder and the oats. Pre heat oven to 180C (350F)
4. Add the dry ingredients to the butter, egg mixture - one third at a time and fold in gently.
5. Add the chocolate chips last.
6. Take a teaspoonful of the batter (not tablespoon) and drop on a greased tray leaving enough space in between two; the batter will flatten and spread so leave enough space. In my trays that means only 5-6 at a time.
7. Bake for 10-11 minutes - they will be a little soft, but will become firm as they cool. Transfer to a wire rack to cook.

Sunday, December 20, 2009

Chocolate Gingerbread Men


"'Tis the season to be jolly' - indeed! This year the cold has been slow in coming - or maybe its just that I have got more accustomed to it over the last two years. By this time last year, we had the room heaters on; this year I haven't even broken out the thermals! Anyhow, I have been enjoying the weather and of course my cooking is reflecting the festive spirit.

The fruits for my Christmas Cake are all marinated, there have been some great soups (sorry no pictures and so no posts!), a first attempt at Butter Chicken (turned out great - but how Da-lhi is that!), fiery kozhambus, soothing masiyals (mashed spinach with lentils finished with a simple tempering) and comforting French toast. There have been visits from dear friends and simple meals shared (not to mention a disaster of a simple casserole!), a delicious meal at Karims, the perfect wedding anniversary celebration and a beautiful evening at the Garden of Five Senses.

This weekend, after visiting the Christmas Carnival at my daughter's old playschool (was it just a year back we were going through the nerve wracking admission process for her?!) I finally got down to baking cookies with her - she has been asking for the Gingerbread Man for the whole of last month, since we have been reading the story. I didn't have molasses, which is what all the recipes seemed to call for. So I decided to replace it with dark chocolate to get the right colour and a different flavour.
They were perfect - the spices beautifully complimenting the chocolate and I even managed icing - I guess my daughter seems to know how difficult I find it, because she kept egging me on "Its great, Amma - you are doing good!" LOL :) Its not the actual work involved, but putting all the sugar in which makes me think twice! Well worth the effort though - the shining eyes and cheery smile as she devoured a gingerbread woman, was priceless!

I did other shapes which my daughter could cut out with the cookie cutters - the gingerbread people I did with stencils since I didn't have the cookie cutter shapes for them. I also made some plain gingersnap cookies (without the chocolate and with more ginger in them) for the adults in the house. The lack of molasses/ chocolate shows in the pale colour, but the taste was great and they were thin and crispy - just the way I like my cookies!

Chocolate Gingerbread Men
Refined flour (maida) - 150gms
Whole wheat flour (atta) - 100 gms
1/2 tbsp dry ginger powder (soonth)
1/2 tbsp cinnamon powder
1/2 tsp powdered star anise
pinch of salt
1/2 tsp baking soda

Unsalted butter - 100gm
Brown sugar - 40gm
1 egg
1/2 cup melted dark chocolate

Tiny black raisins for decorating

Royal Icing: (Some tips here)

White of 1 1/2 small eggs
1/2 tsp lemon juice
2 cups icing sugar

1. Cream the butter (softened on its own if possible) in a bowl till smooth, add the brown sugar and mix again till shiny. Then the egg goes in and mixed for about 3 minutes till light and finally add the melted chocolate (Melt at 10 second intervals in a microwave or in a bowl over barely simmering water on the stove top)
2. Meanwhile, measure out the flour, baking soda, salt and spices and mix together.
3. Add one third of the flour mixture to the creamed butter/egg mixture and mix till just combined, add the other two thirds the same way, taking care not to over mix.
4. Use your hands at the end if needed, divide into two portions, cover with clingfilm and chill in the refrigerator for atleast one hour.
5. Pre heat the oven to 180C. Remove one portion and try to roll out on a floured surface - a rectangle 1/8th of an inch is sufficient. If it is too dry, add some milk a tsp at a time till you can roll out without sticking. If handled too much the dough may need to be chilled again since the chocolate might make it sticky.
6. While rolling out, make sure you keep trying to lift the rolled out dough off the work surface to check whether it is sticking, else you wont be able to peel of the cut out shapes.
7. Cut out the shapes with cookie cutters or stencils (search for Gingerbread men shapes on the internet, print, cut out and place on the cookie dough and cut with a sharp knife), put in small raisins for the eyes and buttons, transfer to butter paper (parchment paper) and bake for 15 minutes - check at 12 minutes and remove if it is done.
8. Cool on a rack - meanwhile, whip the egg white and lemon juice together while adding the icing sugar gradually till the mixture forms peaks when you lift the blender out of the bowl. A little less than 2 cups of sugar usually suffices. Transfer to an icing cone and decorate the cookies when cooled. Leave aside to dry completely.

The Gingersnap cookies

Thursday, December 25, 2008

White Chocolate, Cherry and Oatmeal Cookies


I have been baking a Christmas cake for the past two years and it has become nice way to bring in the holiday spirit - right from marinating the fruit to baking it on Christmas Eve. This was the first time in the last eight years we weren't at the our friend's house in Chennai for Christmas - but the cake still managed to please new friends. And the special part of baking it this year was that a couple of months back I got to meet my friend in London who had given me this recipe some years back. We have only been emailing each other for almost 8 years now so it was wonderful to actually get to meet her!


This year, I also baked some cookies - adapted this recipe which was itself adapted from this one
from Smitten Kitchen who adapted it from Cook's Illustrated. I love crispy cookies much more than the chewy ones so I loved the idea of these. They are actually not so much crispy rather than this kind of absolutely gorgeous vehicle to transport some rich chocolate and oatey goodness into your mouth!! I did away with the sea salt and reduced the oatmeal, threw in some dried cherries and Voila! - absolutely delicious cookies. I had to stop myself from eating the dough while waiting for the first batch to cook :)

Sending these cookies to Neivedyam's Cookie Baking Event which is being hosted by Sharmi.

White Chocolate, Cherry and Oatmeal Cookies

Ingredients:

Flour - 2 cups
Oats - 1 cup (I used quick cooking oats)
Baking powder - 3/4 tsp
Baking soda - 1/2 tsp
Butter - 200gms
White chocolate(chopped) - 170 gms
Egg -1
Vanilla essence - 1 tsp
Dried cherries - 50gms
Sugar - 1 cup

Method:

1. Cream the butter and sugar in a large bowl till smooth.
2. Put the chopped chocolate into a glass bowl and place it inside a bowl of heated water and microwave in 30 second intervals till melted and smooth.
3. Beat the egg and add to the creamed butter and sugar mixing lightly till combined.
4. Sift the flour with the baking powder and baking soda and then add gradually to the egg mixture.
5. Add the vanilla essence and the melted chocolate to the bowl and combine with a wooden spatula.
6. Refrigerate the mixture for about half an hour so that it can be shaped into balls - do not skip this step!
7. Pre heat the oven to 180C (350F), cut butter paper to size and spread on a baking tray.
8. Shape the cookie dough into balls, flatten slightly and place on the baking tray atleast 2 inches apart (they will spread and flatten as they bake). Don't handle the cookie dough for too long since the chocolate and butter will start melting.
9. Bake for 15 minutes. Remove the butter paper with the cookies on it and set aside to cool. They are very fragile before they cool so don't try to remove them from the butter paper when hot.
10. Bake more batches in the same way till the dough is used up.

Sunday, July 6, 2008

Making Memories - Cookies


Today is the last day of the summer holidays for my daughter and most of her friends. My respect for my parents has gone up a notch or two - they managed to keep us occupied in an age when there was no TV, no Barney DVDs and not many options outside of home.

Of course, they weren't helicopter parents either and didn't believe that their children had to be kept "meaningfully" occupied every minute of the day and their intellectual capabilities honed to the best from age two!

But I did manage (with some other VERY resourceful mothers) to get through the vacation without enrolling her in a "summer camp". I did, however, spend 2 weeks with my brother and best friend, so maybe that helped a bit.
For the rest of the time, she was either at her friends' house upstairs or down the road or they were over here - finger painting, block painting, doing puzzles, having doll parties, building Lego towers, crayon colouring books, dancing to music, dressing up in costumes and having pretend plays, eating competitions at lunch,running around in the park every evening and generally enjoying herself. AND she hardly had time to watch any TV!

When it was just the two of us on a hot afternoon, we cuddled up and I read to her in bed - I even found some original A.A. Milne, Winnie-the-Pooh books - remember those? - the ones with those amazing line drawings by E Shepard - not the Disneyfied versions which is all that is available today!

One of those days 2 weeks back, my dear friend A (and Regular Reader Number 1 of my blog!) came downstairs with her kids and we set to work baking cookies. The little ones stood on stools to reach the kitchen platform and were most excited about choosing and cutting out the shapes from the dough and then decorating "their" cookies with sprinkles and icing.


It was quite hot that day and we both were bushed by the end of it BUT the kids could hardly wait for the cookies to come out of the oven....AND then cool down.....it was so precious to watch them crowding around the table, just standing there and waiting for the cookies to cool down! LOL!
(It was a bit gruesome though to watch the Gingerbread Man being devoured head first with a wicked smile!) ;)

I hope we all made some wonderful memories for the children that day and these summer days we are leaving behind!

Sugar Cookies

Refined Flour - 1 cup
Wheat flour - 1/2 cup
1 egg white
Butter - 1/4 cup + 2 tbsp
Castor sugar - 1/2 cup
Milk - as needed
pinch of salt
1 tsp vanilla essence
1/4 tsp baking powder

1. Beat the butter and sugar till light and creamy in a large bowl.
2. Beat the egg separately and add the vanilla essence to it.
3. Sieve the refined flour, wheat flour, baking powder and salt together.
4. Add the beaten egg to the butter sugar mixture.
5. Fold in the flours into this and combine with a clean hand to make a smooth cookie dough.
6. If it is a bit dry, you can add milk a tablespoon at a time till it comes together.
7. Cover with cling wrap and chill in refrigerator for about 10 minutes.
8. In the meantime, preheat the oven to 190C.
9. Grease a baking tray and keep aside.
10. Roll out the chilled dough on the counter which has been sprinkled with a bit of flour - about 1/4th of an inch thickness.
11. Cut out cookie shapes with the cookie cutters (easily found in most utensil shops today or even the ubiquitous Dollar store)
12. Roll out the remaining dough and then cut out shapes again, repeat till all the dough is used up.
13. Decorate the shapes with sprinkles, icing and even chocolate drizzles - use your imagination or better still let your child take the lead!
14. Bake in the preheated oven for about 13 minutes till it just turns brown. Let it stay for about 2 minutes in the oven and it will become a bit crisper.

Sunday, June 8, 2008

Celebrations, Cake & Click Yellow for Bri

I have been back a week now but have hardly had time to breathe. My daughter's 3rd birthday on the weekend gave me only a week to scramble and get everything done in time. There were only six children this time so I decided to do everything at home , including the cake and of course it wasn't as easy as I thought it would be!

I should have expected the madness, considering the fact that I haven't ever iced a cake before. I'm not a great fan of butter sugar icing and don't know the first thing about fresh cream icing. But Birthday baby wanted a "Pink butterfly Cake" so the theme of the party was chosen automatically though I didnt have a theme for even her first and second birthdays! - there were Butterfly invitation cards, butterfly games and even a butterfly cake
- I drew the line at Pink icing for the cake though; instead I made pink marzipan butterfly and flower decorations to put on the icing.

Her best friend's mother got her a pair of pink wings and she was thrilled to bits. This was her first birthday party she really enjoyed; the highlight of the evening was the cutting of the cake of course and she beamed as everyone sang for her!! All that slaving at above 40C temps and 80% humidity was so worth it for that bug eyed look on her face when she saw her cake!

I thought I would never be able to get the marzipan right nor the cookies, the butter and sugar were simply melting and oozing out of everything. I somehow managed to get them both done but I was a puddle of sweat myself by the end of it.

The next day I got a bit smarter, when it was time for the icing I put on the air conditioning in my bedroom and did it all there!! And helping me through it all was Deeba of Passionate about Baking on the phone! - Thanks so much D, I really managed because you kept telling me it would work!

The menu in fact was like a Blog Patrol event I was conducting!!
The basic sponge cake was adapted from this recipe of Deeba's and then I made a butter and sugar icing tinted yellow. The marzipan I adapted, again, from Deeba's recipe, I cut out the flowers and leaves and shaped the butterfly by hand. The stained glass cookies are from her recipe and were much appreciated.

I made these chocolate cupcakes from Cooker's recipe and made some marzipan flowers and leaves to put on them.

I adapted this recipe from Farmgirl Fare to make some delicious carrot and herb rolls. And there was salami and cheese sandwiches, mini idlis and macaroni and cheese.
And then for me to relax after all the sugar fuelled hyperactivity, we had dinner with a few close friends at home - some chilled minty caipiroska, grilled chicken with mango salsa, pesto pasta, dinner rolls and a roasted salad and good company - it was a perfect evening.

ETA: I have just come back and catching up, came across the fund raising for Bri - I am entering this cake in the Click! Yellow for Bri event being hosted at Jugalbandi. I have participated in Click just once before this, frankly my photography skills leave a lot to be desired.
BUT this event is special and is being organised as a fund raiser for Bri of the blog Figs with Bri .
She is waging a second battle against cancer and we are all hoping that she wins this time too. In the meanwhile she needs to pursue all options including alternative therapy which is not covered by health insurance.
Been there, done that and still recovering from the financial effects of battling a major illness, though mine was not cancer. Its amazing to see the outpouring of support and I hope it helps her in as many ways as possible.

If you want to help the fundraiser, you can participate in Click Yellow for Bri at Jugalbandi till the 30th of June. OR you can Make a Donation OR Publicise the fund raiser by writing about it on your blog or website. You can use the HTML at this page.