Showing posts with label egg. Show all posts

Sunday, July 24, 2011

French Toast


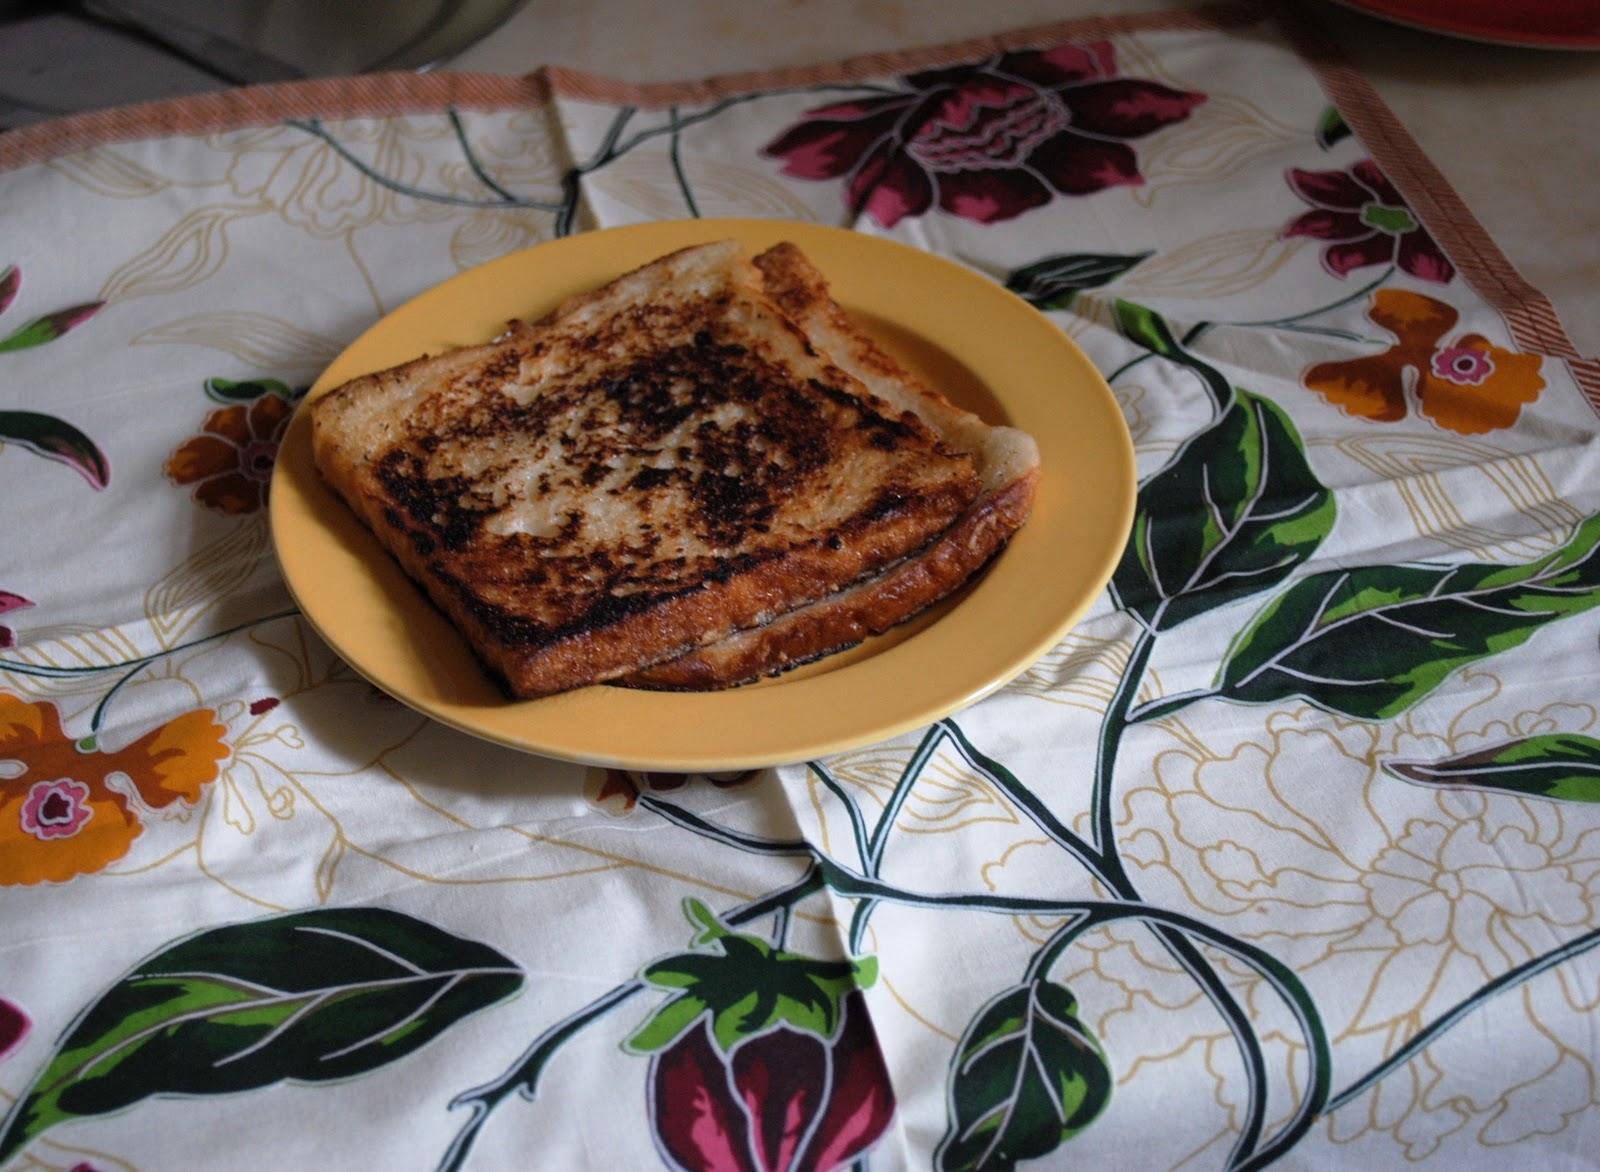
Another dish which holds fond memories of my childhood is of Dad making us breakfast on a Sunday. Dad still makes the best French toast - gently soaking the bread in a custard mixture of egg, milk and sugar and then shallow frying it on a griddle till is golden brown.

I now make it for myself and lately for my daughter who has come to enjoy it -especially when she heard the story of how her Thatha used to make it for me. Everytime she eats it though, she stoutly insists that "Your French Toast is the best, Amma!" And so the story continues.
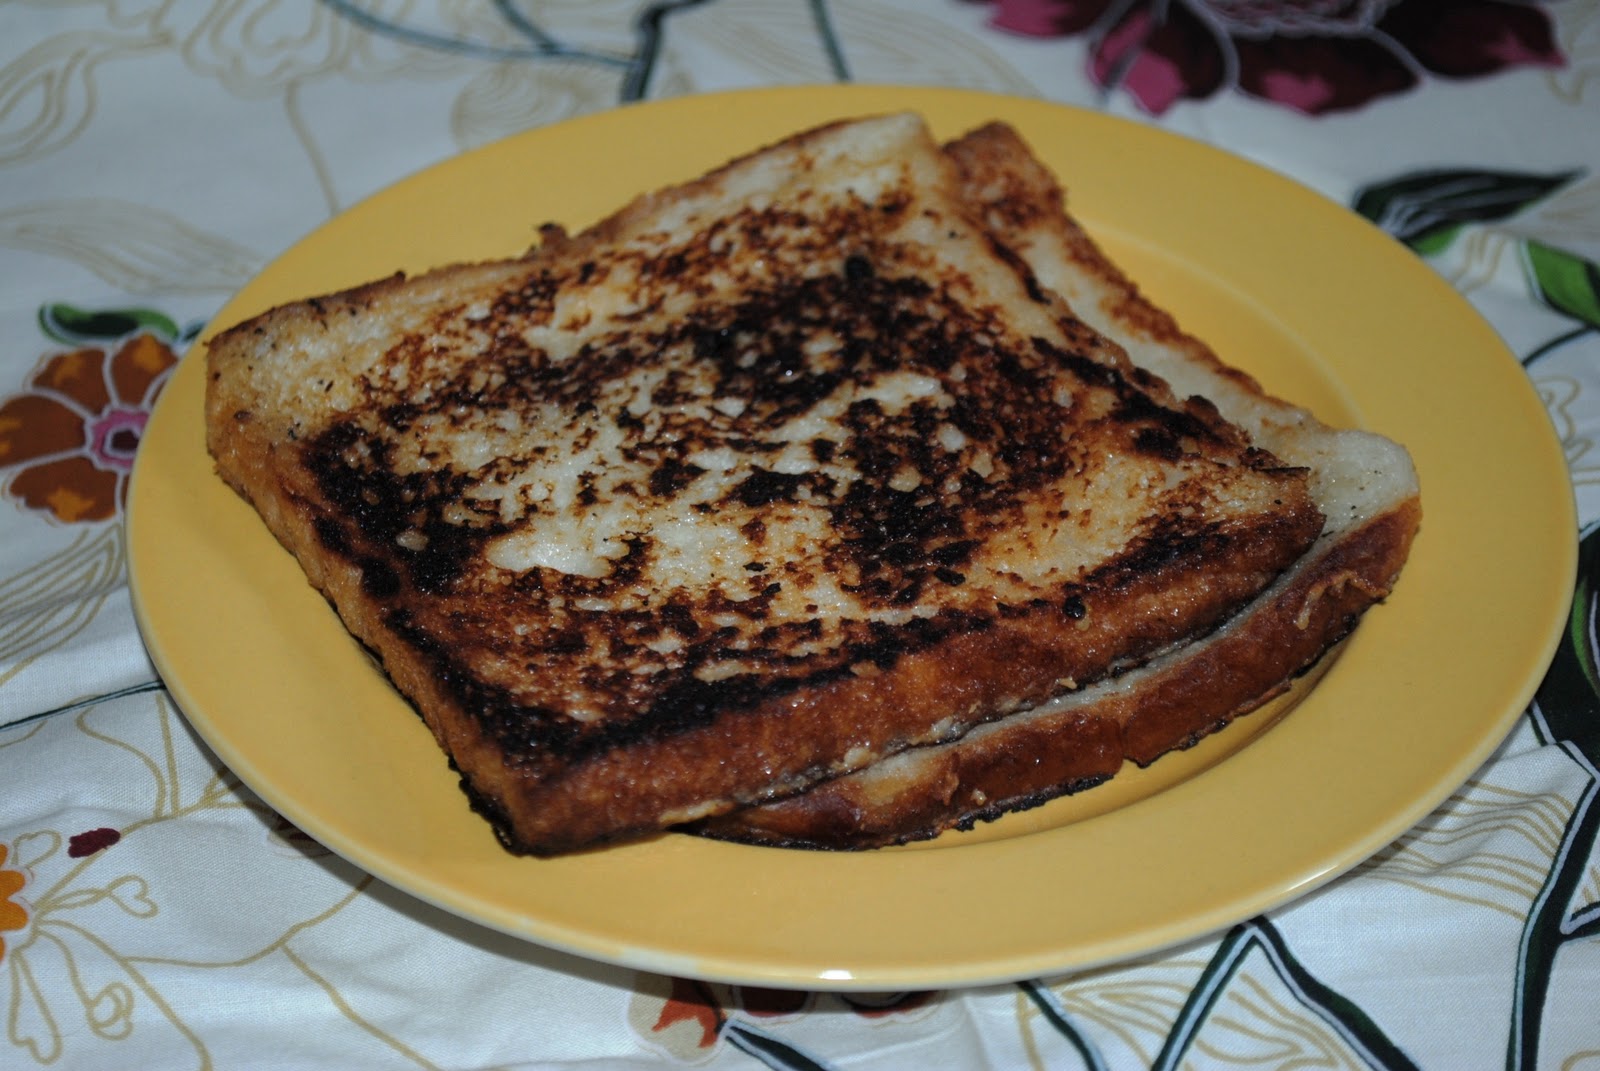


There's really not much to actually warrant a recipe - one egg, about 1 cup of warm milk and 5 tbsp of sugar.

1.Dissolve the sugar in the milk and then lightly beat the egg into it. Pour the egg milk mixture onto a shallow dish.

2. Heat a heavy non stick skillet and melt some butter in it (about a tsp per slice of bread).

3.Dip a bread slice into the milk and soak for about 30-40 seconds before turning and soaking again. Gently moisten the edges as well and then cook on the hot skillet on a medium flame turning till each side is golden brown.

Masala French Toast

This was my adaptation of French Toast for hubby who can't abide by sweet things for breakfast - I myself don't like sweet stuff in the morning - French Toast is the exception.

Replace the sugar with a mixture of salt and green chilli-coriander paste. (Grind 2 green chillies with a a cup of cleaned coriander). Go through steps 2 and 3 as above.

Fried Cheese Sarnies

A recipe I found in a 2002 edition of Good Housekeeping magazine and have tried a couple of times as part of brunch.Very decadent, though savoury.


Bread - 8 slices - crust removed,
Eggs - 2
Mozarella cheese - 4 slices. (mozarella melts well, but you could use cheddar)
olive oil

1. Put a slice of cheese between 2 pieces of bread and cut diagonally into a sandwich.
2. Mix the eggs with salt and put into a large shallow bowl and beat. Add the sandwiches and leave them to soak for 30 minutes, turning them once over, halfway through.
3. Heat 1 tbsp of oil in a frying pan, press the edges of the sandwich firmly together and fry till golden brown.



Friday, June 17, 2011

Orange Caramel Pudding


This post was written before I was ill. I guess the surgery was inevitable, but I didn't know it then and tried my best to fob it off as best as I could.
.


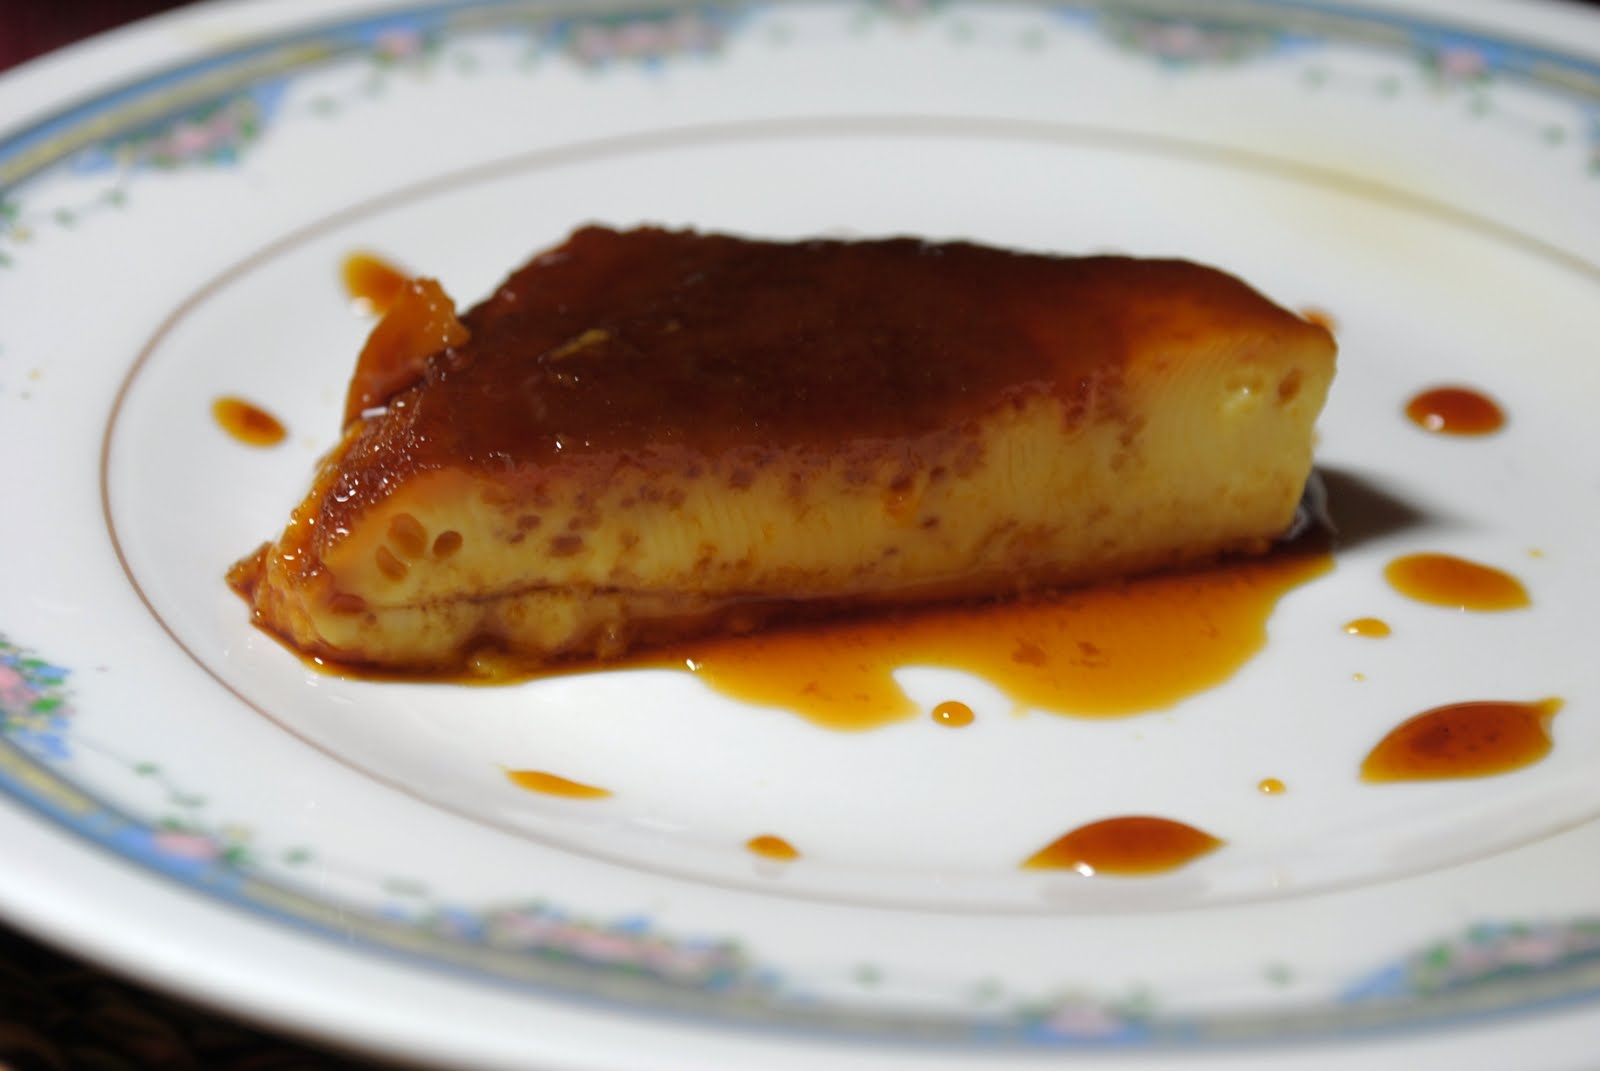
I love Caramel Custard - there I said it. I know you are supposed to have sophisticated tastes as you grow older - dark chocolate mousse, tiramisu, passionfruit cheesecake - but there's something to be said about comforting desserts. The kind you grew up eating, the one you made for the first time when you were 15 and tried cooking in an oven for the first time (yes, a cake was not my first attempt at baking), the kind that old colonial clubs have perfected to a T.  Caramel custard is the one for me. I think its now called Caramel Pudding - but growing up we called it Caramel Custard - a relic of the British Raj I guess, when any dish which involved cooking egg and milk together, was called a custard.

I wasn't well the past month (my congenital digestive condition playing up big time) and had to go on a liquid diet for a couple of days. Then, as is inevitable, I lost some weight and my energy levels plummeted. Now that I'm back to eating solid food, I have taken to eating small portions several times.....not a great way to gain back weight - but we do what we have to do. Right now I'm just glad I'm able to eat and not giving any of my family members sleepless nights. So, this weekend, I decided I needed a bit of pampering.

Which in food terms translates to comfort food. And there is nothing more comforting than a warm, dessert redolent of caramel. No wonder my favourite Haagen Daaz flavour is Dulce de Leche - divine. I read one of this pop quizzes in a magazine, which tried to peg your "type" depending on the dessert you liked. Well, caramel pudding came back as "warm, loyal, the 12 am friend, generous". Fine by me, I say! (I am a Gemini - when I am craving Tiramisu, I morph into the "sexy, dangerous, intense type" ;)


Its been quite sometime since I made Caramel Pudding - a few years actually. So, I thought I should atleast look at a recipe in case I got the proportions wrong. Which is when I came across the Orange Caramel Pudding by Sanjeev Kapoor. This one had a nice twist which I had never tried before; so, since I had orange juice and a lone orange for the rind, I decided to give it a shot.

The caramel almost brought me to my knees though - three times,  my attempt to make caramel came to naught. No, it didn't burn - it just turned into a dry mass of lumps - somewhat like kalkand (khadi saakhar). I couldn't believe that something I had churned out when I was just 15, was giving me so much grief. I wouldn't give up -  (don't worry, if I'm stubborn, I'm also thrifty - the other versions were melted back with some more water into sugar syrup to be used for lemon juice in future!) -so for the fourth time, I referred to this David Leibovitz recipe which talked about making caramel without water, just sugar. I decided to try it - I'm a big believer in not reinventing the wheel which is why I am able to believe in recipes which are tried and tested (the pictures as proof helped!)even if its not the way I usually do it. It worked perfectly - whew.

Basically, this method involves spreading the sugar in a heavy bottomed pan in an even layer and then warming it over medium heat till the water inherent in sugar starts melting the sugar slowly. This takes about 8-10 minutes totally (I realise that I have much less patience than even 5 years back, forget 20) and then it slowly starts caramelizing. It turns brown (do not stir before this happens) and that's the signal to slowly stir a little to get the sugar at the edges into the centre - do not overstir. About 5 minutes later, it melts into a beautiful golden brown syrup and then I stirred it at 2 minutes intervals ever so gently for another 4 minutes (I would reduce that to 2 minutes the next time).

20 minutes to attain that lovely, textured caramel flavour which takes any dessert to the next level. Melt butter or cream into it at this stage to make a caramel sauce or just pour directly into a vessel for a caramel pudding. I poured into a glass casserole and swirled it around to coat the bottom and some of the sides - it doesn't matter if there are a few gaps - as it cooks with the custard, it will melt and spread some more.


The final result was an amazing dish- well worth the multiple tries(which is now history, now that I know this much easier way to make caramel). The orange juice was a great addition - in fact, the next time I might even try to make this without the caramel. The orange flavour is subtle, yet very much there and makes this so much more than just a caramel pudding. And for all those who are skeptical, the pudding didn't curdle with the orange juice; and I didn't even bother sieving the custard mixture before baking it.

Orange Caramel Pudding
 Adapted from this recipe by Sanjeev Kapoor


Ingredients:
Sugar - 1/2 cup for caramel

Eggs - 4
Sugar - 1 cup (castor sugar)
Orange juice - 1 cup
Orange rind 1 tsp-  boiled for 5 minutes in half a cup of water, cooled and then added to the orange juice.

Method:
1. Bring out the individual ramekins or glass baking dish in which you intend making the pudding.
For the caramel:
a.In a heavy bottomed pan, spread the sugar in an even layer - look here for step-by-step instructions and pictures.
b. Heat on medium heat for about 8-10 minutes, till the sugar starts to melt in its own water and starts to turn brown. Slowly bring the sugar from the edges to the centre so that it melts uniformly but do not over stir. When it turns to a nice, brown, caramel coloured liquid (approx 5 minutes), cook for another 2-3 minutes and then take off flame and immediately pour into the ramekins or baking dish and swirl around so that the bottom and sides are coated with the caramel. Don't worry if this is not even.
2. Beat the eggs and sugar together till creamy. Heat the orange juice, orange rind reserved liquid mixture for 3 minutes, cool a little and then slowly add to the egg and sugar mixture.
3. Transfer this mixture (you can sieve at this stage) into the ramekins or baking dish. Pre-heat the oven to 180C
4. Fill a bigger oven proof bowl halfway with boiling water, place the ramekins or the baking dish into it, making sure the water will not be able to enter the bowls.
5. Bake in the pre heated oven at 180C (350F) for 45 minutes (the ramekins may take less time, check at 30 minutes.) The pudding will be set.
6. Remove and cool. To serve, turn upside down onto a plate - the caramel syrup will top the pudding since it is at the bottom.


Friday, March 11, 2011

My Perfect Omelette


Disclaimer - this is my perfect omelette - not THE perfect omelette - so feel free to write in with Your perfect omelette. Even if it was made by someone else - like that uncle who lives in Belgium. Or that dishy chef at the Taj breakfast buffet. Just saying.

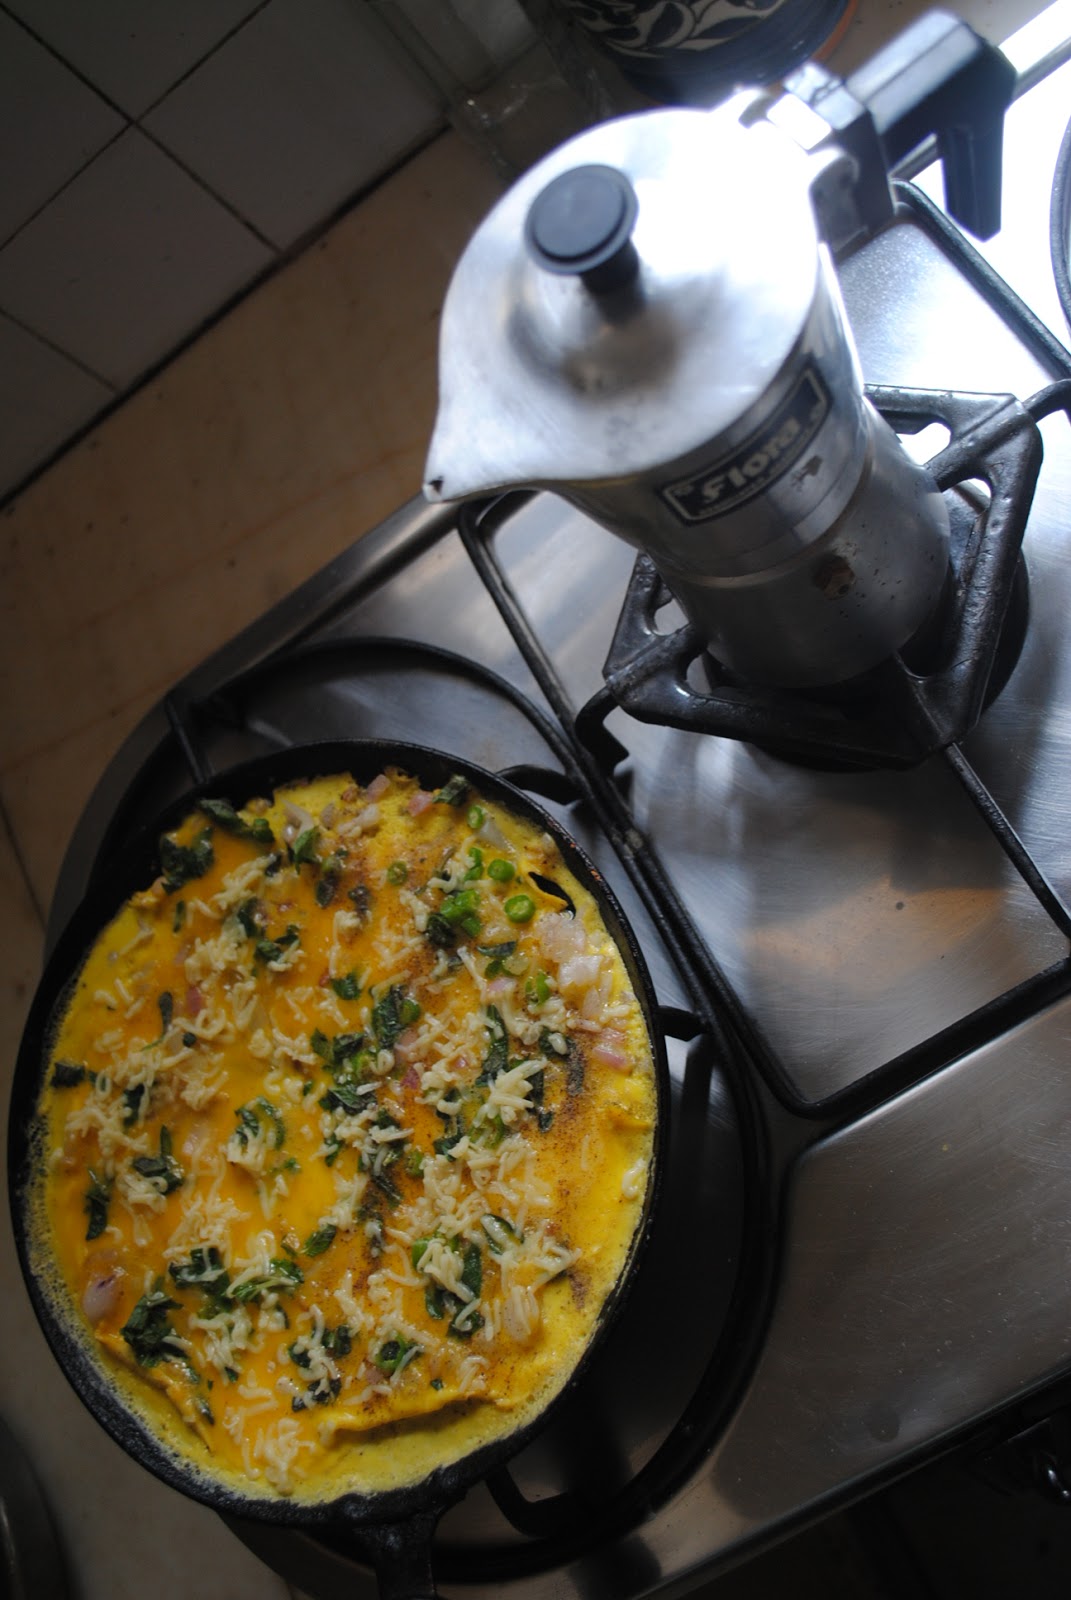
Dad makes the best Spanish Omelette  or frittata- but over the years, I have perfected the kind of omelette we like - 2 or 3 eggs max, non greasy, fluffy, soft and perfectly salted. I hate it when omelettes are undersalted - as they often are in hotels (something pointed out by Vir Sanghvi as well).

I add a little milk to the eggs - it makes the omelette softer. The eggs are well beaten and then seasoned with salt and pepper. The green chillies should be cut just so- not finely minced so that the chilli seeds spices up every inch of the omelette -but in rounds so that they can be picked out by the people who don't want to bit into them (me) and eaten by the extra spice lovers (hubby). I don't fry the chillies, instead sprinkling them over the omelette, except for one quarter of it which is for K since she can't pick the chillies out and may bite into one. She enjoys this omelette, so it makes sense to make the same one for her rather than a separate one.

The onions are fried till soft and not brown, so that we can enjoy their sweetness. I add a pinch of salt while frying the onions and this balances the salt. The cheese is optional and depends on my mood - but just a cube of grated cheese is enough for 3 eggs - any more than that, it will turn into a cheese omelette - which is not a bad thing, just not what we are looking for. Fresh mint or coriander leaves to finish.

And it should be eaten fresh off the skillet - that way I'm a bit like the Soup Nazi from Seinfeld. No wandering around/checking mail/reading newspaper and then coming over to eat my omelette after its been cooling on the table for five minutes. You preferably have to be at the table, with buttered toasts ready (for me), a good 3-5 minutes before the omelette arrives. Yes, hubby has been trained well in the art of eating our perfect omelette ;).

This omelette takes only about 10 minutes to make from start to finish - and worth every minute if you like a well made omelette. Have your coffee perking at the same time, and you will have a lovely cuppa Joe ready, at the end of it all as well!


Our Perfect Omelette
Ingredients:
 Eggs - 3
Milk - 1 tbsp
Onion - 1 chopped fine
Green chillies - 2 chopped in thin rounds
1 cheese cube about 20 gms(grated) - optional
salt - about 1/4 of a tsp - a pinch with the onions and rest
pepper
Butter - 1 tbsp
Mint - 3 tbsp chopped

1. Melt the butter on a non stick skiller on low heat and then saute the chopped onions on a medium flame till just soft. Add a pinch of salt to the onions while sauteeing
2. Meanwhile, beat the milk with the eggs, salt and pepper till its frothy
3. Spread the softened onions over the skiller and then pour the beaten egg evenly. Sprinkle the chopped chillies and cook on a medium low heat for about 3 minutes or till the omelette is set at the bottom.


4. Gently bring the edges of the omelette inwards and tilt the skillet outwards so that the uncooked egg settles at the bottom. Sprinkle the mint and the omelette over the omelette and cook on a low flame for a minute.

5. Fold the omelette over and cook for half a minute, then turn over and cook for half more a minute. Serve warm - we had the omelette with a herbed bun.

Tuesday, December 28, 2010

Tamil Egg Biryani - Pratibha Karan

Yes, here we go again on this blog - waxing poetic about Biryani. This time for a dish which some may call a pretender. If a chicken biryani is looked down as compared to the real deal of a mutton biryani - imagine the status of an egg biryani. NO meat at all? scoff the purists......However, I have eaten some excellent egg biryanis in Tamil Nadu - the fact that I love boiled eggs may have something to do with it!

The egg biryani in the small joints in Chennai are usually the same as the chicken biryani - the biryani often ladled from the same vessel with the chicken pieces replaced with boiled eggs. But an egg biryani made at home can taste very delicious and is an easy alternative to mutton or chicken if you don't have all the ingredients (or don't cook meat at home).

So, when I was looking through Pratibha Karan's book "Biryani" which I recently bought (delayed flights and an airport bookshop are not a good combination for my wallet!), this was the first recipe which I wanted to try. Yes - I know, sounds funny when you think of the several other recipes from all over India included in this book. But I have a weakness for egg biryani.

This recipe is very different from the fiery, red concoction one gets to see at places like Hameedia or Deluxe in Chennai. It is delicately spiced and the flavour seeps into the rice and egg quite beautifully, when cooked on dum. In fact it tasted excellent the next day in my lunch box, when the flavours had even more time  to meld.

The book is a nice one to have in your collection, if you like biryanis and would be willing to try different recipes. I usually don't like cookbooks which are limited to one category - but this one has so much variety from all over the country,it. I know, I probably won't ever make the Bater (Quail) Biryani or even so many of the mutton biryanis, but the novelty of recipes like Seviyon ki Biryani (vermicelli and mutton), fish and prawn biryanis from Kerala, Kairi Biryani (raw mango and mutton) as well as the fact that the book has recipes like Ambur Biryani and Salem Biryani - two very regional specialities from Tamil Nadu - will definitely keep me coming back. The recipes for raitas are a good selection - smoked onion and tomato raita and eggplant raita are definitely going to be on the menu.
Some of the recipes seem a little disconnected from the others though (Kampur Biryani and Arroz Con Pollo), but I guess there will be a few recipes in a book like this, that one doesn't relate to. The vegetarian recipes are interesting and include jackfruit biryani and qabooli. On the whole a very well researched and comprehensive biryani cookbook.

 Tamil Egg Biryani
recipe adapted from Pratibha Karan's book Biryani.
Ingredients:


Basmati - 1 cup (250gms)
Water - 2.5 cups
Bay leaf - 1
Green cardamom (elaichi) -2
Cloves - 2
Cinnamon - 1 "


Wash and soak the rice for 15 minutes, then drain. Cook the rice in the water with all the whole spices and salt - the water should taste a little saltier than necessary for the taste to be just right after it is cooked.
 The rice should be just cooked and the grains should be separate. Keep aside.

4 eggs - peeled and cut in half, hard boiled (8-9 minutes cooking in boiling water)
1 tbsp oil
Garam Masala - 1/4 tsp
pinch of salt

Heat the oil in a non stick pan and fry the eggs lightly; sprinkle the salt and garam masala over the eggs while frying them. Keep aside.

4-5 tomatoes,blanched in hot water and then peeled and pureed along with:
Ginger - 1"
Garlic - 5 cloves
Green chillies - 4-5
2 tbsp oil and 1 tbsp ghee
salt to taste


2 onions sliced thinly and fried in 2-3 tbsp oil till golden brown. Keep aside.

Take a heavy bottomed pan with a tight fitting lid. 
Heat the ghee and oil and fry the tomato spice paste for 5 minutes, along with the salt, till the oil separates.
Pour out the mixture over the lightly fried eggs and mix gently.

In the same heavy bottomed pan, smear a tsp of oil. Spread half of the cooked rice.
Top with the tomato egg mixture and cover with the remaining cooked rice. Sprinkle about 1/3 cup water and one tbsp ghee. Cover with a tight fitting lid and cook for about 5 minutes till the layers are all hot.

Serve hot garnished with the fried onions. A raita made with grated cucumber or bottle gourd (ghia/dudhi) makes a good accompaniment.

Sunday, August 29, 2010

Pesto Crepes


One evening as I stopped by at my friend's place on the way back from work, she mentioned to me that she had a huge amount of basil and was wondering what to do with it. So as we chatted over coffee, I suggested she use it to make pesto and freeze it. So as I called out the ingredients, she made the pesto right then; she gave me the other half to take home and so I did the same as soon as I reached.

Very simple to make this pesto - basil, walnuts, garlic and olive oil. Thats all you need. Really. Once it was ready, I froze it in three separate boxes so I could pull them out as needed.

And thats what I did the next Sunday morning, using a recipe I had seen in Nigella Express. That recipe was for pesto crepes with ham. We don't really eat ham that much- so all I had was chicken sausages and after cutting them fine and lightly sauteeing them, I added them to the batter itself instead of rolling them up inside the pancakes as the recipe did with ham.

This recipe makes about 8 medium sized crepes or 5 large ones. Took me about 5 minutes to mix everything together, another 5 minutes to rest and then 12 minutes to make the crepes. I put some shredded cheese into them, just before rolling them up to serve, but you could also put the cheese into the batter itself. A really quick breakfast option and very very delicious. The pesto made the crepes very flavourful and you don't need anything to accompany them.

P.S - I've been doing some spring cleaning around the blog - on the right are updated links to some of my favourite blogs; still some more blogs to add.
I have also updated the Recipe Index - so please feel free to browse through older recipes and do let me know if you have any requests in a particular cuisine/meal/food group.

For the Pesto: (adapted from a Jacques Pepin recipe)


4 cups basil leaves
6 tbsp olive oil (extra virgin is good for this)
3/4 cup walnuts, lightly toasted
1 green chilli chopped
4 cloves garlic

1.Bring a vessel of salted water to boil and put the basil leaves into it for just 20 seconds. Drain and rinse in cold water. Pat dry slightly
2. Puree the basil leaves along with the walnuts, green chilli and garlic adding half of the olive oil at first and then the rest slowly.
3. Remove and freeze.

For the Crepes: (adapted from Nigella Express)
1/2 cup pesto
3/4 cup flour
1- 1 .5 cups milk
salt to taste
1 egg
pinch baking powder

1 sausage finely chopped and sauteed for 2 minutes
Grated cheese - 1 cup

1. Mix all the ingredients together (except baking powder, sausages and cheese) and blend till smooth.
2. Add chopped sausages and rest for 5 minutes.
3. Heat a griddle and put a few drops of oil or butter on it.
4. Pour a big ladle of batter on the pan and swirl till it spreads into a circle - if too thick, add some more milk.
5. Cook on a low medium flame for 3 - 4 minutes, then add some of the grated cheese in the middle and roll up with a spatula. Turn the roll over and cook for a minute before removing from flame.

Serve warm.


Saturday, August 14, 2010

Chocolate Chip Cookies


My daughter has been asking me to bake cookies with her for the past couple of weeks now. I finally remembered yesterday to buy the unsalted butter I like to use for baking as well as spied on some chocolate chips in the local store. So, of course I had to make chocolate chip cookies!

I had seen some really amazing look choco-chip cookie in Nigella Express, but really there was chocolate *and* chocolate chips *and* cocoa powder as well as 2 cups of sugar in it and 125gms of butter. So, I decided to take the recipes I have used before and tweak it a bit - after all cookies are quite forgiving. I usually use a ratio of 1:2 for the butter to flour ratio and one egg for this amount is usually enough - don't like the smell when I put more than that- in fact for sugar cookies, I use only the egg white.

I added oats to the cookies to add some fibre, since I haven't used whole wheat flour in it. I powdered the oats though before adding it to the batter - my daughter (like many young kids) sometimes hates different textures in one food and I wanted her to enjoy her first home made chocolate chip cookie.

The cookies were rich and dark with the lovely bite of chocolate chips - they were soft and chewy too. I like my cookies crisp so I am going to experiment some more to see how I can make them crisper - would baking them for more time burn them? time to find out!


Chocolate Chip Cookies


Flour - 1 1/4 cup
Rolled Oats - 1/2 cup (I powdered it)
Baking powder - 1/2 tsp
Baking Soda - 1/2 tsp
Cocoa powder - 1 tbsp

Brown Sugar - 1 cup
Butter - 1/2 cup (about 60gms)
Egg - 1
Milk - 1 tbsp
Vanilla essence - 1 tsp
Chocolate Chips - 3/4 cup

Makes 15-18 cookies.

1. Cream butter and sugar together till smooth and shiny - 3 minutes with an electric mixer.
2. Add the egg, milk and vanilla essence and beat for another 3 minutes.
3. In another bowl, mix together the flour, baking powder, baking soda, cocoa powder and the oats. Pre heat oven to 180C (350F)
4. Add the dry ingredients to the butter, egg mixture - one third at a time and fold in gently.
5. Add the chocolate chips last.
6. Take a teaspoonful of the batter (not tablespoon) and drop on a greased tray leaving enough space in between two; the batter will flatten and spread so leave enough space. In my trays that means only 5-6 at a time.
7. Bake for 10-11 minutes - they will be a little soft, but will become firm as they cool. Transfer to a wire rack to cook.

Thursday, December 10, 2009

Maw Gaeng - Thai Sweet Potato Pudding


I had some sweet potato as well as coconut milk left over from this recipe and just as I knew I wanted to make a nice one pot meal from those ingredients, I also knew that this had to go into a dessert. Luckily, there seems to be a recipe to match every mood of mine ;).

This Thai dessert (which seems to have several variations) is quite unusual in that it uses sweet potato (the dark pink, skinned root vegetable). The coconut milk and egg pudding combination is something I have seen in Sri Lankan cuisine too.

Very simple to make and equally easy to finish off! I imagine that it would be quite easy to make a vegan version with a substitute which can be used to replace the eggs.

Maw Gaeng - Thai Sweet Potato Pudding


2 eggs beaten lightly
Coconut milk extract - freshly squeezed from one half of a coconut (or use a cup of canned coconut milk)
1 cup sugar
2 sweet potatoes, boiled, peeled and mashed.
cardamom powder - 1/2 tsp

1. Mix the beaten eggs, coconut milk and sugar in a heavy bottomed pan.
2. Add the mashed sweet potatoes and mix well, heat on low flame and keep stirring till the custard thickens - about 6-7 minutes.
3. Pre heat an oven to 180C and lightly grease a baking dish. Pour the custard into and bake for 45 minutes till golden brown on the sides and the top. A skewer inserted will not come out totally clean but not be sticky.
4. Serve warm with vanilla ice cream

Thursday, November 19, 2009

Tomato and Sweet Corn Clafoutis

I am always looking for one pot dishes, preferably one which can be baked and thus "cook itself". In this direction, I have tried crustless quiches, frittatas . These are perfect for a late Sunday brunch or even a small evening meal at the end of a long day. While looking for some more such recipes which fitted my baked, one pot criteria, I came across Clafoutis.

Clafoutis or clafouti is a dessert - custard with fruit in its simplest form - which originated in France. The fruit of choice is usually cherries but when not in season is replaced with other fruits like peaches, pears, bluberries and the like. It is a simple way to consume summer fruits with some heavy cream, eggs and sugar and a very non fussy dessert which doesn't smother the fresh taste of the fruits.

Since I don't have such a strong sweet tooth, my thoughts wandered to making this a savoury dish - a quick look around and I found that I wasn't the first one with such an idea! In fact, I even stumbled across a rant about the tribe who convert a perfect great dessert into something of an abomination by adding vegetables and extra flour. Well, in my opinion, some of the best recipes have been created because of such experimentation - I'm not going to stop anytime soon, even if I don't produce any path breaking recipes in the process ;).

I made my recipe with the ingredients I had at home - tomatoes, bell peppers and sweet corn - you can used cherry tomatoes and even bacon.

Eggs - 3
Flour - 3-4 tbsp
Cream - 1/2 cup
Milk - 1//2 cup
Feta Cheese - 100 gm crumbled

2 large tomatoes thickly sliced
1 bell pepper - thinly sliced
sweet corn kernels - 1/2 cup

garlic cloves - 2-3
fresh basil leaves - 2 tbsp chopped
salt to taste
crushed pepper - 1 tsp
red chilli flakes - 1/2 tsp
oil - 1 tbsp

1. Preheat the oven to 180C. Heat oil in a pan and add the garlic cloves. After a minute, add the bell peppers and swiftly saute for about 3-4 minutes. Remove.
2. Grease a baking dish and keep aside. Whisk the eggs in a bowl, add the cream, milk, flour, salt chilli flakes and pepper and whisk some more.
3. Pour the custard batter into the greased baking dish and distribute the vegetables (including the sauteed garlic and bell peppers) over the batter till they just sink in. Scatter the chopped basil on top and sprinkle the crumbled feta cheese.
4. Bake for about 40-45 minutes till the custard is just set is just starting to turn golden on top.

Saturday, August 8, 2009

Bread & Butter Pudding


Foibles - we all have them don't we? The dictionary defines the word as " a minor weakness or an eccentricity". And who indulges our foibles better than family and friends? My mother knows I love thick, well set curd and always made sure (still does) that I am the first to "cut" into the curd bowl at home. When we came back from vacations she would rush to the neighbour's house to borrow some "starter yoghurt" so that there would be curd for me by the end of the day. The friend who loves pink in any shape or form - I always keep an eye out for something she may like. My best friend has started picking up coaster sets from the places she visits, knowing that I like collecting them.

The husband of a dear friend in Delhi loves butter and cream - so much so my friend had stopped keeping any butter at home until recently when having children meant that she couldn't go without. The combinations he could come up with were quite creative to say the least - butter in tea, a dollop of cream on his cold coffee..... So when I was wondering what to gift him for his birthday, I remembered my friend telling me how as a child, he enjoyed having bread and butter with sugar. Something which even I remember my Dad making for me when I was a little girl.

This bread and butter pudding seemed perfect for him - its a recipe I have made many times in the past 10 years and has never failed to please. One of the times I made it for a potluck, an acquaintance commented how the taste took him straight back to his Ooty boarding school days. I don't remember where this recipe is from - probably one of those Good Housekeeping magazines and I have adapted it over the years to make it perfect for our taste...its simple, hardly takes an hour from start to finish and is absolutely delicious! I made this recipe this time, in two batches - one to gift and a smaller one for my daughter - the second batch had a little less milk-egg mixture to soak and looks drier than it actually is. But it is quite creamy and very satisfying.

So, go ahead, indulge yourself or your loved one - give into your foibles!

Bread & Butter Pudding
Bread - 2 slices
Butter - enough to butter the 3 slices generously
Eggs - 1 plus one egg yolk
Milk - 300ml
Castor sugar - 2 tbsp
Demerara sugar - 2 tbsp
Vanilla extract - 1 tsp
Raisins & sultanas - 2 tbsp each
Cinnamon powder - 1/4 tsp

1. Butter the bread slices and cut each slice into quarters. Arrange the slices, buttered side up, in a shallow oven proof dish.
2. Sprinkle the raisins and sultanas on top.
3. Mix the eggs, castor sugar, milk and vanilla essence and strain if there any "bits". Pour over the bread, sprinkle the cinnamon and demerara sugar and soak for 15-20 minutes.
4. Pre heat the oven to 180 C and cook the pudding for 45 minutes till the custard is set and the top is a nice golden brown.
5. Serve warm or cold.

Tuesday, July 21, 2009

Dad's Spanish Omelette

Sunday breakfasts cooked by Dad were really special. While he was in Iran, he learnt to make a mean Spanish omelet from the Swedish engineers he worked with there. The last time he made this for me was on my birthday 4 years back and he hadn’t lost his touch. It was simply delicious – thick wedges layered with potatoes, stuffed with slowly browned onions and capsicums, topped with cheese. Hmmm… reminds me, I should ask him to make it again the next time he visits.

When I grew up and started reading more about food, I found that in Spain this is called a “tortilla” and is widely served as a snack or a light meal in Spain – especially in Tapas bars. Quite a different concept from the breakfast dish I had always known it as. In Britain it is called Spanish omelet, while in Italy there is a version which is called “Frittata”. They are all flat open faced omelets with a large variation in the fillings and while the bottom is cooked on the stove top, the top is finished in the oven. Read more here.

I made this recently on a Sunday morning (for some reason I can’t wrap my head around making this on any other day! I guess the tradition continues...) Along with the potatoes I also tossed in some sliced sausages and topped it with feta cheese, dried herbs and fresh coriander. The combinations for a frittata are endless - feel free to experiment with bell peppers, mushrooms and any other ingredient you fancy.

Frittata cooking on the stove top

Go easy on the salt if you are using feta cheese since it is naturally salty. Even my daughter gets to share this lovely breakfast because I sprinkle the crushed pepper and some chilli flakes only on 3/4th of the frittata leaving one wedge for her to enjoy.

Frittatas usually use anywhere between 6 to 10 eggs - thats how you get those thick wedges which you can cut. Which is why I usually make these when we have friends staying over with us....makes for a nice brunch of sorts without too much time spent in the kitchen. This time, since it was just the three of us (2.5 actually!), I used 3 eggs. I don't have a smaller non stick pan so I used the normal one which is why it is much thinner than usual.

When making the frittata with 6 eggs or more, I use a round oven proof tin - first on the stovetop and then later in the oven to set the top. This time I put the non stick pan inside the oven - not a good idea at all.
a. Non stick pans are as such a bad idea because of the teflon coating (am trying to find some good cast iron frying pans I can season and use) and one inside the oven isn't a good idea either.
b. I kept in there for about 3-4 minutes, but it might melt the plastic handle of the frying pan.

So, what I'm going to do in future (and would suggest the same for anyone trying this) is to use an oven proof pan which I can also use on the stove top. Think pie pans, roasting tins....

I am sending this recipe on to Family Recipes - the event which brings memories of family, food and fun - the brainchild of Shelby and Laura.

Dad’s Spanish Omelet

Ingredients:

Eggs - 6

Milk - 1 tbsp

salt and pepper to taste

Potatoes - 2, sliced thin and cooked in water for about 8 minutes, till almost done

Mushrooms/sausages/bell peppers - 1/2 cup sliced thin

Red chilli flakes/paprika powder - 1 tsp

Fresh coriander & mint - 1/4 cup chopped

Dried herbs (optional) - 1/4 tsp

Feta cheese - 100 gm

Oil - 1 tbsp


Method:

1. Heat oil in an oven proof tin and arrange the parboiled potato slices at the bottom of the tin and cook each side till golden, about 5 minutes.

2. While that is cooking, beat the eggs and the milk along with the salt and pepper. When the potatoes are almost done, add the mushrooms/sausages/bell peppers to the pan and cook on low for about 5 minutes till they wilt.

3. Pour in the egg mixture and wait till it spread evenly. Sprinkle the fresh herbs, dried herbs, red chilli flakes and feta cheese. Pre heat the oven to 180C

4. After about 2-3 minutes, the egg would have set and the bottom would be almost cooked; Put the tin into the oven (or under the grill) and bake for about 5 minutes till the top is cooked and golden. The cheese will also have melted. Serve warm, cut into wedges along with a hunk of bread on the side.

Saturday, February 14, 2009

Good Food - Egg Curry


So many years ago as a new bride, I got 6 foreign magazines a month from the neighbourhood circulating library. One of them was Good Food - a BBC magazine which had some really good recipes and some nice articles on food. I remember trying many of them - especially the one pot ones which suited me when I was learning to balance work and home. Then of course, there were the absolutely amazing pictures to drool over.

Over the years though, I have shifted to looking for recipes online on it's website and it's very convenient to search by ingredients or look for a particular dish. I was very happy then, to find the Good Food "101 Healthy Eats" cookbook. A really good selection of recipes - simple, healthy and delicious. I am definitely going to cook my way through this book!

I love egg curry in any form and am constantly trying out new recipes. So no surprise then, that the first recipe I tried from this book was an egg curry. I was quite intrigued actually, the recipe was quite different from the usual - it had spinach and cherry tomatoes to start with and then was finished with coconut milk. Seemed like an interesting combination and I wasn't disappointed. The curry was smooth and creamy but not heavy and the spinach added a very nice texture to the whole dish.


Egg Curry

Adapted from Good Food "101 Healthy Eats"


3 eggs
1 onion - finely sliced
1 tsp Red chilli powder
1/4 tsp turmeric powder
1 tsp coriander powder
1/2 tsp cumin powder
(the original recipe uses korma curry paste instead of spice powders)
2 cups spinach leaves, cleaned and chopped
1 tomato chopped fine
100ml coconut milk
1 tbsp oil

Method:
1. Boil the eggs for about 8 minutes, drain, cool and peel. keep aside.
2. Heat the oil in a wide pan and add the onions, saute for 5 minutes till soft.
3. Add the chilli powder, turmeric powder, coriander powder and cumin powder and saute 2 minutes.
4. Add the chopped spinach and fry for 5 minutes till it softens. Add the tomatoes and the coconut milk and simmer gently for another 5 minutes.
5. Slice the eggs into half and add the curry, season with salt, gently heat through and remove from flame.

Sunday, August 31, 2008

Chocolate Brownies


Brownies have been one of my favourite kinds of dessert for some years now and I try not to pass up a chance to have good warm brownies with cold vanilla icecream. But some of the versions I have tasted (especially in those godawful coffee cafes which abound in every nook and cranny) have been really bad. Dry, barely-there chocolate versions which you wish you never tried in the first place.

A good chocolate brownie is one which is moist and fudgy, holds together well but doesn't crumble and of course has some good dark chocolate in it.

For some reason I didn't try making brownies - didn't want to end up with one of those terrible versions I despised....until I saw this recipe at Jugalbandi. The pictures screamed gooey delectable squares of heaven. And of course, as anyone who knows Jai and Bee will tell you, if it's on their blog and looks like its delicious - it *is* delicious!

Jugalbandi was most certainly an inspiration when I wrote my first post - and I made that sweet beginning with one of their recipes - seems fitting then that almost a year later and close too 100 posts, I post yet another recipe from their amazing blog!

I made this Chocolate Brownie from J&B's recipe for Chocolate Almond Brownie and it was absolutely delicious. I added walnuts to the original recipe, used three eggs instead of four and used all butter instead of apple sauce. Verdict - chocolate brownies just the way I like them - moist, chocolately and not cloyingly sweet!

This is going to Zlamushka's event Tried and Tasted - Jugalbandi's blog is this month's pick and I am looking forward to seeing what's everyone's favourite recipe from their blog!! Recipes inspired from their blog:

Chicken & Red Pepper Crustless Pie
Rosy Tomato Risotto
Poee and Xacuti

Friday, July 18, 2008

Banana Muffins


We had another baking session with the kids during the holidays. This time with three 3 year olds and one six year old. Decided to bake muffins this time, these individual cakes always manage to thrill the little ones! I had a couple of ripe bananas lying around so I decided to make Banana Muffins and also throw in some walnuts.


The bananas, milk, honey, eggs and walnuts make for a power packed treat for the little ones - rich in calcium, iron, Vitamin A, protein, essential fatty acids and potassium. It takes hardly anytime to prepare and my little helpers gave me a hand with mixing the ingredients and pouring out the batter.


The muffins when they were baked were really moist and soft, though they turned out a tad salty....not sure whether it was more salt or the combination of cinnamon and salt. Will cut down on both the next time.

The banana muffins are on their way to the Think Spice...Think Nutmeg event being hosted this month by Aparna of My Diverse Kitchen. Think Spice was originally hosted by Sunita's World.


Banana Muffins


1/2 tsp cinnamon (can be replaced with vanilla essence)

1/2 tsp nutmeg (grated)

1 cup whole wheat flour (atta)

1½ cups refined flour (maida)

2 tsp baking powder

¼ tsp baking soda

½ cup honey

1 egg

½ tsp salt (would change it to 1/4 tsp next time)

1 cup milk

3 tbsp oil

3 ripe bananas, mashed

Half a cup of chopped walnuts (lightly toasted)


1. Preheat oven to 180C.

2. Mix the wheat flour, refined flour, baking soda, baking powder, salt, nutmeg and cinnamon together in a bowl.

3. In another bowl, mix the honey, egg, milk, oil and add the dry ingredients until just combined. At the end mix in the chopped walnuts.

4. Grease a muffin pan or line cupcake moulds with cupcake papers.

5. Fill the muffin moulds or cupcake liners till the top and bake for 35-45 minutes till they are golden brown and a toothpick inserted comes out clean.

6. Remove to a rack and cool completely before unmoulding.

For a superb eggless version, take a look at Vaishali's recipe.

Monday, June 30, 2008

Baked Eggs


What do you do when the rest of the family (which is just 1 and a quarter members anyway) wants to eat cornflakes and oats for breakfast on a Sunday morning when you are in the mood for something more elaborate? - Why?! Go right ahead and make something just for yourself.

And its even better if it is something which can be specifically be made in portions for just one person; that way when its time to eat breakfast with everyone else, you don't have to "share".
*evil grin*

Wicked thoughts aside, I was really in the mood to have some eggs for breakfast, but making an omelet with just one egg was not fun while two eggs were too many for a single person. So I baked myself an egg in a ramekin.

The fancy name for this is Eggs en Cocette. Cream, ham, veggies and cheese with just set eggs make a perfect breakfast for one in about 15 minutes. Of course, you can make as many as the people at your table.

I used cream cheese, tomatoes, coriander and LOTS of pepper for my version of this protein packed breakfast. It goes to Weekend Breakfast Blogging's (WBB) second anniversary edition being hosted by Raaga of the Singing Chef - this month focuses on Express Breakfasts. WBB is originally the idea of Nandita of Saffron Trail.

Baked Eggs

1 Egg
1 tbsp Cream Cheese
Half a tomato chopped
2 tbsp coriander leaves
salt
pepper

1. Preheat the oveen to 220C
2. Lightly grease a ramekin and fill the bottom with the cream cheese
3. Top the cream cheese with tomatoes and chopped coriander. (If you want to add other veggies like mushroom, zucchini etc, just saute them a bit before adding)
4. Carefully break an egg into the ramekin on top of the tomatoes and coriander.
5. Add salt and pepper - grated cheese can be added at this stage.
6. Place the ramekin into a baking dish with water in it which covers 3/4 th of the ramekin.
7. Bake for 10-12 minutes, I cooked it till it was firm and set.
8. Eat it from the ramekin with toasted bread while other members look on wide eyed :)

Elaborate versions here and here.

Monday, June 16, 2008

Nupur's Goan Egg Curry


The monsoon has set in 2 weeks earlier in Delhi and we are enjoying some glorious weather - temperatures in the 30s and even late 20s (celsius) and gentle morning showers - nothing like the furious monsoons I am used to in Mumbai.

With weather like this, it's quite normal for thoughts on a lazy Sunday morning to stray to some exciting food to eat. None 0f the light food we have been sticking to for the summer days, what we need is some spicy, chatpata food.

Egg curry is one of our favourite dishes and I love trying out new versions - always searching for the "perfect egg curry". Looks like I have found it now!

Nupur of One Hot Stove was one of the first food bloggers I came across and at that time her wonderful event A to Z of Marathi dishes was on and that's how I stumbled upon the wonderful world of food blogging! Each of the dishes on Nupur's blog is an individual effort to explore the wonderful world of food. Traditional Indian dishes are made simple and easy to understand while newer cuisines are also tried out and adapted with her usual eagerness to experiment and learn. The recipes are simple and she always talks to her readers - talking down is just not her style!

But behind that modest person, lies someone who has the gifted knack of getting her culinary creations just right. Whether its lip smacking street food like pav bhaji, a "crowd pleaser" like vegetable biryani (this is one dish which I have made on several occasions when we have had people over and its never failed to delight!), Perfect Sabudana or the light as air Vietnamese Summer Rolls, Nupur has been a prolific blogger with a wide variety of dishes on her blog and I am very thankful that not only does she take the time and effort to figure out the best way to make certain dishes, she then comes back and shares it with us!

So when I saw this delicious egg curry she posted for this month's edition of Click, I just knew I had to try it. I didn't have the Goan fish curry masala, so I ground my own from an approximation of what she suggested, using red chillies, coriander seeds, black peppercorns, coconut and garlic. Nupur used coconut milk and since I was using grated coconut I ground the paste really really smooth to make up for that ; while the final outcome may have been a little different from what she had made I must say its by far the most delicious egg curry we have had!

Definitely a keeper of a recipe and I am sending it in to the Tried and Tasted June event being hosted by dear Zlamushka of Burnt Mouth. This is a new event where every month one blog is chosen to be "Tried and Tasted" by trying out recipes.

I also made the Onion Cheese Kulcha, cut down the cheese in it and added a potato in the filling - it was absolutely delicious and made for a wonderful meal paired with the egg curry. Unfortunately, no pics because the dough took a long time to rise in this cool weather and by the time it was baked in the oven we were too hungry to wait and just dug into these hot, filling and absolutely flavourful breads!

Tuesday, May 20, 2008

Revisiting recipes – Crustless Quiche with Spinach and Feta Cheese


I have often wanted to make this recipe of mine; invariably I would either be out of eggs or feta cheese. Last week when my daughter had a day off from school, a couple of friends and I planned an "art day"for the kids at my place. (Read keeping the kids busy and out of our hair!)

My upstairs neighbour organised the brushes, the face paint and loads of one sided paper. Some simple cuts in potato and brinjal halves and they had a whale of a time dipping them in the paint and making block prints! Then there was spray painting which they did with cut outs and an old toothbrush. Of course most of the paints seemed to be on them than on the paper LOL!

Lunch was a mixed spread. Phulkas, Lobia Saag (Cowpeas beans and Spinach Gravy), Cucumber and Tomato salad, Crustless Quiche with Spinach and Feta cheese, Brown Rice with Chicken and Pumpkin and Apple Crisp.

I have made a similar quiche before using roasted peppers and cream cheese. I wanted to make it again with different ingredients; spinach was the first thing which came to mind and since I had feta cheese too, it seemed perfect.

I was searching for other ideas and I came across this recipe from Baking Bites - the talk of flour that would automatically separate from the batter and form a crust seemed too exciting, though I had used flour in my earlier recipe too and didn't remember a crust forming. I decided to try this once again and adapted the recipe.

The quiche was good and we really liked the wedges we had; the browned top making a lovely contrast to the flaky insides and the delicious feta complimenting the overall taste. But I didn't get the crust effect separately though the bottom was quite firm. Maybe next time I will stick to the recipe completely and see what happens since the flour proportion was quite different from what I used in mine.

Crustless Quiche with Spinach and Feta Cheese


Ingredients:

Wheat flour - 1/2 cup
Refined flour (maida) - 1/2 cup
Baking powder - 1/4 tsp
Baking soda - pinch
Salt - 1/4 tsp
Egg whites - 3
Milk - 1 cup
Spinach - 1 cup cleaned and chopped
Onions - 1 cup chopped
Feta cheese - 1/3 cup cut into small squares
Chilli powder - 1/4 tsp
Carom seeds (ajwain/omam) - 1/4 tsp
Crushed black pepper - 1 tsp
Olive oil - 1 tsp

Method:

1. Mix the flours, baking powder, baking soda and salt together in a bowl.
2. Pre heat the oven to 180C and grease a 10" pie pan or a shallow baking pan. Take a pan, heat the oil and put in some ajwain seeds, when they change colour (1/2 a minute), add the onions and saute for 2-3 minutes till transluscent. Then add the chopped spinach and saute till it softens and wilts (about 3 minutes). Remove and cool.
3. Whisk the egg whites and add the milk, salt, crushed black pepper and chilli powder to it.
4. Mix in the flour mixture gently and then add the spinach onion mixture.
5. Pour in the batter into the prepared pie plate and place the pieces of feta cheese on top.
6. Bake at 180C for 15-20 minutes, a toothpick inserted will come out clean and the top will be golden brown.


Sunday, April 27, 2008

Vanilla, Cream Cheese and Date Cake


My daughter had an end- of-term party coming up at school (I don't think we ever had such things...for that matter I don't remember going to play school, I think it was straightaway Kindergarten at 3 years) and every child was required to bring one item for the party.

Mine was to bring a snack while her friend was to bring a cake - her mother asked me whether I would bake a cake so that she didn't have to give store bought cake with all that sugar and icing. So we swapped and I came up with a delicious cake adapting this recipe from the Joy of Cooking site.

The kids enjoyed this simple fluffy cake with the childhood favourite Vanilla - the cream cheese made it that much more flavourful and soft.

I am sending this to Masterbaker's April theme - Vanilla Each month Nikki picks one ingredient and we get to bake whatever we want, then she bakes up a bunch of the entries and picks a winner - simple and fun!


Vanilla, Cream Cheese and Date Cake


Ingredients:

Refined flour (maida) - 2 cups
Butter - 1 cup
Cream Cheese - 3/4 cup (I used cream cheese spread and cut out the 1/4 tsp salt in the recipe, you can also use fresh thick hung curd)
Eggs - 3
Sugar - 1 cup
Baking powder - 1/2 tsp
Baking soda - 1 /4 tsp
Vanilla scrapings from one pod or 3/4 tbsp vanilla essence
Pitted and chopped dates - 1 cup

Method:

1. Preheat oven to 180C and lightly grease a cake pan and keep aside.

2. Sift the flour, baking powder, baking soda and salt. into a bowl. Soak chopped dates in 1/4 cup of warm milk and keep aside.

3 Beat the butter and cream cheese until smooth. Add the sugar a little at a time and beat until creamy and smooth.

4. Beat in the eggs, one at time and mix well. Add vanilla bean extract or vanilla essence and beat well.

5. Fold in the flour mixture gently until just mixed, drain and add the dates and pour the cake batter into the greased pan.

6. Bake for 1 hour at 180C or until a toothpick inserted into the center comes out clean. Remove from oven and cool on a wire rack for 15 -20 minutes, before removing out of the pan and cooling again.


Monday, March 17, 2008

Orange Date Cake - Arusuvai Friendship Chain

After much wiffling and waffling....I finally decided how to use the orange extract I received from Deeba of Passionate about Baking as part of the Arusuvai Friendship chain. I baked this lovely citrus cake with luscious dates - especially for our very own orange blossom - our almost 3 year old daughter. Just as she fills our home with sparkling eyes and shy smiles, with stubborn cries and pouted lips, the fragrance of this cake warmed our hearts. This was for a sentimental family occasion and she loved that there was something special for her.
And for me it seemed fitting that a gift from someone who I have not even met yet, but seem to know so well, should be used to create a gift for someone so dear to me.

Thank you so much Deeba - it added that special touch to a beautiful day when my daughter got all saucer eyed looking at "her" cake (we are in possessive mode these day) as it came out of the oven - the one she helped stir and mix and pour orange "joosh" into.

This was the first time I experimented with a cake...I usually pretty much stick to baking recipes and wasn't at all sure how this one would turn out. Now that this frontier has been breached - well my oven had better be scared - very scared!

I loved that the cake turned out so moist and fluffy with a nice crust. The flavour of orange seeped right through. It didn't need an orange glaze which most recipes recommended.....The dates which popped up in between were a nice addition and I think soaking them in the orange juice and orange zest really helped make them juicy.This one will definitely be made many more times and hopefully become a fond childhood memory for our daughter.

I am also sending this recipe and story to Sugar High Fridays #41, which is being hosted at Habeas Brulee and this month's theme is all about Sweet Gifts.


Orange Date Cake


Ingredients:

Flour - 1 and 3/4 cup
Butter - 3/4 cup
Light Brown sugar - 3/4 cup
Baking powder - 3/4 tsp
Baking soda - 1/4 tsp
Salt - 1/2 tsp
Eggs - 2
Orange extract - 2 tsp
Vanilla essence - 1 tsp
Buttermilk - 1/2 cup (Pour half a tablespoon of lime juice into half a cup of milk and set aside for 5-10 minutes till it separates - strain and use)
Grated zest of 2 medium organges (about 2 tbsp)
Juice of 2 medium oranges (1/2 cup)
Chopped seedless dates - 3/4 cup

1. Preheat the oven to 180C (350F). Soak chopped dates in the orange juice and orange zest for about half an hour. Grease a ring mould or a 8" cake pan and keep aside.
2. Sift together the flour, salt, baking powder and baking soda.
3. Cream butter and sugar together in a large bowl; beat eggs well and keep aside.
4. Strain the dates and keep aside the orange juice and zest.
5. Take the bowl with the creamed butter and sugar; add the dry ingredients(flour,salt etc) a little at a time alternating with the wet ingredients (egg, buttermilk and orange juice), ending with the dry ingredients.
6. Pour in the vanilla essence and orange extract. Mix in the chopped dates and the orange zest.
7. Pour in the batter into the greased cake pan and bake at 180C for 45 minutes or till done. Check with a skewer to see whether it comes out clean when pierced into the cake.
8. Let cool inside the oven for about 5 minutes, then remove and let cool outside for about 10 minutes. Remove from pan when fully cooled and set aside for sometime on wire rack.


Thursday, January 24, 2008

Rasbhari Cake (Cape Gooseberries Cake)


Rasbhari - the name itself conjures up plump juicy succulent images! This warm golden berry lives up to its name and I love the tart sweet taste it has....
I made my acquaintance with this delicious fruit very recently and was instantly smitten. Have you read those messages in the newspapers? - atleast the ones in Delhi have them - "Dear Girl in a blue suit,you were ahead of me in the queue for PVR tickets for "Welcome", I became yours then and there - please tell me who you are, Sunny"

Well, I did something like that too - trying to figure out what this fruit was and what I could do with it! The answers poured in from all you friendly bloggers who told me that this was the cape gooseberry - locally called "rasbhari". I hope Sunny was as lucky!

I found this lovely recipe for an upside down cake on The Cooks Cottage.....but I had too little of the fruit left to make it, so I adapted the recipe and made a cake by pureeing the berries and mixing it in with the batter. I used wheat flour instead of refined flour.

I was intrigued by the jaggery used in the original recipe and decided to keep it - that along with the berry puree gave this cake a lovely colour and crust and it tasted equally delicious!

Rasbhari Cake

Ingredients:

Cape gooseberries - 3/4 cup
Unsalted butter - 1/3 cup at room temperature
Jaggery - 2 tbsp grated.
Sugar - 1/3 cup
Wheat flour -1 cup
Rava - 1/2 cup
Baking powder - 1 tsp
Egg -1
Vanilla essence - 2 tsp

Method:

1. Pre heat the oven to 350F/180C, lightly grease a 6" cake tin, sprinkle the grated jaggery over the greased base and keep aside.
2. Cream the butter and sugar together till smooth and creamy.Beat the egg well.
3. Gently cook the berries in a pan with water just about covering it, when it softens and the skins start separating, take off the flame. Put the berries in cold water and peel carefully. Puree the fruit.
3. Sift the flour with the baking powder; add the vanilla essence and the pureed berries to the butter cream mixture and then mix in the flour and rava. Fold in the beaten egg with a cutting motion and combine into a dropping consistency batter.
4. Pour into the prepared cake tin and bake at 180C/350F for about 20-25 minutes - check at 20 minutes to see whether a skewer poked in comes out clean.