Showing posts with label chocolate. Show all posts

Wednesday, December 21, 2011

Milk Chocolate Macadamia Biscotti for Christmas


 Biscotti is a crisp (some would say hard) biscuit of Italian origin,traditionally enjoyed  (in Italy) with a wine or orange juice and in places outside Italy with a steaming cup of coffee. The word Biscotti describes its preparation - it is derived from the Latin word biscoctus which means "twice cooked/ baked". It describes foods which were cooked / baked twice so that they lasted longer and could be used to feed soldiers or travellers on long journeys and during wars. Their origin being the town of Prato, they are known as Biscotti di Prato; but they are also commonly called "cantuccini" in Tuscany and Sicily.

The traditional recipe only uses flour, sugar, almonds and eggs while not incorporating butter or yeast. The dough is baked in slabs and when fresh and warm cut into slices and baked once again till crisp. Recent recipes have started incorporating other nuts like hazelnuts, pistachios, pine nuts; baking powder and butter have also been included along with flavourings in the form of almond or vanilla extract and some spices like anise and cinnamon.

I love my cookies a bit crisp and crunchy and don't much prefer the soft ones, so I have always wanted to bake Biscotti. Never got around to doing it though until now. The thought of baking them twice and the fear of them crumbling while cutting them into slices after the first round of baking made it a little daunting, but it was actually all very smooth when I did get around to baking it.

I used milk chocolate (I had a large Cadbury Dairy Milk Fruit and Nut slab a friend had gifted my daughter and she - like me- doesn't always prefer "things" coming in between her chocolate. So I decided to cut it up into chips and use it in the biscotti. I also had some macadamia nuts lying from my trip to Australia and decided to use those as well. I adapted this recipe from Canadian Living.

I had my daughter's best friends over when I was making this so the tiny hands all wanted to shape the logs and they did a good job! My oven couldn't accomodate 14" logs, so I just divided the dough into 3 parts and made three smaller logs. The kids couldn't wait for the logs to be baked and then cool a bit so we could cut slices and I had a tough time restricting how much of the freshly baked logs they could consume - LOL! The slices cut quite easily with a serrated knife - you have to take care to use firm strokes to cut and not linger too much. The middle part of one of the logs was crumbling a bit, but there were a lot of takers for the crumbs, so I didn't have a problem with that :)

The Biscotti came out beautifully flavoured, not too sweet and with just the right amount of crunch from the nuts. They were crisp and made for a lovely snack with just the right amount of hardness. This is definitely a recipe to repeat since it has become a favourite in our house - none of my other cookies have won such all round approval satisfying the picky husband (when it comes to sweets) and the savoury liking daughter.


I have also baked my Christmas Cake with the kids - the one which I have been doing for many years and it is luscious with all the dried fruit inside - I sliced one portion and am dousing the other round cake with small spoons of orange juice till it is ready to be eaten on Christmas. I have another batch of dried fruit soaking with which I am going bake another Christmas cake when my niece arrives and we will have that one for New Year with friends and family. This is a different recipe I'm going to be using for the first time, lets see how it turns out. Have you baked your Christmas Cake - try this recipe here, its easy and you will love the flavour! If you haven't soaked dried fruit, ust steam the fruit for about 7-8 minutes gently in orange juice or rum and rest for 30 minutes, before proceeding with the recipe. Recipe here

Now back to the Biscotti.


 Milk Chocolate Macadamia Biscotti
 Ingredients:

Butter - 1/2 cup, softened
Sugar - 3/4 cup
Eggs - 2
Flour - 2 cups
Baking powder - 1.5 tsp
Salt - 1/4 tsp
Almond Essence - 1 tsp
Vanilla Extract - 1 tsp
Macadamia Nuts - 1/2 cup, chopped (can replace with almonds)
Milk Chocolate chips (I used milk chocolate bar chopped up into small pieces) - 2/3 cup

Method:

1. Cream the butter and sugar in a bowl, beat till smooth and shiny.
2. Add the eggs one at a time and beat well.
3. Mix in the almond essence and vanilla extract into the egg mixture
4. In another bow, sieve the flour and baking powder together. Add to the egg mixture and combine with a light hand till it comes together into a soft dough.
5. Add the chopped nuts and the milk chocolate pieces and mix into the dough.
6. With your hands, divide the dough into 2 or 3 parts, depending on the size of your oven/baking tray.
7. Shape each part into a log about 10-12" long and place on a greased baking tray, then flatten slightly while still leaving the edges rounded, making each long about 3-4" wide. Use flour while shaping the logs in case they are sticking to your hands.
8. Pre heat the oven to 180C and bake for 25-20 minutes, till the tops are just turning golden and the logs are firm. Cool for 10 minutes
9. Cut the logs with a serrated knife diagonally in a firm, swift motion into 1/2" slices each.
10. Stand the slices upright in a baking tray and bake at 180C for 20 minutes, till dry and crisp and base is slightly browned.

Tuesday, December 13, 2011

Orange and Chocolate Chip Muffins with Sprinkles


Do you know what happens when your 6 year old bakes muffins? -  you digress so far from the original recipe that it bears only a slight  resemblance to what you intended to bake. Almonds get turned down (because nuts are good only with chocolate, Amma), chocolate chips get added in (there's so little left in the packet Amma, lets finish it) and finally the muffins miraculously sprout sprinkles on top (Please Amma, can we have sprinkles on top - Please, please pleaaaaaase).

I started with The Cooker's recipe for some delicious Orange, Oats and Almond Muffins - they seemed delicious. K had a compensatory holiday last Friday, after her Sports Day in school and was bouncing off the walls at home. So we decided to bake - and she said she would do "everything".  I helped her measure out the ingredients,  and as she poured and stirred and whipped, she slowly took over the kitchen till the recipe morphed into something else with a life of its own! 
 But she was so thrilled at the fact that she was doing "everything", that I didn't have the heart to turn down her suggestions. After all, what's a few choc chips and sprinkles between friends - am sure the Cooker wouldn't mind the transformation of her recipe! 
And this was also K's gift to Amma and Appa on their 14th anniversary :) - how much sweeter can it get? The muffins rose beautifully and were soft and fluffy. Must be all the love and enthusiasm which went in with those tiny hands.
This also goes out to my best friend S whose anniversary it is today - Happy Anniversary S and A - here's wishing you many more!.

 Orange and Chocolate Chip Muffins with Sprinkles
Ingredients

½ cup Quaker Oats ground coarsely
1 ¼  cup flour
¾  cup whole wheat flour
 ½  cup butter (or oil)
½ cup sugar (I used castor sugar and would probably increase the quantity a tad bit more next time)
2 eggs
1 cup orange juice
½ cup yoghurt
½  tsp baking powder
½ tsp baking soda
½ cup yoghurt
½ cup multicoloured sprinkles
½ cup chocolate chips
1 tbsp orange zest, grated

Method
1. Mix the refined flour, whole wheat flour, oats, salt, baking soda, baking powder and orange zest in a bowl.
2. In another bowl, cream the butter and sugar together till shiny, then add the eggs one by one and beat for 2 minutes each.
3. Add the orange juice, yoghurt and chocolate chips into the egg mixture and mix till combined.
4. Gently fold in the flour mixture, one third at a time into the egg mixture till just combined; do not overmix.
5. Pre heat the oven to 180C (350F). Grease 2 muffin trays (6 muffins each).
6. Spoon the batter into the muffin trays till they just graze the top of the moulds. Decorate with sprinkles on top/
7. Bake in the oven for 15-20 minutes – a skewer inserted should come clean. Cool completely before unmoulding. 


Monday, October 31, 2011

No Fuss Chocolate Mousse and a Giveaway

I used to be quite the expert at making chocolate mousse from scratch; dishing out smooth, velvety scoops of delicious goodness! Till I started reading about the dangers of consuming raw eggs especially for children. So I stopped.....

Recently I started dreaming of a spoonful of chocolate heaven again but didn't want to go down the gelatine route either. There were recipes with cream and agar but frankly with the thin cream we get here (no double whipped) I was very doubtful of its ability to set well. That's when I remembered seeing a recipe in Nigella's book. Yes - it was very much there and used marshmallows.

So I tried the recipe and it was a very easy and fabulous tasting one. The mousse turned out silken smooth and with no fuss at all! I made these for a dinner with friends during Navratri and served them in shot glasses as well as these antique glasses (antique - because they are 40 years old, my Dad got them from Japan when he was posted there!). The kids had a whale of a time licking the ends of the shot glasses which they couldn't reach with their spoons!

My blog is now 4 years old!! Only apt that I celebrate with a chocolate dessert since I began this blog with another delicious chocolate dessert. Thanks to all my readers and especially the people who take time to comment and mail me - its your interest which inspires me to blog about my cooking efforts.

And because I love y'all so much and to thank you for your support, I am hosting a GiveAway on my blog this month. For my Indian readers, I have The Mainland China Cookbook by Anjan Chatterjee to give away. The book will be sent to the lucky winner through Flipkart.

 This is one of my favourite restaurants and they have an amazing spread, not to mention some great customer service from a warm and welcoming staff. I have eaten in their restaurants in Chennai, Delhi and Mumbai and enjoyed most meals. The book has recipes for all their signature dishes - Crackling Spinach, Lotus Leaf Wrapped Rice, Lamb Stir Fry, Stir Fried Chinese Greens, Shao Xiang Chicken with Cashews and Chillies, Spring Onion Pancakes - in a crisp and clean format which makes the recipes easy to replicate in your own home.

For my readers outside India - I am giving away one copy of Anjum Anand's new book "I Love Curry" - a lovely collection of Indian recipes (not only curries but also sides, raitas, breads, salads and rice) with a contemporary twist to them. Anjum Anand is the host of Indian Food Made Easy and I love her effortless style and how she breaks down Indian cooking to show the depth and variety the cuisine has to offer without making it seem too complicated and preachy. The book will be sent to the lucky winner via Amazon.


So from Nov 1 to Nov 15th, 2011 - to participate in the Giveaway:
1. Leave a comment with your email id and place of residence
2. Tell me what's your favourite recipe on the blog
3. Share with me the dishes / cuisine you would like to see more of, on Peppermill


Chocolate Mousse
(serves 12-14)

Marshmallows - 200gms chopped into smaller pieces
Butter - 100 gms
Dark Chocolate - 400gms
Cream - 300gms
Vanilla essence - 1 tsp
  1. Take a heavy pan and put in the chopped marshmallows, butter and chocolate (I had a packet which was a mix of white and pink marshmallows!) Chop the marshmallows else it takes a lot of time to melt.
2. Heat the pan over a low flame, stirring now and then till melted and comes together.Don't overheat or it might get clumpy. Remove from heat and keep aside.
    3. Meanwhile, whip the cream with the vanilla essence until a little thick, and then fold into the slightly cooled chocolate mixture - it should be a nice, smooth mixture.
   4. Spoon into 12-14 shot glasses - about 3-4 tbsp in each. Refrigerate till it sets and then serve.

Wednesday, September 28, 2011

Nutella Pinwheel Cookies

I amo actually not much of a Nutella enthusiast - certainly not like my brother who can slather it on to bread slices and make sandwiches of it!! But I recently bought a jar in an attempt to persuade my daughter to finish up her lunch box - the deal being that she would get Nutella sandwiches one day of the week if she finishes up her lunch the other 4 days. (I don't even know why I am making these deals because its not as if the lunches on the other days are uninteresting or she doesn't like them. She just chats and eats so slowly that she runs out of time most days. Sigh....and some days she has Chocos from her friend's lunchbox - not to judge, but really Chocos for lunch?? Must be another harried Mom who was trying to make a deal with her 6 year old!

Anyway, so when I saw this latest post on Anita's blog for some luscious Cinnamon Rolls,  what instantly came to mind were pinwheel cookies and the Nutella jar in the fridge. I thought Joy of Baking would have a recipe for pinwheel cookies of some sort, but they didn't and instead found a site called Joy of Desserts and I found this recipe which used chocolate. I adapted the recipe to use the chocolate hazelnut spread and it was a lovely combination.

The humidity made it a bit difficult to roll out the dough even though I chilled it, so I finally had to roll out the chocolate part of the dough on top of the plain dough which is why the pinwheels are not as well defined as I would have liked them. Did nothing to the taste though; these were some seriously good cookies - soft and crumbly and with the delicious taste of chocolate and hazelnuts mixed in without being overwhelmingly cloying.


Nutella Pinwheel Cookies (Adapted from Joy of Desserts)

1 1/2 cups flour (I ended up kneading in about another 1/4 cup of flour in my attempt to roll out the dough)
1/2 cup butter ( I had only salted butter so skipped the pinch of salt in the original recipe)
1/2 cup sugar
2 tablespoons Nutella
1 egg
3 -4 tablespoons milk
1 1/2 teaspoons baking powder

1. Sieve the flour with the baking powder (and salt if usinng)
2. Cream the butter and then add the sugar and bear till light and shiny.
3. Add the egg and beat for another 2 minutes.
4. Fold in the flour and baking powder and mix well, adding milk one tablespoon at a time till you manage to get a soft dough.
5. Divide the dough into two portions and add the Nutella to one of the portions.
6. Wrap the dough portions with plastic wrap and chill in the fridge for 15 minutes.
7. Turn the plain dough out and roll 1/8th inch thick. Roll the Nutella dough out to the same size as the plain dough.
8. Place the Nutella dough over the plain dough and press together, Then roll away from you into a tight even cylindrical roll.
9. Chill again for 10 minutes, Remove and cut into thin slices.
10. Bake in a pre heated oven at 190C for 10 minutes.

Wednesday, September 14, 2011

Chocolate Brownie (Cocoa based)


This almost turned out to be a disaster because the sugar just refused to melt and I had a sticky mass of butter and cocoa powder. What should have taken about 15 minutes to make took more than an hour as we battled to have the sugar melt into some kind of semblance of what it usually does. Something definitely wrong with that batch of sugar I bought - not from the usual supermarket, so I guess I'm not going back to the neighbourhood kirana wala for sugar anytime soon now.

Coming to the recipe, this is one of my favourite recipes for a deliciously decadent brownie - this is not a very gooey brownie though, its a little chewy but soft and the coffee (which is my addition) adds a lovely rich flavour to it. This recipe is adapted from this blog which itself is an adaptation from Alice Meidrich's Bittersweet and has a mint adaptation to it. I also like this recipe because it uses cocoa powder which I almost always have at home, as opposed to chocolate which I may or may not have at hand.

I usually put in walnuts but this time since I was a bit doubtful about the sugar which had not melted properly, I decided not to waste nuts in case this turned out to be a disaster. But I had promised chocolate chips when we started baking so my daughter insisted on it and they went in. I would go with the nuts though, the chocolate chips in a chocolate brownie is rather a lost cause but who's to argue with a 6 year old!

This batch was demolished quite swiftly - its almost addictive once you taste that lovely, dark chocolate flavour and one can go on eating it. Easy to whip up - this is a must try.

Chocolate Brownie
Butter - 1/2 cup (I used salted butter so omitted any salt in the recipe, if using unsalted, I would add about 1/2 tsp of salt)
Sugar - 1 cup (can reduce to 3/4 cup)
Cocoa powder - 3/4 cup
Instant Coffee powder - 2 tbsp
Vanilla essence - 1/2 tsp
Eggs - 2
Maida (all purpose flour) - 1/2 cup
Chocolate chips - 1/2 cup (can be substituted partly or wholly with walnuts)

1. Combine the sugar, butter and cocoa powder in a vessel and place in another pan containing water which is simmering. (The next time I would just use softened butter and combine it with powdered sugar and cocoa powder till smooth and shiny.) Mix with a wooden spoon till melted and well blended.
2. Take off heat and cool slightly till just warm. Add the vanilla essence Dissolve coffee powder in  1/4 cup of boiling water and cool. Add to the sugar butter mixture.
3. Add the eggs one at a time and beat well. Then add the flour and beat till just combined with a wooden spatula.
4. Fold in the nuts or chocolate chips and pour into a tray which has been covered with aluminum foil.
5, Bake in a pre heated oven at 180C for about 20-25 minutes. Remove when the toothpick inserted comes out not completely dry but just a bit moist inside.
6. Cool completely and cut into squares. Depending on the size of the squares you could get upto 15-20 pieces. I cut them small and got about 20 pieces.

Thursday, March 17, 2011

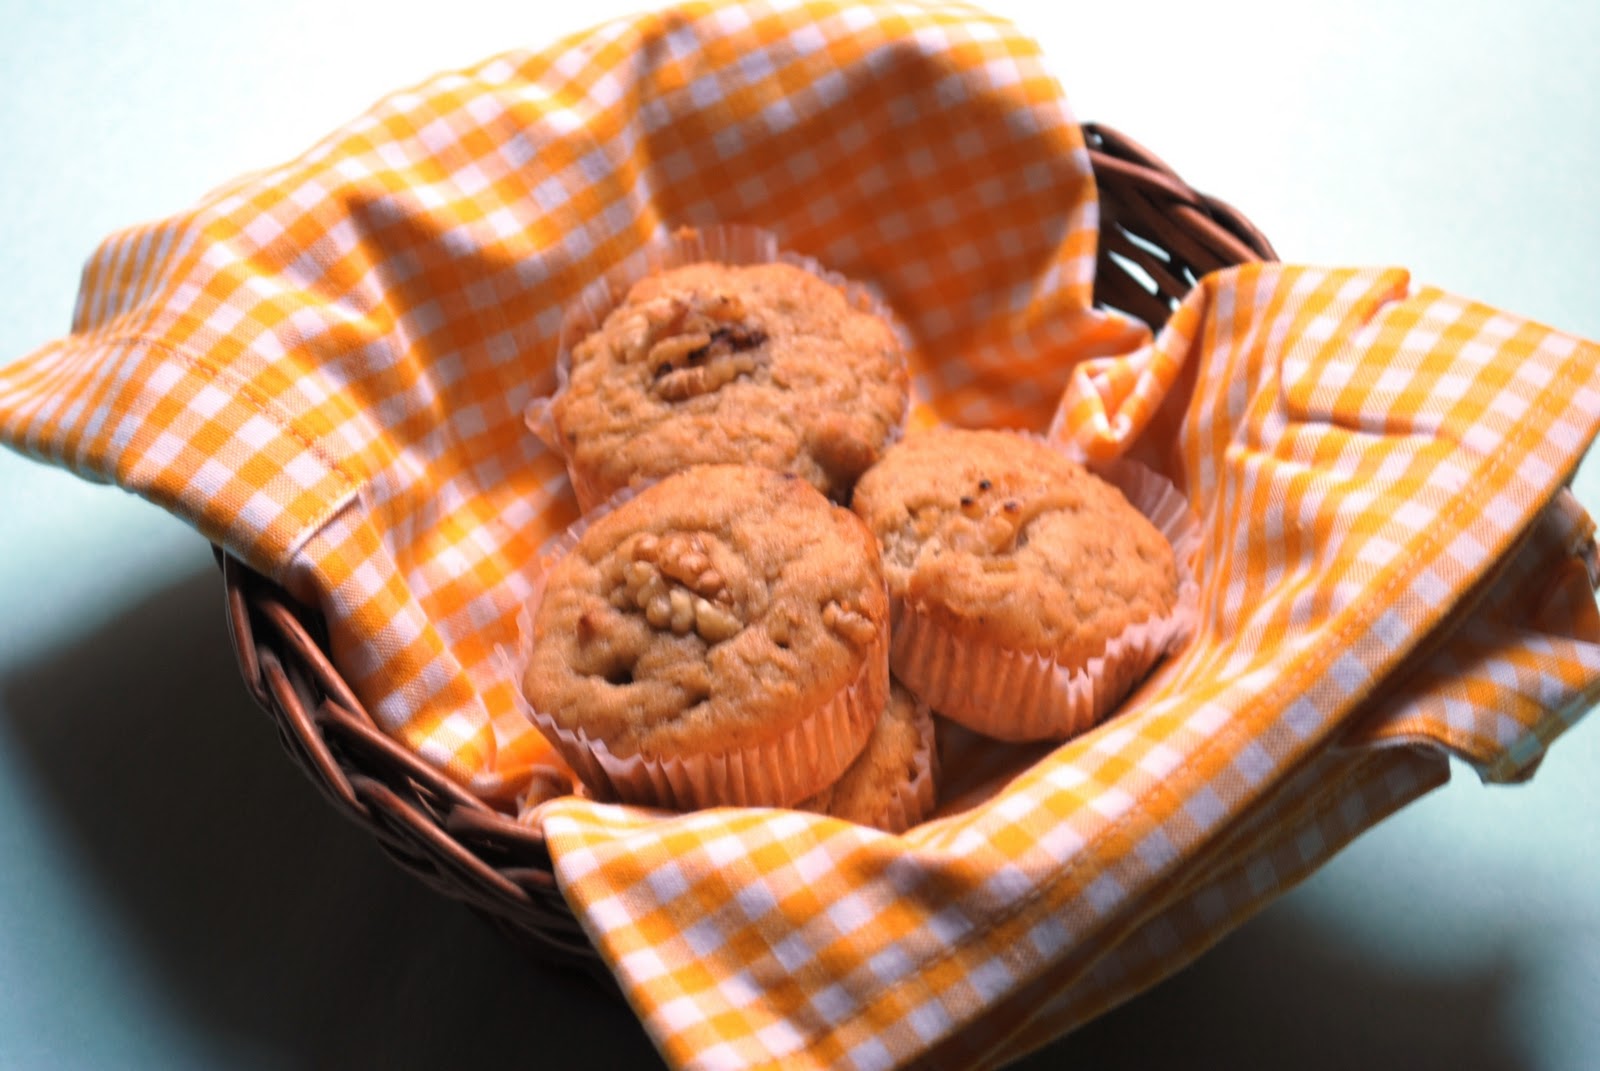
Eggless Banana Walnut Muffins

MIL is staying with us this month - I had to really persuade her to come this time, since she was quite reluctant to make the trip from Coimbatore. Age related hearing loss has made her a little reluctant to socialize. But she did come finally and its been nice to have her here with us. My daughter especially seems to bloom a litte bit more every time one of her grandparents is around.

We took her out for lunch last weekend (Punjab Grill - very good food and great service - pleasantly surprised) and while walking around the mall, she spotted some cupcakes at a cafe. She asked about them but they had egg in them, so I decided to make some eggless muffins at home. Banana muffins seemed the easiest and she likes nuts, so decided to modify this recipe of mine for white chocolate walnut muffins, to make some banana walnut muffins.

It barely took me about an hour from start to finish. I packed a couple in my daughter's tiffin the next day and she couldn't stop beaming with delight at the chocolate chips. This is a light muffin but nice and flavourful.The sugar can be brought down a notch since it was a little sweet for me.

Eggless Banana Walnut  Muffins
Ingredients:
1/2 cup butter
1/2 cup brown sugar (I would bring this down by a couple of tablespoons)
1 banana (medium)
3 tbsp milk
3/4 tsp vanilla essence
1 cup maida
1/2 tsp baking powder
1/2 tsp baking soda
salt - a pinch
1/2 cup walnuts (toasted on a skillet or in an oven, peeled and broken into half) You could use chocolate chips, I did that for half of them because my daughter wanted some.

1. Blend the banana with the milk and vanilla essence with the hand blender into a puree.
2. In a bowl, cream the butter and brown sugar with a hand blender till light and fluffy. Add the banana puree and then blend again.
3. Sift the flour with the salt and the baking powder into thebowl of batter and fold in gently till just combined. Do not overmix
4. Fold in the walnuts (or the chocolate chips) reserving a few to decorate on top. Pre-heat the oven to 180C (350F).
5. Grease a muffin pan or line them with cupcake liners. Drop spoonfuls of batter into the muffin pan and bake for 15-20 minutes (took 20 minutes for me). A toothpick should come clean when poked into the muffins.
6. Let stand till cool and then unmould from the muffin pan.


Wednesday, February 9, 2011

Chocolate and Macadamia Nut Fudge - the perfect Valentine's Day treat

My own stash of indulgence - chocolate fudge seems so much more decadent than just chocolate. The creamy combination of butter, chocolate and nuts is exquisite! The original recipe from Nigella Express has pistachios in it; I used macadamia nuts since I had them left over from my trip to Australia - but feel free to use the nuts you like. Plus I added dried currants. Not much can go wrong when you combine chocolate, fruit and nuts.

I reduced the condensed milk in the recipe and used dark chocolate instead of semi sweet - still perfectly soft, fudgy and delicious. AND super quick.So, go ahead - make this your Valentine's Day gift....for yourself! :)


Chocolate and Macadamia Nut Fudge 
(Adapted from Chocolate Pistachio Fudge from Nigella Express)

300gm dark chocolate,broken up or chopped (I use Morde dark Chocolate which is great for cooking and now available in most large grocery stores)
1/2 can condensed milk (sweetened)
pinch of salt
1/2 cup macadamia nuts - lightly toasted and broken into pieces
1/3 cup black currants or big, dark raisins
1 tbsp butter

1. Put the chopped chocolate, condensed milk, butter and salt in a vessel which can fit into another pan half filled with water. Put the pan of water on low heat and stir till the chocolate melts and mixes with the condensed milk and butter. Alternatively, you can put the ingredients in a microwaveable bowl and zap it at 40 second intervals till the chocolate melts.

2. Add the broken nuts and raisins/currants into the chocolate mixture and mix well.

3. Take a 8" square pan and line it with aluminum foil. Pour the mixture into it and even out the top with the blunt end of a knife or the back of a spoon.

4. Cool and then refrigerate until the fudge is set. Cut into squares as you would for barfi (an Indian milk sweet).


5. Its cool here now, so I left it outside in a jar, but when its warm, its probably best to store this in the fridge (Nigella recommends keeping it in the freezer and having it without thawing).

This goes to the Forever Nigella Event - #2 - Seduced by Chocolate being hosted by Sarah of Maison CupCake


Tuesday, December 21, 2010

White Chocolate, Oatmeal and Macadamia Nut Cookies

I picked up a bag of macadamia nuts on my trip to Australia earlier this year and apart from eating some of the nuts as is, it has been sitting in my pantry quite untouched. I remembered the nuts while looking for a new recipe to try this week - when I spend time baking a couple of Christmas cakes and my daughter is nagging me to bake the Gingerbread People - I figure, in for a penny, in for a pound! Last year I had made these scrumptious White Chocolate, Cherry and Oatmeal Cookies, so I thought I could use macadamia nuts in the recipe instead. This combination is apparently a classic as well - the creamy white chocolate contrasting well with the nuts.


I dropped teaspoonfuls of the cookie dough and they came out a little thin and crunchy - thats how I like my cookies. If you like them softer and bigger, then you can drop more batter at a time and / or take them out 2 minutes earlier. The cookies will be soft to touch when they are done (and may look like they are undercooked) but they will harden a little as they cool. As long as they are pale brown on top and can be removed carefully with a spatula, they are fine. And no, for those who wonder, you cannot taste the oatmeal in the cookies. These cookies are lovely and crumbly, crisp outside and soft inside and nutty all over - one of the best I have made at home!

Wishing you a Merry Christmas and a very Happy New Year!


White Chocolate, Oatmeal and Macadamia Nut Cookies
Flour - 1.5 cups
Oatmeal - 1/4 cup (I use quick cooking oats and run them for half a minute in the mixer)
Baking powder - 1 /2 tsp
Baking soda - 1/2 tsp
salt - 1/4 tsp

Unsalted Butter - 110 gms (1/4 lb) - if frozen, bring to room temperature by microwaving at 10 second intervals, till just soft
Castor sugar - 1/4 cup
White Chocolate - I used Lindt - 100gms, chopped
Egg - 1
Vanilla essence - 1 tsp

Macadamia Nuts - 1 cup, toasted and chopped

1. Put the chopped chocolate into a glass bowl and place it inside a bowl of heated water and microwave in 20 second intervals till melted and smooth. Or put the chopped chocolate into a steel bowl and then place inside another bowl of water and heat gently over a low flame till it melts. Don't let the water come to a boil.

2. Cream the butter and sugar for about 2-3 minutes till it is smooth and shiny.

3. Beat the egg separately and add to the creamed butter and sugar along with the vanilla essence. Beat on medium till mixed in - about -2 minutes.

4. Sift together the flour, oatmeal, baking powder, baking soda and salt. Gently combine into the creamy butter sugar mixture - one third at a time - and run the blender on slow till just combined.

5. Pre heat the oven to 170C/325 F. Add the cooled and melted white chocolate and the macadamia nuts and combine well with a wooden spatula.

6. Grease a baking tray and dust with flour. Drop teaspoonfuls of the cookie batter leaving enough space for them to spread and flatten when they bake. A small tray will be able to accomodate only 5 cookies at a time.

7. Bake for 20 minutes at 170C. Remove and transfer carefully to a tray and leave to cool and harden. Store in an airtight container.


And for all those who love Nigella's cooking (and even those who don't!) - Maison Cupcakes is beginning a new event called Nigella Forever. "Each month there will be a theme and you can blog about any of Nigella’s recipes which fit in this theme.  The opening theme is “Seasonal Sensations”, "deliberately loose and fancy free so that as many of you get into the Nigella swing of things from the outset.
This month you can cook or bake anything Christmassy, anything celebratory for New Year, do party canapes or even wintery comfort food for snow days". 
Knowing the number of recipes I have cooked (and posted here) from her book, I am definitely going to enjoy this event.

Sunday, September 5, 2010

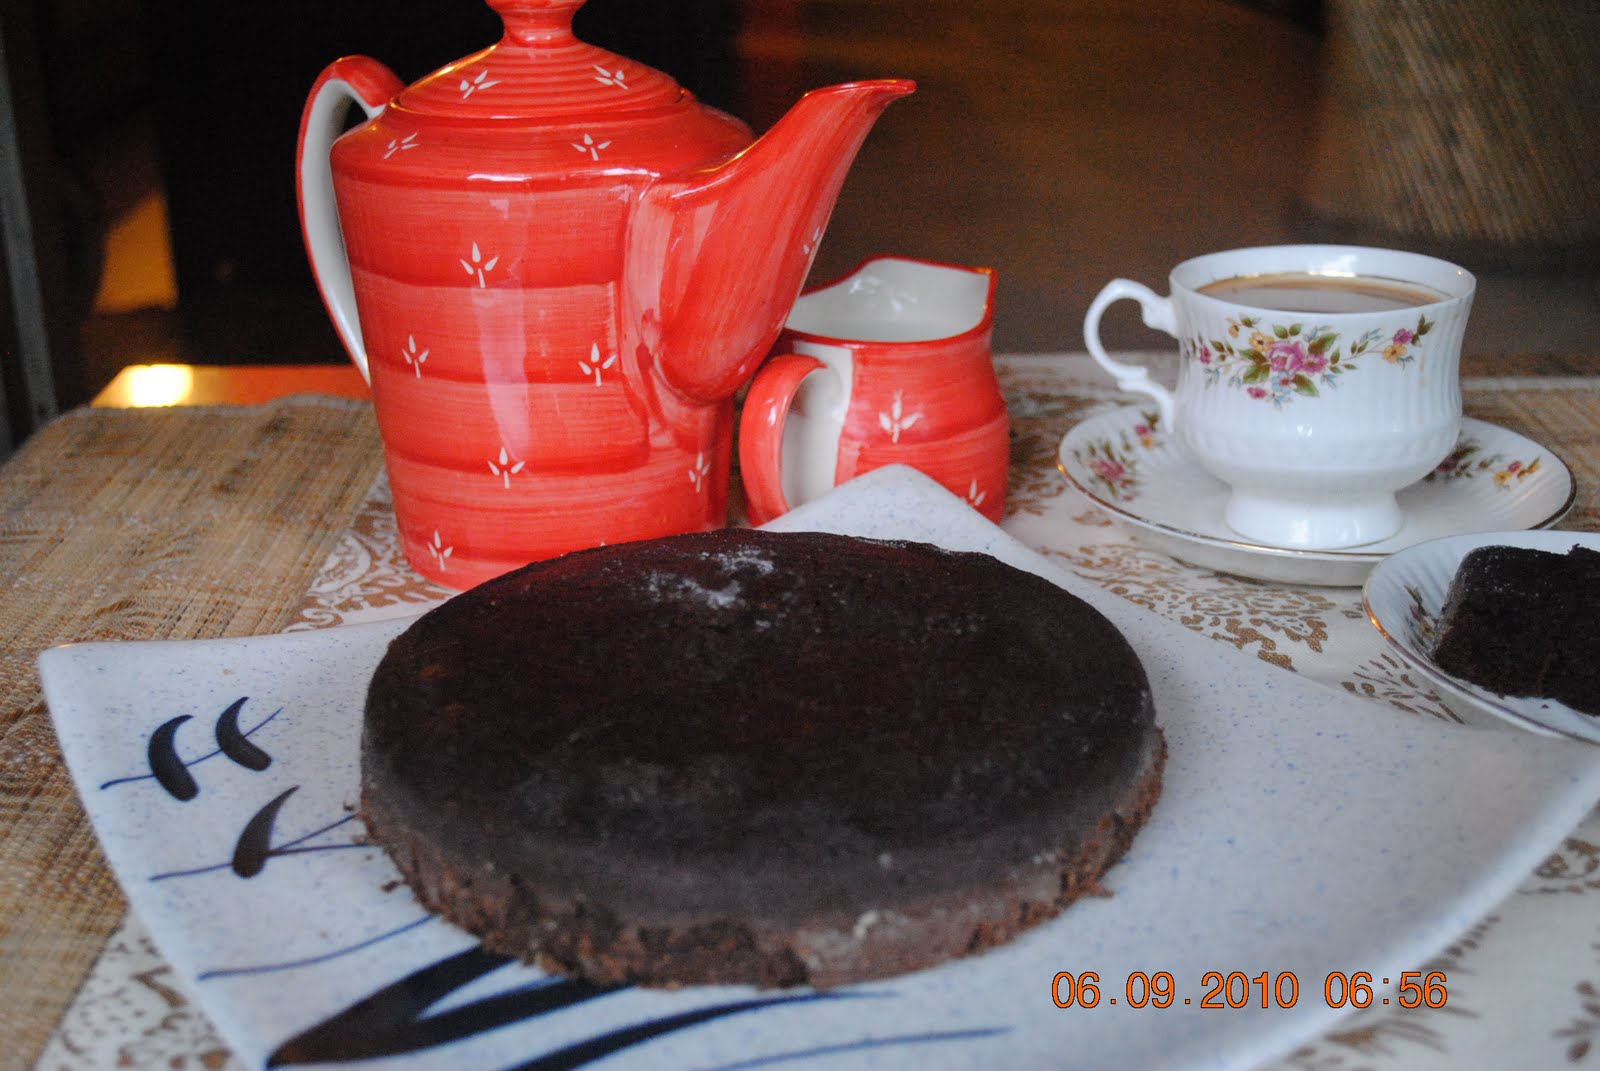
The Best Chocolate Cake for a Tea Party


For Anita's Tea Party celebration, the only fitting thing I could think of was this divine Chocolate Cake which I have blogged about before. This time though, I made it so my daughter's teachers could have a tea party celebration for Teacher's Day!

I have seen previous Teacher's Days in Delhi and the gifts and flowers it seems to entail in this showy city.....I don't subscribe to the idea at all. My mother has been a teacher all her working life and I know for sure that the one thing they do like is genuine appreciation for all the hard work they put in - the one upmanship among parents is, to say the least, annoying and sometimes embarassing.

My daughter is still very young though and it is a little difficult to explain to her why we don't necessarily have to do what everyone else is doing. So, I thought of involving her in baking a homemade chocolate cake instead, as a token of her love and appreciation - something which the other teachers could partake in as well, instead of making it a personal gift. She was happy to do all the mixing and measuring (and licking of bowl!) and took genuine pride at the end of it all in the soft, pillowy cake which emerged out of the oven. Lets raise a toast to freeing ourselves from the pack and doing what's right instead.

This time around, I added some whole wheat flour and cut back on the butter (as promised the last time) and it didn't make a difference. It is still a gorgeous chocolate cake - one you should try the next time you want someone to know, they're special.

 Chocolate Cake


Ingredients:
Refined flour (maida) - 1 cup
Whole wheat flour - 1/4 cup
Baking soda - 1/2 tsp
Baking powder - 1/2 tsp
1/2 cup cocoa powder, (I used Cadbury's)
1/2 tsp coffee powder (instant)
1 cup boiling water
Vanilla essence - 2 tsp
Butter at room temperature - 1 cup
Castor sugar - 1 cup
Eggs - 2

Method:
1. Take a large bowl and beat the butter in it with an electric mixed on medium for about half a minute.
2. Add the sugar gradually and cream together till shiny and fluffy, about 5 minutes. Add the eggs one at a time and beat the first well before adding the second one.
3. Meanwhile, heat the water till it is boiling and then pour over the cocoa powder in a bowl. Mix well till dissolved. Cool and then mix in the vanilla essence.
4. Sieve the flour, baking soda and baking powder together. Add the flour mix a little at a time to the butter sugar egg mixture, alternating with the cocoa mixture, beating continuously with the mixer on medium continuously. When it is combined well, beat on low for another half a minute.
5. Pour the cake batter into 2 pans (I used a 8" round pan and a smaller rectangular pan) which have been lined with parchment paper on the bottom and greased and floured on the sides.
If not using parchment paper on the bottom (I didn't have any this time), grease and flour the bottom well, instead. This cake is very soft and if not lined or greased, may break when you try to turn it out.
6. Pre heat the oven to 190C and bake for about 25 minutes - a toothpick inserted should come out moist but not uncooked. Cool completely before attempting to take it out - this is very important.
7. Warm slightly before serving.

Saturday, August 14, 2010

Chocolate Chip Cookies


My daughter has been asking me to bake cookies with her for the past couple of weeks now. I finally remembered yesterday to buy the unsalted butter I like to use for baking as well as spied on some chocolate chips in the local store. So, of course I had to make chocolate chip cookies!

I had seen some really amazing look choco-chip cookie in Nigella Express, but really there was chocolate *and* chocolate chips *and* cocoa powder as well as 2 cups of sugar in it and 125gms of butter. So, I decided to take the recipes I have used before and tweak it a bit - after all cookies are quite forgiving. I usually use a ratio of 1:2 for the butter to flour ratio and one egg for this amount is usually enough - don't like the smell when I put more than that- in fact for sugar cookies, I use only the egg white.

I added oats to the cookies to add some fibre, since I haven't used whole wheat flour in it. I powdered the oats though before adding it to the batter - my daughter (like many young kids) sometimes hates different textures in one food and I wanted her to enjoy her first home made chocolate chip cookie.

The cookies were rich and dark with the lovely bite of chocolate chips - they were soft and chewy too. I like my cookies crisp so I am going to experiment some more to see how I can make them crisper - would baking them for more time burn them? time to find out!


Chocolate Chip Cookies


Flour - 1 1/4 cup
Rolled Oats - 1/2 cup (I powdered it)
Baking powder - 1/2 tsp
Baking Soda - 1/2 tsp
Cocoa powder - 1 tbsp

Brown Sugar - 1 cup
Butter - 1/2 cup (about 60gms)
Egg - 1
Milk - 1 tbsp
Vanilla essence - 1 tsp
Chocolate Chips - 3/4 cup

Makes 15-18 cookies.

1. Cream butter and sugar together till smooth and shiny - 3 minutes with an electric mixer.
2. Add the egg, milk and vanilla essence and beat for another 3 minutes.
3. In another bowl, mix together the flour, baking powder, baking soda, cocoa powder and the oats. Pre heat oven to 180C (350F)
4. Add the dry ingredients to the butter, egg mixture - one third at a time and fold in gently.
5. Add the chocolate chips last.
6. Take a teaspoonful of the batter (not tablespoon) and drop on a greased tray leaving enough space in between two; the batter will flatten and spread so leave enough space. In my trays that means only 5-6 at a time.
7. Bake for 10-11 minutes - they will be a little soft, but will become firm as they cool. Transfer to a wire rack to cook.

Sunday, July 11, 2010

Chocolate Pudding - Nigella Express


One of the gifts I got this birthday was Nigella Express - the book based on her show (or was it the other way round?!) which features recipes for people on the go - "quick to prepare, easy to follow".

I have been watching her shows for more than a year now, though not regularly. I like her style and the effortless ease which she seems to bring to the kitchen. It does seem like nothing is too difficult when it comes to cooking, if you enjoy it enough. And the Express series shows how you can enjoy it if you make it easier by using simple and fuss free recipes and basic ingredients. (Though I must say Nigella coming back from work by bus after shopping for a last minute dinner party seems a tad too much!)

What I have never identified with though, is the amount of fat and cream which seems to go into her cooking - especially the desserts!! A tub of cream cheese here, 2 sticks of butter there and then some whipped cream to end it all :) I guess she is also liked for cocking a snook at the New Age lean and mean recipes - it* is* refreshing in some ways though, to see food being enjoyed.

Though Nigella started out writing for newspapers and magazines since the early 90s - first as a book reviewer and restaurant critic and then as a freelance writer and even an editor - she really came into the public eye with her books How to Eat and How to be a Domestic Goddess. Then in 2000, she really came into her own with her show "Nigella Bites" on Channel Four in the UK. Her distinctive style of presentation where she seems to flirt with food and the fact that she is not a trained chef but rather comes across as someone who passionately loves food, has endeared herself to her viewers.

So, when my friend who gifted me the book was to come over for lunch with her family this weekend, I decided to cook something from the book since I knew she loves Nigella. I ended up making two recipes from the book - this chocolate pudding and a potato salad. I also saw a prawn and mango curry recipe and got inspired to make a fish curry on the same lines for our meal.

In the midst of my Saturday morning chores, I barely had about a couple of hours to cook up this meal. But truly, this chocolate pudding was ready in no time, just as Nigella promises. As the fish curry simmered on the stove and the potatoes for the salad were boiling, I got together the 5 ingredients needed and within half an hour it was all in the oven. It helped of course, that because of the astonishing intensity of the Delhi heat this year, I didn't have to melt the chocolate and butter - it turned into a gooey mess just standing there on the counter - its a wonder that there was no puddle in place of me at the end of the two hours!

I tweaked the measures a little though - the Lindt chocolate I had was only 100gms instead of the 120gms in the book. Couldn't bring myself to add 110 gms of butter, so I pared it down by half. The sugar too was halved to about half a cup and with the dark chocolate instead of bittersweet chocolate, it was fine. Eggs were 4 according to her recipe, I used 3; and about 1tbsp less than 1/3 cup of flour.

The changes did not seem to make a difference to the pudding though - it was light and airy on the edges and a little gooey in the centre - maybe it may have been much more molten in the centre with the extra egg and butter and less like a brownie. But all in all, quite delicious and a keeper of a recipe for sure. Nigella calls these Glitzy Chocolate Puddings and glazes the top with a a mixture of butter and chocolate - I didn't use the glaze and they were still quite amazing. I might do that for a dinner party next time - as a showstopper as she calls it!

Chocolate Pudding - Nigella Express

3 eggs
1/3 cup flour
60gms butter (about 1/2 cup)
1/2 cup sugar
100 gms dark chocolate (Lindt Dark Coffee)
1/4 tsp baking powder
pinch of salt

1. Cream sugar and eggs together, with a whisk or a blender, till pale and shiny - about 8 minutes in my hand blender.
2. Melt dark chocolate and butter together in the microwave (20 seconds at a time on Full power) or on the stove over a double boiler. Cool.
3. Mix flour, salt and baking powder, gently fold into the beaten eggs and then mix in the cooled dark chocolate and butter.
4. Pre heat the oven to 180C (350F) and grease 8 individual ramekins or one square/rectangle baking tin.
5. Pour the pudding mix into the greased ramekins/baking tin and bake for 25 minutes.

Sunday, December 20, 2009

Chocolate Gingerbread Men


"'Tis the season to be jolly' - indeed! This year the cold has been slow in coming - or maybe its just that I have got more accustomed to it over the last two years. By this time last year, we had the room heaters on; this year I haven't even broken out the thermals! Anyhow, I have been enjoying the weather and of course my cooking is reflecting the festive spirit.

The fruits for my Christmas Cake are all marinated, there have been some great soups (sorry no pictures and so no posts!), a first attempt at Butter Chicken (turned out great - but how Da-lhi is that!), fiery kozhambus, soothing masiyals (mashed spinach with lentils finished with a simple tempering) and comforting French toast. There have been visits from dear friends and simple meals shared (not to mention a disaster of a simple casserole!), a delicious meal at Karims, the perfect wedding anniversary celebration and a beautiful evening at the Garden of Five Senses.

This weekend, after visiting the Christmas Carnival at my daughter's old playschool (was it just a year back we were going through the nerve wracking admission process for her?!) I finally got down to baking cookies with her - she has been asking for the Gingerbread Man for the whole of last month, since we have been reading the story. I didn't have molasses, which is what all the recipes seemed to call for. So I decided to replace it with dark chocolate to get the right colour and a different flavour.
They were perfect - the spices beautifully complimenting the chocolate and I even managed icing - I guess my daughter seems to know how difficult I find it, because she kept egging me on "Its great, Amma - you are doing good!" LOL :) Its not the actual work involved, but putting all the sugar in which makes me think twice! Well worth the effort though - the shining eyes and cheery smile as she devoured a gingerbread woman, was priceless!

I did other shapes which my daughter could cut out with the cookie cutters - the gingerbread people I did with stencils since I didn't have the cookie cutter shapes for them. I also made some plain gingersnap cookies (without the chocolate and with more ginger in them) for the adults in the house. The lack of molasses/ chocolate shows in the pale colour, but the taste was great and they were thin and crispy - just the way I like my cookies!

Chocolate Gingerbread Men
Refined flour (maida) - 150gms
Whole wheat flour (atta) - 100 gms
1/2 tbsp dry ginger powder (soonth)
1/2 tbsp cinnamon powder
1/2 tsp powdered star anise
pinch of salt
1/2 tsp baking soda

Unsalted butter - 100gm
Brown sugar - 40gm
1 egg
1/2 cup melted dark chocolate

Tiny black raisins for decorating

Royal Icing: (Some tips here)

White of 1 1/2 small eggs
1/2 tsp lemon juice
2 cups icing sugar

1. Cream the butter (softened on its own if possible) in a bowl till smooth, add the brown sugar and mix again till shiny. Then the egg goes in and mixed for about 3 minutes till light and finally add the melted chocolate (Melt at 10 second intervals in a microwave or in a bowl over barely simmering water on the stove top)
2. Meanwhile, measure out the flour, baking soda, salt and spices and mix together.
3. Add one third of the flour mixture to the creamed butter/egg mixture and mix till just combined, add the other two thirds the same way, taking care not to over mix.
4. Use your hands at the end if needed, divide into two portions, cover with clingfilm and chill in the refrigerator for atleast one hour.
5. Pre heat the oven to 180C. Remove one portion and try to roll out on a floured surface - a rectangle 1/8th of an inch is sufficient. If it is too dry, add some milk a tsp at a time till you can roll out without sticking. If handled too much the dough may need to be chilled again since the chocolate might make it sticky.
6. While rolling out, make sure you keep trying to lift the rolled out dough off the work surface to check whether it is sticking, else you wont be able to peel of the cut out shapes.
7. Cut out the shapes with cookie cutters or stencils (search for Gingerbread men shapes on the internet, print, cut out and place on the cookie dough and cut with a sharp knife), put in small raisins for the eyes and buttons, transfer to butter paper (parchment paper) and bake for 15 minutes - check at 12 minutes and remove if it is done.
8. Cool on a rack - meanwhile, whip the egg white and lemon juice together while adding the icing sugar gradually till the mixture forms peaks when you lift the blender out of the bowl. A little less than 2 cups of sugar usually suffices. Transfer to an icing cone and decorate the cookies when cooled. Leave aside to dry completely.

The Gingersnap cookies

Saturday, July 11, 2009

Divine Chocolate Cake


A dear friend in Chennai, used to make this absolutely divine chocolate cake - a bit fudgy at the centres and the lovely rich taste of chocolate in very bite. We loved having it at every celebration - birthday, Christmas and other special occasions. I had taken the recipe from her but never really bothered making it - why mess with perfection! But I missed it a lot after moving here two years back and finally decided to make it myself.

The intense richness of this cake, I believe, comes from pouring the boiling water over the cocoa and coffee powders. You know the perfect chocolate cake recipe you were looking for? - well this is it! I will be experimenting with a whole wheat & low fat version, but I think we should all be a little decadent sometimes and indulge ourselves :)
I am sending the first picture to Click - Bi colour this month - the popular photography event hosted by Jai & Bee of Jugalbandi.
Divine Chocolate Cake

Ingredients:
Refined flour (maida) - 1 1/4 cups
Baking soda - 1/2 tsp
Baking powder - 1/2 tsp
1/2 cup cocoa powder, (I used Cadbury's)
1 cup boiling water
Vanilla essence - 2 tsp
Butter at room temperature - 1.25 cups
Castor sugar - 1 cup
Eggs - 2
Method:
1. Take a largish bowl and beat the butter in it with an electric mixed on medium for about half a minute.
2. Add the sugar gradually and cream together till shiny and fluffy, about 5 minutes. Add the eggs one at a time and beat the first well before adding the second one.
3. Meanwhile, heat the water till it is boiling and then pour over the cocoa powder in a bowl. Mix well till dissolved. Cool and then mix in the vanilla essence.
4. Sieve the flour, baking soda and baking powder together. Add the flour mix a little at a time to the butter sugar egg mixture, alternating with the cocoa mixture, beating continuously with the mixer on medium continuously. When it is combined well, beat on low for another half a minute.
5. Pour the cake batter into 2 pans (I used a 8" round pan and a smaller rectangular pan) which have been lined with parchment paper on the bottom and greased and floured on the sides. If not using parchment paper on the bottom, I would recommend heavily greasing and flouring the bottom instead. The cake turned out really soft and broke a bit when I tried to turn it out onto a plate.
6. Pre heat the oven to 190C and bake for about 25 minutes - a toothpick inserted should come out moist but not uncooked. Cool completely before attempting to take it out.
7. Warm slightly before serving.

Tuesday, April 21, 2009

White Chocolate Muffins (Eggless) and a Breakfast Picnic

Yes, you heard that right! A Breakfast picnic is what we did a couple of weekends back - the weather had been absolutely brilliant in the early am that whole week, so four families with 6 kids and a dog set out at 7 30 am to Lodhi Gardens (Delhi).
We have "our" spot, right under a big old tree with some benches nearby, which we use during the winters (we did two last year and one the year before) but since it was so early in the morning, that was taken over by people doing yoga and stuff. Winters we normally reach around 11 30 when the sun is out and there are fewer people at that time.

So we picked another spot a little further away - we were shaded by the big tomb and some trees cool breeze blew all around us - it was perfect! We spread our dhurries, poured out the tea from the thermos and brought out the food. The cheese sandwiches and rava idlis with gun powder came out first along with a whole bottle of freshly squeezed orange juice. So fortified, the kids went adventure hunting looking out for tunnels, ponds and "secret hiding" places along with some of the adults and the dog. The rest of us, lay back and chatted looking at the blue skies and the spring flowers and almost dozing with our eyes half-closed.

The children were back in no time chattering on about all the "treasures" they had unearthed and dived right back into the food - aloo parathas and gobi parathas, bananas and grapes. Games of catch followed and then turned into a quest for finding ladybugs in the bushes and flowers accompanied by squeals of delight when one would land on a tiny hand. It was worth all the "effort" of waking up on a Saturday morning and getting the kids ready in time - and I treasure these times so much because I have never had the chance to do these things in Mumbai or Chennai. Delhi is blessed with these wide, open spaces which are so easily accessible and I'm glad to be making the most of it while we are here.

Besides the rava idlis, I brought along these white chocolate muffins which I had made the previous day. I made them without eggs since MIL is visiting and she doesn't eat eggs. I added the banana to make up for the moisture content and consistency. And to complete my itch for one weird ingredient per recipe I threw in some chopped candied amla (gooseberry) into the batter. The muffins were nice and moist; some of you might want to add a bit more sugar if you prefer your muffins sweeter. You could also chop more walnuts and add them right into the batter. Replacing the white chocolate with dark chocolate is another option.

This goes to Joelen's Tasty Tools event - where this month's tool of choice is Muffin Pans.

White Chocolate Muffins (Eggless)

Wheat Flour (atta) - 1.5 cups
Refined flour - 3/4 cup
Baking powder - 1.5 tsp
Baking soda - 1/2 tsp
Castor Sugar - 1 cup

1/2 cup unsalted butter
1/2 mashed banana
white chocolate - 100gms, chopped into pieces
1/2 - 3/4 cup milk
1 tsp vanilla essence

Walnuts - 6, broken into halves
Candied amla - 2 tbsp, chopped (optional)

1. Sieve both the flours with the baking powder, soda and the powdered sugar. Keep aside.
2. Melt the white chocolate pieces in a microwave at 30 second intervals till soft. You can also put the chocolate into a steel bowl which goes into another vessel half filled with water and then heat it on the stove, stirring till it melts.
3. When the chocolate cools a bit, add it to the mashed bananas along with butter and vanilla essence.
4. Mix the flour into this mixture and whip with a blender. Add the milk a little at a time till the mixture is thick and creamy, but not too runny.
5. Add the chopped candied amla, mix and drop spoonfuls of the batter into muffin covers or a greased muffin tray, taking care to fill only three fourth of the mould.
6. Place half a walnut into the top of each muffin and then bake for 14 minutes in a pre-heated oven at 180C. Cool completely.

Thursday, December 25, 2008

White Chocolate, Cherry and Oatmeal Cookies


I have been baking a Christmas cake for the past two years and it has become nice way to bring in the holiday spirit - right from marinating the fruit to baking it on Christmas Eve. This was the first time in the last eight years we weren't at the our friend's house in Chennai for Christmas - but the cake still managed to please new friends. And the special part of baking it this year was that a couple of months back I got to meet my friend in London who had given me this recipe some years back. We have only been emailing each other for almost 8 years now so it was wonderful to actually get to meet her!


This year, I also baked some cookies - adapted this recipe which was itself adapted from this one
from Smitten Kitchen who adapted it from Cook's Illustrated. I love crispy cookies much more than the chewy ones so I loved the idea of these. They are actually not so much crispy rather than this kind of absolutely gorgeous vehicle to transport some rich chocolate and oatey goodness into your mouth!! I did away with the sea salt and reduced the oatmeal, threw in some dried cherries and Voila! - absolutely delicious cookies. I had to stop myself from eating the dough while waiting for the first batch to cook :)

Sending these cookies to Neivedyam's Cookie Baking Event which is being hosted by Sharmi.

White Chocolate, Cherry and Oatmeal Cookies

Ingredients:

Flour - 2 cups
Oats - 1 cup (I used quick cooking oats)
Baking powder - 3/4 tsp
Baking soda - 1/2 tsp
Butter - 200gms
White chocolate(chopped) - 170 gms
Egg -1
Vanilla essence - 1 tsp
Dried cherries - 50gms
Sugar - 1 cup

Method:

1. Cream the butter and sugar in a large bowl till smooth.
2. Put the chopped chocolate into a glass bowl and place it inside a bowl of heated water and microwave in 30 second intervals till melted and smooth.
3. Beat the egg and add to the creamed butter and sugar mixing lightly till combined.
4. Sift the flour with the baking powder and baking soda and then add gradually to the egg mixture.
5. Add the vanilla essence and the melted chocolate to the bowl and combine with a wooden spatula.
6. Refrigerate the mixture for about half an hour so that it can be shaped into balls - do not skip this step!
7. Pre heat the oven to 180C (350F), cut butter paper to size and spread on a baking tray.
8. Shape the cookie dough into balls, flatten slightly and place on the baking tray atleast 2 inches apart (they will spread and flatten as they bake). Don't handle the cookie dough for too long since the chocolate and butter will start melting.
9. Bake for 15 minutes. Remove the butter paper with the cookies on it and set aside to cool. They are very fragile before they cool so don't try to remove them from the butter paper when hot.
10. Bake more batches in the same way till the dough is used up.

Sunday, August 31, 2008

Chocolate Brownies


Brownies have been one of my favourite kinds of dessert for some years now and I try not to pass up a chance to have good warm brownies with cold vanilla icecream. But some of the versions I have tasted (especially in those godawful coffee cafes which abound in every nook and cranny) have been really bad. Dry, barely-there chocolate versions which you wish you never tried in the first place.

A good chocolate brownie is one which is moist and fudgy, holds together well but doesn't crumble and of course has some good dark chocolate in it.

For some reason I didn't try making brownies - didn't want to end up with one of those terrible versions I despised....until I saw this recipe at Jugalbandi. The pictures screamed gooey delectable squares of heaven. And of course, as anyone who knows Jai and Bee will tell you, if it's on their blog and looks like its delicious - it *is* delicious!

Jugalbandi was most certainly an inspiration when I wrote my first post - and I made that sweet beginning with one of their recipes - seems fitting then that almost a year later and close too 100 posts, I post yet another recipe from their amazing blog!

I made this Chocolate Brownie from J&B's recipe for Chocolate Almond Brownie and it was absolutely delicious. I added walnuts to the original recipe, used three eggs instead of four and used all butter instead of apple sauce. Verdict - chocolate brownies just the way I like them - moist, chocolately and not cloyingly sweet!

This is going to Zlamushka's event Tried and Tasted - Jugalbandi's blog is this month's pick and I am looking forward to seeing what's everyone's favourite recipe from their blog!! Recipes inspired from their blog:

Chicken & Red Pepper Crustless Pie
Rosy Tomato Risotto
Poee and Xacuti

Wednesday, February 13, 2008

French Vanilla Cake with Chocolate Ganache


On a recent trip I came across vanilla beans - an ingredient I have been looking for ever since I started visiting Vanilla Garlic, where amazingly creative Garrett waxes eloquent about vanilla bean varieties, vanilla sugar and what not......

So, when I saw that test tube shaped bottle with three long curling-black-as-gnarled-wood vanilla beans, I grabbed it up. Isn't it an oxymoron that the bean itself is this dark blackish brown and the colour one associates it with is white....vanilla icecream, vanilla white, plain as vanilla.....
I came back and it lay on my spice rack, where I could see it while cooking. I would open the bottle and take a deep breath and place it back. It's time had not come.....my cooking depends a lot on what I feel like, I rarely cook something "just because".

And so Valentine's Day drew nearer and though I did feel like making something this year, I somehow couldn't bring myself to think of chocolates or strawberry or pink and red stuff. So I kept looking at recipes and putting it off.

Today I caught sight of my vanilla in-a-test tube and knew that this is what I wanted to make - something with this rich aroma which makes the world seem like a nicer warmer place. I vaguely remembered a recipe on Vanilla Garlic and when I checked - there it was - perfect for my mood and for the day - French Vanilla Cupcakes.

So I set about making this as a cake. I followed the recipe exactly since I wasn't sure whether the custardy consistency he referred to would make it differ in anyway. The only thing I changed is the quantity of sugar - I used 1 1/2 cups instead of 2 and it was quite sweet.

The Circle of Life

The cake was oh-so-soft! but still had a nice brown crumb. It tasted of vanilla and a dozen childhood memories......and is perfect for my Valentine's Day this year.

I had decided to make a chocolate ganache to go with this since I'm not too fond of meringues. But when it came to making the ganache, I realised I am still the girl who likes to draw and hates painting in the sketch......I didn't feel like frosting the whole cake!
I just wanted more of the creamy vanilla flavour, so I just frosted the 3 cup cakes and part of the main cake.


Three valentines for the three of us

This goes to the Serendipity Bake Off hosted by familiabencomo with help from the soapchix at Serendipity Soaps and to Pooja at My Creative Ideas for her Valentine event.

And one of the pics goes to Jai and Bee of Jugalbandi for their event Click - this month's theme is FLOUR.