Showing posts with label child friendly. Show all posts

Wednesday, December 21, 2011

Milk Chocolate Macadamia Biscotti for Christmas


 Biscotti is a crisp (some would say hard) biscuit of Italian origin,traditionally enjoyed  (in Italy) with a wine or orange juice and in places outside Italy with a steaming cup of coffee. The word Biscotti describes its preparation - it is derived from the Latin word biscoctus which means "twice cooked/ baked". It describes foods which were cooked / baked twice so that they lasted longer and could be used to feed soldiers or travellers on long journeys and during wars. Their origin being the town of Prato, they are known as Biscotti di Prato; but they are also commonly called "cantuccini" in Tuscany and Sicily.

The traditional recipe only uses flour, sugar, almonds and eggs while not incorporating butter or yeast. The dough is baked in slabs and when fresh and warm cut into slices and baked once again till crisp. Recent recipes have started incorporating other nuts like hazelnuts, pistachios, pine nuts; baking powder and butter have also been included along with flavourings in the form of almond or vanilla extract and some spices like anise and cinnamon.

I love my cookies a bit crisp and crunchy and don't much prefer the soft ones, so I have always wanted to bake Biscotti. Never got around to doing it though until now. The thought of baking them twice and the fear of them crumbling while cutting them into slices after the first round of baking made it a little daunting, but it was actually all very smooth when I did get around to baking it.

I used milk chocolate (I had a large Cadbury Dairy Milk Fruit and Nut slab a friend had gifted my daughter and she - like me- doesn't always prefer "things" coming in between her chocolate. So I decided to cut it up into chips and use it in the biscotti. I also had some macadamia nuts lying from my trip to Australia and decided to use those as well. I adapted this recipe from Canadian Living.

I had my daughter's best friends over when I was making this so the tiny hands all wanted to shape the logs and they did a good job! My oven couldn't accomodate 14" logs, so I just divided the dough into 3 parts and made three smaller logs. The kids couldn't wait for the logs to be baked and then cool a bit so we could cut slices and I had a tough time restricting how much of the freshly baked logs they could consume - LOL! The slices cut quite easily with a serrated knife - you have to take care to use firm strokes to cut and not linger too much. The middle part of one of the logs was crumbling a bit, but there were a lot of takers for the crumbs, so I didn't have a problem with that :)

The Biscotti came out beautifully flavoured, not too sweet and with just the right amount of crunch from the nuts. They were crisp and made for a lovely snack with just the right amount of hardness. This is definitely a recipe to repeat since it has become a favourite in our house - none of my other cookies have won such all round approval satisfying the picky husband (when it comes to sweets) and the savoury liking daughter.


I have also baked my Christmas Cake with the kids - the one which I have been doing for many years and it is luscious with all the dried fruit inside - I sliced one portion and am dousing the other round cake with small spoons of orange juice till it is ready to be eaten on Christmas. I have another batch of dried fruit soaking with which I am going bake another Christmas cake when my niece arrives and we will have that one for New Year with friends and family. This is a different recipe I'm going to be using for the first time, lets see how it turns out. Have you baked your Christmas Cake - try this recipe here, its easy and you will love the flavour! If you haven't soaked dried fruit, ust steam the fruit for about 7-8 minutes gently in orange juice or rum and rest for 30 minutes, before proceeding with the recipe. Recipe here

Now back to the Biscotti.


 Milk Chocolate Macadamia Biscotti
 Ingredients:

Butter - 1/2 cup, softened
Sugar - 3/4 cup
Eggs - 2
Flour - 2 cups
Baking powder - 1.5 tsp
Salt - 1/4 tsp
Almond Essence - 1 tsp
Vanilla Extract - 1 tsp
Macadamia Nuts - 1/2 cup, chopped (can replace with almonds)
Milk Chocolate chips (I used milk chocolate bar chopped up into small pieces) - 2/3 cup

Method:

1. Cream the butter and sugar in a bowl, beat till smooth and shiny.
2. Add the eggs one at a time and beat well.
3. Mix in the almond essence and vanilla extract into the egg mixture
4. In another bow, sieve the flour and baking powder together. Add to the egg mixture and combine with a light hand till it comes together into a soft dough.
5. Add the chopped nuts and the milk chocolate pieces and mix into the dough.
6. With your hands, divide the dough into 2 or 3 parts, depending on the size of your oven/baking tray.
7. Shape each part into a log about 10-12" long and place on a greased baking tray, then flatten slightly while still leaving the edges rounded, making each long about 3-4" wide. Use flour while shaping the logs in case they are sticking to your hands.
8. Pre heat the oven to 180C and bake for 25-20 minutes, till the tops are just turning golden and the logs are firm. Cool for 10 minutes
9. Cut the logs with a serrated knife diagonally in a firm, swift motion into 1/2" slices each.
10. Stand the slices upright in a baking tray and bake at 180C for 20 minutes, till dry and crisp and base is slightly browned.

Sunday, July 24, 2011

French Toast


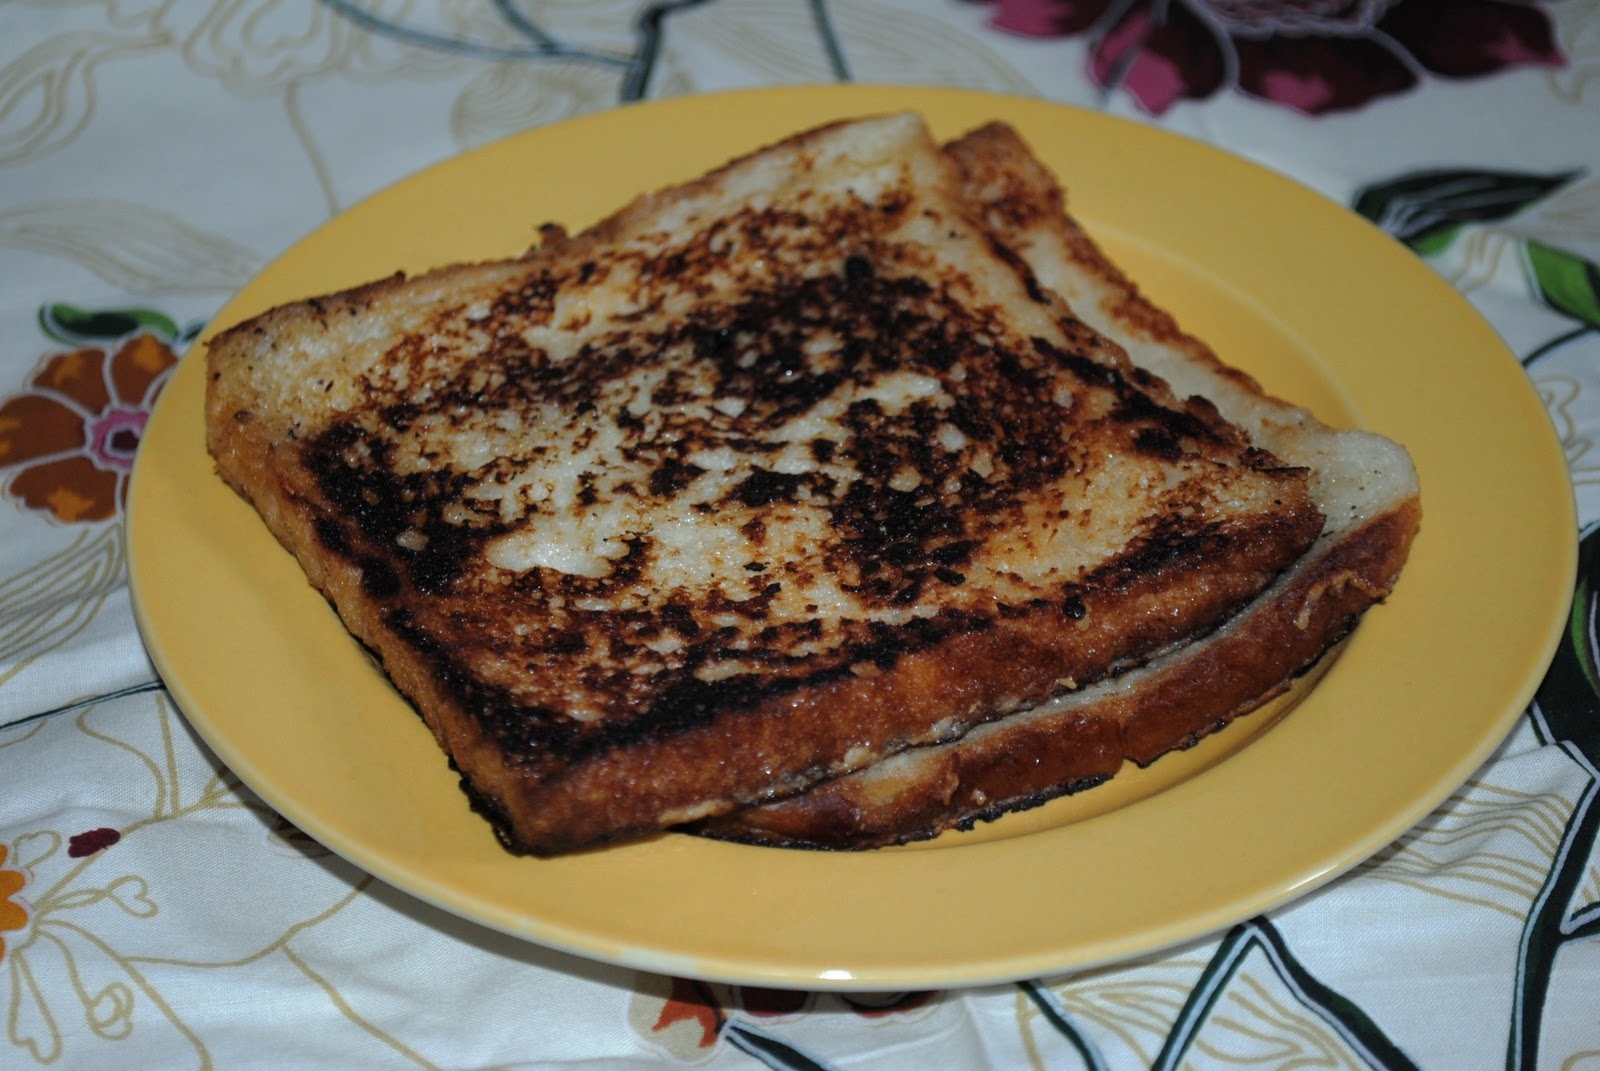
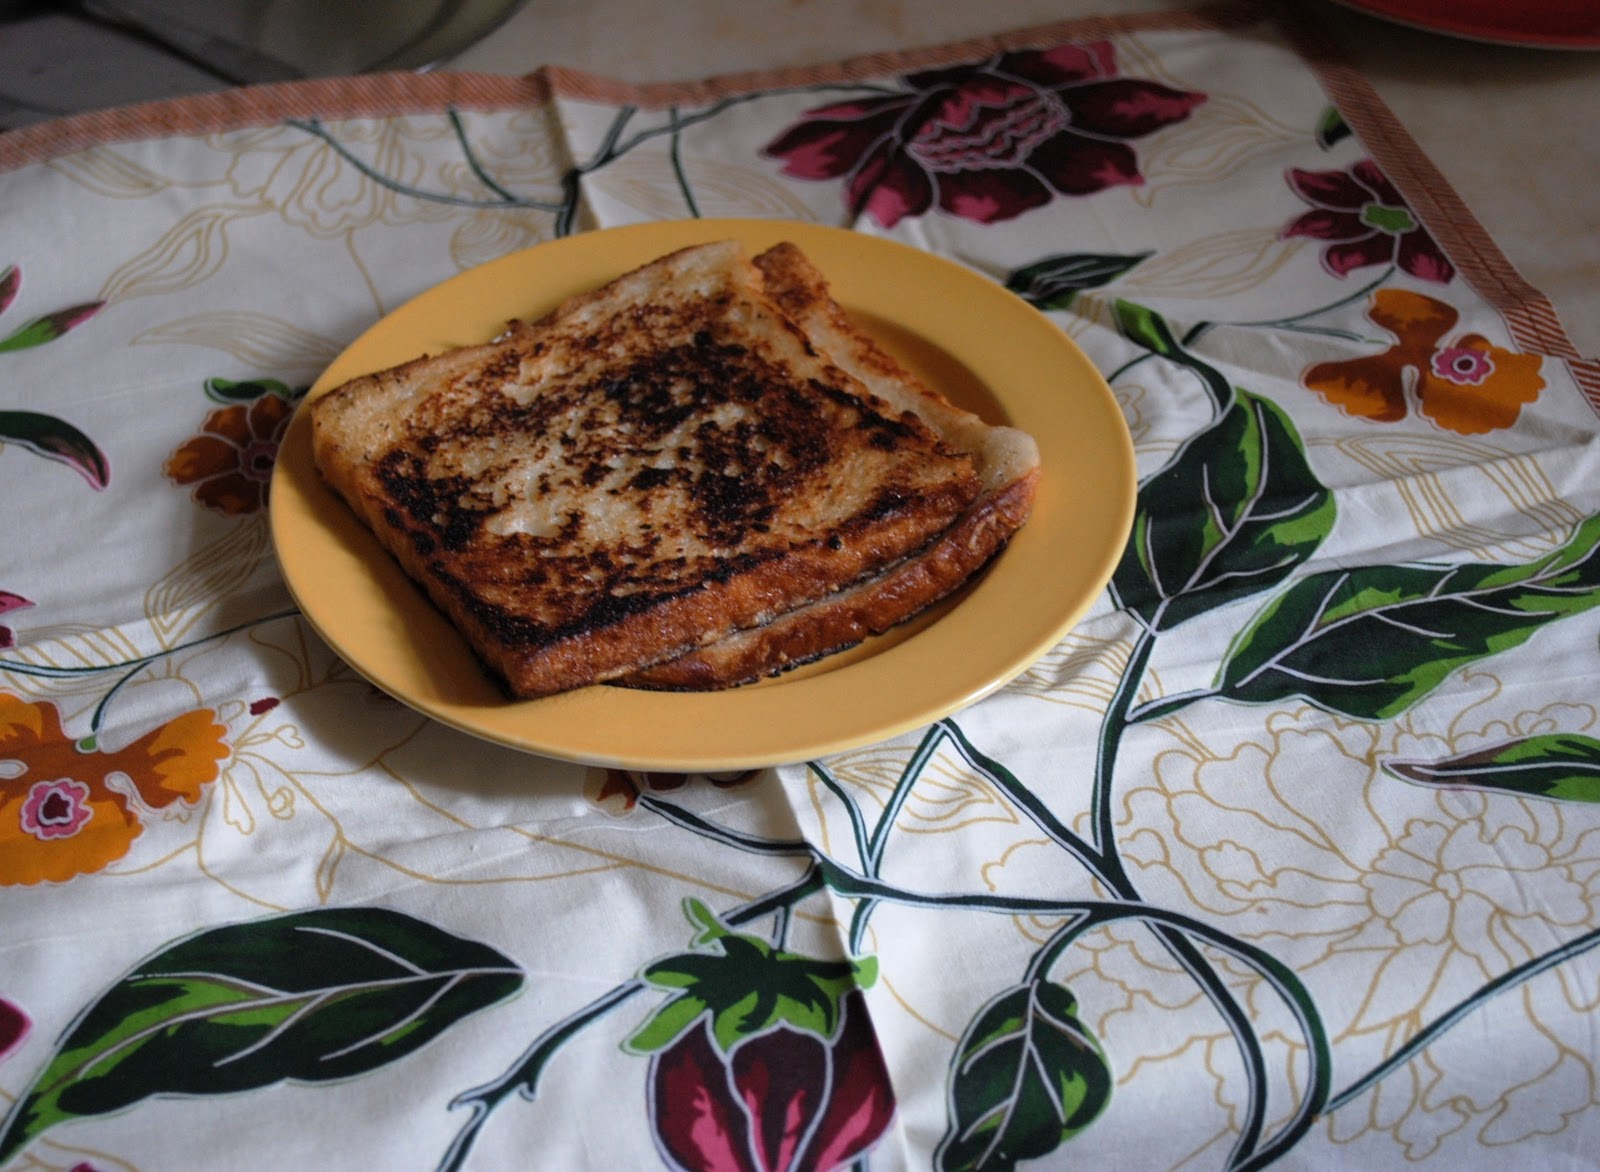
Another dish which holds fond memories of my childhood is of Dad making us breakfast on a Sunday. Dad still makes the best French toast - gently soaking the bread in a custard mixture of egg, milk and sugar and then shallow frying it on a griddle till is golden brown.

I now make it for myself and lately for my daughter who has come to enjoy it -especially when she heard the story of how her Thatha used to make it for me. Everytime she eats it though, she stoutly insists that "Your French Toast is the best, Amma!" And so the story continues.


There's really not much to actually warrant a recipe - one egg, about 1 cup of warm milk and 5 tbsp of sugar.

1.Dissolve the sugar in the milk and then lightly beat the egg into it. Pour the egg milk mixture onto a shallow dish.

2. Heat a heavy non stick skillet and melt some butter in it (about a tsp per slice of bread).

3.Dip a bread slice into the milk and soak for about 30-40 seconds before turning and soaking again. Gently moisten the edges as well and then cook on the hot skillet on a medium flame turning till each side is golden brown.

Masala French Toast

This was my adaptation of French Toast for hubby who can't abide by sweet things for breakfast - I myself don't like sweet stuff in the morning - French Toast is the exception.

Replace the sugar with a mixture of salt and green chilli-coriander paste. (Grind 2 green chillies with a a cup of cleaned coriander). Go through steps 2 and 3 as above.

Fried Cheese Sarnies

A recipe I found in a 2002 edition of Good Housekeeping magazine and have tried a couple of times as part of brunch.Very decadent, though savoury.


Bread - 8 slices - crust removed,
Eggs - 2
Mozarella cheese - 4 slices. (mozarella melts well, but you could use cheddar)
olive oil

1. Put a slice of cheese between 2 pieces of bread and cut diagonally into a sandwich.
2. Mix the eggs with salt and put into a large shallow bowl and beat. Add the sandwiches and leave them to soak for 30 minutes, turning them once over, halfway through.
3. Heat 1 tbsp of oil in a frying pan, press the edges of the sandwich firmly together and fry till golden brown.


Friday, June 17, 2011

Orange Caramel Pudding


This post was written before I was ill. I guess the surgery was inevitable, but I didn't know it then and tried my best to fob it off as best as I could.
.


I love Caramel Custard - there I said it. I know you are supposed to have sophisticated tastes as you grow older - dark chocolate mousse, tiramisu, passionfruit cheesecake - but there's something to be said about comforting desserts. The kind you grew up eating, the one you made for the first time when you were 15 and tried cooking in an oven for the first time (yes, a cake was not my first attempt at baking), the kind that old colonial clubs have perfected to a T.  Caramel custard is the one for me. I think its now called Caramel Pudding - but growing up we called it Caramel Custard - a relic of the British Raj I guess, when any dish which involved cooking egg and milk together, was called a custard.

I wasn't well the past month (my congenital digestive condition playing up big time) and had to go on a liquid diet for a couple of days. Then, as is inevitable, I lost some weight and my energy levels plummeted. Now that I'm back to eating solid food, I have taken to eating small portions several times.....not a great way to gain back weight - but we do what we have to do. Right now I'm just glad I'm able to eat and not giving any of my family members sleepless nights. So, this weekend, I decided I needed a bit of pampering.

Which in food terms translates to comfort food. And there is nothing more comforting than a warm, dessert redolent of caramel. No wonder my favourite Haagen Daaz flavour is Dulce de Leche - divine. I read one of this pop quizzes in a magazine, which tried to peg your "type" depending on the dessert you liked. Well, caramel pudding came back as "warm, loyal, the 12 am friend, generous". Fine by me, I say! (I am a Gemini - when I am craving Tiramisu, I morph into the "sexy, dangerous, intense type" ;)


Its been quite sometime since I made Caramel Pudding - a few years actually. So, I thought I should atleast look at a recipe in case I got the proportions wrong. Which is when I came across the Orange Caramel Pudding by Sanjeev Kapoor. This one had a nice twist which I had never tried before; so, since I had orange juice and a lone orange for the rind, I decided to give it a shot.

The caramel almost brought me to my knees though - three times,  my attempt to make caramel came to naught. No, it didn't burn - it just turned into a dry mass of lumps - somewhat like kalkand (khadi saakhar). I couldn't believe that something I had churned out when I was just 15, was giving me so much grief. I wouldn't give up -  (don't worry, if I'm stubborn, I'm also thrifty - the other versions were melted back with some more water into sugar syrup to be used for lemon juice in future!) -so for the fourth time, I referred to this David Leibovitz recipe which talked about making caramel without water, just sugar. I decided to try it - I'm a big believer in not reinventing the wheel which is why I am able to believe in recipes which are tried and tested (the pictures as proof helped!)even if its not the way I usually do it. It worked perfectly - whew.

Basically, this method involves spreading the sugar in a heavy bottomed pan in an even layer and then warming it over medium heat till the water inherent in sugar starts melting the sugar slowly. This takes about 8-10 minutes totally (I realise that I have much less patience than even 5 years back, forget 20) and then it slowly starts caramelizing. It turns brown (do not stir before this happens) and that's the signal to slowly stir a little to get the sugar at the edges into the centre - do not overstir. About 5 minutes later, it melts into a beautiful golden brown syrup and then I stirred it at 2 minutes intervals ever so gently for another 4 minutes (I would reduce that to 2 minutes the next time).

20 minutes to attain that lovely, textured caramel flavour which takes any dessert to the next level. Melt butter or cream into it at this stage to make a caramel sauce or just pour directly into a vessel for a caramel pudding. I poured into a glass casserole and swirled it around to coat the bottom and some of the sides - it doesn't matter if there are a few gaps - as it cooks with the custard, it will melt and spread some more.


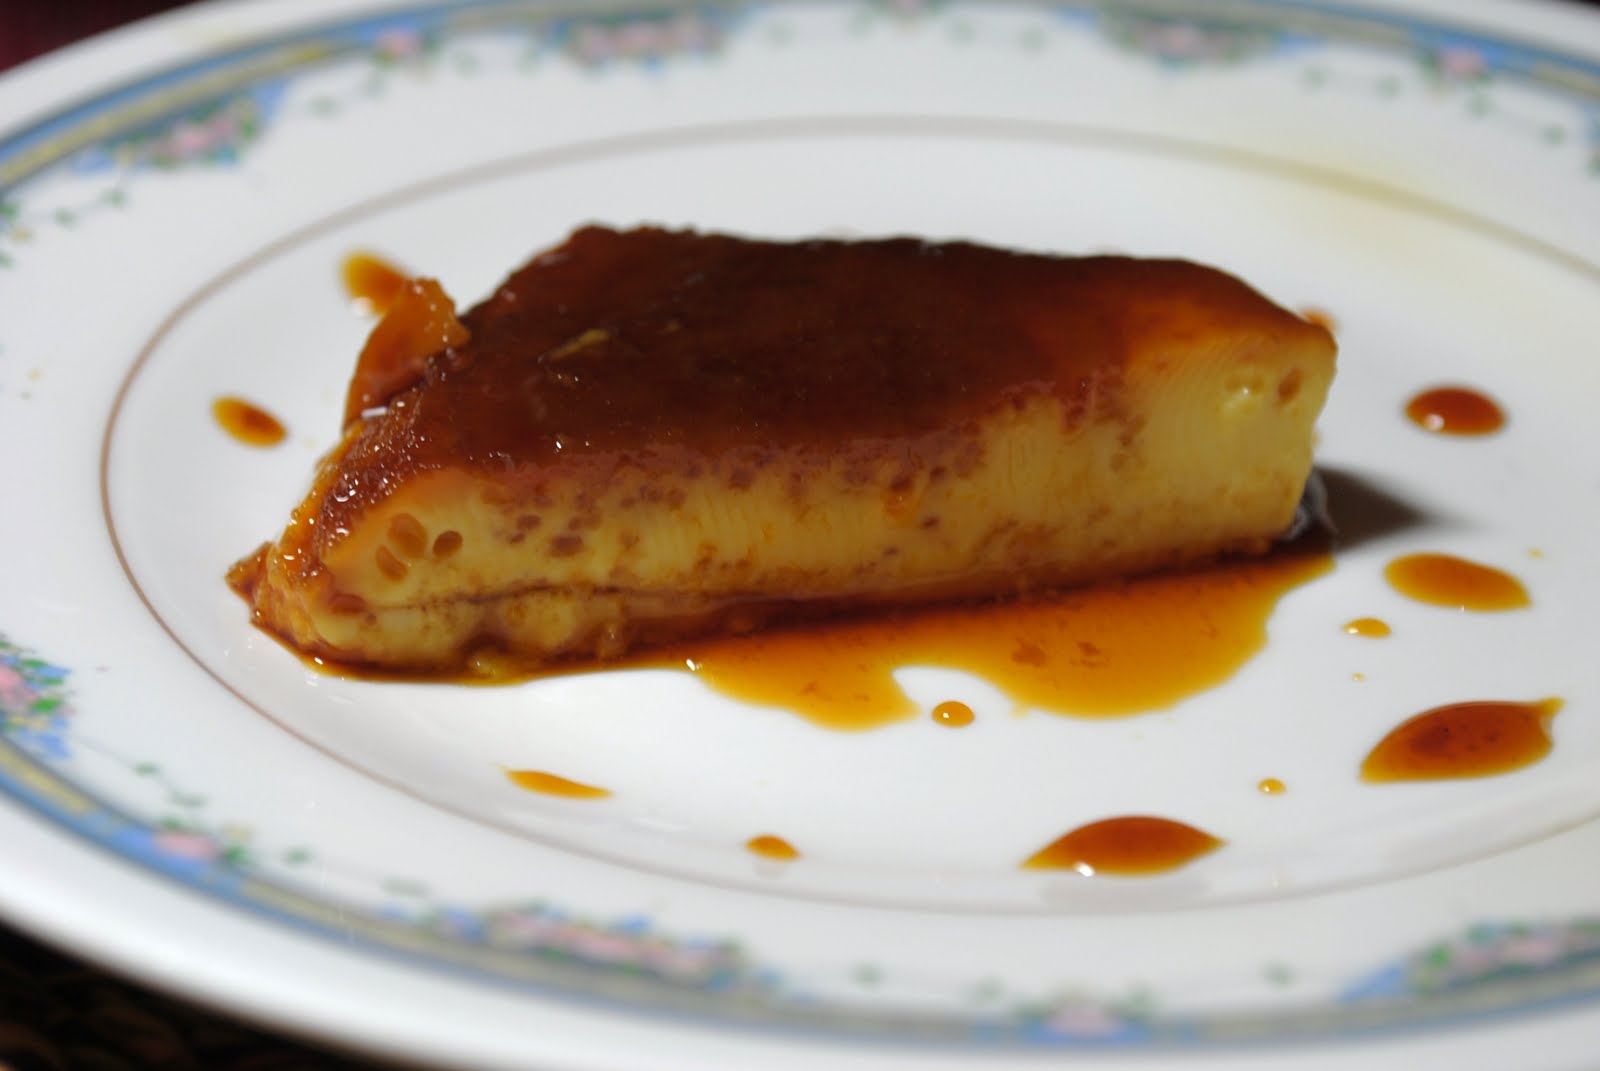
The final result was an amazing dish- well worth the multiple tries(which is now history, now that I know this much easier way to make caramel). The orange juice was a great addition - in fact, the next time I might even try to make this without the caramel. The orange flavour is subtle, yet very much there and makes this so much more than just a caramel pudding. And for all those who are skeptical, the pudding didn't curdle with the orange juice; and I didn't even bother sieving the custard mixture before baking it.

Orange Caramel Pudding
 Adapted from this recipe by Sanjeev Kapoor


Ingredients:
Sugar - 1/2 cup for caramel

Eggs - 4
Sugar - 1 cup (castor sugar)
Orange juice - 1 cup
Orange rind 1 tsp-  boiled for 5 minutes in half a cup of water, cooled and then added to the orange juice.

Method:
1. Bring out the individual ramekins or glass baking dish in which you intend making the pudding.
For the caramel:
a.In a heavy bottomed pan, spread the sugar in an even layer - look here for step-by-step instructions and pictures.
b. Heat on medium heat for about 8-10 minutes, till the sugar starts to melt in its own water and starts to turn brown. Slowly bring the sugar from the edges to the centre so that it melts uniformly but do not over stir. When it turns to a nice, brown, caramel coloured liquid (approx 5 minutes), cook for another 2-3 minutes and then take off flame and immediately pour into the ramekins or baking dish and swirl around so that the bottom and sides are coated with the caramel. Don't worry if this is not even.
2. Beat the eggs and sugar together till creamy. Heat the orange juice, orange rind reserved liquid mixture for 3 minutes, cool a little and then slowly add to the egg and sugar mixture.
3. Transfer this mixture (you can sieve at this stage) into the ramekins or baking dish. Pre-heat the oven to 180C
4. Fill a bigger oven proof bowl halfway with boiling water, place the ramekins or the baking dish into it, making sure the water will not be able to enter the bowls.
5. Bake in the pre heated oven at 180C (350F) for 45 minutes (the ramekins may take less time, check at 30 minutes.) The pudding will be set.
6. Remove and cool. To serve, turn upside down onto a plate - the caramel syrup will top the pudding since it is at the bottom.


Thursday, March 17, 2011

Eggless Banana Walnut Muffins

MIL is staying with us this month - I had to really persuade her to come this time, since she was quite reluctant to make the trip from Coimbatore. Age related hearing loss has made her a little reluctant to socialize. But she did come finally and its been nice to have her here with us. My daughter especially seems to bloom a litte bit more every time one of her grandparents is around.

We took her out for lunch last weekend (Punjab Grill - very good food and great service - pleasantly surprised) and while walking around the mall, she spotted some cupcakes at a cafe. She asked about them but they had egg in them, so I decided to make some eggless muffins at home. Banana muffins seemed the easiest and she likes nuts, so decided to modify this recipe of mine for white chocolate walnut muffins, to make some banana walnut muffins.

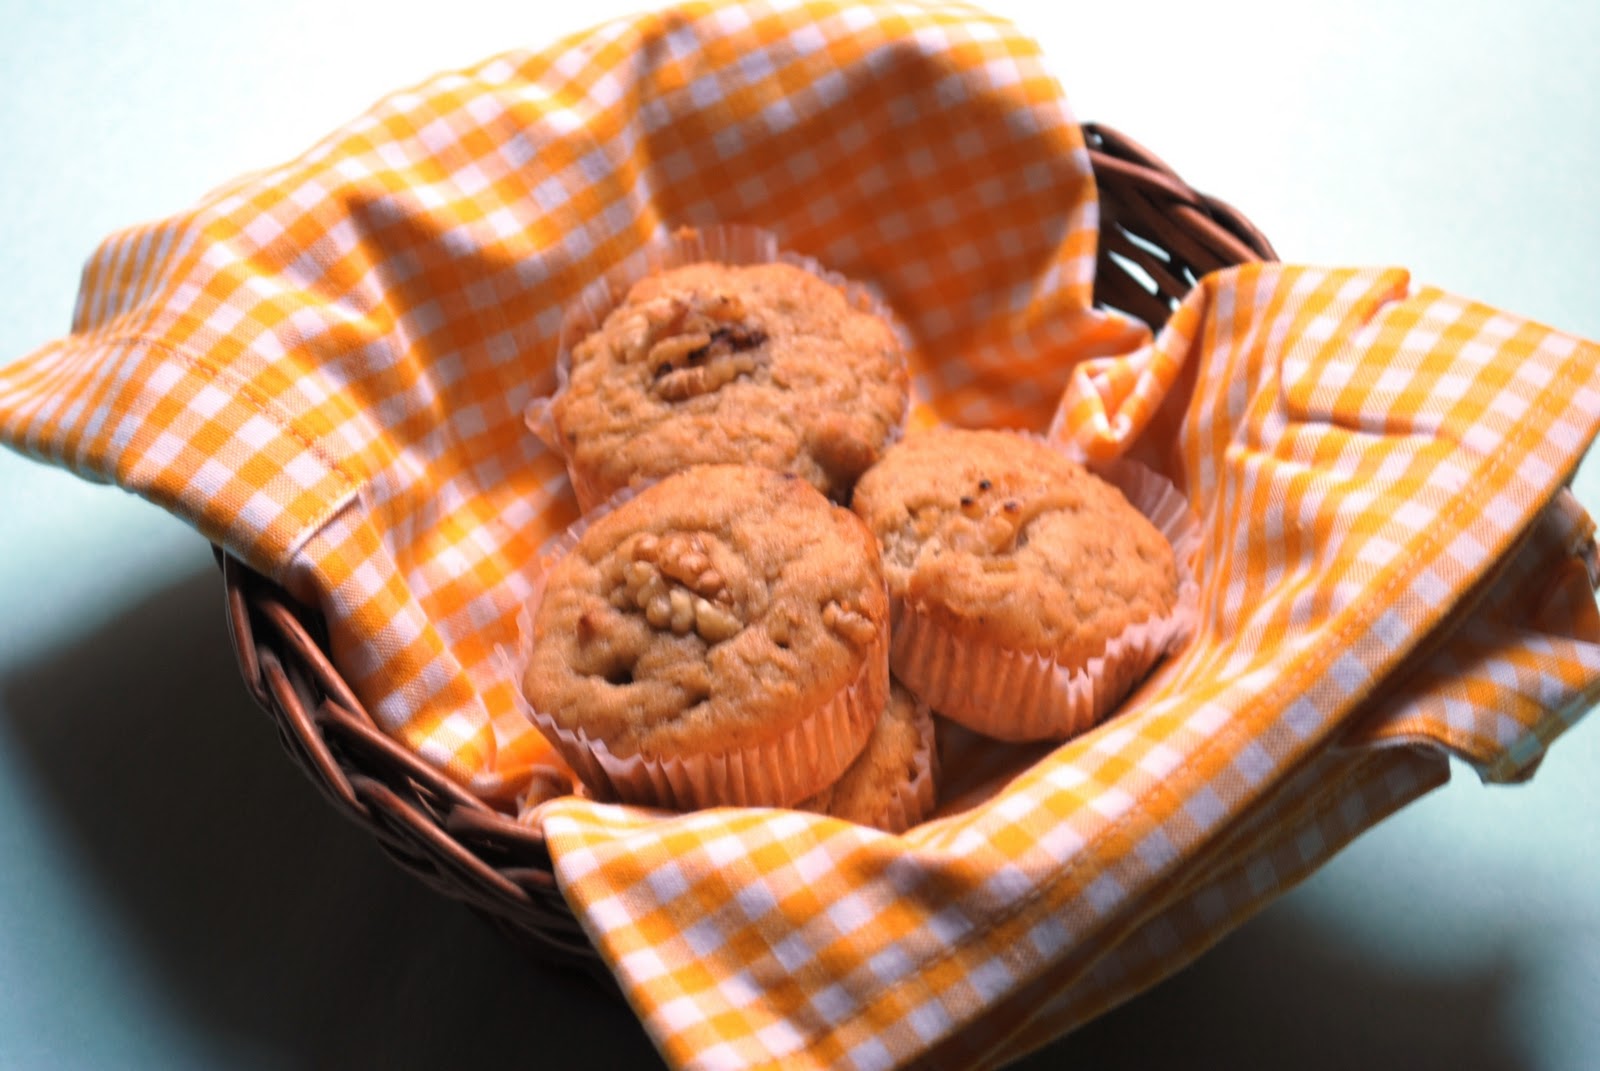
It barely took me about an hour from start to finish. I packed a couple in my daughter's tiffin the next day and she couldn't stop beaming with delight at the chocolate chips. This is a light muffin but nice and flavourful.The sugar can be brought down a notch since it was a little sweet for me.

Eggless Banana Walnut  Muffins
Ingredients:
1/2 cup butter
1/2 cup brown sugar (I would bring this down by a couple of tablespoons)
1 banana (medium)
3 tbsp milk
3/4 tsp vanilla essence
1 cup maida
1/2 tsp baking powder
1/2 tsp baking soda
salt - a pinch
1/2 cup walnuts (toasted on a skillet or in an oven, peeled and broken into half) You could use chocolate chips, I did that for half of them because my daughter wanted some.

1. Blend the banana with the milk and vanilla essence with the hand blender into a puree.
2. In a bowl, cream the butter and brown sugar with a hand blender till light and fluffy. Add the banana puree and then blend again.
3. Sift the flour with the salt and the baking powder into thebowl of batter and fold in gently till just combined. Do not overmix
4. Fold in the walnuts (or the chocolate chips) reserving a few to decorate on top. Pre-heat the oven to 180C (350F).
5. Grease a muffin pan or line them with cupcake liners. Drop spoonfuls of batter into the muffin pan and bake for 15-20 minutes (took 20 minutes for me). A toothpick should come clean when poked into the muffins.
6. Let stand till cool and then unmould from the muffin pan.


Friday, March 11, 2011

My Perfect Omelette


Disclaimer - this is my perfect omelette - not THE perfect omelette - so feel free to write in with Your perfect omelette. Even if it was made by someone else - like that uncle who lives in Belgium. Or that dishy chef at the Taj breakfast buffet. Just saying.

Dad makes the best Spanish Omelette  or frittata- but over the years, I have perfected the kind of omelette we like - 2 or 3 eggs max, non greasy, fluffy, soft and perfectly salted. I hate it when omelettes are undersalted - as they often are in hotels (something pointed out by Vir Sanghvi as well).

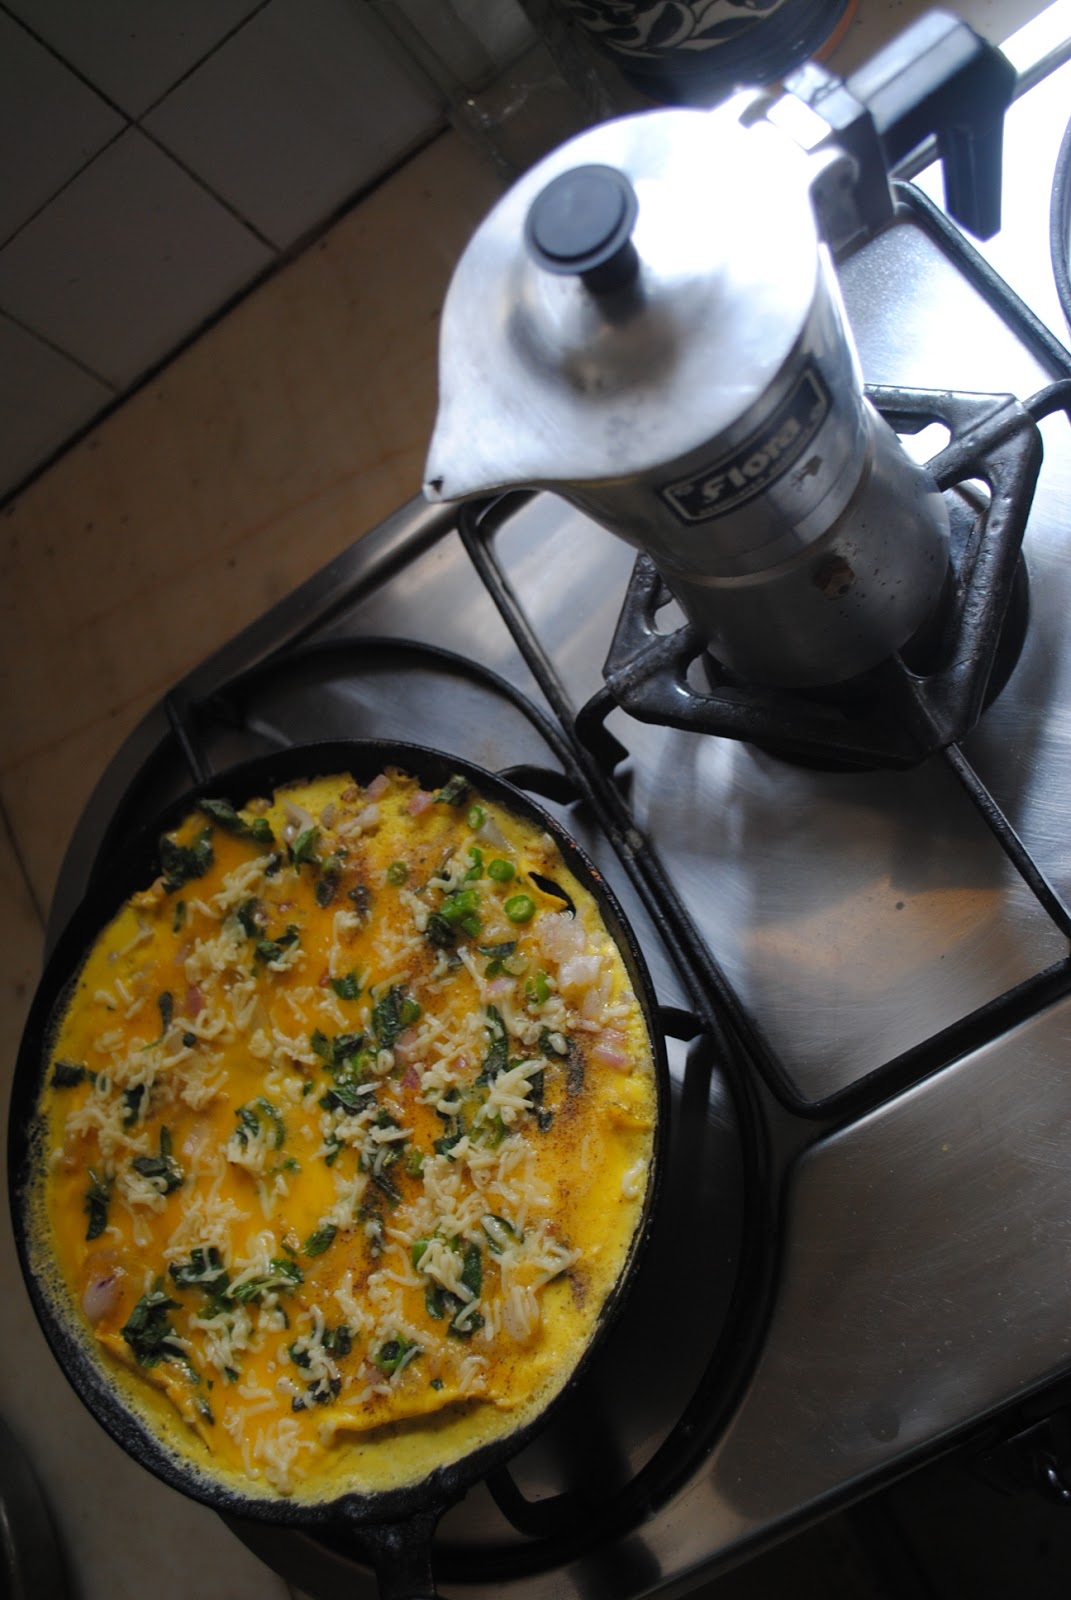
I add a little milk to the eggs - it makes the omelette softer. The eggs are well beaten and then seasoned with salt and pepper. The green chillies should be cut just so- not finely minced so that the chilli seeds spices up every inch of the omelette -but in rounds so that they can be picked out by the people who don't want to bit into them (me) and eaten by the extra spice lovers (hubby). I don't fry the chillies, instead sprinkling them over the omelette, except for one quarter of it which is for K since she can't pick the chillies out and may bite into one. She enjoys this omelette, so it makes sense to make the same one for her rather than a separate one.

The onions are fried till soft and not brown, so that we can enjoy their sweetness. I add a pinch of salt while frying the onions and this balances the salt. The cheese is optional and depends on my mood - but just a cube of grated cheese is enough for 3 eggs - any more than that, it will turn into a cheese omelette - which is not a bad thing, just not what we are looking for. Fresh mint or coriander leaves to finish.

And it should be eaten fresh off the skillet - that way I'm a bit like the Soup Nazi from Seinfeld. No wandering around/checking mail/reading newspaper and then coming over to eat my omelette after its been cooling on the table for five minutes. You preferably have to be at the table, with buttered toasts ready (for me), a good 3-5 minutes before the omelette arrives. Yes, hubby has been trained well in the art of eating our perfect omelette ;).

This omelette takes only about 10 minutes to make from start to finish - and worth every minute if you like a well made omelette. Have your coffee perking at the same time, and you will have a lovely cuppa Joe ready, at the end of it all as well!


Our Perfect Omelette
Ingredients:
 Eggs - 3
Milk - 1 tbsp
Onion - 1 chopped fine
Green chillies - 2 chopped in thin rounds
1 cheese cube about 20 gms(grated) - optional
salt - about 1/4 of a tsp - a pinch with the onions and rest
pepper
Butter - 1 tbsp
Mint - 3 tbsp chopped

1. Melt the butter on a non stick skiller on low heat and then saute the chopped onions on a medium flame till just soft. Add a pinch of salt to the onions while sauteeing
2. Meanwhile, beat the milk with the eggs, salt and pepper till its frothy
3. Spread the softened onions over the skiller and then pour the beaten egg evenly. Sprinkle the chopped chillies and cook on a medium low heat for about 3 minutes or till the omelette is set at the bottom.


4. Gently bring the edges of the omelette inwards and tilt the skillet outwards so that the uncooked egg settles at the bottom. Sprinkle the mint and the omelette over the omelette and cook on a low flame for a minute.

5. Fold the omelette over and cook for half a minute, then turn over and cook for half more a minute. Serve warm - we had the omelette with a herbed bun.

Monday, February 14, 2011

Spaghetti with Shrimp, Arugula and Sun Dried tomatoes


Recently a dear friend sent me some fresh, home grown arugula (rocket leaves)-she grows it in her garden. Arugula is something I have come to know only in the past 5 years, its not something we saw or ate growing up. It's available in most metros now, though expensive and sometimes not very fresh. I have ordered on occasion from Altitude which supplies organic produce and natural products and its been very fresh. Older leaves tend to have a sharp, almost mustardy flavour while the tender ones are nutty. I had some fresh shrimp at home so I initially planned to grill the prawns and serve it with the arugula - almost like a grilled summer salad.

But then as I got down to make it and was wondering what else to serve with it for dinner, I decided to make it with spaghetti. And then from there the dish just took its own course - sun dried tomatoes seemed a nice combination with the shrimp and spaghetti. I finally decided to braise the dish with vodka and finish it off with some cream. It all came together quite beautifully, though I didn't have a clue at the beginning on where I was heading.

The fresh shrimp was melt-in-the-mouth soft and went very will the combination of arugula and sun dried tomatoes. The only thing to be careful is not to overcook the shrimp, else it will become tough. There is not much added seasoning - the shrimp, sun dried tomatoes and arugula - all lend their distinctive flavour to this dish.


 Spaghetti with Shrimp, Arugula and Sun Dried tomatoes

Spaghetti - 250gms (dried)
Shrimp / Prawns - 300gm - cleaned and washed thoroughly; if using frozen, then thaw well.Marinate in lemon juice and pinch of salt for 15 minutes.
Arugula (Rocket Leaves) - a big handful, washed and torn
Sundried tomatoes - 8-10 soaked in 1/2 cup warm water (or as is if they are in oil)


1 tbsp olive oil
3 cloves garlic - chopped finely
2 tomatoes pureed
100ml vodka (you could use white wine instead of vodka, or omit it altogether and add some lime juice at the end instead)
2-3 tbsp cream (I used the cream skimmed everday from the milk we get)
salt to taste
freshly crushed pepper - 1 tsp

Tabasco sauce - 1 tsp

1. Heat a pan full of water with a tsp of olive oil and a tsp of salt and bring it boil. It should be big enough for the spaghetti to cook in. Cook the spaghetti till just done (al dente) and then drain and rinse in cold water. Toss with a little olive oil and keep aside. (If you are cooking ahead, then this can be done later, in time to serve)

2. Meanwhile, heat 1 tbsp olive oil in a big pan and saute the chopped garlic in it for a couple of minutes. Fry the shrimp for 3-4 minutes, remove and keep warm. In the same pan, add the pureed tomatoes, soaked sun dried tomatoes with its water, vodka and salt and bring to boil, simmer for 5 minutes till there is not much liquid. Stop here if you are cooking ahead.

3. Add the prawns back; tip the cooked pasta, freshly crushed pepper and arugula and toss together on a medium flame till well combined (2-3 minutes). Add the cream and tabasco sauce, season and turn off the flame after a minute. Serve warm.


Wednesday, February 9, 2011

Chocolate and Macadamia Nut Fudge - the perfect Valentine's Day treat

My own stash of indulgence - chocolate fudge seems so much more decadent than just chocolate. The creamy combination of butter, chocolate and nuts is exquisite! The original recipe from Nigella Express has pistachios in it; I used macadamia nuts since I had them left over from my trip to Australia - but feel free to use the nuts you like. Plus I added dried currants. Not much can go wrong when you combine chocolate, fruit and nuts.

I reduced the condensed milk in the recipe and used dark chocolate instead of semi sweet - still perfectly soft, fudgy and delicious. AND super quick.So, go ahead - make this your Valentine's Day gift....for yourself! :)


Chocolate and Macadamia Nut Fudge 
(Adapted from Chocolate Pistachio Fudge from Nigella Express)

300gm dark chocolate,broken up or chopped (I use Morde dark Chocolate which is great for cooking and now available in most large grocery stores)
1/2 can condensed milk (sweetened)
pinch of salt
1/2 cup macadamia nuts - lightly toasted and broken into pieces
1/3 cup black currants or big, dark raisins
1 tbsp butter

1. Put the chopped chocolate, condensed milk, butter and salt in a vessel which can fit into another pan half filled with water. Put the pan of water on low heat and stir till the chocolate melts and mixes with the condensed milk and butter. Alternatively, you can put the ingredients in a microwaveable bowl and zap it at 40 second intervals till the chocolate melts.

2. Add the broken nuts and raisins/currants into the chocolate mixture and mix well.

3. Take a 8" square pan and line it with aluminum foil. Pour the mixture into it and even out the top with the blunt end of a knife or the back of a spoon.

4. Cool and then refrigerate until the fudge is set. Cut into squares as you would for barfi (an Indian milk sweet).


5. Its cool here now, so I left it outside in a jar, but when its warm, its probably best to store this in the fridge (Nigella recommends keeping it in the freezer and having it without thawing).

This goes to the Forever Nigella Event - #2 - Seduced by Chocolate being hosted by Sarah of Maison CupCake


Tuesday, December 21, 2010

White Chocolate, Oatmeal and Macadamia Nut Cookies

I picked up a bag of macadamia nuts on my trip to Australia earlier this year and apart from eating some of the nuts as is, it has been sitting in my pantry quite untouched. I remembered the nuts while looking for a new recipe to try this week - when I spend time baking a couple of Christmas cakes and my daughter is nagging me to bake the Gingerbread People - I figure, in for a penny, in for a pound! Last year I had made these scrumptious White Chocolate, Cherry and Oatmeal Cookies, so I thought I could use macadamia nuts in the recipe instead. This combination is apparently a classic as well - the creamy white chocolate contrasting well with the nuts.


I dropped teaspoonfuls of the cookie dough and they came out a little thin and crunchy - thats how I like my cookies. If you like them softer and bigger, then you can drop more batter at a time and / or take them out 2 minutes earlier. The cookies will be soft to touch when they are done (and may look like they are undercooked) but they will harden a little as they cool. As long as they are pale brown on top and can be removed carefully with a spatula, they are fine. And no, for those who wonder, you cannot taste the oatmeal in the cookies. These cookies are lovely and crumbly, crisp outside and soft inside and nutty all over - one of the best I have made at home!

Wishing you a Merry Christmas and a very Happy New Year!


White Chocolate, Oatmeal and Macadamia Nut Cookies
Flour - 1.5 cups
Oatmeal - 1/4 cup (I use quick cooking oats and run them for half a minute in the mixer)
Baking powder - 1 /2 tsp
Baking soda - 1/2 tsp
salt - 1/4 tsp

Unsalted Butter - 110 gms (1/4 lb) - if frozen, bring to room temperature by microwaving at 10 second intervals, till just soft
Castor sugar - 1/4 cup
White Chocolate - I used Lindt - 100gms, chopped
Egg - 1
Vanilla essence - 1 tsp

Macadamia Nuts - 1 cup, toasted and chopped

1. Put the chopped chocolate into a glass bowl and place it inside a bowl of heated water and microwave in 20 second intervals till melted and smooth. Or put the chopped chocolate into a steel bowl and then place inside another bowl of water and heat gently over a low flame till it melts. Don't let the water come to a boil.

2. Cream the butter and sugar for about 2-3 minutes till it is smooth and shiny.

3. Beat the egg separately and add to the creamed butter and sugar along with the vanilla essence. Beat on medium till mixed in - about -2 minutes.

4. Sift together the flour, oatmeal, baking powder, baking soda and salt. Gently combine into the creamy butter sugar mixture - one third at a time - and run the blender on slow till just combined.

5. Pre heat the oven to 170C/325 F. Add the cooled and melted white chocolate and the macadamia nuts and combine well with a wooden spatula.

6. Grease a baking tray and dust with flour. Drop teaspoonfuls of the cookie batter leaving enough space for them to spread and flatten when they bake. A small tray will be able to accomodate only 5 cookies at a time.

7. Bake for 20 minutes at 170C. Remove and transfer carefully to a tray and leave to cool and harden. Store in an airtight container.


And for all those who love Nigella's cooking (and even those who don't!) - Maison Cupcakes is beginning a new event called Nigella Forever. "Each month there will be a theme and you can blog about any of Nigella’s recipes which fit in this theme.  The opening theme is “Seasonal Sensations”, "deliberately loose and fancy free so that as many of you get into the Nigella swing of things from the outset.
This month you can cook or bake anything Christmassy, anything celebratory for New Year, do party canapes or even wintery comfort food for snow days". 
Knowing the number of recipes I have cooked (and posted here) from her book, I am definitely going to enjoy this event.

Sunday, November 28, 2010

Urlaikizhangu Podimaas - Potato Stir Fry


Podimaas is probably the first "grown up" way of eating potatoes that a child is introduced to in Tamil cuisine and it remains a favourite comfort food for me well into adulthood. Podimaas refers to a simple stir fry of potatoes - boiled and then tempered with very few spices (usually green chillies and ginger); a teaspoon of lentils adds the crunch I look forward to in this dish which is otherwise melt-in-the-mouth soft.

For podimaas, the boiled potatoes are usually crumbled by hand till they are a little mashed but not completely. However, I like it when they are in small pieces (not choppped with a knife but roughly done with my hands). Since my daughter pretty much eats the same food we do, I use red chillies instead of green chillies since they are less spicy. Lots of turmeric is important for me -bright yellow is just the way podimaas should be! Different from the golden, crusty version I make at other times.

What is your favourite version of having potatoes?


Urlaikizhangu Podimaas - Potato Stir Fry

4 medium sized potatoes, boiled and peeled.

1 tbsp oil
Mustard seeds - 1 tsp
Chana Dal - 1 tsp
Urad Dal - 1/2tsp
Curry Leave - a few
Dried Red chillies - 2-3 broken (traditionally, one used fresh green chillies)
Ginger - grated/chopped fine - 1/2 tsp

Turmeric powder - 1/2 tsp

Salt to taste
lime juice - a squeeze

1. With your hands, roughly break the boiled potatoes into small pieces; or chop them up.
2. Add the oil to a pan and heat, put in the mustard seeds and when they pop, lower flame, add the chana dal, urad dal, red chillies and curry leaves. When the dals turn goldern, add the turmeric powder and ginger.
3. Add the potatoes and salt and mix well. Stiry fry for about 5 minutes, till it heats through and is mixed well.
4. Remove from flame and add a dash of lime juice. Serve warm with rice and accompaniments like sambar, rasam or kozhambu. Thayir saadam (yoghurt mixed with rice) tastes sublime with this stir fry.


Thursday, November 18, 2010

Kathrikai Gosthu (Eggplant in Tomato Sauce)


Remember this story of pongal and first love? Well, I clean forgot to post the gosthu which went with that pongal. Its only when SIL reminded me about it and asked me to make it for the whole family two weeks back when we were together for Diwali, that I decided to come back and post it.

I am definitely going to make this more often - even my usually pernickety family (Dad can tell which ingredient is missing in Mom's rasam just by smelling it when its cooking!) loved it. My brother, when I tried to serve him the gothsu, sniffed and said he "preferred" his ven pongal with coconut chutney - if not anything, we are definitely food snobs that way! But after hearing my Dad raving about it, he finally tried it and then ended up polishing it off completely!

The base recipe is from Suganya's Tasty Palette and I have adapted it to our taste. I didn't use the freshly ground masala and instead used Sambar powder. I, however, sauteed the sambar powder in oil along with the brinjals and other vegetables first, before adding the tamarind extract and boiling. Once the vegetables were half cooked, I added the tamarind pulp - else, I find, the vegetables take a longer time to cook if the souring agent is added beforehand. I omitted the jaggery as well since we usually prefer savoury flavours for breakfast. The moong dal and potatoes mean that the curry thickens up nicely and doesn't need gram flour.


This is going to Nupur's Blog Bites #9 - The Holiday Buffet - the potluck edition which goes on till December - can't wait to see the entries for this one !

Sunday, September 26, 2010

Orange and Clove Tea Cake - Mad Tea Party comes home!

This cake was made on an almost instantaneous decision....no plan, no lingering over recipes, no comparing notes. Just 15 minutes to put together the ingredients and another 35 minutes to bake - it was the first time I was trying this recipe, so I was a little anxious how it would turn out. But it was perfect.

Just like the person and the tea party this was made for - an instantaneous connection made just by reading each other's blogs. Sensing the similar wavelengths, appreciating the passion for food, the honesty and the humility which shines through. So, when the opportunity came to meet - couldn't pass it up. Not even if the both of us were on the last weekend before we went on a trip and had a million things to do. And it all came together so beautifully - a perfect tea party (though coffee was drunk!) with the right company and some stimulating conversation.

As some of you may have guessed by now, this was me meeting up with Anita of Mad Tea Party. For our own Mad Tea Party.  Exchange of mails, telephone numbers, calls and we had a tentative plan to meet on the weekend. So Sunday morning, Anita called and we fixed up for that afternoon 3 30pm. My relatively free Sunday had by then transformed into a matinee show of Beauty and the Beast with kiddo followed by lunch with friends, so I knew I wouldn't have time to serve up an elaborate spread. BUT when you have a food blogger coming over, you have to have food!

I had a couple of tangerines at home and I knew a tea cake would be nice and light for that time of the day.  So, I quickly looked for an orange based cake, which I found on the Whole Foods Market website - scanned through the list of ingredients to check that there were no exotic deal breakers. The main ingredient was Greek Yoghurt - which I thought could be substituted with hung curd. So, I tied up some home made yoghurt to hang in the fridge and then left at 10am to return only at 3pm.

I then raced around roasting the cloves and then grinding them, combining the eggs with the yoghurt, honey and zesting the oranges and lemon, while Tara (my girl Friday) tried to get some semblance of segments from the tangerines without mangling them. Managed to get everything together and into the oven by 3 30pm and 5 minutes later Anita and her husband were at the door! So, the cake baked itself while we chatted and caught up on who we were and what we did and all the things that connect us in this small world.


And as the filter coffee perked, hubby joined us too after his brief siesta while my daughter came back from our neighbour's place and we talked some more.Finally, time to check the cake (I had set it for 45 minutes but it was done in 35) and it looked gorgeous - lovely brown crust with the oranges peeping out.  It smelt delicious too - the cloves and the orange filling up the house with their aroma.

By then the dance of the cameras had begun, with my daughter pitching in for good measure, insisting that she wanted to take a pic too - talk about seizing the moment! The husbands waited patiently ("long suffering" were the words used I think) while we took our pics. And then we sat back and did what we do best - eat! 

I had made some khari biscuits too - with my latest discovery of readymade puff pastry from a local gourmet chain. I really, really miss my khari biscuits and the puff pastry makes it as easy as one- two- three! Roll it out, cut and bake. But more on that later.
The cake was moist and had that lovely citrusy flavour - a little sweeter than the recipe said it would be, but not as sweet as a dessert cake. Went well with the coffee - despite what one might think about a citrus cake.


Orange and Clove Tea Cake (adapted from here)


Ingredients:
1-2 oranges cut into peeled sections - I used one large kinoo (mandarin) orange.

1 cup whole wheat flour (atta)
1 cup refined flour (maida)
1/4 tsp salt
1/2 tsp clove powder (1 tsp cloves, roasted for 3-4 minutes and then ground) (the original recipe calls for 1.5 tsp but I didn't want to experiment with that much; this quantity gave a gentle bite to the cake without overwhelming it)
1/2 tsp baking soda
1 tsp baking powder

1/4 cup castor sugar
1 1/2 tbsp orange zest
1 tbsp lemon zest
1 tsp vanilla essence
1 tsp orange extract

1 cup hung curd (hang about 2.5 cups of homemade yoghurt or 2 cups of  store bought yoghurt for atleast one hour)

6 tbsp honey ( I would reduce this to 5)
3 eggs at room temperature
1/3 cup pure olive oil

1. Grease and flour an 8" cake tin. Pre heat the oven to 350C
2. Combine the dry ingredient - sieving the whole wheat flour before adding to the refined flour, salt, baking powder, baking soda, clove powder and salt.
3. In a large bowl, mix the castor sugar with the lemon and orange zest with fingers. Add the eggs and honey and essence and beat till well combined,.
4. Add the olive oil and the hung curd and beat again till you get a smooth, thick batter. 
5. Pour the batter into the prepared cake tin and arrange the orange segments on top so that they are half in and half out of the batter.
6. Bake for 35 minutes or till a skewer comes out clean.

Monday, September 20, 2010

Buttermilk Roast Chicken - Nigella Express


I have managed to try quite a few recipes from Nigella Express in just 2 months - a testament in my opinion, to any cookbook. At first glance, I thought the book would be more of a coffee table acquisition to drool over, than one which I could actually use on an everyday basis. This, especially in the context of Nigella's style of cooking as seen on her television show, where we see liberal lashings of butter and cream being used - something which I just can't seem to get myself to replicate.

To be fair, it is usually the Nigella Feast episodes and the Christmas specials where the calorie laden desserts seem to hold sway. The Nigella Express recipes are lighter and more practical: even where the recipe calls for a little more calories than I would normally use, its easily adaptable to a low fat version. Like I did for this recipe for roasted chicken.

The recipes in the On the Run section are particularly helpful when you are looking for a quick fix but flavourful meal - or even something you can pack for lunch. Her Sesame Peanut Noodles  for example - as easy as mixing together cooked noodles with peanut butter (yes peanut butter!) and some sliced peppers and chopped herbs - I added some chilli flakes to spice it up and it was a great work week dinner with the leftovers perfect for the lunch box a day or two later.

This recipe for roasted chicken though, turned out to be just right for a light lunch on Sunday after a heavy breakfast. The best part about it is it suits my style of marinating meat or fish into different portions as soon as its bought. Some for curry, others for grilled or baked recipes and so on. So, when its time to cook, you just have to thaw and cook the way you want it.

For this recipe, you need chicken drumsticks to be marinated in a very simple combination of buttermilk, maple syrup and garlic for anywhere between 2 hours to overnight or more. It literally takes less than an hour to put together a meal with these drumsticks. I had initially marinated this in preparation for my brother and family visiting us to celebrate my Dad's 70th Birthday. But in all the confusion that followed their arrival (and the fact that with my parents here, we were eating mainly vegetarian meals) I forgot about them!

So once they had left, and the house came back to just the three of us, I poked around the kitchen missing Mom's cooking and then came across these. I had substituted honey for the syrup and cut down the amount of oil in the recipe and it was delicious. The next time I made this, I used some golden syrup and a sprinkling of Mexican spice powder and it was even more delicious. My daughter loves chicken drumsticks and was thrilled with these. I served it with a lightly spiced Pulao (pilaf) and some Tomato Carrot Soup.

Buttermilk Roasted Chicken (Adapted from Nigella Express)

Ingredients:

6 chicken drumsticks (I used skinless)

1 cup buttermilk - Buttermilk when used in Western recipes, refers to the whey left behind after curdling milk with vinegar or some other souring agent (like cream of tartare). I used, what we refer to as buttermilk in India - a little home made yoghurt whipped with 2-3 three times the water.

4 tbsp + 1 tbsp olive oil

2-3 garlic cloves minced

1 tbsp black peppercorn crushed

2 tsp salt

1/2 tsp chilli powder

1 tsp cumin powder

1/2 tbsp honey

1. Whisk together 4 tbsp of olive oil with the buttermilk, honey, crushed garlic, chilli pwd , pepper and the cumin powder.

2. Toss the chicken drumsticks in the marinade in a freezer bag.

3. If cooking in the next 2 hours, leave in the refrigerator, else freeze till you are ready to cook later. Remove from the 'fridge (or if removing from the freezer than thaw for half an hour to 45 minutes). Drain the marinade and reserve for making a sauce or jus for another dish.

4. Pre heat the oven to 190C, toss the drumsticks in 1 tbsp of oil and cook the chicken for 25-30 minutes till it is brown and crispy on the outside and completely cooked on the inside (you can check with a fork)

Sunday, August 29, 2010

Pesto Crepes


One evening as I stopped by at my friend's place on the way back from work, she mentioned to me that she had a huge amount of basil and was wondering what to do with it. So as we chatted over coffee, I suggested she use it to make pesto and freeze it. So as I called out the ingredients, she made the pesto right then; she gave me the other half to take home and so I did the same as soon as I reached.

Very simple to make this pesto - basil, walnuts, garlic and olive oil. Thats all you need. Really. Once it was ready, I froze it in three separate boxes so I could pull them out as needed.

And thats what I did the next Sunday morning, using a recipe I had seen in Nigella Express. That recipe was for pesto crepes with ham. We don't really eat ham that much- so all I had was chicken sausages and after cutting them fine and lightly sauteeing them, I added them to the batter itself instead of rolling them up inside the pancakes as the recipe did with ham.

This recipe makes about 8 medium sized crepes or 5 large ones. Took me about 5 minutes to mix everything together, another 5 minutes to rest and then 12 minutes to make the crepes. I put some shredded cheese into them, just before rolling them up to serve, but you could also put the cheese into the batter itself. A really quick breakfast option and very very delicious. The pesto made the crepes very flavourful and you don't need anything to accompany them.

P.S - I've been doing some spring cleaning around the blog - on the right are updated links to some of my favourite blogs; still some more blogs to add.
I have also updated the Recipe Index - so please feel free to browse through older recipes and do let me know if you have any requests in a particular cuisine/meal/food group.

For the Pesto: (adapted from a Jacques Pepin recipe)


4 cups basil leaves
6 tbsp olive oil (extra virgin is good for this)
3/4 cup walnuts, lightly toasted
1 green chilli chopped
4 cloves garlic

1.Bring a vessel of salted water to boil and put the basil leaves into it for just 20 seconds. Drain and rinse in cold water. Pat dry slightly
2. Puree the basil leaves along with the walnuts, green chilli and garlic adding half of the olive oil at first and then the rest slowly.
3. Remove and freeze.

For the Crepes: (adapted from Nigella Express)
1/2 cup pesto
3/4 cup flour
1- 1 .5 cups milk
salt to taste
1 egg
pinch baking powder

1 sausage finely chopped and sauteed for 2 minutes
Grated cheese - 1 cup

1. Mix all the ingredients together (except baking powder, sausages and cheese) and blend till smooth.
2. Add chopped sausages and rest for 5 minutes.
3. Heat a griddle and put a few drops of oil or butter on it.
4. Pour a big ladle of batter on the pan and swirl till it spreads into a circle - if too thick, add some more milk.
5. Cook on a low medium flame for 3 - 4 minutes, then add some of the grated cheese in the middle and roll up with a spatula. Turn the roll over and cook for a minute before removing from flame.

Serve warm.


Saturday, August 14, 2010

Chocolate Chip Cookies


My daughter has been asking me to bake cookies with her for the past couple of weeks now. I finally remembered yesterday to buy the unsalted butter I like to use for baking as well as spied on some chocolate chips in the local store. So, of course I had to make chocolate chip cookies!

I had seen some really amazing look choco-chip cookie in Nigella Express, but really there was chocolate *and* chocolate chips *and* cocoa powder as well as 2 cups of sugar in it and 125gms of butter. So, I decided to take the recipes I have used before and tweak it a bit - after all cookies are quite forgiving. I usually use a ratio of 1:2 for the butter to flour ratio and one egg for this amount is usually enough - don't like the smell when I put more than that- in fact for sugar cookies, I use only the egg white.

I added oats to the cookies to add some fibre, since I haven't used whole wheat flour in it. I powdered the oats though before adding it to the batter - my daughter (like many young kids) sometimes hates different textures in one food and I wanted her to enjoy her first home made chocolate chip cookie.

The cookies were rich and dark with the lovely bite of chocolate chips - they were soft and chewy too. I like my cookies crisp so I am going to experiment some more to see how I can make them crisper - would baking them for more time burn them? time to find out!


Chocolate Chip Cookies


Flour - 1 1/4 cup
Rolled Oats - 1/2 cup (I powdered it)
Baking powder - 1/2 tsp
Baking Soda - 1/2 tsp
Cocoa powder - 1 tbsp

Brown Sugar - 1 cup
Butter - 1/2 cup (about 60gms)
Egg - 1
Milk - 1 tbsp
Vanilla essence - 1 tsp
Chocolate Chips - 3/4 cup

Makes 15-18 cookies.

1. Cream butter and sugar together till smooth and shiny - 3 minutes with an electric mixer.
2. Add the egg, milk and vanilla essence and beat for another 3 minutes.
3. In another bowl, mix together the flour, baking powder, baking soda, cocoa powder and the oats. Pre heat oven to 180C (350F)
4. Add the dry ingredients to the butter, egg mixture - one third at a time and fold in gently.
5. Add the chocolate chips last.
6. Take a teaspoonful of the batter (not tablespoon) and drop on a greased tray leaving enough space in between two; the batter will flatten and spread so leave enough space. In my trays that means only 5-6 at a time.
7. Bake for 10-11 minutes - they will be a little soft, but will become firm as they cool. Transfer to a wire rack to cook.

Saturday, July 31, 2010

Rava Idli


I don't lose my cool that often (so she says!) but when I do get upset my mind can churn over it for hours. The best way to calm me down is to plonk me in a bookshop. Of course, there will be a dent in my wallet when I come out, but atleast (her South Indian sensibilities say), it won't be because of adding more clothes to my wardrobe ;).

So, some weeks back when I was fuming because of the spouse's tendency to procrastinate, I walked into a bookshop and started browsing through the shelves. And as usual ended up at the cookery section. Found two youngsters who had parked themselves right in front of the measly three shelves of cookery books and were leafing (and I use this term very loosely) through some coffee table books - one on Interior Design and one on French Cuisine. Reminded me of the episode in Friends where Ross discovers that the section in the library which has the book he has authored, is frequented by young lovers wanting to make out, because no one ever goes there. My mood had only improved very slightly by then and I was annoyed that I had to reach over them to look at the books; they weren't fazed though, kept talking about this and that, the while turning the pages quite aimlessly.
After a few more attempts at browsing, I took a deep breath and decided not to let my own surly mood interrupt these two - didn't we all catch so many stolen moments in the most incongruous of places? I smiled as I thought of my own rendevous with hubby and how we used to wait for them - so what if today that might mean I would have to wait till he actually got around to making it on time ;).
Just as I straightened up to leave however, one title on the bottom shelf caught my eye. Chandra Padmanabhan's Dakshin - a book I had seen praised on many blogs. I picked it up immediately and after going through it for a few pages, decided to buy it. I left the store feeling much happier. She seems to have covered most of my favourite dishes and the recipes are just the home made versions we are used to. Simple instructions, basic ingredients and no complex, tweaked recipes. I agree though that its more Tamilian recipes as compared to South Indian recipes - there's not much representation from the other states here. But what she does do is describe classic Tamil recipes very well.

Last Saturday, while wondering what to do for breakfast, I got the book out and leafed through her tiffin recipes. And found the recipe for rava idli - now I have only ever had the MTR mix version and since it is so good, I never bothered trying to make it from scratch. For the past couple of months however, it hasn't been available in the markets, so I decided to try the recipe.

The end product exceeded all my expectations - I guess I didn't think it would turn out as good as a product which had been perfected after extensive lab tests. But I can't believe I could forget about the magic of fresh ingredients! The idlis were soft and oh-so- flavourful! Though the recipe didn't call for it, I let the semolina soak with the yoghurt and other ingredients for about an hour, so maybe that helped too. Rava idlis are also my 5 year old's favourite tiffin item and I often send it in her snack box to schoo, so its great the recipe worked.

Had the idlis with a hotel style "sideish" - a lovely tangy, spicy, curry made with tomatoes coconut - recipe to follow. Nirvana on a weekend.


Rava Idli (Chandra Padmanabhan - Dakshin)

Made 12-15 idlis

2 tbsp ghee
1 cup semolina (rava/sooji)

1/2 cup sour yoghurt (beaten a bit)
2 green chillies chopped
1 cup coriander leaves chopped
salt to taste

2 tbsp chopped cashew nuts

Tempering:
3 tsp ghee
1 tsp mustard seeds
1 tsp cumin seeds (jeera)
curry leaves

1. Heat 2 tbsp ghee and roast the semolina till golden. Cool
2. Mix the semolina with green chillies, yoghurt,salt and coriander leaves. Add about 1/2 cup water to make a thick batter of pouring consistency.
3. Heat 1 tsp ghee, fry the cashews and keep aside.
4. Heat the remaining 2 tsp ghee and add tempering ingredients. After the mustard seeds splutter, add the tempering and the cashew nuts to the batter.
5. Pour into an idli mould and steam in a pressure cooker (without the weight on) or in a large vessel, for 15 minutes.
6. Remove the mould from the cooker, cool and remove idlis. Serve hot with tomato curry (thakali kozhambu) or sambar or chutney.

Saturday, May 29, 2010

Baked Cauliflower in a Creamy Sauce


I know there are some people who don't like cauliflower because of the smell which is common to vegetables like these including cabbage, broccoli etc. These are called cruciferous vegetables because they are grown from stalks that are cross shaped sectionally. The smell, however, is due to chemicals ( in particular sulphur compunds) which have been shown to lower the risk of cancer. These chemicals stimulate the production of enzymes which are now known to break down carcinogens and thus aid in preventing cancer. Who would have thought huh?

I personally like cauliflower a lot - whether cooked with potatoes Punjabi style to make Aloo Gobhi or put into a South Indian kurma with other vegetables. Cauliflower is a very accomodating vegetable and shares space very easily with other vegetables. However, it becomes a little monotonous to have the same recipes every week, so I try to move things around a bit by changing the way we eat the same vegetable.

This was one attempt at doing that - cauliflower made in a kind of casserole to go with a potato bread I had made earlier that morning. For something which rustled up so quickly, it had lots of flavour and was a good match with the crusty bread. Definitely a must-try - the chicken soup can be substituted with any other thick soup like Cream of Mushroom. The top becomes a little bit crusty while the inside stays creamy.


1 medium Cauliflower

1 onion chopped fine
1" ginger - finely chopped
3 cloves garlic finely chopped
green chillies - 2 sliced

2 tomatoes finely chopped
salt to taste
red chilli powder - 1 tsp
Coriander powder - 1/2 tsp

Oil - 1 tbsp


1/2 packet Knorr Chicken Delite Soup dissolved in 350ml water
1 1/2 cubes grated cheese (about 3/4 cup)
1/4 cup chopped coriander

1. Cut away the hard stems of the cauliflower and immerse it whole into salted water for about 10 minutes. (This will get any bugs/worms out)
2. Wash the cauliflower and separate into small florets, cutting with a knife if necessary.
3. Heat the oil in a pan and add the garlic, ginger and green chillies and saute for few seconds, put in the onion and saute till translucent and soft.
4. Add the chilli powder and coriander powder and saute, then add tomatoes and salt and cook till pulpy. (go easy on the salt because the soup mixture will have some)
5. Add the cauliflower , cover and cook for about 5-8 minutes till half cooked.
6. Pour in the dissolved soup mixture and bring to boil and cook for about a minute. Pre heat the oven to 190C
7. Add the grated cheese (reserving about 2 tbsp for the topping) and the coriander and turn off.
8. Pour the cauliflower into a casserole, sprinkle the grated cheese over it and bake for 15 minutes.

Friday, April 23, 2010

Rava Pongal and Kathirikai Gothsu (Semolina Breakfast Dish with Eggplant)


Pongal is a traditional South Indian breakfast - in fact some people consider it to be completely Tamilian in origin. The way I have always had it at home is with rice and split moong lentils cooked together till just mushy and tempered in ghee with cracked pepper, cumin seeds and cashews and served with coconut chutney.
It was only after moving to Chennai in my 20s that I discovered other versions of our usual breakfasts at home. So, there was rava khichdi - which was basically the usual upma made with semolina, but with vegetables, tomatoes and garam masala added to it which made it different from the lighter version we made basic tempering of mustard, gram dal and onions along with maybe peas or carrot.

And then there was the rava pongal which I tasted on the way to Kodaikanal in 1996 - we had stopped at one of the TTDC (Tamil Nadu Tourist Development) restuarants just outside Trichy. It was a brand new car, two people newly in love - and the keys locked inside the car.

Since it was a new car, the duplicate key wasn't in its usual place, the wallet - so while we sweated and tried to get the central locking open (why is it that there are always 10 people around you giving advice on things while not actually doing anything concrete to help?!) it was getting hotter and more frustrating. Finally we gave up and my to-be hubby very sadly got out his trusty Swiss knife to cut out the quarter glass. Long story short, we reached Kodai with the window held together with duct tape and 13 years later, the love story is still going strong while the car went out of our lives after 9 years and some memorable road trips.

But this story is actually about the rava pongal and gothsu we ate at that TTDC restaurant - I had never tasted anything like that before and the combination of soothing semolina with a tangy eggplant was an immediate hit. And while I have often thought of it, have never got down to replicating it - after all what if the taste was enhanced by the flush of first love ;)

Nupur's event Blog Bites #2 - the Copy Cat edition made me think of it once again and I decided to make it for a weekend breakfast. The semolina and moong lentils make this quite filling and I would even suggest this as a brunch idea. The gothsu recipe I have adapted from Suganya's recipe from her blog Tasty Palette - my go-to blog for authentic Tamil cuisine recipes as well as some amazing ideas for baked and healthy vegetarian goodies. While her recipe has mixed veggies in it, I restricted mine to eggplants alone in order to recreate the dish I had so many years back.

The rava pongal recipe I retrieved from Red Chillies - again, thanks to RC's food blog aggregator I keep in touch with much of the blog world as I can. The recipe is truly "simple and easy" and got done in minutes - but I must warn you, don't get fooled by the quantity, less is more here and its quite a filling meal. Together the pongal and gothsu were a delicious combination!

So Thank you Suganya and Soma for helping me to go back in time and savour a piece of history - we smiled as we at the table day and thought back to that day and all those shared memories we have - isn't that what makes a relationship strong at the end of the day?

PS - Taking a small break now - am on a work trip till the 6th May and then on vacation till the 17th May. So, see you when I am back - be good people!!

Wednesday, March 31, 2010

Baked Diamond Cuts (Whole Wheat Crackers)


I remember having this snack in my childhood, both at home and other people's homes. They seem to have taken a backseat with the introduction of packaged snacks, so much so I haven't seen them even on occasions like Diwali (why would I, when there are pre packaged hampers of Kurkure available! *roll eyes*). I used to especially like the sweet diamond cuts which is made by lightly dipping the fried pieces into a sugar syrup. Growing up in Mumbai, while we called them diamond cuts, they are called Shankarpale in Marathi and we used to gorge on them during Diwali.

So, when I had some kids coming over for a playdate, I thought of making these for them - lest they never know that something like this existed. Of course, the wuz that I am, couldn't think of deep frying them as per the traditional recipe and so I looked for a recipe where I could bake them. I found a simple recipe from one of my favourite chefs - Sanjeev Kapoor.

This one is made out of half whole wheat flour and half refined flour - not sure if that is the reason why the diamond cuts didn't puff up the way they usually do. I don't think its to do with the fact that they were baked instead of deep fried, so maybe next time I will experiment with the ratio of flours. Or maybe chill them the way you do for pastry dough.

The crackers were fine though - a nice, savoury snack which the kids and moms both enjoyed - crisp and light. My daughter really liked it so I will definitely be making them again. The flavour of the carom seeds was subtle but brought back some great memories. We had the crackers with a dip and paired it with some gooey chocolate brownies (which I will post later).

Baked Diamond Cuts (Whole Wheat Crackers)


3/4 cup whole wheat flour (atta)
3/4 cup refined flour (maida)
3/4 tsp baking powder
1/3 cup ghee
salt to taste (1/2 tsp was enough for me)
Ajwain/omam (carom seeds)
1/2 cup chilled water

1. In a medium sized bowl, mix the refined flour and the whole wheat flour with the baking powder and salt.
2. Add the ghee and mix together till it resembled bread crumbs.
3. Add the carom seeds and then knead into a dough adding just as much water as is needed to make it pliable but not sticky or soft.
4. Cover with a cloth and keep aside for about half an hour.
5. Pre heat oven to 180 C. Divide the dough into 4 equal parts and roll out thinly on a lightly floured surface. I rolled it out to a little thicker than a roti (about 1/8th of an inch).
6. Prick all over with a fork; with a sharp knife or pastry cutter make diagonal lines at equal intervals on the rolled out dough and then once again cut again crosswise to give diamond shapes.
7. Place in batches on a lightly greased tray and bake for 15-16 minutes at 180C, checking to see that it doesn't over brown. Cool and store in air tight containers.