Showing posts with label walnut. Show all posts

Wednesday, November 30, 2011

Beetroot, Pear and Feta Salad with Orange Balsamic Reduction


 This is a gorgeous salad and a must try. Even my Dad who is a little conservative in his tastes (as he ages, else it was he who was the ultimate foodie when I was growing up!!) loved it and had second and third helpings. I initially made this for this dinner with friends and served it with a Lamb Chilli and Spaghetti Aglio - E Olio, but it is so simple that this can be a quick addition for an everyday meal with just pasta or even grilled chicken or fish.

The original idea comes from Feast on Cheap which has the beets roasted in her version while I pressure cooked them. Indian beets must be different because they just didn't cook in the oven after all that time. Pressure cooking was way simpler. Also, the orange balsamic reduction is from another recipe of hers but I liked it so much I incorporated it into this one. I omitted the onions/shallots in the original recipe because Indian onions are quite pungent. Be sure to mix the pears and the beets only when ready to serve because otherwise the pears will turn blood red - my pic was taken after 15 minutes and its already red.

The sweet flavours of the beet and the pear are interpersed with a sharp tartness from the balsamic vinaigrette and heightened by the salty feta - my favourite!. Such a beautiful combination of flavours!!

Beetroot, Pear and Feta Salad with Orange Balsamic Reduction


Ingredients:
Beetroot - 3 medium
Pear - 1 ripe - firm variety
Feta Cheese crumbled - 1/2 cup (about 100 gm)
Walnuts - 1/2 cup (toasted and lightly rubbed to remove the peel)
Coriander leaves - 2-3 tbsp
Dressing:
Orange juice - 4 tbsp
Balsamic vinegar - 1/2 cup
Olive oil - 2tbsp
Lemon juice - 2 tsp
Grated giner - 1/2 tsp
Grated garlic - 1/2 tsp
Chilli powder - 1/2 tsp
Freshly crushed black pepper - 1/4 tsp
Salt to taste


1.  Put the beets into a vessel or directly in a pressure cooker, with a little water and cook for one whistle (8-10 minutes)
2. Meanwhile,  heat the balsamic vinegar and orange juice together on a medium flame till it reduces to half (about 4-5 minutes), stirring occasionally.
3. Whisk in all the other ingredients of the dressing along with the orange juice reduction and keep aside to allow the flavours to meld.
4. Once the pressure cooker can be opened and the beets have cooled, peel them, cut the ends and then cut into 1" cubes or thinner (I did thinner slices). Place in the salad bowl you will be serving them in.
5.Cut the pears into very thin slices. Crumble the feta cheese.
6. Add the toasted walnuts, feta cheese, and pears to the beets and toss with the dressing till well mixed. Garnish with chopped coriander. Serve immediately.
7. To make ahead and serve later, toss the beets in 1/2 the dressing and refrigerate covered. In another bowl. In another bowl, add the feta, pears and walnuts and rerigerate covered. Just before serving, add the pears, walnuts and feta to the beet bow, toss with the remaining dressing and garnish with chopped coriander.

Thursday, March 17, 2011

Eggless Banana Walnut Muffins

MIL is staying with us this month - I had to really persuade her to come this time, since she was quite reluctant to make the trip from Coimbatore. Age related hearing loss has made her a little reluctant to socialize. But she did come finally and its been nice to have her here with us. My daughter especially seems to bloom a litte bit more every time one of her grandparents is around.

We took her out for lunch last weekend (Punjab Grill - very good food and great service - pleasantly surprised) and while walking around the mall, she spotted some cupcakes at a cafe. She asked about them but they had egg in them, so I decided to make some eggless muffins at home. Banana muffins seemed the easiest and she likes nuts, so decided to modify this recipe of mine for white chocolate walnut muffins, to make some banana walnut muffins.

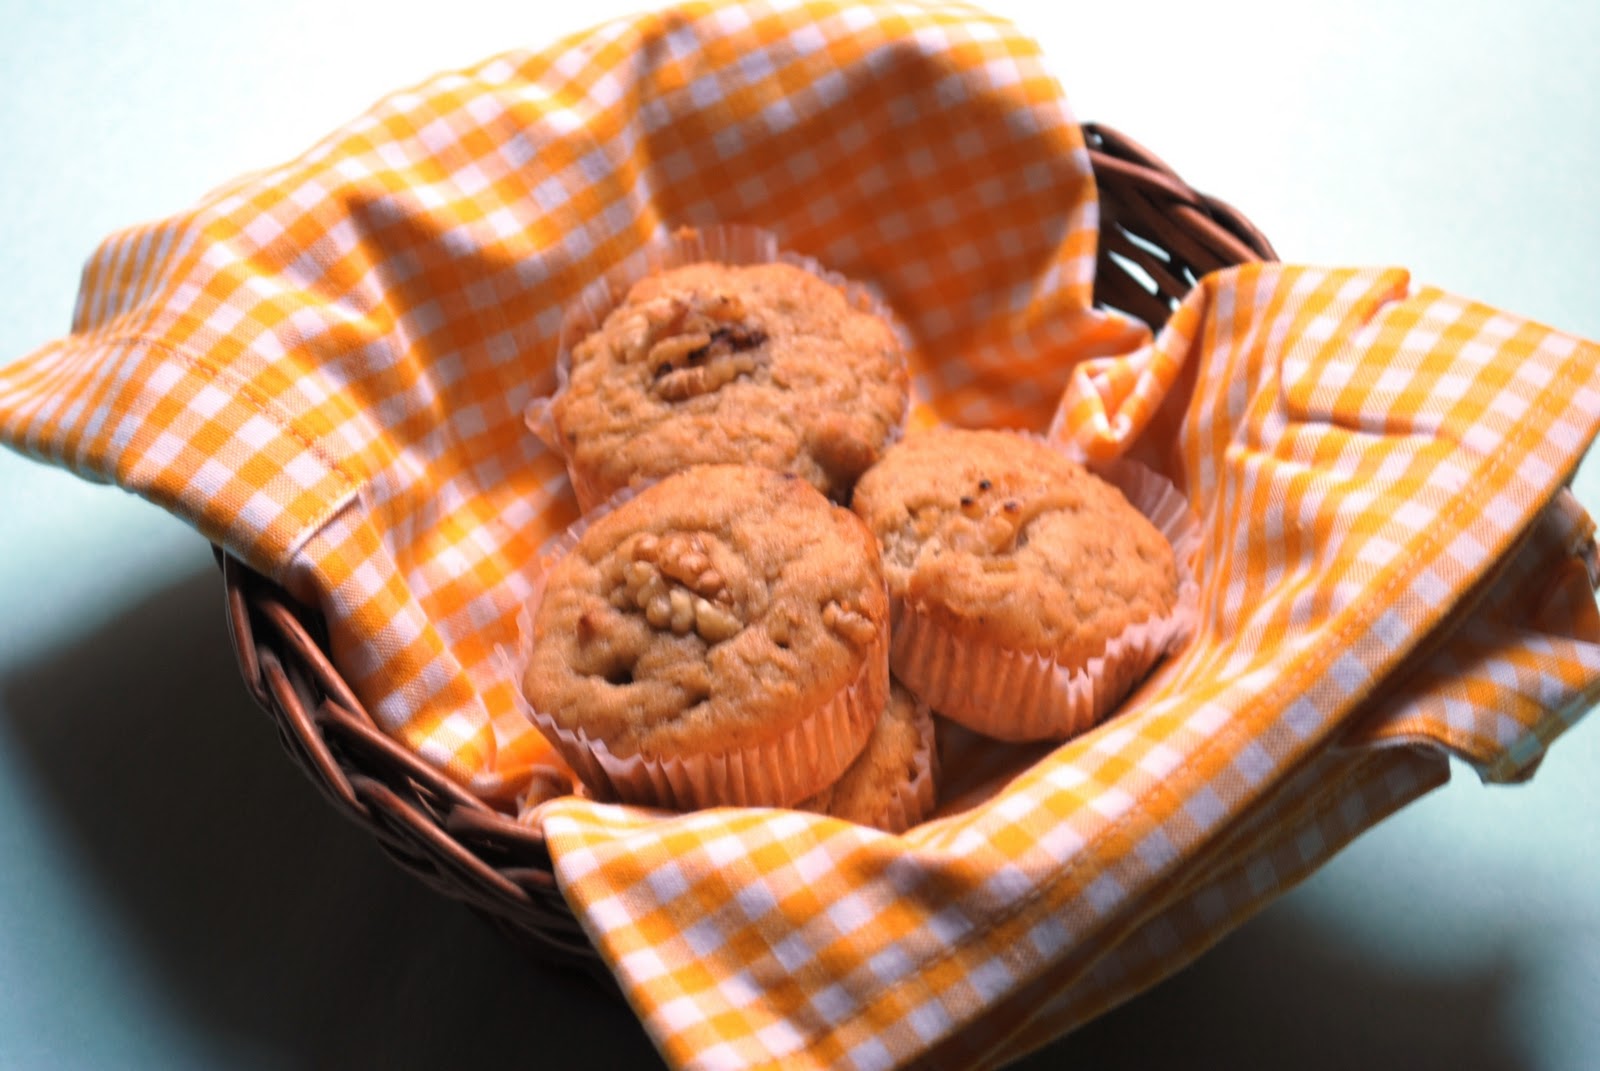
It barely took me about an hour from start to finish. I packed a couple in my daughter's tiffin the next day and she couldn't stop beaming with delight at the chocolate chips. This is a light muffin but nice and flavourful.The sugar can be brought down a notch since it was a little sweet for me.

Eggless Banana Walnut  Muffins
Ingredients:
1/2 cup butter
1/2 cup brown sugar (I would bring this down by a couple of tablespoons)
1 banana (medium)
3 tbsp milk
3/4 tsp vanilla essence
1 cup maida
1/2 tsp baking powder
1/2 tsp baking soda
salt - a pinch
1/2 cup walnuts (toasted on a skillet or in an oven, peeled and broken into half) You could use chocolate chips, I did that for half of them because my daughter wanted some.

1. Blend the banana with the milk and vanilla essence with the hand blender into a puree.
2. In a bowl, cream the butter and brown sugar with a hand blender till light and fluffy. Add the banana puree and then blend again.
3. Sift the flour with the salt and the baking powder into thebowl of batter and fold in gently till just combined. Do not overmix
4. Fold in the walnuts (or the chocolate chips) reserving a few to decorate on top. Pre-heat the oven to 180C (350F).
5. Grease a muffin pan or line them with cupcake liners. Drop spoonfuls of batter into the muffin pan and bake for 15-20 minutes (took 20 minutes for me). A toothpick should come clean when poked into the muffins.
6. Let stand till cool and then unmould from the muffin pan.


Wednesday, March 25, 2009

Carrot Coconut Muffins

A special family occasion always calls for something which warms the heart as well as the palate. And when we are talking about celebrating the joy that our little girl brings into our lives, her twinkling eyes and impish smile which make every day a new wonder - then it has to be something which screams "Sunshine"!


These carrot coconut muffins do just that - their warm orange colour seems to be a shade of happiness itself and their moist insides burst with the goodness of carrots and apples. I saw them first quite sometime back on the Joy of Baking website and later on Meeta's wonderful blog "Whats for Lunch, Honey".
These muffins are the easiest thing to bake and use ingredients which we usually have at hand. My daughter loved making it with me and couldn't wait for them to bake and then cool to see how they turned out - very much the way she pestered us that whole morning for mehendi and then as soon as it was on she wanted to take it off and see the colour "NOW"! :)

I didn't make the cream cheese frosting since I didn't think they were needed at all - warm them just a little in the oven and you're good to go. I used homemade unsalted butter instead of the oil in the original recipe and toned down the sugar a wee bit.These muffins are apparently also called "Morning Glory Muffins" - I can see why!


Carrot Coconut Muffins


1 1/2 cups maida
1/2 cup wheat flour
3/4 tsp baking soda
1.5 tsp baking powder

3/4 cup unsalted butter
1 cup sugar
3 eggs

2 cups grated carrots
1 apple, peeled and grated (should be crisp and not the mushy kind)
1 cup grated coconut (I used fresh coconut)
1/2 cup walnuts, lightly toasted, peeled and chopped
1 tsp vanilla essence
1/2 tsp cinnamon powder (For some reason everytime I combine cinnamon and salt, the dish seems to get over salted, so this time I did away with the salt in the original recipe,completely)

Method:
1. Sift the flours and the baking powder,cinnamon powder and soda together.
2. Beat the eggs and keep aside. In a large bowl, beat the butter and sugar together till creamy.
3. Mix in the eggs and vanilla essence into the butter and sugar and then add the flour, grated carrots, apples, chopped walnuts and coconut mixing just until combined.
4. The key to spongy muffins is not to mix the ingredients too much but just till they come together.
5. Spoon the batter into lightly greased muffin pans or you can line the muffin pans with muffin papers and then spoon the batter into them.
6. Bake in a pre heated oven at 180C (350F) for 22-25 minutes till a skewer inserted comes out clean. Rest for 10 minutes and turn out of the muffin pan and let it cool completely.

Sunday, August 31, 2008

Chocolate Brownies


Brownies have been one of my favourite kinds of dessert for some years now and I try not to pass up a chance to have good warm brownies with cold vanilla icecream. But some of the versions I have tasted (especially in those godawful coffee cafes which abound in every nook and cranny) have been really bad. Dry, barely-there chocolate versions which you wish you never tried in the first place.

A good chocolate brownie is one which is moist and fudgy, holds together well but doesn't crumble and of course has some good dark chocolate in it.

For some reason I didn't try making brownies - didn't want to end up with one of those terrible versions I despised....until I saw this recipe at Jugalbandi. The pictures screamed gooey delectable squares of heaven. And of course, as anyone who knows Jai and Bee will tell you, if it's on their blog and looks like its delicious - it *is* delicious!

Jugalbandi was most certainly an inspiration when I wrote my first post - and I made that sweet beginning with one of their recipes - seems fitting then that almost a year later and close too 100 posts, I post yet another recipe from their amazing blog!

I made this Chocolate Brownie from J&B's recipe for Chocolate Almond Brownie and it was absolutely delicious. I added walnuts to the original recipe, used three eggs instead of four and used all butter instead of apple sauce. Verdict - chocolate brownies just the way I like them - moist, chocolately and not cloyingly sweet!

This is going to Zlamushka's event Tried and Tasted - Jugalbandi's blog is this month's pick and I am looking forward to seeing what's everyone's favourite recipe from their blog!! Recipes inspired from their blog:

Chicken & Red Pepper Crustless Pie
Rosy Tomato Risotto
Poee and Xacuti

Friday, July 18, 2008

Banana Muffins


We had another baking session with the kids during the holidays. This time with three 3 year olds and one six year old. Decided to bake muffins this time, these individual cakes always manage to thrill the little ones! I had a couple of ripe bananas lying around so I decided to make Banana Muffins and also throw in some walnuts.


The bananas, milk, honey, eggs and walnuts make for a power packed treat for the little ones - rich in calcium, iron, Vitamin A, protein, essential fatty acids and potassium. It takes hardly anytime to prepare and my little helpers gave me a hand with mixing the ingredients and pouring out the batter.


The muffins when they were baked were really moist and soft, though they turned out a tad salty....not sure whether it was more salt or the combination of cinnamon and salt. Will cut down on both the next time.

The banana muffins are on their way to the Think Spice...Think Nutmeg event being hosted this month by Aparna of My Diverse Kitchen. Think Spice was originally hosted by Sunita's World.


Banana Muffins


1/2 tsp cinnamon (can be replaced with vanilla essence)

1/2 tsp nutmeg (grated)

1 cup whole wheat flour (atta)

1½ cups refined flour (maida)

2 tsp baking powder

¼ tsp baking soda

½ cup honey

1 egg

½ tsp salt (would change it to 1/4 tsp next time)

1 cup milk

3 tbsp oil

3 ripe bananas, mashed

Half a cup of chopped walnuts (lightly toasted)


1. Preheat oven to 180C.

2. Mix the wheat flour, refined flour, baking soda, baking powder, salt, nutmeg and cinnamon together in a bowl.

3. In another bowl, mix the honey, egg, milk, oil and add the dry ingredients until just combined. At the end mix in the chopped walnuts.

4. Grease a muffin pan or line cupcake moulds with cupcake papers.

5. Fill the muffin moulds or cupcake liners till the top and bake for 35-45 minutes till they are golden brown and a toothpick inserted comes out clean.

6. Remove to a rack and cool completely before unmoulding.

For a superb eggless version, take a look at Vaishali's recipe.

Monday, June 2, 2008

Coriander Pesto Yogurt Bread


I finally managed to buy a lot of baking stuff I needed and I'm quite happy that for keeping to my New Year's Day resolution of increasing my baking proficiency! One of my buys was a loaf tin (I know, some baker I am, didn't even have a loaf tin for so long!) I a

I had to use it right away of course; suddenly I couldn't find all those loaf recipes which would haunt me when I didn't have a loaf tin- there were all kinds of free form breads but hardly any loaves. One can use the same recipe of course, but I didn't want to take a chance...

Finally, I gave up and decided to just tweak the recipes I have already tried out. A bit of coriander walnut pesto remaining from this dish went into the bread and also yoghurt I had seen so many recipes using buttermilk (different from our "mor" or "chaach").

I was quite worried when the liquid proportion seemed too much and the dough was much stickier than anything I had handled before. After almost 4 cups of flour totally, I finally stopped and just put it aside to rise. Good thing I had a loaf tin, since a free form bread would have been a small nightmare!

The dough rose beautifully both the times; I left it for almost 2 hours and 15 minutes the first time and the second time for about 50 minutes.

Hubby though, was a bit worried that he wouldn't get a "tall bread" and insisted we should have bought a taller tin - I was already a bit stressed about the dough being so sticky so I told him the comments section was closed at this time!!.

The bread was fine though, I needn't have worried; this is how I have always wanted my bread to be - those lovely holes and soft insides.
This is a nice bread - good crust and crumb and just the right texture - not too dry and crumbly and not too dense. The pesto wasn't enough to make a mark on the bread (though the bread did look greenish) but I could taste the faint hints of coriander. Next time I won't rely on leftovers and make the pesto for this dish itself!

We had the bread for breakfast - as many versions as the people at home - plain with cheese spread for my daughter, sandwich with green chutney, potato and tomato slices for the husband and toasted with home made butter and strawberry and mint conserve for me.

I don't think there's anything to compare with the aroma of freshly baked bread and the pleasure of cutting your own thick slices - I am definitely going to be baking more bread!


Coriander Pesto Yogurt Bread


Ingredients:
Active dried yeast - 2.5 tsp
Warm water - 1 cup ( I would cut this down to half a cup and then add more water to the dough later if needed.)
Sugar - 1tsp

Wheat Flour (atta) - 1 cup
Refined flour (AP/maida) - 2.5 -3 cups
Yogurt - 1/4 cup
Coriander Walnut Pesto - 1/4 cup (can increase it to 1/2 a cup)
Salt - 2 tsp
Veg oil - 3 tsp

Method:

1. Dissolve the sugar and yeast in the warm water and set aside for 10-15 minutes till the mixture is foamy.

2. Take the wheat flour, salt, yoghurt, yeast mixture, pesto, oil and 2 cups of the refined flour in a bowl and mix till well combined. Add refined flour a tablespoon at a time till the dough comes together.

3. Knead the dough till smooth and springy (5 minutes), transfer to a lightly oiled bowl and cover with plastic wrap. Set aside for about 1.5 hours till it doubles in volume.

4. Transfer the dought to a lightly floured bowl or surface and lightly flatten. Put into a lightly greased and floured loaf tin or shape into a free form loaf; cover with a damp kitchen towel and set aside for another 45 minutes to an hour for the second rise.

5. Pre heat the oven to 190C and bake the loaf for 30-35 minutes.

Saturday, May 24, 2008

Pasta tossed with Coriander and Walnut Pesto


This post by dear Mansi of Fun and Food really set me thinking. Though I had known for sometime now that Pesto needn't contain only Basil, I had never tried making it with any other ingredient. Basil isn't very easy to get around here (except the more pungent Holy Basil variety - tulsi).

I made the Coriander Walnut Pesto recipe with a few changes to it. I didn't want it as a dip though but in some form for dinner. So, I boiled some pasta and tossed the pesto in and mixed in some halved cherry tomatoes. Served it warm with some pumpkin soup and a roasted mushroom salad for a delicious meal.

I also had some leftover pasta cold for lunch the next day and it tasted great with the pasta taking on the pesto flavours completely.

There was some leftover pesto which I added to a bread recipe I was making - and voila! Pesto Yoghurt Bread! Thanks for the recipe Mansi!

Pasta tossed with Coriander and Walnut Pesto


Ingredients:

Pesto:

Coriander leaves - 2 cups washed and chopped
Walnut, lightly toasted and skin removed - 1/3 cup
Sweet corn kernels - 1/2 cup
Green chillies - 2-3 depending on heat level
Olive oil - 4 tbsp
salt to taste
Lemon juice - 1 tbsp

Pasta:

Macaroni or Spaghetti - 1.5 cups
Cherry tomatoes washed and halved - 1 cup
salt to taste
Olive oil - 1 tbsp
Crushed Black pepper - 1 tsp
Parmesan cheese - 1/4 cup
Method:

1. Bring enough water with salt and a tsp of the olive oi in a large vesse, to a boil. Add the pasta and cook for about 8-10 minutes; the pasta should not be overcooked but remain al dente (with a bit of bite to it).
2, Drain the water and rinse under cold water for a minute to stop it cooking in its own heat. Toss with the remaining tablespoon of olive oil and keep aside.
3. Meanwhile, blend all the ingredients for the pesto together, adding the olive oil a tablespoon at a time till they come together in a thick paste.
4. Gently toss the warm pasta with the pesto, crushed black pepper and the cherry tomatoes till well combined, check seasoning and adjust salt if needed. Sprinkle the parmesan cheese on top and serve immediately.


Sunday, May 4, 2008

Pumpkin Walnut Bread - Eggless


Pumpkin is not a well liked vegetable by certain members of this house because of its sweet taste which "spoils" the taste of the dish. *ahem*.
I
, on the other hand, love its orange flesh, the way it takes on the flavours of the dish it is cooked in - spicy if put into a puli kuzhambu or sambar, mustardy with potatoes in a typical Bengali dish, plumping up the volume of a soup, melding beautifully into this risotto and sweet when put into a pie.

The ones we get here are usually those huge green and white streaked ones.....simply called "kaddu" - no differentiation into varieties (I wouldn't know a kabochon if it stared me in the face!). Just ask the sabziwallah to cut a 500gm piece and you're good for a week.

Well, this time our friendly neighbourhood Mother Dairy outlet had the smaller variety. Peach coloured skin and a nice plump shape. I picked it up immediately; I would figure out what to do with it later. A couple of days later, I remembered a pumpkin loaf recipe I had seen on Elise's Simply Recipes - the recipe was adapted from Fannie Farmer and seemed fuss-free.

I laid out the pumpkin to roast in the oven while I went out and finished some chores. When I came back, the pumpkin flesh was cooked and ready. l I started removing the rest of the ingredients for the bread - and then discovered that there were no eggs at home! I hate when this happens (as if I have anyone else to blame but myself) and then my latent substitution avatar just takes over.
The prospect of going out even for the 3 minute walk to the store to buy eggs was just too much to contemplate in the heat of the afternoon. Technically, I could have waited till evening, but nope- I HAD to finish baking the bread then and there!

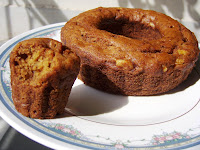
I remembered baking a Walnut & Ginger Bite ring sometime back which didn't have eggs, so I knew it was possible. I went to work modifying the original recipe. Eggs basically bind the ingredients or help in rising, so I put in one teaspoon of baking powder for the leavening and though the pumpkin may have been enough for the moisture, I added half a ripe banana as well.

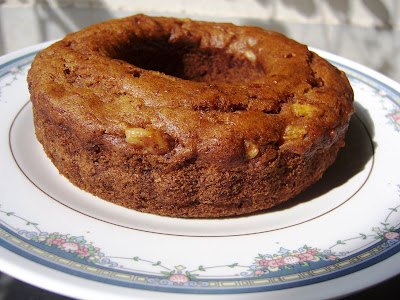
The bread was a beautiful brown colour when it came out of the oven and the house was redolent with the aroma of cinnamon and nutmeg. It had a brown crust and a nice moist texture to it. Not too sweet so I didn't mind having it with breakfast and it makes a great tea time treat too. If you want to have it for dessert, its delicious with a scoop of vanilla ice cream. It tasted even better the next day, something I have often found with baked stuff.

I do have a theory about cinnamon though - I think it heightens the taste of salt in a dish - its happened in a restaurant once and with a carrot cake I baked a couple of years back. This time too, though not very salty, you could taste a bit of salt in the bread and I think it was because of the cinnamon in it.


Susan of Food Blogga is hosting Beautiful Bones - an Osteoporosis Food Event "to alert women to the potential risks of osteoporosis and encourage them to take steps to protect their bones at every age". This event is on the whole month of May which is National Osteporosis Awareness Month.Along with anaemia, Indian women are particularly susceptible to osteoporosis; genetics have much to do with it (Asians and Caucasian women are at greater risk) but also the fact that a high percentage of Indian women suffer a great deal from malnutrition - either due to a poor diet while growing up (many times due to a gender bias) or their own negligence of their health while taking care of the others in the family. It is estimated that 50% of healthy Indian women over 50 years of age have low bone mass.

I got concerned with this gap when I saw a direct correlation between the reduced intake of calcium in my MILs diet and her increasing joint problems and reduced bone mass. She put it down to age, but I connected to the fact that she was consistently reducing her milk, yoghurt and other calcium intake after my FIL died (culturally ingrained reactions to societal pressure are a whole another post!)

A diet rich in calcium and Vitamin D (adequate vitamin D is required for proper absorption of calcium) during childhood and adolescence goes a long way in preventing osteoporosis later.
But that doesn't mean that calcium is not as important after your teens. Women in the age group 25-50 years required 1000mg of calcium per day while women over 65 years of age require 1500 mg per day.

Don't feel like glugging a glass of milk everyday? Milk is not the only source of calcium; in fact it is difficult to digest and may not give you all the calcium you need. Think of other calcium rich sources:

1. Leafy greens like spinach (paalak), lettuce, spring onion greens and other local greens (keerai) like methi (fenugreek), suva (dill), sarson (mustard greens), khatta paalak, haak, molai keerai/arai keerai/siru keerai(all amaranth varieties), murunga keerai(drumstick leaves),agathi keerai,poonaganni keerai,pulichai keerai,manathakali keerai.

2. Vegetables like cabbage, broccoli, green beans, bhindi (okra), pumpkin/squash, radish (mooli) , cauliflower, carrots, eggplant (brinjal), brussel sprouts, asparagus and celery

3. Herbs and spices like coriander, basil, thyme, rosemary, fennel, oregano, garlic, cloves and cinnamon.

4. Nuts,seeds and beans like sesame seeds (til), mustard seeds (rai), walnut (akhrot), almond (badaam), cashewnut (kaju), kidney beans (rajma, lobia), chickpeas (kabuli chana, kadala), water chestnuts (singhada), lotus seeds (makhana), melon seeds.

5. Fruits like tomatoes, oranges, guava, banana, chikoo (sapodilla), coconut, figs (anjeer) and custard apple

6. Milk products like yoghurt, cheese and paneer and Soy products like tofu, soya beans, soy milk

Apart from calcium intake, it is important that it gets absorbed by our body:

  • Vitamin D aids in absorption of calcium; sources rich in Vitamin D are
  • High consumption of sodium (salt) and caffeine (whether in coffee or colas) results in increased excretion of calcium.
  • Calcium through one's diet is better absorbed than through supplements.
  • While there are factors which may prevent complete absorption of calcium from sources like spinach, beets, celery and peanuts (oxalic acid) and whole grains, nuts and beans (phytic acid) - the decrease in the available quantity of calcium for absorption is relatively low.
  • Calcium interference with iron absorption or vice versa is not considered significant enough to affect normal intake when the intake of both is in typical moderate amounts.
Read more here on calcium, its importance, dietary sources and absorption.

While pumpkin is a moderate source of calcium (24mg per 1 cup) and cannot compare to greens and other vegetables in terms of calcium content, walnuts have about 100mg of calcium in every 100gm. What better excuse to indulge in this nutty bread!


Pumpkin Walnut Bread - Eggless

Ingredients:

Skinned and cooked pumpkin - 1 1/4 cup
(I followed the recipe instructions, cut the pumpkin into 4 parts and kept them cut side down on foil, cooked them in a pre heated oven at 200 C for 45 minutes. When it was completely cooled, I scooped the cooked flesh out of the skin, measured out what I wanted and froze the rest of it; You can also skin and chop the pumpkin and steam cook the flesh)

Flour - 2 cups (I used wheat flour 1 cup and refined flour (maida) 1 cup)
Vegetable oil - 3/4 cup (the original recipe uses olive oil)
Brown sugar - 1 cup (more if you want the bread to be sweeter)
Baking soda - 1/2 tsp
Baking powder - 1 tsp
Salt - 1/2 tsp (I would reduce it to 1/4 tsp next time)
Cinnamon powder - 1/2 tsp
Grated nutmeg - 1 /2 tsp
Water - 1/2 cup
Ripe banana - 1/2 mashed
Chopped walnuts - 1/2 cup (lightly toast the walnuts for 3-4 minutes to remove the skin, cool and chop.)

Method:

1. Pre heat the oven to 180C (350F), grease a loaf tin or a ring mould and keep aside.
2. Sift the flour, salt, baking soda,baking powder, cinnamon powder and grated nutmeg together.
3. In a big bowl, mix the cooked pumpkin with the oil, mashed banana, water and sugar till well combined.
4. To this add the mixed dry ingredients a little at a time mixing just as much as needed. If you find the batter too thick, add milk a teaspoon at a time till you get the required consistency - not pouring consistency but spoon dropping type.
5. Mix in the chopped walnuts gently and spoon into the prepared loaf tin or ring mould.
6. Bake for about 45-50 minutes or till a toothpick inserted in the middle comes clean. Mine took about 60 minutes but was quite moist inside and did not dry out.


Other calcium rich recipes:

Sindhi Sai Bhaji

Broccoli Soup

Sunday, December 9, 2007

Spaghetti and Vegetarian "Meat"balls


Pasta is a favourite at home and both S and I love trying out pasta dishes when we eat out. I have tried making different kinds of pasta and different sauces too……risoni (rice shaped pasta) became one of our favourites till Nilgiris stopped stocking it for some reason.Pasta which looks like rice – can’t be a better thing to appeal to our South Indian sensibilities I guess ;).
Then there’s farfalle, penne and macaroni – in order of preference.
I don’t prefer the baked versions very much, since it usually calls for way more cheese than we should be having, and it becomes too heavy. Lasagne is the one thing that hubby can’t resist though when we eat out and it was his way of checking out if a new place made the grade – don’t get your lasagna right? Don’t even bother again! It’s a different matter that most restaurants in Chennai used to have chicken lasagna on the menu, is that an oxymoron I wonder…..

Spaghetti however, doesn’t get made too often, because I love having a LOT of sauce with it and I usually don’t have that many tomatoes on hand!

On one of those rare occasions when I had everything for the sauce and the spaghetti on the same day ( a cosmic event!), I decided to make a nice sauce with it to go with the spaghetti.

Then I decided to make meatballs – without the mutton, since I don’t cook mutton at home often – make that “at all”! I don’t eat mutton and hubby avoids red meat too. Chicken is my usual substitute but I didn’t feel like eating chicken either that night.

So, then my mind started wandering, which led to some internet searching…..turns out there are so many recipes out there for “meatless meatballs”, my head started spinning!! Apparently people want to make vegetarian meatballs taste exactly like meat. Well, I don’t miss mutton at all considering I wasn’t a big meat eater at any point, so I just wantedto make – well vegetarian dumplings to put into the sauce with my spaghetti!

So, I shut down all the search windows which were bent on confusing my already addled brain and keeping in mind the various things and ingredients used in different recipes, made my own version. I decided to go with silken tofu – first time I would be using it – mushrooms and walnuts.

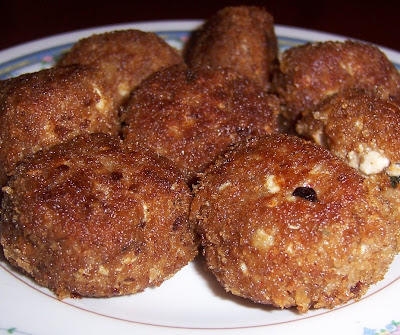
I was amazed at how well they turned out….the walnuts and the mushrooms gave the tofu a really nice texture and “bite”. It also kept its shape very well, both while frying and in the sauce, so I think thats a great thing - no fussing to keep it from breaking!
Spaghetti and Vegetarian "Meat"balls

Ingredients:
Spaghetti – 250gms

For the sauce:
Tomatoes – ½ kg
Garlic – 5-6 cloves chopped fine
Cumin powder – ¼ tsp
Chilli powder – ½ tsp
Mixed dry herbs – 2 tbsp
Freshly crushed black pepper – 1 tsp
Olive Oil – 1 tbsp
Salt to taste

Vegetarian "Meat"balls:
Silken Tofu – firm – 1 cup crumbled
Walnuts – 2 tbsp finely chopped
Mushrooms – 100 gms cleaned and finely chopped
Whole wheat flour – 1 tbsp
Bread crumbs – ¼ cup
Salt to taste
Oregano – 1 tsp
Cumin powder – ½ tsp
Pepper powder – 1 tsp

Oil – 2 tbsp to shallow fry or 1 tbsp to bake.

Method:
1. Wash tomatoes, microwave with just enough water for 3 minutes on high. Remove, dunk into cold water and peel.
2. Roughly chop the peeled tomatoes and scoop with juices into a vessel
3. Heat olive oil in a pan and add garlic to it, sauté for a minute and then add the tomatoes to the garlic, sauté for 3-4 minutes.
4. Add chilli powder, cumin powder and salt, let it cook covered for about 15 minutes, adding a splash of water in between if needed. It should cook to a thick sauce consistency.
5. Add the mixed herbs and a bit of vegetable stock or water if it is too thick. Add the crushed pepper just before taking off the flame.
6. Meanwhile, cook the spaghetti as per directions on the pack and toss it with a tsp of olive oil and keep warm. Ideally, make the spaghetti just before you are ready to eat, so that it doesn’t dry out.
7. Assemble all the ingredients for the balls in a bowl, except the oil. Mix well and combine till it all comes together, adding just enough bread crumbs as is necessary to bind the balls together.
Check and adjust seasoning. Should make about 10-12 balls.
8. Shallow fry the balls in 2 batches adding a tbsp of oil each time, till they change colour and are brown on all sides. Or bake them in an oven for about 15 minutes at 180 C, rotating them in between so they brown evenly.
9. Add them to the warm sauce and keep aside
10. When ready to serve, plate the warm spaghetti individually and pour some of the warm sauce and meatballs over it.
This dish is going to Presto Pasta Nights, a weekly event hosted by Ruth over here @ Once Upon a Feast.