Showing posts sorted by date for query bake. Sort by relevance Show all posts

Wednesday, February 1, 2012

Individual Bolognese Pot Pies

What do you do when you have some lovely leftover meat ragu from a Spaghetti Bolognese dinner? Why you bake them into dainty little pot pies!


Spaghetti Bolognese is a favourite at home but doesn't get made often because we don't eat mutton that often and plus its best to have during the winter when you don't mind a slightly heavier meal. I usually make use my tried and tested Bolognese recipe, but this time I tried Emeril Lagasse's recipe with a few changes and it was really delicious!

I then had quite a bit of the ragu leftover so a couple of evenings later, I reduced it down to a thicker consistency and add some peas as well. Portioned it out into small ramekins (use bigger ones for single potions) and then rolled out some puff pastry to cover it. Baked it for about 15 minutes and voila! dinner was ready. I made some small cut out shapes of the pastry to decorate, but its really not necessary.


For the Ragu Sauce 

Olive oil - 2 tsp

Mutton mince - 300gm

Bacon - 4 strips chopped

4 chorizo sausages - chopped finely or crumbled

Onions - 2 medium, chopped

Carrots - 1 medium, diced

Tomatoes - 5 pureed 

Tomato puree - 1/4 cup

1 stock cube (chicken or beef) dissolved in 300ml of water

Red wine - 3/4 cup

Garlic - 2 cloves, chopped finely

 Bay leaves - 2

Freshly crushed black pepper - 1/2 tsp

Red chilli powder - 1/2 tsp

Cumin powder - 1/2 tsp

Dried oregano - 1 tsp

Cinnamon powder - 1/2 tsp

Sugar - 1 tsp

Milk - 1/4 cup 

Cooked Spaghetti - 300gms

Parmesan powder - to serve

1. Take a pan and heat the olive oil in it. Add the bacon and cook till browned and fat is rendered - about 3-4 minutes.
2. Stir in the onions and carrots and cook for 4 minutes till soft. 
3. Next add the bay leaves, garlic, salt, pepper, red chilli powder, cumin powder, cinnamon powder and oregano and saute for a minute.
4. Add the mutton mince and finely chopped sausages and fry for 5 minutes till they are browned.
5. Add the red wine and cook for 3 minutes breaking up any browned bits sticking to the pan.
6. Add both the purees, the stock and sugar and bring to boil. Reduce heat to medium and simmer covered till the sauce is thickened - about an hour and fifteen minutes. 
7. Add the milk and check the salt. Stir well and remove from heat and keep warm. Serve over cooked spaghetti sprinkled with parmesan powder for Spaghetti Bolognese.
 
For the pot pies:
Peas - 1/4 cup
Puff pastry - one sheet for the entire quantity or 1/2 or 1/4 if only working with leftover sauce
Egg - 1, beaten with 1 tbsp water
- add the peas and continue cooking for another half hour till the sauce is much thicker in consistency.
- Spoon into individual ramekins leaving about half an inch at the top for the pastry
- Roll out puff pastry on a floured surface and cut out circles which will fit inside the ramekins (I didn't tuck the pastry inside which I will do next time)
- Brush the pastry with the egg wash and cover the ramekins tucking in the edges.
- Make slits on top of the pastry to vent. You can decorate by cutting small shapes with cookie cutters from the pastry bits left over and then just pressing down lightly over the top of the pastry cover.
- Bake in a pre heated oven at 200C for 15 minutes or till the top is golden brown and flaky.


Monday, January 16, 2012

Herbed Dinner Rolls


Its been a long time since I baked bread - what with all the cookies and cakes which happened in the last couple of months, bread baking took a backseat. Woke up one morning last week, with a yen to bake and when I asked my daughter what she would like to bake, she said bread. I was immediately excited , though felt it might be completely mistimed considering how cold it is right now. I wasn't even sure whether the bread would rise with such a cold wind blowing outside.


But K hauled out the Bread Book by Sara Lewis (from which I have previously made an Olive and Feta Cheese bread, Carrot & Mustard Bread, Stuffed Mushroom and Garlic Baguette and Rapid Light Wholemeal Loaf) and we pored over the recipes on each page - she finally picked the Fancy Dinner Rolls, "because of the shapes". So dinner rolls it was then. She was thrilled to be kneading the dough for the first time and considering how fussy she is otherwise about getting icky stuff on her hands, didn't seem to mind the mess at all sticking to her fingers!  I finished up with the rest of the kneading and we set out the bowl of dough in the balcony to double. And it rose beautifully!

She then shaped half the dough into pull apart rolls - basically , you make small balls of the dough and arrange them in the baking tray or dish in a kind of circle so that they touch each other. They stick together when they prove for the second time so that after they bake, you have to "pull them apart". The remaining dough I shaped into a simple coil and a knot.

The shaped rolls rose for second time and after brushing them with a simple egg wash, I sprinkled the round rolls with sesame seeds and fennel seeds while the coiled ones were topped with some fresh basil from my potted plant. The rolls baked for about 10-15 minutes each and the baking bread filled the house with that heavenly, yeasty aroma which makes you want to grab the freshly baked bread and slather it with some butter and eat it just like that!


Herbed Dinner Rolls
All purpose flour (maida) - 475g (4 1/2 cups)
Butter - 2 tbsp
Sugar - 1 tsp
Salt -1 tsp
Fast action dried yeast - 1.5 tsp
Warm Water - 275ml

Egg yolk - 1 to glaze
water - 1 tbsp
sesame seeds, fennel seeds, fresh basil (one can also use poppy seeds, paprika and fresh rosemary)

1. Put the flour into the bowl and rub the butter into it till it resembles fine breadcrumbs.
2. Add the sugar, salt and yeast and then slowly incorporate as much warm water as is needed to make a soft dough.
3. Knead well for 5 minutes until dough is smooth and elastic but not too sticky. Put the dough into the bowl and cover loosely with an oiled plastic wrap and leave in a warm place to rise till doubled in size - about an hour
4. Knead the dough again on a lightly floured surface and divide into 12 pieces. Grease a baking sheet or 2 trays
For pull apart rolls: - take 2 pieces of dough and divide each into 3 small balls. Arrange into a circle or 2 triangles so that they touch each other.
For coils - take 2 pieces of dough and shape each one into a rope 10 inches long and then coil each rope into a spiral.
For knots - take 2 pieces of dough and shape each one into a rope about 9 inches long. Loop one end of one rope and then thread the other end through the loop to make the knot. Repeat
5. Cover the shaped rolls with loosely oiled plastic wrap and leave in a warm place to rise for 20 minutes to half an hour.
6. Brush the tops of the rolls with egg yolks mixed with 1 tbsp of water and sprinkle with the seeds or herbs.
7. Bake in a pre heated oven at 200C for 10 -15 minutes until the tops are golden and the base sounds hollow when tapped with the fingertips. Transfer to a wire rack and cool completely.


Saturday, January 7, 2012

Jam Sandwich Cookies (Jim Jams)

 My niece and nephew are visiting from Mumbai for the Christmas hols and its been great fun having them here. The lil' one at 3 is a complete delight and my 6 year old daughter is thrilled to have someone younger than her. My niece is now 12 and she has grown into such a poised, mature girl :) Its always nice catching up with SIL as well. \

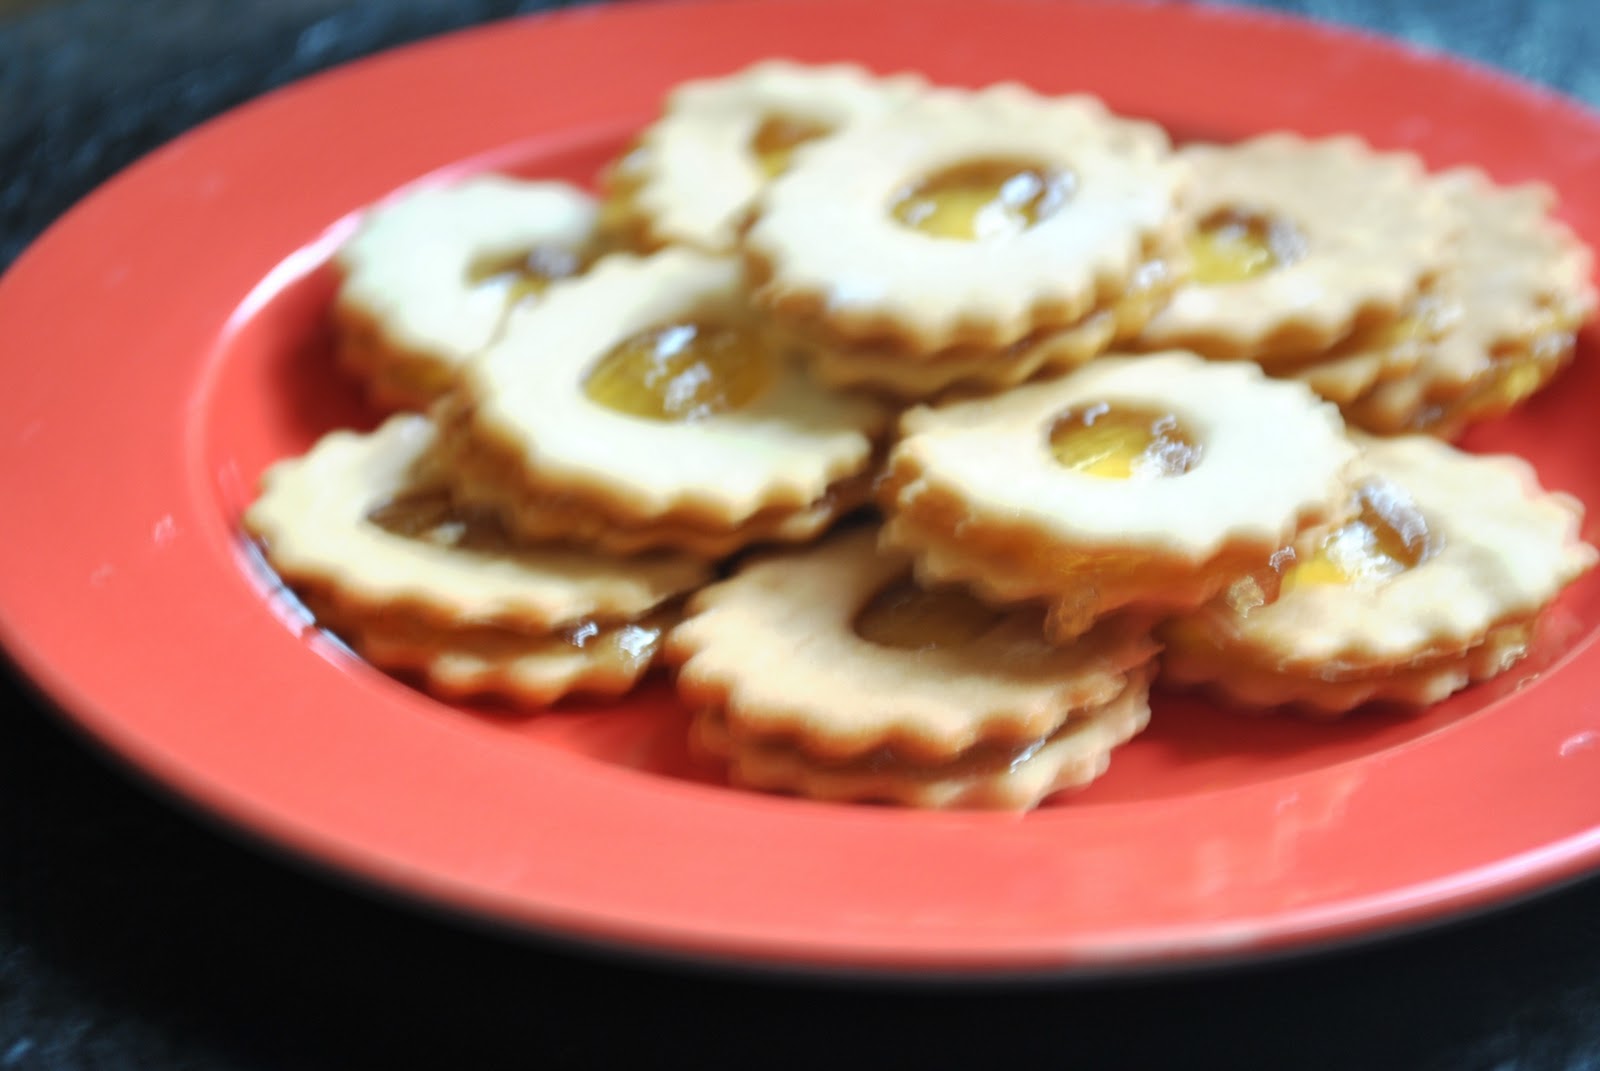
The kids were asking for cream biscuits (which is what we call cookies in India) the other evening so I asked them whether they wanted to bake jam biscuits. My niece was especially thrilled at the idea since she wants to learn to bake. So, I gave her the ingredients and she measured them out, kneaded and rolled and very painstakingly applied the jam gently on the cooled cookies before sandwiching them. She was so pleased with the biscuits, she couldn't stop beaming. K was suitable adoring of her elder cousin and even forgot to even ask to taste the batter at every stage.

I divided the dough into two parts, one part went into making the jam cookies and the other we mixed in candied fruit (Tutti Frutti) into the dough and made cookies from it. I had rolled out the jam cookie dough a tad too thin than needed so it was a bit crisper than needed. You could also cut out the cookies after making a roll of the dough - but the dough might be a bit too soft for that. I did cut out the dough for the Tutti Frutti cookies and they were thicker.


The Jam cookies were a hit with the kids - which one of us didn't like those jam filled biscuits!!And they did exactly what I used to = first took apart the biscuits, licked the jam from both sides and then ate the biscuits! Somethings never change :)

 Jam Sandwich Cookies

Flour - 1 1/2 cups plus more for dusting and kneading
Salt -  a pinch
Egg - 1 (can omit, use 2 tbsp milk and 1 tsp baking powder)
Butter - 1/2 cup
Castor Sugar - 1/2 cup
Vanilla extract - 1 tsp
Milk - 1 -2 tbsp (as required)

Jam - any jam, I used pineapple - about 1/4 cup

1. Cream butter and sugar together till shiny. Add and egg and then beat till fluffy.
2. Sieve flour and salt together and then gently fold into the egg mixture.
3. Add vanilla extract and gently mix together to form soft dough, If too dry, add about a tbsp or two of milk. If too sticky, add flour one tbsp at a time till you are just able to form a rough ball of dough.
4. Wrap the dough in cling film and chill in the refrigerator for about an hour till firm.
5. Sprinkle flour on the work platform and roll out the dough into a rectangle about 1/2" inch high.
6. Cut with a cookie cutter, remove the uncut versions, form into ball and roll out again. Repeat till the dough is exhausted.
7. This step is optional, if you have a small cookie cutter or a tiny bottle top, you could cut out holes in half of the cookies to form a window for the jam to be seen on top.
8. Pre heat the oven to 180C, arrange the cookies in batches on a greased baking tray, leaving some space in between.
9. Bake for 10-15 minutes, depending on the thickness of the cookies and number of cookies on the tray - start checking after 6 minutes to ensure they are just cooked and don't get burnt. Remove when tops are firm and just starting to change colour.
10. Remove. cool and bake next batch. Once all the cookies are baked and cooled, spread jam on the the flat side of the cookies without holes on top and cover with the cookies with holes. Press gently and store in piles in an airtight container.

Wednesday, December 28, 2011

Asian Style Baked Basa with Crispy Noodles

 
Basa is the name some marketing dude has coined for Vietnamese Catfish (like the Patagonian Toothfish became popular on menus around the world as Chilean Sea Bass). This fish has become very popular in India in recent years - the restaurants were the first to begin and now it is available in most metros at neighbourhood frozen food outlets. In just a few years, the annual import of basa has crossed 1,500 tonnes with Kolkata alone consuming 500 to 600 tonnes - that local seafood loving city!

With its firm, white flesh which lends itself to almost any kind of dish, and lack of "fishy" smell, it has become much favoured by the local palate especially for grilled and Oriental dishes.  The supply chain supports this demand by making perfectly frozen fillets available at competitive prices. My neighbourhood guy sells it at Rs. 450 /kg - I got 6 servings out of it, enough for 2 meals for 3 people. Compare this with Rs. 600-Rs. 700/kg for sole or even local fish like surmai or pomfret which are between Rs 350 - Rs 400 per kg. 

Of course, I would never use basa to replace local fish in Indian curries - but it seems perfect for appetizers and grilled mains. This time I used Asian flavours to marinate the fish and then baked it and served it over stir fried noodles. Delicious.


 Asian Style Baked Basa with Crispy Noodles
Serves 2


Basa Fillet - 1 large - about 350gms
Marinade/Dipping Sauce
Fish Sauce - 1 tbsp
Soy Sauce - 1 tbsp
Sriracha Sauce (or any Hot sauce) - 1 tbsp
Olive Oil - 1 tbsp
Garlic - 1tbsp, finely chopped
Ginger - 1 tbsp, thinly shredded

For the baking process
Rice wine vinegar - 1 tbsp
Lime juice - 1 tbsp
Coriander - 2 tbsp chopped
Olive Oil - 1 tbsp
Freshly crushed black pepper
salt to taste


Spring Onions - 2 sliced (reserve the green tops)

Green chilli - 2 slit

Noodles - 200gms (I was out of noodles and used spaghetti)

Olive oil  - 1 tbsp
salt to taste
Garlic - 2 cloves chopped finely

1.  Mix all ingredients for the marinade, lightly whisk and keep aside.
2. Divide the Basa fillet into two portions and marinate in the prepared marinade for about half an hour to an hour
3. Pre heat oven to 180C. Mix the rice wine vinegar, Olive oil, lime juice, chopped coriander, salt and pepper.
4. Pour the prepared vinegar mixture into a baking tray, remove the fish fillets from the marinade (reserve the marinade for the spaghetti) and place on the baking tray. Top each fillet with half of the chopped spring onions and one green chilli
5. Bake in the pre heated oven at 180C for 15 minutes, till the fish is just flaky.
6. While the fish is baking, bring a pot of water to boil, add the spaghetti to the boiling water and cool till just done (al dente). Takes about 6-8 minutes.
7. In a wok or heavy bottomed pan, heat 1 tbsp olive oil, add the finely chopped garlic cloves and saute for half a minute. Add the reserved marinade mixture and boil 2 minutes.
8. Add the spaghetti to the wok and stir fry for 3-5 minutes till slightly crispy, season with a little salt if needed, usually the marinade mixture has ennough salt in it from the sauces.
9. To serve, divide the noodles between two plates and place one fillet of fish on top of each pile. Garnish with chopped spring onion greens and a wedge of lime.

Wednesday, December 21, 2011

Milk Chocolate Macadamia Biscotti for Christmas


 Biscotti is a crisp (some would say hard) biscuit of Italian origin,traditionally enjoyed  (in Italy) with a wine or orange juice and in places outside Italy with a steaming cup of coffee. The word Biscotti describes its preparation - it is derived from the Latin word biscoctus which means "twice cooked/ baked". It describes foods which were cooked / baked twice so that they lasted longer and could be used to feed soldiers or travellers on long journeys and during wars. Their origin being the town of Prato, they are known as Biscotti di Prato; but they are also commonly called "cantuccini" in Tuscany and Sicily.

The traditional recipe only uses flour, sugar, almonds and eggs while not incorporating butter or yeast. The dough is baked in slabs and when fresh and warm cut into slices and baked once again till crisp. Recent recipes have started incorporating other nuts like hazelnuts, pistachios, pine nuts; baking powder and butter have also been included along with flavourings in the form of almond or vanilla extract and some spices like anise and cinnamon.

I love my cookies a bit crisp and crunchy and don't much prefer the soft ones, so I have always wanted to bake Biscotti. Never got around to doing it though until now. The thought of baking them twice and the fear of them crumbling while cutting them into slices after the first round of baking made it a little daunting, but it was actually all very smooth when I did get around to baking it.

I used milk chocolate (I had a large Cadbury Dairy Milk Fruit and Nut slab a friend had gifted my daughter and she - like me- doesn't always prefer "things" coming in between her chocolate. So I decided to cut it up into chips and use it in the biscotti. I also had some macadamia nuts lying from my trip to Australia and decided to use those as well. I adapted this recipe from Canadian Living.

I had my daughter's best friends over when I was making this so the tiny hands all wanted to shape the logs and they did a good job! My oven couldn't accomodate 14" logs, so I just divided the dough into 3 parts and made three smaller logs. The kids couldn't wait for the logs to be baked and then cool a bit so we could cut slices and I had a tough time restricting how much of the freshly baked logs they could consume - LOL! The slices cut quite easily with a serrated knife - you have to take care to use firm strokes to cut and not linger too much. The middle part of one of the logs was crumbling a bit, but there were a lot of takers for the crumbs, so I didn't have a problem with that :)

The Biscotti came out beautifully flavoured, not too sweet and with just the right amount of crunch from the nuts. They were crisp and made for a lovely snack with just the right amount of hardness. This is definitely a recipe to repeat since it has become a favourite in our house - none of my other cookies have won such all round approval satisfying the picky husband (when it comes to sweets) and the savoury liking daughter.


I have also baked my Christmas Cake with the kids - the one which I have been doing for many years and it is luscious with all the dried fruit inside - I sliced one portion and am dousing the other round cake with small spoons of orange juice till it is ready to be eaten on Christmas. I have another batch of dried fruit soaking with which I am going bake another Christmas cake when my niece arrives and we will have that one for New Year with friends and family. This is a different recipe I'm going to be using for the first time, lets see how it turns out. Have you baked your Christmas Cake - try this recipe here, its easy and you will love the flavour! If you haven't soaked dried fruit, ust steam the fruit for about 7-8 minutes gently in orange juice or rum and rest for 30 minutes, before proceeding with the recipe. Recipe here

Now back to the Biscotti.


 Milk Chocolate Macadamia Biscotti
 Ingredients:

Butter - 1/2 cup, softened
Sugar - 3/4 cup
Eggs - 2
Flour - 2 cups
Baking powder - 1.5 tsp
Salt - 1/4 tsp
Almond Essence - 1 tsp
Vanilla Extract - 1 tsp
Macadamia Nuts - 1/2 cup, chopped (can replace with almonds)
Milk Chocolate chips (I used milk chocolate bar chopped up into small pieces) - 2/3 cup

Method:

1. Cream the butter and sugar in a bowl, beat till smooth and shiny.
2. Add the eggs one at a time and beat well.
3. Mix in the almond essence and vanilla extract into the egg mixture
4. In another bow, sieve the flour and baking powder together. Add to the egg mixture and combine with a light hand till it comes together into a soft dough.
5. Add the chopped nuts and the milk chocolate pieces and mix into the dough.
6. With your hands, divide the dough into 2 or 3 parts, depending on the size of your oven/baking tray.
7. Shape each part into a log about 10-12" long and place on a greased baking tray, then flatten slightly while still leaving the edges rounded, making each long about 3-4" wide. Use flour while shaping the logs in case they are sticking to your hands.
8. Pre heat the oven to 180C and bake for 25-20 minutes, till the tops are just turning golden and the logs are firm. Cool for 10 minutes
9. Cut the logs with a serrated knife diagonally in a firm, swift motion into 1/2" slices each.
10. Stand the slices upright in a baking tray and bake at 180C for 20 minutes, till dry and crisp and base is slightly browned.

Tuesday, December 13, 2011

Orange and Chocolate Chip Muffins with Sprinkles


Do you know what happens when your 6 year old bakes muffins? -  you digress so far from the original recipe that it bears only a slight  resemblance to what you intended to bake. Almonds get turned down (because nuts are good only with chocolate, Amma), chocolate chips get added in (there's so little left in the packet Amma, lets finish it) and finally the muffins miraculously sprout sprinkles on top (Please Amma, can we have sprinkles on top - Please, please pleaaaaaase).

I started with The Cooker's recipe for some delicious Orange, Oats and Almond Muffins - they seemed delicious. K had a compensatory holiday last Friday, after her Sports Day in school and was bouncing off the walls at home. So we decided to bake - and she said she would do "everything".  I helped her measure out the ingredients,  and as she poured and stirred and whipped, she slowly took over the kitchen till the recipe morphed into something else with a life of its own! 
 But she was so thrilled at the fact that she was doing "everything", that I didn't have the heart to turn down her suggestions. After all, what's a few choc chips and sprinkles between friends - am sure the Cooker wouldn't mind the transformation of her recipe! 
And this was also K's gift to Amma and Appa on their 14th anniversary :) - how much sweeter can it get? The muffins rose beautifully and were soft and fluffy. Must be all the love and enthusiasm which went in with those tiny hands.
This also goes out to my best friend S whose anniversary it is today - Happy Anniversary S and A - here's wishing you many more!.

 Orange and Chocolate Chip Muffins with Sprinkles
Ingredients

½ cup Quaker Oats ground coarsely
1 ¼  cup flour
¾  cup whole wheat flour
 ½  cup butter (or oil)
½ cup sugar (I used castor sugar and would probably increase the quantity a tad bit more next time)
2 eggs
1 cup orange juice
½ cup yoghurt
½  tsp baking powder
½ tsp baking soda
½ cup yoghurt
½ cup multicoloured sprinkles
½ cup chocolate chips
1 tbsp orange zest, grated

Method
1. Mix the refined flour, whole wheat flour, oats, salt, baking soda, baking powder and orange zest in a bowl.
2. In another bowl, cream the butter and sugar together till shiny, then add the eggs one by one and beat for 2 minutes each.
3. Add the orange juice, yoghurt and chocolate chips into the egg mixture and mix till combined.
4. Gently fold in the flour mixture, one third at a time into the egg mixture till just combined; do not overmix.
5. Pre heat the oven to 180C (350F). Grease 2 muffin trays (6 muffins each).
6. Spoon the batter into the muffin trays till they just graze the top of the moulds. Decorate with sprinkles on top/
7. Bake in the oven for 15-20 minutes – a skewer inserted should come clean. Cool completely before unmoulding. 


Tuesday, October 4, 2011

Vegetable Biryani - The Party Pleaser

This is one of the first biryanis I tried when we started entertaining and I wasnt still comfortable cooking meat or chicken. So I would stick to a chicken curry and stay safe with the rice.  Plus in Chennai, we had friends who were vegetarians and it made sense to have one main which everyone could enjoy. More convenient for me as well to come home after work and just concentrate on a few things for dinner. 

But this biryani is definitely magical - good times assured and some very satisfied diners. Every. Single. Time. Don't take my word for it - go ahead and try it. I used to think it may have been all that rum and cola we DINKS were consuming - but no, its improved its reputation even as our choice of drinks has become a little  more diverse and refined. And now, since my repertoire has expanded in the past 14 years, I make this as a Sunday lunch as well - its no longer a "party dish" alone. 

I do have a confession though - part of this dish's popularity is aided by the addition of a ready made ingredient - Parampara Biryani Masala. It doesn't completely rely on it, but the taste definitely improves with the addition. You could replace with some other commercial biryani masala - I have tried Everest which works well too. 

This is going to Tickling Palates' event Hibernative Foods - she says our ancestors instinctively prepared foods which matched the seasons. Which is why, she says, the festival season from Dasera to Diwali during the cooler months, sees a surfeit of protein rich and fatty foods like sweets and savouries. So, the brief for this month was to prepare food rich in proteins as well as fat. Biryani of course is definitely a winter dish with its warming properties....and its a rich dish with protein and fats in the form of the vegetables, ghee and yoghurt.


Rice - 2 cups
Cloves - 3-4
Cardamom - 2-3
Cinnamon -2 sticks
Bay leaves - 1
Oil - 2 tsp
Salt


Onions - 2 big, sliced thin
Tomato - 1 meidum chopped
Chopped veggies - 2 cups (carrots, beans, peas, mushrooms, bell peppers)

Yoghurt - 1 cup
Ginger garlic paste - 2 tsp
Green chillies - 3 slit long
Red chilli powder - 1/2 tsp
Biryani masala - 2 tbsp (Parampara paste is what I use)
Coriander leaves - 1 tbsp chopped
Mint leaves - 1 tbsp chopped
Ghee / oil - 3-4 tbsp
salt

1 Cook basmati rice in lots of salted water along with bay leaves, cloves, cinnamon, cardamom,cardamom and oil till it is three fourth cooked. Drain the rice, fluff with a fork onto a platter and keep aside.
2 Heat the ghee or oil in a heavy bottome pan, add the sliced onions, saute for 8-10 mts till nice and brown. Reserve half of the onions for garnish.
3 In the same pan, add the ginger garlic paste,green chillis, mint leaves and coriander leaves lightly fry for 2-3 minutes.
4. Add the red chilli powder and biryani masala along with the chopped tomatoes and fry for 3-4 minutes.
5. Add the yoghurt and salt and mix well. Cook for 5 minutes till the masala comes together well and then add the vegetables, fry 2 minutes and cover and cook till just tender. Turn off flame and keep aside.
6. .In a baking dish, smear some oil at the bottom and arrange half of the par boiled rice in an even layer.
7. Take the vegetable yoghurt masala mixture and spread evenly over the rice
8. Spread the remaining rice over the masala, top with the fried onions and some more of the coriander and mint leaves.
9. Cover with foil and bake in a pre heated oven at 190C for about 30 minutes. let rest uncovered for about 5 minutes before removing the foil.

Wednesday, September 28, 2011

Nutella Pinwheel Cookies

I amo actually not much of a Nutella enthusiast - certainly not like my brother who can slather it on to bread slices and make sandwiches of it!! But I recently bought a jar in an attempt to persuade my daughter to finish up her lunch box - the deal being that she would get Nutella sandwiches one day of the week if she finishes up her lunch the other 4 days. (I don't even know why I am making these deals because its not as if the lunches on the other days are uninteresting or she doesn't like them. She just chats and eats so slowly that she runs out of time most days. Sigh....and some days she has Chocos from her friend's lunchbox - not to judge, but really Chocos for lunch?? Must be another harried Mom who was trying to make a deal with her 6 year old!

Anyway, so when I saw this latest post on Anita's blog for some luscious Cinnamon Rolls,  what instantly came to mind were pinwheel cookies and the Nutella jar in the fridge. I thought Joy of Baking would have a recipe for pinwheel cookies of some sort, but they didn't and instead found a site called Joy of Desserts and I found this recipe which used chocolate. I adapted the recipe to use the chocolate hazelnut spread and it was a lovely combination.

The humidity made it a bit difficult to roll out the dough even though I chilled it, so I finally had to roll out the chocolate part of the dough on top of the plain dough which is why the pinwheels are not as well defined as I would have liked them. Did nothing to the taste though; these were some seriously good cookies - soft and crumbly and with the delicious taste of chocolate and hazelnuts mixed in without being overwhelmingly cloying.


Nutella Pinwheel Cookies (Adapted from Joy of Desserts)

1 1/2 cups flour (I ended up kneading in about another 1/4 cup of flour in my attempt to roll out the dough)
1/2 cup butter ( I had only salted butter so skipped the pinch of salt in the original recipe)
1/2 cup sugar
2 tablespoons Nutella
1 egg
3 -4 tablespoons milk
1 1/2 teaspoons baking powder

1. Sieve the flour with the baking powder (and salt if usinng)
2. Cream the butter and then add the sugar and bear till light and shiny.
3. Add the egg and beat for another 2 minutes.
4. Fold in the flour and baking powder and mix well, adding milk one tablespoon at a time till you manage to get a soft dough.
5. Divide the dough into two portions and add the Nutella to one of the portions.
6. Wrap the dough portions with plastic wrap and chill in the fridge for 15 minutes.
7. Turn the plain dough out and roll 1/8th inch thick. Roll the Nutella dough out to the same size as the plain dough.
8. Place the Nutella dough over the plain dough and press together, Then roll away from you into a tight even cylindrical roll.
9. Chill again for 10 minutes, Remove and cut into thin slices.
10. Bake in a pre heated oven at 190C for 10 minutes.

Wednesday, September 14, 2011

Chocolate Brownie (Cocoa based)


This almost turned out to be a disaster because the sugar just refused to melt and I had a sticky mass of butter and cocoa powder. What should have taken about 15 minutes to make took more than an hour as we battled to have the sugar melt into some kind of semblance of what it usually does. Something definitely wrong with that batch of sugar I bought - not from the usual supermarket, so I guess I'm not going back to the neighbourhood kirana wala for sugar anytime soon now.

Coming to the recipe, this is one of my favourite recipes for a deliciously decadent brownie - this is not a very gooey brownie though, its a little chewy but soft and the coffee (which is my addition) adds a lovely rich flavour to it. This recipe is adapted from this blog which itself is an adaptation from Alice Meidrich's Bittersweet and has a mint adaptation to it. I also like this recipe because it uses cocoa powder which I almost always have at home, as opposed to chocolate which I may or may not have at hand.

I usually put in walnuts but this time since I was a bit doubtful about the sugar which had not melted properly, I decided not to waste nuts in case this turned out to be a disaster. But I had promised chocolate chips when we started baking so my daughter insisted on it and they went in. I would go with the nuts though, the chocolate chips in a chocolate brownie is rather a lost cause but who's to argue with a 6 year old!

This batch was demolished quite swiftly - its almost addictive once you taste that lovely, dark chocolate flavour and one can go on eating it. Easy to whip up - this is a must try.

Chocolate Brownie
Butter - 1/2 cup (I used salted butter so omitted any salt in the recipe, if using unsalted, I would add about 1/2 tsp of salt)
Sugar - 1 cup (can reduce to 3/4 cup)
Cocoa powder - 3/4 cup
Instant Coffee powder - 2 tbsp
Vanilla essence - 1/2 tsp
Eggs - 2
Maida (all purpose flour) - 1/2 cup
Chocolate chips - 1/2 cup (can be substituted partly or wholly with walnuts)

1. Combine the sugar, butter and cocoa powder in a vessel and place in another pan containing water which is simmering. (The next time I would just use softened butter and combine it with powdered sugar and cocoa powder till smooth and shiny.) Mix with a wooden spoon till melted and well blended.
2. Take off heat and cool slightly till just warm. Add the vanilla essence Dissolve coffee powder in  1/4 cup of boiling water and cool. Add to the sugar butter mixture.
3. Add the eggs one at a time and beat well. Then add the flour and beat till just combined with a wooden spatula.
4. Fold in the nuts or chocolate chips and pour into a tray which has been covered with aluminum foil.
5, Bake in a pre heated oven at 180C for about 20-25 minutes. Remove when the toothpick inserted comes out not completely dry but just a bit moist inside.
6. Cool completely and cut into squares. Depending on the size of the squares you could get upto 15-20 pieces. I cut them small and got about 20 pieces.

Thursday, August 4, 2011

Garlic Bread Soup - and other Leftover Tales

This is a literally a recipe which came about because of Leftovers. My usually dependable recipe for paav went kaput and I was left saddled with a laadi of baked but inedible pav. Well one could technically eat them, but not actually enjoy them. Plus I had a dinner with some friends and there was French baguette left over the next day, which became quite hard and stale by the next day since it was outside uncovered while we chatted and ate.

I found a great savoury pudding recipe from Mark Bittman which I adapted to make a bake for the dinner itself. But the French bread was languishing the day after and getting harder everyday. So I looked around and found that soups were another great way of using up leftover bread! And this soup is so good, I would gladly buy fresh bread to make it! A great find by the way for someone like me who loves soup - The Joy of Soup

It looks very ordinary but the combination of garlic and onion and bread is simply awesome. I didn't add as much cheese and stuck to Cheddar instead of Parmesan - but I did use much more garlic and it was just amazing. The flavours of this soup come together very well and I must ask you try this - we had this in 38C weather, so its not like one of those hearty, warming soups which make you feel all full - its quite light.


Garlic Bread Soup
Onion - 1 chopped
Garlic - half a bulb of garlic - not a clove, but half of a whole garlic, chopped
Bread - crusty French  bread is great, but any bread you want to use up is good. - about 1 cup diced.
1 chicken stock cube dissolved in 3 cups of water. (about 600-700ml)
1 bay leaf
2-3 peppercorns

1/2 tsp paprika powder
salt, pepper and olive oil

1/4 cup cream
2-4 tbsp grated cheddar cheese
parsley/coriander to garnish

1. heat the oil in a sauce pan and add the onions, garlic, peppercorns and bay leaves to it. Saute for about 5-7 minutes till the onions turn a little brown.
2. Add salt and the chicken stock and bring to boil. Simmer for about 30 minutes on a low flame and then add the paprika powder and some more salt if needed
3, Add the bread and wait for it to dissolve into the soup. Remove and cool. Blend into a smooth consistency.
4. Add the cream and warm gently on a low flame. Add the cheese and wait till it dissolves or add it individually when serving in bowls. Garnish


Friday, June 17, 2011

Orange Caramel Pudding


This post was written before I was ill. I guess the surgery was inevitable, but I didn't know it then and tried my best to fob it off as best as I could.
.


I love Caramel Custard - there I said it. I know you are supposed to have sophisticated tastes as you grow older - dark chocolate mousse, tiramisu, passionfruit cheesecake - but there's something to be said about comforting desserts. The kind you grew up eating, the one you made for the first time when you were 15 and tried cooking in an oven for the first time (yes, a cake was not my first attempt at baking), the kind that old colonial clubs have perfected to a T.  Caramel custard is the one for me. I think its now called Caramel Pudding - but growing up we called it Caramel Custard - a relic of the British Raj I guess, when any dish which involved cooking egg and milk together, was called a custard.

I wasn't well the past month (my congenital digestive condition playing up big time) and had to go on a liquid diet for a couple of days. Then, as is inevitable, I lost some weight and my energy levels plummeted. Now that I'm back to eating solid food, I have taken to eating small portions several times.....not a great way to gain back weight - but we do what we have to do. Right now I'm just glad I'm able to eat and not giving any of my family members sleepless nights. So, this weekend, I decided I needed a bit of pampering.

Which in food terms translates to comfort food. And there is nothing more comforting than a warm, dessert redolent of caramel. No wonder my favourite Haagen Daaz flavour is Dulce de Leche - divine. I read one of this pop quizzes in a magazine, which tried to peg your "type" depending on the dessert you liked. Well, caramel pudding came back as "warm, loyal, the 12 am friend, generous". Fine by me, I say! (I am a Gemini - when I am craving Tiramisu, I morph into the "sexy, dangerous, intense type" ;)


Its been quite sometime since I made Caramel Pudding - a few years actually. So, I thought I should atleast look at a recipe in case I got the proportions wrong. Which is when I came across the Orange Caramel Pudding by Sanjeev Kapoor. This one had a nice twist which I had never tried before; so, since I had orange juice and a lone orange for the rind, I decided to give it a shot.

The caramel almost brought me to my knees though - three times,  my attempt to make caramel came to naught. No, it didn't burn - it just turned into a dry mass of lumps - somewhat like kalkand (khadi saakhar). I couldn't believe that something I had churned out when I was just 15, was giving me so much grief. I wouldn't give up -  (don't worry, if I'm stubborn, I'm also thrifty - the other versions were melted back with some more water into sugar syrup to be used for lemon juice in future!) -so for the fourth time, I referred to this David Leibovitz recipe which talked about making caramel without water, just sugar. I decided to try it - I'm a big believer in not reinventing the wheel which is why I am able to believe in recipes which are tried and tested (the pictures as proof helped!)even if its not the way I usually do it. It worked perfectly - whew.

Basically, this method involves spreading the sugar in a heavy bottomed pan in an even layer and then warming it over medium heat till the water inherent in sugar starts melting the sugar slowly. This takes about 8-10 minutes totally (I realise that I have much less patience than even 5 years back, forget 20) and then it slowly starts caramelizing. It turns brown (do not stir before this happens) and that's the signal to slowly stir a little to get the sugar at the edges into the centre - do not overstir. About 5 minutes later, it melts into a beautiful golden brown syrup and then I stirred it at 2 minutes intervals ever so gently for another 4 minutes (I would reduce that to 2 minutes the next time).

20 minutes to attain that lovely, textured caramel flavour which takes any dessert to the next level. Melt butter or cream into it at this stage to make a caramel sauce or just pour directly into a vessel for a caramel pudding. I poured into a glass casserole and swirled it around to coat the bottom and some of the sides - it doesn't matter if there are a few gaps - as it cooks with the custard, it will melt and spread some more.


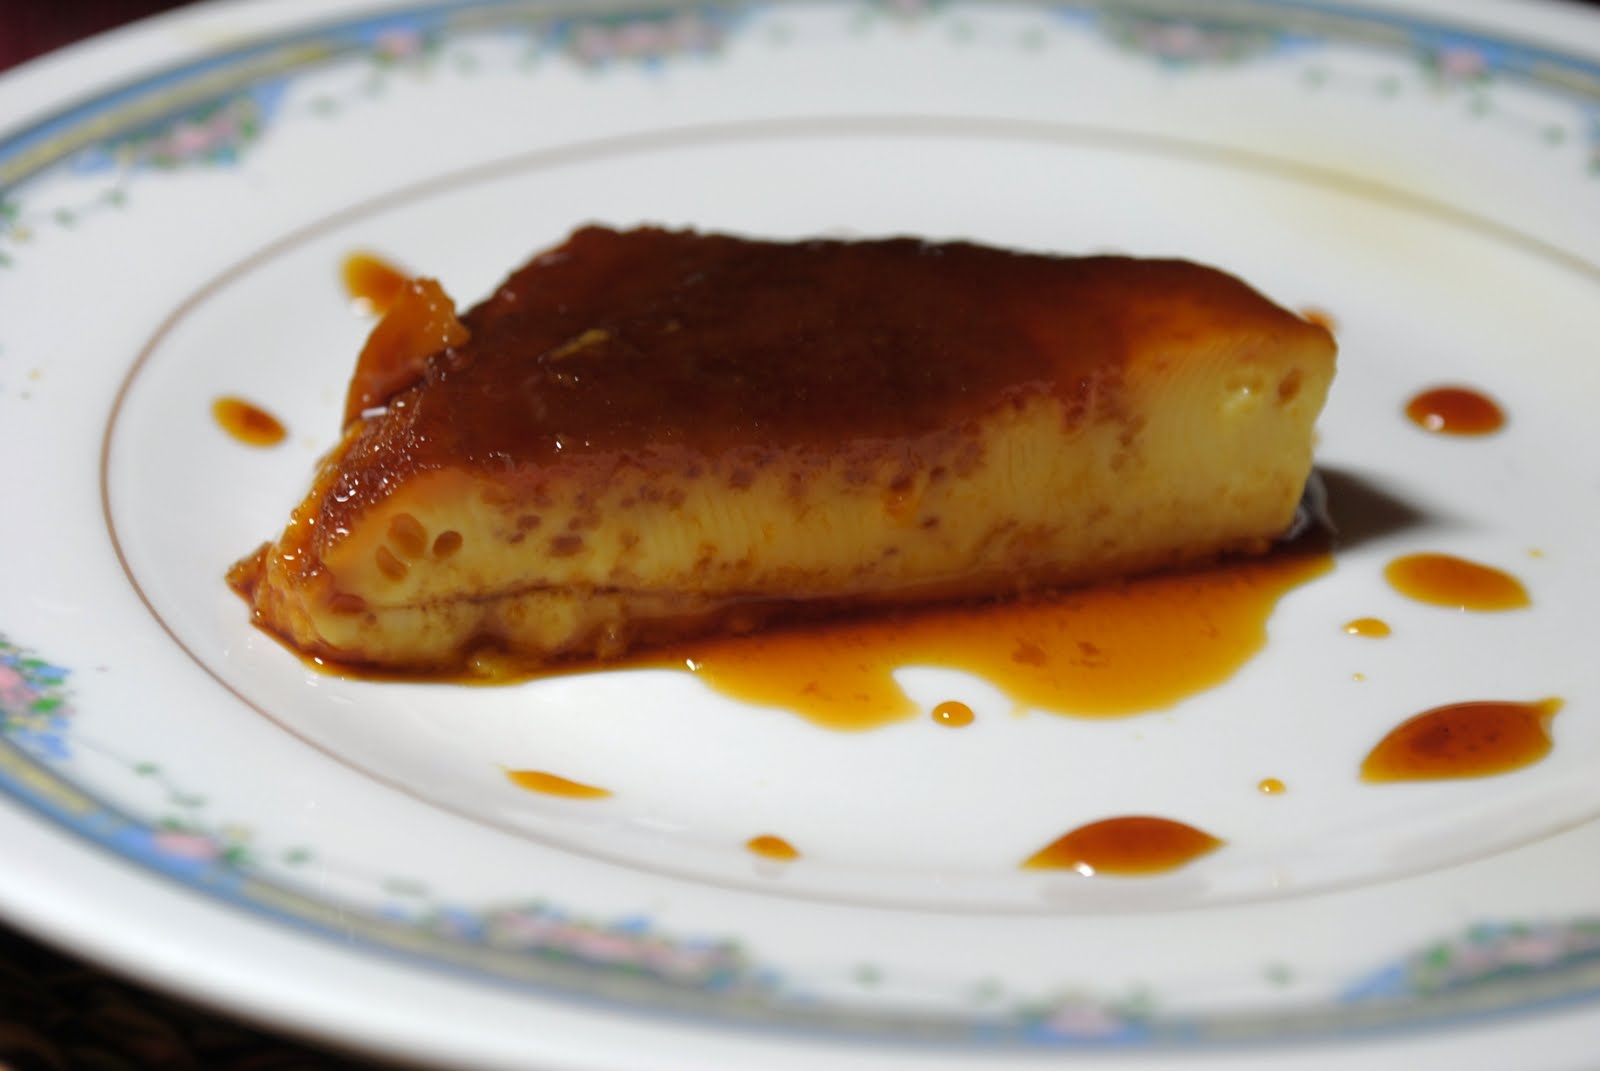
The final result was an amazing dish- well worth the multiple tries(which is now history, now that I know this much easier way to make caramel). The orange juice was a great addition - in fact, the next time I might even try to make this without the caramel. The orange flavour is subtle, yet very much there and makes this so much more than just a caramel pudding. And for all those who are skeptical, the pudding didn't curdle with the orange juice; and I didn't even bother sieving the custard mixture before baking it.

Orange Caramel Pudding
 Adapted from this recipe by Sanjeev Kapoor


Ingredients:
Sugar - 1/2 cup for caramel

Eggs - 4
Sugar - 1 cup (castor sugar)
Orange juice - 1 cup
Orange rind 1 tsp-  boiled for 5 minutes in half a cup of water, cooled and then added to the orange juice.

Method:
1. Bring out the individual ramekins or glass baking dish in which you intend making the pudding.
For the caramel:
a.In a heavy bottomed pan, spread the sugar in an even layer - look here for step-by-step instructions and pictures.
b. Heat on medium heat for about 8-10 minutes, till the sugar starts to melt in its own water and starts to turn brown. Slowly bring the sugar from the edges to the centre so that it melts uniformly but do not over stir. When it turns to a nice, brown, caramel coloured liquid (approx 5 minutes), cook for another 2-3 minutes and then take off flame and immediately pour into the ramekins or baking dish and swirl around so that the bottom and sides are coated with the caramel. Don't worry if this is not even.
2. Beat the eggs and sugar together till creamy. Heat the orange juice, orange rind reserved liquid mixture for 3 minutes, cool a little and then slowly add to the egg and sugar mixture.
3. Transfer this mixture (you can sieve at this stage) into the ramekins or baking dish. Pre-heat the oven to 180C
4. Fill a bigger oven proof bowl halfway with boiling water, place the ramekins or the baking dish into it, making sure the water will not be able to enter the bowls.
5. Bake in the pre heated oven at 180C (350F) for 45 minutes (the ramekins may take less time, check at 30 minutes.) The pudding will be set.
6. Remove and cool. To serve, turn upside down onto a plate - the caramel syrup will top the pudding since it is at the bottom.


Thursday, March 17, 2011

Eggless Banana Walnut Muffins

MIL is staying with us this month - I had to really persuade her to come this time, since she was quite reluctant to make the trip from Coimbatore. Age related hearing loss has made her a little reluctant to socialize. But she did come finally and its been nice to have her here with us. My daughter especially seems to bloom a litte bit more every time one of her grandparents is around.

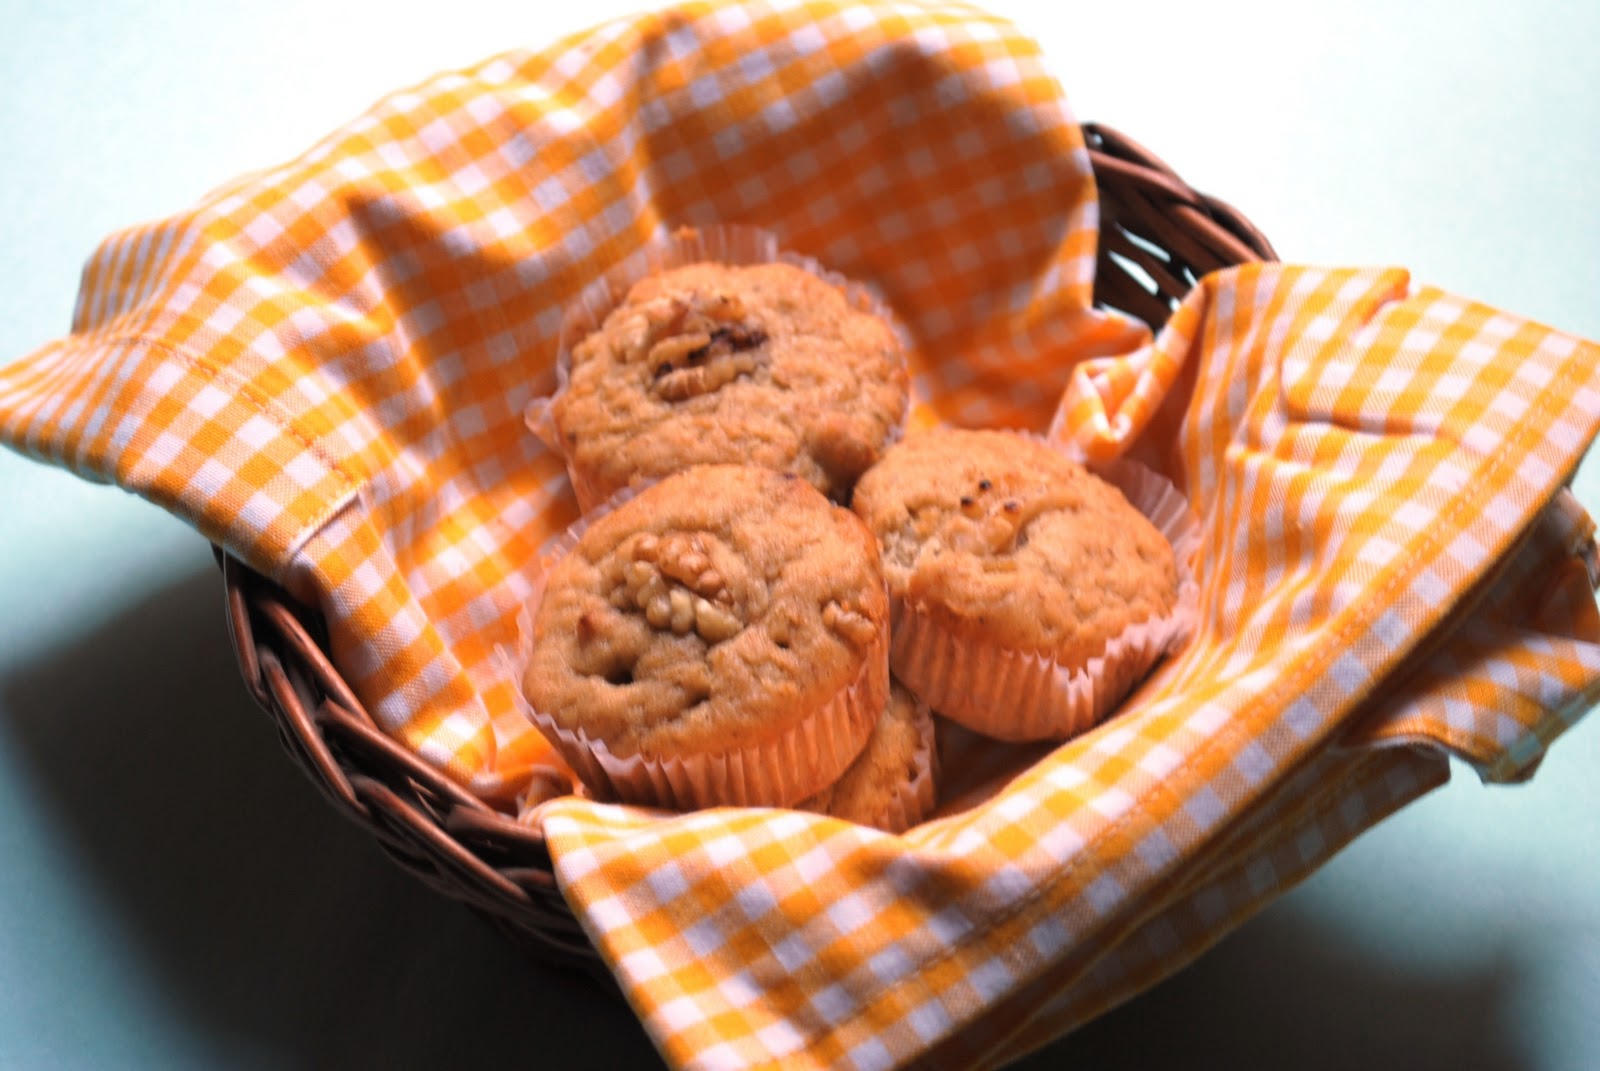
We took her out for lunch last weekend (Punjab Grill - very good food and great service - pleasantly surprised) and while walking around the mall, she spotted some cupcakes at a cafe. She asked about them but they had egg in them, so I decided to make some eggless muffins at home. Banana muffins seemed the easiest and she likes nuts, so decided to modify this recipe of mine for white chocolate walnut muffins, to make some banana walnut muffins.

It barely took me about an hour from start to finish. I packed a couple in my daughter's tiffin the next day and she couldn't stop beaming with delight at the chocolate chips. This is a light muffin but nice and flavourful.The sugar can be brought down a notch since it was a little sweet for me.

Eggless Banana Walnut  Muffins
Ingredients:
1/2 cup butter
1/2 cup brown sugar (I would bring this down by a couple of tablespoons)
1 banana (medium)
3 tbsp milk
3/4 tsp vanilla essence
1 cup maida
1/2 tsp baking powder
1/2 tsp baking soda
salt - a pinch
1/2 cup walnuts (toasted on a skillet or in an oven, peeled and broken into half) You could use chocolate chips, I did that for half of them because my daughter wanted some.

1. Blend the banana with the milk and vanilla essence with the hand blender into a puree.
2. In a bowl, cream the butter and brown sugar with a hand blender till light and fluffy. Add the banana puree and then blend again.
3. Sift the flour with the salt and the baking powder into thebowl of batter and fold in gently till just combined. Do not overmix
4. Fold in the walnuts (or the chocolate chips) reserving a few to decorate on top. Pre-heat the oven to 180C (350F).
5. Grease a muffin pan or line them with cupcake liners. Drop spoonfuls of batter into the muffin pan and bake for 15-20 minutes (took 20 minutes for me). A toothpick should come clean when poked into the muffins.
6. Let stand till cool and then unmould from the muffin pan.


Saturday, January 8, 2011

A Nigella Spread for New Year's Eve


This New Year's Eve was the third consecutive year we stayed home - After many, many years of partying the night away from home.  2008 saw our dear friends from Chennai spending New Year's with us, so we had a great time with them. Then hubby was diagnosed with swine flu on New Year's Eve last year, so that was a very quiet New Year's Eve dinner. This year too, we decided we didn't want to be driving around Delhi in the fog; also since Christmas vacation began, our daughter had been staying up later than usual and we thought it would be so much nicer to have her up with us as well, now that she is older.

So we planned to have dinner with some friends - our neighbours from upstairs and another couple of friends who live down the road, came over. It was a lovely evening - great conversation, excellent company, wine and music and a sit-down dinner to complete things.

The menu came together just the day before for me - a combination of things I had in my mind for some time - they fitted together very well. For appetizers there was -  

Bacon Wrapped Dates   - A lovely mix of sweet and salt flavours - seedless dates wrapped in strips of bacon, held together with a toothpick and then roasted in an oven at 180C for about 25 minutes. Easy Peasy as my daughter would say.

This is adapted from Nigella's recipe in her book Nigella Express - it has the usual chickpeas pureed into a slightly grainy hummus, but with a twist in the form of roasted red peppers being added to the mix. Garlic, olive oil, lemon juice, salt and a dash of paprika powder make up the rest.


Crudites with Hung Curd Dip 


This is basically yoghurt, about 500ml, hung for about an hour or so and then mixed with salt, a tsp of chopped garlic and a tbsp of chopped coriander. Squeeze of lime if needed and sometimes a tbsp of cheese spread mixed in.


Cocktail Sausages

Another Nigella Express recipe - Sausages tossed in honey, sesame oil and soy sauce and then roasted for 40 minutes at 180C - I cut up the sausages though, instead of roasting them whole as in the recipe.

 A from upstairs, brought a  lovely broccoli salad and I had baked this Rapid Light Wholemeal Loaf earlier in the day

And for the mains there was
Spanish Chicken baked with onions and potatoes 

The original recipe from Nigella, was supposed to have Chorizo sausages, I had some Chorizo salami which I thought I would add half an hour before it was done - but I forgot. Still good though, the flavour of the roasted onions mingled with orange zest marinated chicken was fabulous - a must try addition to your party menu, because it literally cooks itself while you spend time with your guests.


And a creamy Meatball Stew with Chickpeas, Sweet Potatoes and Pumpkin served over steamed rice
This stew is perfect for winter - it brings a touch of the Carribean summer and warms you up. Nigella's recipe had store bought "mini meatballs" - I made them from scratch using minced meat (lamb or goat mince is fine) mixed with bread crumbs, egg, oil and some herbs and spices. Make balls and then deep fry or bake. These were then simmered for about an hour and a half in coconut milk and stock along with chickpeas, sweet potato and pumpkin (in lieu of the butter squash in the original recipe).


And to end the meal and begin a New Year- a decadent Chocolate Pudding


Now while, I did plan the Pudding and the Hummus - I have made the pudding before and the hummus is something I have been wanting to try - the Spanish Chicken and the Stew just came together at the last minute (especially the chicken which I made up my mind about only in the afternoon!) and it all turned out to be Nigella's recipes!! Truly, her stuff is eminently doable and so so hassle free.


 I also made some Chocolate Fudge for my daughter to have through her vacation - though mine had Macadamia Nuts and Raisins in it and she picks all the nuts out!

For any of the recipes, just mail me at peppercornmill AT gmail DOT com or leave a comment naming the dish you want a recipe for and I will be happy to mail it to you.

Maison de Cupcakes is hosting the first edition of a brand new event called Nigella Forever - this time's theme is centred around Seasonal Sensations  - "anything Christmassy, anything celebratory for New Year, do party canapes or even wintery comfort food for snow days".


Tuesday, December 21, 2010

White Chocolate, Oatmeal and Macadamia Nut Cookies

I picked up a bag of macadamia nuts on my trip to Australia earlier this year and apart from eating some of the nuts as is, it has been sitting in my pantry quite untouched. I remembered the nuts while looking for a new recipe to try this week - when I spend time baking a couple of Christmas cakes and my daughter is nagging me to bake the Gingerbread People - I figure, in for a penny, in for a pound! Last year I had made these scrumptious White Chocolate, Cherry and Oatmeal Cookies, so I thought I could use macadamia nuts in the recipe instead. This combination is apparently a classic as well - the creamy white chocolate contrasting well with the nuts.


I dropped teaspoonfuls of the cookie dough and they came out a little thin and crunchy - thats how I like my cookies. If you like them softer and bigger, then you can drop more batter at a time and / or take them out 2 minutes earlier. The cookies will be soft to touch when they are done (and may look like they are undercooked) but they will harden a little as they cool. As long as they are pale brown on top and can be removed carefully with a spatula, they are fine. And no, for those who wonder, you cannot taste the oatmeal in the cookies. These cookies are lovely and crumbly, crisp outside and soft inside and nutty all over - one of the best I have made at home!

Wishing you a Merry Christmas and a very Happy New Year!


White Chocolate, Oatmeal and Macadamia Nut Cookies
Flour - 1.5 cups
Oatmeal - 1/4 cup (I use quick cooking oats and run them for half a minute in the mixer)
Baking powder - 1 /2 tsp
Baking soda - 1/2 tsp
salt - 1/4 tsp

Unsalted Butter - 110 gms (1/4 lb) - if frozen, bring to room temperature by microwaving at 10 second intervals, till just soft
Castor sugar - 1/4 cup
White Chocolate - I used Lindt - 100gms, chopped
Egg - 1
Vanilla essence - 1 tsp

Macadamia Nuts - 1 cup, toasted and chopped

1. Put the chopped chocolate into a glass bowl and place it inside a bowl of heated water and microwave in 20 second intervals till melted and smooth. Or put the chopped chocolate into a steel bowl and then place inside another bowl of water and heat gently over a low flame till it melts. Don't let the water come to a boil.

2. Cream the butter and sugar for about 2-3 minutes till it is smooth and shiny.

3. Beat the egg separately and add to the creamed butter and sugar along with the vanilla essence. Beat on medium till mixed in - about -2 minutes.

4. Sift together the flour, oatmeal, baking powder, baking soda and salt. Gently combine into the creamy butter sugar mixture - one third at a time - and run the blender on slow till just combined.

5. Pre heat the oven to 170C/325 F. Add the cooled and melted white chocolate and the macadamia nuts and combine well with a wooden spatula.

6. Grease a baking tray and dust with flour. Drop teaspoonfuls of the cookie batter leaving enough space for them to spread and flatten when they bake. A small tray will be able to accomodate only 5 cookies at a time.

7. Bake for 20 minutes at 170C. Remove and transfer carefully to a tray and leave to cool and harden. Store in an airtight container.


And for all those who love Nigella's cooking (and even those who don't!) - Maison Cupcakes is beginning a new event called Nigella Forever. "Each month there will be a theme and you can blog about any of Nigella’s recipes which fit in this theme.  The opening theme is “Seasonal Sensations”, "deliberately loose and fancy free so that as many of you get into the Nigella swing of things from the outset.
This month you can cook or bake anything Christmassy, anything celebratory for New Year, do party canapes or even wintery comfort food for snow days". 
Knowing the number of recipes I have cooked (and posted here) from her book, I am definitely going to enjoy this event.

Sunday, December 5, 2010

Christmas Cake preparations - and Milestones

I have been tardy this year in soaking the dry fruits for the cake I make for Christmas every year. I usually try to do it mid-November, or atleast by the 25th, but this year we seemed to have a million things to do on the weekends this month.
Started with our Diwali celebration at the beginning of November, in Mumbai with family, then there was a breakfast picnic like this one, outdoor parties before it becomes too cold, dance and musical performances -The Manganiyar Seduction (an international act of Rajasthani folk musicians performing in 36 boxes stacked one on top of the other in 4 rows) was particularly spectacular!  - a children's literature festival called Bookaroo which has managed to reach its third year with much support from enthusiastic parents and children and the driving force of Swati Roy and Sanjay Roy who own Eureka - the children's bookstore.


In December, the 3-day Jazz Utsav was this weekend - we went on Friday, which was the opening day, and were treated to some scintillating performances - especially the one by Ranjit Barot and Talvin Singhs' bands.
The Delhi International Arts Festival (DIAF) also began this weekend - it has a smorgasbord of events happening till the 12th December including some excellent classical dance performances and theatre. The first ever exhibition of Anish Kapoor in India - (Anish Kapoor is a celebrated contemporary sculptor), opened this week at the newly refurbished National Gallery of Modern Art - and while I don't pretend to understand contemporary art and installations, I am definitely not going to miss an opportunity to broaden my horizons. As I tell my daughter - its OK to not like something after you have tried it, but you should atleast try everything once.
Then there is the Old World Theatre Festival at Habitat Centre, Christmas fairs organised by the various embassies, the Christmas decorations inside hotels and malls to gawk at....November to February is such a nice time to do things in Delhi - its what makes the rest of the year bearable!

These are some of the pics from the German Christmas Fair yesterday - my daughter and I had a nice time picking through the stalls and looking at the christmas stuff all over. There was a stall by the Swiss German Bakery where I picked up some wonderful baguette and sour dough bread as well as the aromatic Lebkuchen - a traditional Christmas cookie/cake which is quite strongly spiced with cinnamon and cloves. The reason I call it cookie/cake, it though it is a cake, it is not soft, melt-in-the-mouth, but quite crumbly in texture with a nice crust. I was happy with my glass of German beer, a quiche and some bratwurst (which was quite pungent I must say) while K devoured a lovely chocolate croissant. 

Anyway, suffice to say that I have enough excuses to have postponed the soaking this long. But I got up early this morning and managed to soak all the dry fruits and nuts. They will sit there for the next two weeks till I bake the cake on the 22nd or 23rd December - the cake tastes better later, as the flavours have time to meld.

'Tis the season to be jolly and all that - well, Peppermill has turned 3 - yes, can't believe it, but my first post was in November 2007. Thank you everyone who reads this blog, for all your encouragement and support and for reaching out to me - I have received much more than I can give, and for that I am thankful.


Don't need an excuse to celebrate though, so if you have always thought of baking a fruit cake, now's the time to start! Its a small list of ingredients and all readily available. For those who don't want to steep the fruits in alcohol, just use orange juice. Also, there are a lot of recipes which recommend "feeding" the cake with alcohol, after its baked (some days before Christmas) till its finally eaten. I don't - I also don't cover it with marzipan icing which is another traditional thing to do. I like my cake slices just as they are - filled with fruit, soft and dense and with that lovely dark colour and rich smell.


These are the ingredients I soak

Mixed Dry Fruit chopped - 350 gms (choose from currants,sultanas,raisins, dates, fig, apricot)

I use equal quantities of currants,raisins, dates,apricots and plums (dried)
The dry fruits are soaked 3-4 weeks in advance in about 1/4 cup of dark rum (brandy can also be used)

For the complete recipe and the earlier post- look here

Or you can also try Chocolate Gingerbread Men or White Chocolate, Cherry and Oatmeal Cookies