Showing posts sorted by relevance for query bake. Sort by date Show all posts

Monday, January 16, 2012

Herbed Dinner Rolls


Its been a long time since I baked bread - what with all the cookies and cakes which happened in the last couple of months, bread baking took a backseat. Woke up one morning last week, with a yen to bake and when I asked my daughter what she would like to bake, she said bread. I was immediately excited , though felt it might be completely mistimed considering how cold it is right now. I wasn't even sure whether the bread would rise with such a cold wind blowing outside.


But K hauled out the Bread Book by Sara Lewis (from which I have previously made an Olive and Feta Cheese bread, Carrot & Mustard Bread, Stuffed Mushroom and Garlic Baguette and Rapid Light Wholemeal Loaf) and we pored over the recipes on each page - she finally picked the Fancy Dinner Rolls, "because of the shapes". So dinner rolls it was then. She was thrilled to be kneading the dough for the first time and considering how fussy she is otherwise about getting icky stuff on her hands, didn't seem to mind the mess at all sticking to her fingers!  I finished up with the rest of the kneading and we set out the bowl of dough in the balcony to double. And it rose beautifully!

She then shaped half the dough into pull apart rolls - basically , you make small balls of the dough and arrange them in the baking tray or dish in a kind of circle so that they touch each other. They stick together when they prove for the second time so that after they bake, you have to "pull them apart". The remaining dough I shaped into a simple coil and a knot.

The shaped rolls rose for second time and after brushing them with a simple egg wash, I sprinkled the round rolls with sesame seeds and fennel seeds while the coiled ones were topped with some fresh basil from my potted plant. The rolls baked for about 10-15 minutes each and the baking bread filled the house with that heavenly, yeasty aroma which makes you want to grab the freshly baked bread and slather it with some butter and eat it just like that!


Herbed Dinner Rolls
All purpose flour (maida) - 475g (4 1/2 cups)
Butter - 2 tbsp
Sugar - 1 tsp
Salt -1 tsp
Fast action dried yeast - 1.5 tsp
Warm Water - 275ml

Egg yolk - 1 to glaze
water - 1 tbsp
sesame seeds, fennel seeds, fresh basil (one can also use poppy seeds, paprika and fresh rosemary)

1. Put the flour into the bowl and rub the butter into it till it resembles fine breadcrumbs.
2. Add the sugar, salt and yeast and then slowly incorporate as much warm water as is needed to make a soft dough.
3. Knead well for 5 minutes until dough is smooth and elastic but not too sticky. Put the dough into the bowl and cover loosely with an oiled plastic wrap and leave in a warm place to rise till doubled in size - about an hour
4. Knead the dough again on a lightly floured surface and divide into 12 pieces. Grease a baking sheet or 2 trays
For pull apart rolls: - take 2 pieces of dough and divide each into 3 small balls. Arrange into a circle or 2 triangles so that they touch each other.
For coils - take 2 pieces of dough and shape each one into a rope 10 inches long and then coil each rope into a spiral.
For knots - take 2 pieces of dough and shape each one into a rope about 9 inches long. Loop one end of one rope and then thread the other end through the loop to make the knot. Repeat
5. Cover the shaped rolls with loosely oiled plastic wrap and leave in a warm place to rise for 20 minutes to half an hour.
6. Brush the tops of the rolls with egg yolks mixed with 1 tbsp of water and sprinkle with the seeds or herbs.
7. Bake in a pre heated oven at 200C for 10 -15 minutes until the tops are golden and the base sounds hollow when tapped with the fingertips. Transfer to a wire rack and cool completely.


Tuesday, December 21, 2010

White Chocolate, Oatmeal and Macadamia Nut Cookies

I picked up a bag of macadamia nuts on my trip to Australia earlier this year and apart from eating some of the nuts as is, it has been sitting in my pantry quite untouched. I remembered the nuts while looking for a new recipe to try this week - when I spend time baking a couple of Christmas cakes and my daughter is nagging me to bake the Gingerbread People - I figure, in for a penny, in for a pound! Last year I had made these scrumptious White Chocolate, Cherry and Oatmeal Cookies, so I thought I could use macadamia nuts in the recipe instead. This combination is apparently a classic as well - the creamy white chocolate contrasting well with the nuts.


I dropped teaspoonfuls of the cookie dough and they came out a little thin and crunchy - thats how I like my cookies. If you like them softer and bigger, then you can drop more batter at a time and / or take them out 2 minutes earlier. The cookies will be soft to touch when they are done (and may look like they are undercooked) but they will harden a little as they cool. As long as they are pale brown on top and can be removed carefully with a spatula, they are fine. And no, for those who wonder, you cannot taste the oatmeal in the cookies. These cookies are lovely and crumbly, crisp outside and soft inside and nutty all over - one of the best I have made at home!

Wishing you a Merry Christmas and a very Happy New Year!


White Chocolate, Oatmeal and Macadamia Nut Cookies
Flour - 1.5 cups
Oatmeal - 1/4 cup (I use quick cooking oats and run them for half a minute in the mixer)
Baking powder - 1 /2 tsp
Baking soda - 1/2 tsp
salt - 1/4 tsp

Unsalted Butter - 110 gms (1/4 lb) - if frozen, bring to room temperature by microwaving at 10 second intervals, till just soft
Castor sugar - 1/4 cup
White Chocolate - I used Lindt - 100gms, chopped
Egg - 1
Vanilla essence - 1 tsp

Macadamia Nuts - 1 cup, toasted and chopped

1. Put the chopped chocolate into a glass bowl and place it inside a bowl of heated water and microwave in 20 second intervals till melted and smooth. Or put the chopped chocolate into a steel bowl and then place inside another bowl of water and heat gently over a low flame till it melts. Don't let the water come to a boil.

2. Cream the butter and sugar for about 2-3 minutes till it is smooth and shiny.

3. Beat the egg separately and add to the creamed butter and sugar along with the vanilla essence. Beat on medium till mixed in - about -2 minutes.

4. Sift together the flour, oatmeal, baking powder, baking soda and salt. Gently combine into the creamy butter sugar mixture - one third at a time - and run the blender on slow till just combined.

5. Pre heat the oven to 170C/325 F. Add the cooled and melted white chocolate and the macadamia nuts and combine well with a wooden spatula.

6. Grease a baking tray and dust with flour. Drop teaspoonfuls of the cookie batter leaving enough space for them to spread and flatten when they bake. A small tray will be able to accomodate only 5 cookies at a time.

7. Bake for 20 minutes at 170C. Remove and transfer carefully to a tray and leave to cool and harden. Store in an airtight container.


And for all those who love Nigella's cooking (and even those who don't!) - Maison Cupcakes is beginning a new event called Nigella Forever. "Each month there will be a theme and you can blog about any of Nigella’s recipes which fit in this theme.  The opening theme is “Seasonal Sensations”, "deliberately loose and fancy free so that as many of you get into the Nigella swing of things from the outset.
This month you can cook or bake anything Christmassy, anything celebratory for New Year, do party canapes or even wintery comfort food for snow days". 
Knowing the number of recipes I have cooked (and posted here) from her book, I am definitely going to enjoy this event.

Saturday, January 7, 2012

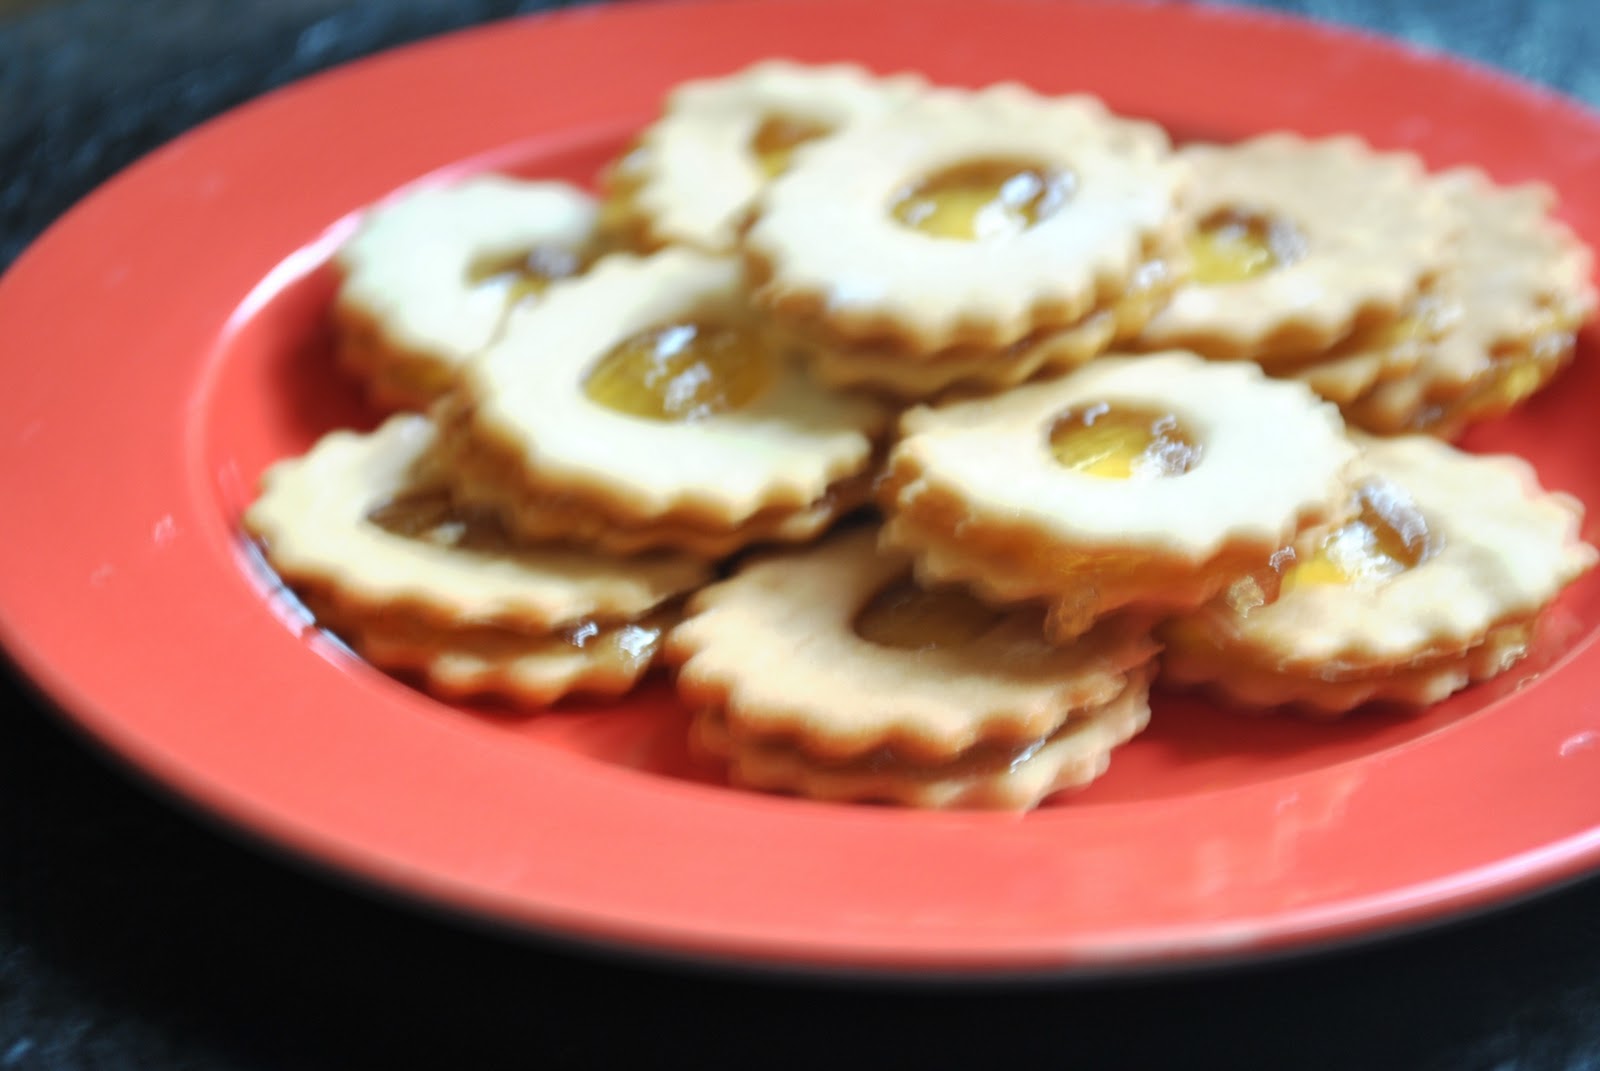
Jam Sandwich Cookies (Jim Jams)

 My niece and nephew are visiting from Mumbai for the Christmas hols and its been great fun having them here. The lil' one at 3 is a complete delight and my 6 year old daughter is thrilled to have someone younger than her. My niece is now 12 and she has grown into such a poised, mature girl :) Its always nice catching up with SIL as well. \

The kids were asking for cream biscuits (which is what we call cookies in India) the other evening so I asked them whether they wanted to bake jam biscuits. My niece was especially thrilled at the idea since she wants to learn to bake. So, I gave her the ingredients and she measured them out, kneaded and rolled and very painstakingly applied the jam gently on the cooled cookies before sandwiching them. She was so pleased with the biscuits, she couldn't stop beaming. K was suitable adoring of her elder cousin and even forgot to even ask to taste the batter at every stage.

I divided the dough into two parts, one part went into making the jam cookies and the other we mixed in candied fruit (Tutti Frutti) into the dough and made cookies from it. I had rolled out the jam cookie dough a tad too thin than needed so it was a bit crisper than needed. You could also cut out the cookies after making a roll of the dough - but the dough might be a bit too soft for that. I did cut out the dough for the Tutti Frutti cookies and they were thicker.


The Jam cookies were a hit with the kids - which one of us didn't like those jam filled biscuits!!And they did exactly what I used to = first took apart the biscuits, licked the jam from both sides and then ate the biscuits! Somethings never change :)

 Jam Sandwich Cookies

Flour - 1 1/2 cups plus more for dusting and kneading
Salt -  a pinch
Egg - 1 (can omit, use 2 tbsp milk and 1 tsp baking powder)
Butter - 1/2 cup
Castor Sugar - 1/2 cup
Vanilla extract - 1 tsp
Milk - 1 -2 tbsp (as required)

Jam - any jam, I used pineapple - about 1/4 cup

1. Cream butter and sugar together till shiny. Add and egg and then beat till fluffy.
2. Sieve flour and salt together and then gently fold into the egg mixture.
3. Add vanilla extract and gently mix together to form soft dough, If too dry, add about a tbsp or two of milk. If too sticky, add flour one tbsp at a time till you are just able to form a rough ball of dough.
4. Wrap the dough in cling film and chill in the refrigerator for about an hour till firm.
5. Sprinkle flour on the work platform and roll out the dough into a rectangle about 1/2" inch high.
6. Cut with a cookie cutter, remove the uncut versions, form into ball and roll out again. Repeat till the dough is exhausted.
7. This step is optional, if you have a small cookie cutter or a tiny bottle top, you could cut out holes in half of the cookies to form a window for the jam to be seen on top.
8. Pre heat the oven to 180C, arrange the cookies in batches on a greased baking tray, leaving some space in between.
9. Bake for 10-15 minutes, depending on the thickness of the cookies and number of cookies on the tray - start checking after 6 minutes to ensure they are just cooked and don't get burnt. Remove when tops are firm and just starting to change colour.
10. Remove. cool and bake next batch. Once all the cookies are baked and cooled, spread jam on the the flat side of the cookies without holes on top and cover with the cookies with holes. Press gently and store in piles in an airtight container.

Monday, September 28, 2009

Cheesy Pasta Bake

Mac & Cheese has somehow not held me in thrall though this largely American dish seems to be a sure fire crowd pleaser. I used to be mystified about the various recipes that peppered the foreign magazines my circulating library in Chennai delivered. There was “classic Mac n Cheese”, “Mac n Cheese with a twist”, “Mom’s secret recipes” – I couldn’t imagine the to-do over what is essential cooked macaroni baked with a rich cheese sauce. Apparently, this dish became even more popular when Kraft introduced its instant version, packaged as a “meal in a box”, where the cheese sauce was made from powder base – this idea got a big boost with the World War II rationing and working women which meant that meat, dairy products and time were all in short supply.

Now, I’m no food snob and actively encourage the “to each his own” attitude; I suspect that the blandness of this dish is what makes me stay away. We usually like a nice pesto pasta and an Arrabiata sauce is also a great favourite with us. My daughter who dotes on pasta usually gets a version which has lots of veggies in it, a mild tomato sauce which is finished with a dash of milk and gratings of cheese.

But there are those days when you crave carbs and lots of cheese – okay, okay, not you, It’s just me! But I do. This cheesy bake was made on one such day. I did put in veggies though, since I couldn’t imagine eating just pasta and cheese and also added a couple of tablespoons of pureed tomatoes to give it some more flavour. It's a modified version of Mac & Cheese I guess....

It was deliciously satisfying to cut into that cheesy white sauce covered bake…..so tell me, what do you do when the craving for carb strikes? What is the dish that acts as an immediate remedy? – is it rice and sambar? Or khichdi? Or aloo paratha?

Cheesy Pasta Bake

Saturday, March 14, 2009

Spinach & Corn Quiche

The Quiche which is now considered predominantly a French dish, originated in a region in ancient Germany which was renamed Lorraine when it became part of France. Ergo - the term "Quiche Lorraine" ( "quiche" from the German word "kuchen' for cake).
Larousse Gastronomique describes it as "An open tart filled with a mixture of beaten eggs, creme fraiche and pieces of bacon, served hot as a first course or hors d'oeuvre". The cheese and onion additions, among others, came much later and it was the Quiche Lorraine which became fashionable in the United States in the 1970s as an appetizer. Since it adapts well to a variety of ingredients, soon innovative quiches with fillings like anchovy, olives and ham became the favourite of creative cooks. However, it was done to death in that decade and by the Eighties it lost its favoured status.

The quiche, however, remains a favourite of mine since I discovered it, and it's a bad restaurant which manages to put me off with an "eggy" smell or by smothering it in cheese. An interesting filling with a nice crust is all a good quiche needs and though I hesitated making the crust for a long time sticking to "crustless" quiches, I finally took the plunge. I'm so glad I did - it was really much easier than what I thought it would be.


This quiche from Jugalbandi had the most amazing crust and this quiche on Sunita's World a very interesting filling - so I did what any self respecting Gemini who had to choose would do - I combined and adapted both the recipes! :).

What I got was a lovely quiche with a nutty crust and a great tasting filling. Spinach and corn seem to be the most popular quiche filling and it's easy to see why, once you eat just a slice of this quiche. I kept the egg and the cheese to the minimum and let the sesame seeds in the crust and the spinach in the filling do the talking. This made for a great meal with soup on the side and I even had a leftover slice for a snack the next day.


Crust:
1 &1/4 cup whole wheat flour
1/2 cup quick cooking oats and 2 tbsp sesame seeds, toasted and powdered
1/4 cup chilled water
5-6 tbsp olive oil
1/2 tsp red chilli flakes
1/4 tsp cumin powder
1/2 tsp baking powder
3/4 tsp salt

Filling:
1 cup sweet corn
1/2 cup chopped spinach
2 tbsp fresh basil leaves, chopped
1 tsp olive oil
1 medium onion, chopped
3 cloves garlic, finely chopped
1 tsp Freshly crushed black pepper
1/2 tsp red chilli flakes
1 tsp dried herbs
salt to taste
1 egg
1/2 cup milk
4 tbsp cheese grated

1. Rub all the ingredients for the crust together, in a large bowl, except the water. Adding the water slowly, mix the ingredients together till just combined into a smooth but not sticky dough, taking care not to knead.
2. Lightly grease a pie dish (preferably with a removable bottom) and place the ball of dough in the centre. Pat with both hands downwards and outwards till it spreads to cover the bottom and the sides of the pie dish. Prick all over with a fork, wrap in cling wrap and chill for half an hour.
3. Pre heat the oven to 220 C, remove the pie dish from the 'fridge and cover with foil. Fill it with kidney beans (rajma) and bake blind for 25 minutes. Remove foil and bake for another 20 minutes. Cool and keep aside.
4. While the crust is baking you can start on the filling. Heat the oil and saute the onions till they turn soft and translucent - 5 minutes. Add the garlic, basil leaves, dried herbs, chilli flakes, corn and salt and cook for 3-4 minutes. Add the spinach and coriander leaves and saute for just a minute and remove from flame. Cool the filling.
5. Break the eggs in a bowl and beat along with the eggs and a pinch of salt. Pre heat the oven to 180C
6. Spoon the cooled filling into the baked crust and smooth over with a spatula. Pour the beaten eggs and milk over the filling covering it evenly. Bake in the oven for 35 minutes till set, at 30 minutes, remove the pan, sprinkle the grated cheese over the quiche and bake for the last 5 minutes. Let rest for a bit and then cut and serve warm.
7. If you need to warm it, use the grill or oven and not the microwave.

PS - I made this again on the weekend, this time using the tofu filling in J&B's recipe and it was equally fabulous! I substituted the chard with spinach and the basil and thyme with coriander and mint leaves, made the crust a day before -perfect for an appetizer though my spice quotient left some of my guests gasping! I blamed the really fresh red chilli flakes I got from Dilli Haat for that! ;)

So go on, try this one out, don't let the idea of French cuisine daunt you - its as easy as pie ;)


Friday, February 27, 2009

Aubergine & Tofu Bake


I have Vaishali of Earthvegan to thank for this dish and her first food blog event - Its a Vegan World. She is one of my favourite bloggers and I love how she does so many interesting things with recipes. Of course, we all know how much she loves her bananas ;)! But seriously, though I am not a vegan, I have learnt a lot about how one can adapt recipes without losing any of the flavours.
So, while trying to think of something to make for her event which was not a pasta based dish (the theme is Italian this time), I really racked my brains and pushed myself to come up with something as original as she might have thought up. AND I promised myself not to take the easy way and peek into her blog .....

A tall order indeed then - to make an Italian dish which was vegan and not pasta based. I finally remembered that I make a pretty decent Italian aubergine bake (which turns out a bit like this recipe) and if I did away with the milk, parmesan cheese and the egg white I usually added - I could adapt it quite well to suit the vegan theme. Once I started thinking on those lines, I decided to add some tofu with the aubergines and to substitute the parmesan cheese with a soy milk based white sauce.The funny part is that as I adapted and improvised the recipe it almost resembled a vegan moussaka! Well, call it what you want but it sure tasted delicious and made a great one dish meal for us. The bread crumb crust was crisp and golden while the tofu bits combined with the creamy mashed potatoes and the crispy aubergines made for an interesting texture. Sending this to Vaishali's first event - Its a Vegan World - Italian.

Aubergine & Tofu Bake
Aubergines
1 (bharta type) round aubergine - medium, sliced in 1/4" thick slices and sprinkled with salt and set aside for about 30 minutes. (the aubergine slices may look too much in the beginning, but will shrink after roasting)
1 tsp dried thyme
1 tsp freshly crushed black pepper
2 tbsp olive oil

Tofu
200gm extra firm tofu cut into 2" slices, sprinkled with tabasco sauce, salt and pepper and kept aside.
50 gm extra firm tofu crumbled
1 big onion, finely chopped
3 tomatoes, chopped
5 garlic cloves, minced
1/2 tsp red chilli powder
1 tsp jeera powder
salt to taste
1tsp olive oil
5-6 fresh basil leaves

Potato
3 medium potatoes cooked in a pressure cooker till soft, peeled and mashed along with the ingredients below:
salt to taste
crushed black pepper
1 tsp olive oil
1/4 cup soy milk

Breadcrumbs
1 cup bread crumbs (I usually toast leftover bread, powder it and store in the fridge)
1 tsp dried thyme
salt to taste
minced garlic clove-1
Mix together and keep aside.

Sauce
1 cup soy milk
1 tbsp flour
salt to taste
freshly crushed black pepper
2 tsp olive oil

1. Arrange the salted aubergine slices (after draining any liquid) on a baking tray, sprinkle with the dried thyme and pepper and roast in a pre heated oven at 200C for about 15- minutes
2. Heat 1 tsp olive oil in a pan, add the minced garlic and finely chopped onion and saute 10 minutes.
3. Put in the cumin powder, red chilli powder, tomatoes and salt and fry for another 5 minutes till the tomatoes turn mushy. Add the crumbled tofu (not the sliced one), basil leaves and salt and remove after another 3 minutes.
4. Pre heat the oven to 180C, grease a deep 8"oven proof dish and arrange half of the aubergine and tofu slices on the bottom and top with half the tofu tomato mixture and then half of the mashed potato mixture.
Repeat - aubergine & tofu slices,
- tofu tomato mixture
- mashed potatoes.
5. Make the white sauce, by frying the flour on a low flame in 2 tsp of olive oil till it loses its rawness but doesn't burn. Add the soy milk a little at a time and then whisk over a flame till there are no lumps and the sauce thickens and is smooth. (about 7 minutes)
6. Pour the sauce over the pre arranged layers in the oven dish and then cover with the seasoned bread crumbs.
7. Bake the casserole for 30 minutes at 180C till the breadcrumbs are golden. Remove, slice carefully and serve warm.


Wednesday, December 21, 2011

Milk Chocolate Macadamia Biscotti for Christmas


 Biscotti is a crisp (some would say hard) biscuit of Italian origin,traditionally enjoyed  (in Italy) with a wine or orange juice and in places outside Italy with a steaming cup of coffee. The word Biscotti describes its preparation - it is derived from the Latin word biscoctus which means "twice cooked/ baked". It describes foods which were cooked / baked twice so that they lasted longer and could be used to feed soldiers or travellers on long journeys and during wars. Their origin being the town of Prato, they are known as Biscotti di Prato; but they are also commonly called "cantuccini" in Tuscany and Sicily.

The traditional recipe only uses flour, sugar, almonds and eggs while not incorporating butter or yeast. The dough is baked in slabs and when fresh and warm cut into slices and baked once again till crisp. Recent recipes have started incorporating other nuts like hazelnuts, pistachios, pine nuts; baking powder and butter have also been included along with flavourings in the form of almond or vanilla extract and some spices like anise and cinnamon.

I love my cookies a bit crisp and crunchy and don't much prefer the soft ones, so I have always wanted to bake Biscotti. Never got around to doing it though until now. The thought of baking them twice and the fear of them crumbling while cutting them into slices after the first round of baking made it a little daunting, but it was actually all very smooth when I did get around to baking it.

I used milk chocolate (I had a large Cadbury Dairy Milk Fruit and Nut slab a friend had gifted my daughter and she - like me- doesn't always prefer "things" coming in between her chocolate. So I decided to cut it up into chips and use it in the biscotti. I also had some macadamia nuts lying from my trip to Australia and decided to use those as well. I adapted this recipe from Canadian Living.

I had my daughter's best friends over when I was making this so the tiny hands all wanted to shape the logs and they did a good job! My oven couldn't accomodate 14" logs, so I just divided the dough into 3 parts and made three smaller logs. The kids couldn't wait for the logs to be baked and then cool a bit so we could cut slices and I had a tough time restricting how much of the freshly baked logs they could consume - LOL! The slices cut quite easily with a serrated knife - you have to take care to use firm strokes to cut and not linger too much. The middle part of one of the logs was crumbling a bit, but there were a lot of takers for the crumbs, so I didn't have a problem with that :)

The Biscotti came out beautifully flavoured, not too sweet and with just the right amount of crunch from the nuts. They were crisp and made for a lovely snack with just the right amount of hardness. This is definitely a recipe to repeat since it has become a favourite in our house - none of my other cookies have won such all round approval satisfying the picky husband (when it comes to sweets) and the savoury liking daughter.


I have also baked my Christmas Cake with the kids - the one which I have been doing for many years and it is luscious with all the dried fruit inside - I sliced one portion and am dousing the other round cake with small spoons of orange juice till it is ready to be eaten on Christmas. I have another batch of dried fruit soaking with which I am going bake another Christmas cake when my niece arrives and we will have that one for New Year with friends and family. This is a different recipe I'm going to be using for the first time, lets see how it turns out. Have you baked your Christmas Cake - try this recipe here, its easy and you will love the flavour! If you haven't soaked dried fruit, ust steam the fruit for about 7-8 minutes gently in orange juice or rum and rest for 30 minutes, before proceeding with the recipe. Recipe here

Now back to the Biscotti.


 Milk Chocolate Macadamia Biscotti
 Ingredients:

Butter - 1/2 cup, softened
Sugar - 3/4 cup
Eggs - 2
Flour - 2 cups
Baking powder - 1.5 tsp
Salt - 1/4 tsp
Almond Essence - 1 tsp
Vanilla Extract - 1 tsp
Macadamia Nuts - 1/2 cup, chopped (can replace with almonds)
Milk Chocolate chips (I used milk chocolate bar chopped up into small pieces) - 2/3 cup

Method:

1. Cream the butter and sugar in a bowl, beat till smooth and shiny.
2. Add the eggs one at a time and beat well.
3. Mix in the almond essence and vanilla extract into the egg mixture
4. In another bow, sieve the flour and baking powder together. Add to the egg mixture and combine with a light hand till it comes together into a soft dough.
5. Add the chopped nuts and the milk chocolate pieces and mix into the dough.
6. With your hands, divide the dough into 2 or 3 parts, depending on the size of your oven/baking tray.
7. Shape each part into a log about 10-12" long and place on a greased baking tray, then flatten slightly while still leaving the edges rounded, making each long about 3-4" wide. Use flour while shaping the logs in case they are sticking to your hands.
8. Pre heat the oven to 180C and bake for 25-20 minutes, till the tops are just turning golden and the logs are firm. Cool for 10 minutes
9. Cut the logs with a serrated knife diagonally in a firm, swift motion into 1/2" slices each.
10. Stand the slices upright in a baking tray and bake at 180C for 20 minutes, till dry and crisp and base is slightly browned.

Tuesday, November 27, 2007

Poee (Goan Bread)


Goa holds a special place in my heart – we planned our honeymoon in Goa because our dear friends A & S were getting married there the week after our wedding – what better way to start our married life than attending a true blue Goan wedding! It was a fabulous time and we have returned many times since then – always coming away with a yearning to stay back for just a little more time. Goa does that to you. It also leaves the bride and groom locked out of their room on their wedding night, but that’s another story!

We did the touristy thing only that first time – ditching the regimented hotel tour after the first day and preferring to go around on bikes, making up our own itinerary. The churches and temples truly went beyond being mere monuments and I could feel the sense of history and of so many lives and cultures intertwined.

Subsequent visits have been just about not going anywhere except the beach and the shacks, eating and drinking in the company of friends, snoozing on the sands after a dip in the sea and NOT expecting anything to happen on time. Whether it’s been a visit to bring in the New Year with friends 5 years back or attending a wedding this year, we have enjoyed every visit. And know we will be back for more of the sea, sand and susegad - a Konkani word which refers to a laid back attitude and an unhurried pace of life.

Goan cusine is a lesser known area of Indian cusine in my opinion and didn’t get it’s rightful due for a long time. I have always loved eating at my Goan friends’ homes and the Gomantak thali places in Mumbai (I used to spend so much time there and then lived in Bandra for 3 years; Mom was convinced I would end up marrying a Goan!) and though not a great meat eater, have liked many of the dishes they prepare.

While hotel food in Goa is more accommodative to vegetarians, street food is almost always geared towards the meat eaters! Fried fish and fresh batter fried calamari, steaming fish curries and rice, chicken cooked in different styles, lamb vindalhos and pork sorpotels – and all this often accompanied by the rustic Goan bread – the butterfly shaped Poee. Similar to the Pav/Pau made famous by Mumbai’s famous Pao Bhaji, this bread is soft and spongy and can be found in shops as well as the small bakeries in Goa.

While slowly getting accustomed to the chilly days in Delhi as winter is setting in and mentally dreading the even colder temps to come in January, I had this sudden urge one lazy Friday when the three of us had bunked work and school, to bake something; as if the warmth of the oven might permeate the house too. And what better “warming” food to bake than bread!

I had just picked up Madhur Jaffrey’s book Flavours of India from the library and it had a recipe for Poee which seemed just the ticket for my mood.
I looked for other recipes on the net which might give a whole wheat flour version, but surprisingly couldn’t find any (I did find this recipe which is quite close to Jaffrey’s recipe). So I decided to adapt the recipe on my own – after all bread is usually quite forgiving as recipes go.

I replaced a little less than half of the quantity of all purpose flour with wheat flour and half of the water quantity with milk. I also upped the quantity of yeast by one more teaspoon and brushed the tops of one batch of bread with a tsp of butter for a golden brown crust.

The first batch which I baked for 20 minutes at 220 C came out a bit crisper than what I wanted, so I baked the next batch for 15 minutes and reduced the temperature to 200C and they turned out softer.

Though I quite liked the consistency as it was this time, the next time I might try increasing the baking powder by one more teaspoon just to see whether they become spongier.

The bread was good the next day too and when I warmed it up with a pat of butter inside it, my 2 year old couldn’t have enough of it. The brown crust and the soft insides are really satisfying and the lovely smell of the bread baking filling the house is incentive enough for me to bake this again and again.

The bread is great to eat with hot curries and in a kind of reverse planning, I started looking for a dish to accompany the Poee after I had finished baking them. I picked out Chicken Xacuti (Recipe here) from Madhur Jaffrey’s book again ; together they made a delicious meal.

Poee - Recipe adapted from Madhur Jaffrey's Flavours of India


Makes 6-8 poee

Ingredients:


Maida (flour) – 3 ½ cups (I used 1 ½ cups wheat flour and 2 cups maida)
Active dry yeast - 1 tsp (I used 2 tsp)
Salt – ½ tsp
Water – 1 ½ cups (I used 1 cup water and ½ cup milk)
Sugar – 1 tsp

Method:


1. Dissolve sugar in 1/2 cup of warm water and then sprinkle yeast over the mixture,mix well and set aside for 10 minutes till it is foamy.
2. Combine the flour and salt in a big bowl, add the yeast mixture and milk/water to this and mix well. Knead the dough till it is soft, adding a splash of water if it is too dry. Keep some flour handy and add a little at a time if it seems too wet. Knead well for about 5 minutes and then roll into a large ball, cover with oiled cling wrap or a damp cloth and keep aside in a warm place for about 1 and half hours till it doubles in size.
3. Knead the dough again and divide into 6-8 portions. Roll each portion into a round and flatten a bit, then make a vertical slash over the top in the centre with a sharp knife.
4. With your fingers at the vertical slash, pull the dough apart gently from the centre to the sides. The ball will now look like an open book.
5. Repeat with all the portions and place on a greased baking sheet and set aside in a warm place again till it rises – about half an hour to 45 minutes. Each portion will now look like a butterfly.
6. Sprinkle a little flour on top of each and bake in a pre heated oven at 200-210 C for about 15-20 minutes.

Serve as breakfast bread or as an accompaniment to a curry dish for a meal.

Tuesday, December 13, 2011

Orange and Chocolate Chip Muffins with Sprinkles


Do you know what happens when your 6 year old bakes muffins? -  you digress so far from the original recipe that it bears only a slight  resemblance to what you intended to bake. Almonds get turned down (because nuts are good only with chocolate, Amma), chocolate chips get added in (there's so little left in the packet Amma, lets finish it) and finally the muffins miraculously sprout sprinkles on top (Please Amma, can we have sprinkles on top - Please, please pleaaaaaase).

I started with The Cooker's recipe for some delicious Orange, Oats and Almond Muffins - they seemed delicious. K had a compensatory holiday last Friday, after her Sports Day in school and was bouncing off the walls at home. So we decided to bake - and she said she would do "everything".  I helped her measure out the ingredients,  and as she poured and stirred and whipped, she slowly took over the kitchen till the recipe morphed into something else with a life of its own! 
 But she was so thrilled at the fact that she was doing "everything", that I didn't have the heart to turn down her suggestions. After all, what's a few choc chips and sprinkles between friends - am sure the Cooker wouldn't mind the transformation of her recipe! 
And this was also K's gift to Amma and Appa on their 14th anniversary :) - how much sweeter can it get? The muffins rose beautifully and were soft and fluffy. Must be all the love and enthusiasm which went in with those tiny hands.
This also goes out to my best friend S whose anniversary it is today - Happy Anniversary S and A - here's wishing you many more!.

 Orange and Chocolate Chip Muffins with Sprinkles
Ingredients

½ cup Quaker Oats ground coarsely
1 ¼  cup flour
¾  cup whole wheat flour
 ½  cup butter (or oil)
½ cup sugar (I used castor sugar and would probably increase the quantity a tad bit more next time)
2 eggs
1 cup orange juice
½ cup yoghurt
½  tsp baking powder
½ tsp baking soda
½ cup yoghurt
½ cup multicoloured sprinkles
½ cup chocolate chips
1 tbsp orange zest, grated

Method
1. Mix the refined flour, whole wheat flour, oats, salt, baking soda, baking powder and orange zest in a bowl.
2. In another bowl, cream the butter and sugar together till shiny, then add the eggs one by one and beat for 2 minutes each.
3. Add the orange juice, yoghurt and chocolate chips into the egg mixture and mix till combined.
4. Gently fold in the flour mixture, one third at a time into the egg mixture till just combined; do not overmix.
5. Pre heat the oven to 180C (350F). Grease 2 muffin trays (6 muffins each).
6. Spoon the batter into the muffin trays till they just graze the top of the moulds. Decorate with sprinkles on top/
7. Bake in the oven for 15-20 minutes – a skewer inserted should come clean. Cool completely before unmoulding. 


Sunday, April 27, 2008

Vanilla, Cream Cheese and Date Cake


My daughter had an end- of-term party coming up at school (I don't think we ever had such things...for that matter I don't remember going to play school, I think it was straightaway Kindergarten at 3 years) and every child was required to bring one item for the party.

Mine was to bring a snack while her friend was to bring a cake - her mother asked me whether I would bake a cake so that she didn't have to give store bought cake with all that sugar and icing. So we swapped and I came up with a delicious cake adapting this recipe from the Joy of Cooking site.

The kids enjoyed this simple fluffy cake with the childhood favourite Vanilla - the cream cheese made it that much more flavourful and soft.

I am sending this to Masterbaker's April theme - Vanilla Each month Nikki picks one ingredient and we get to bake whatever we want, then she bakes up a bunch of the entries and picks a winner - simple and fun!


Vanilla, Cream Cheese and Date Cake


Ingredients:

Refined flour (maida) - 2 cups
Butter - 1 cup
Cream Cheese - 3/4 cup (I used cream cheese spread and cut out the 1/4 tsp salt in the recipe, you can also use fresh thick hung curd)
Eggs - 3
Sugar - 1 cup
Baking powder - 1/2 tsp
Baking soda - 1 /4 tsp
Vanilla scrapings from one pod or 3/4 tbsp vanilla essence
Pitted and chopped dates - 1 cup

Method:

1. Preheat oven to 180C and lightly grease a cake pan and keep aside.

2. Sift the flour, baking powder, baking soda and salt. into a bowl. Soak chopped dates in 1/4 cup of warm milk and keep aside.

3 Beat the butter and cream cheese until smooth. Add the sugar a little at a time and beat until creamy and smooth.

4. Beat in the eggs, one at time and mix well. Add vanilla bean extract or vanilla essence and beat well.

5. Fold in the flour mixture gently until just mixed, drain and add the dates and pour the cake batter into the greased pan.

6. Bake for 1 hour at 180C or until a toothpick inserted into the center comes out clean. Remove from oven and cool on a wire rack for 15 -20 minutes, before removing out of the pan and cooling again.


Wednesday, November 21, 2007

Chicken and Red Pepper Crustless Pie

When I saw this recipe for savoury muffins on Jugalbandi I knew I just had to try it out! The roasted peppers sounded like they would taste amazingly delicious along with the goat’s cheese. We had invited some new friends home for dinner – the first we were having after moving here – so I decided to make this as an appetizer.

The only thing was that, on the menu I had in mind, there was already a vegetarian appetizer and I needed one with chicken in it. So I decided to adapt the recipe and incorporate chicken into it. I also didn’t end up getting either feta or goat’s cheese in this village….err city…..so I had to settle for cream cheese. I don’t want to hear anything more said about Chennai being a small town – even the next door Nilgiri’s there used to stock imported cheese! I take back all my petty rants Nilgiri!

Then I decided that since there were other things I had to bake in the oven or grill, I didn’t want to spend time fiddling with individual muffins so I baked this as a sort of pie/quiche, without a crust – don’t know whether there is an actual name for this (Pudding? Tortilla?), so will call it a Crustless pie for now!.

I cut down on the cheese because of the additional chicken added to this recipe and increased the other proportions to serve about 10 people.

I roasted one red pepper in my oven, but found it annoying to keep opening the oven to turn them, so ended up roasting the others on the gas flame with a pair of tongs till black on all sides, wrapping them in foil tightly for 10 minutes and then peeling them. That worked fine for me.

So, this is my version of Jai & Bee’s wonderful creation, many thanks to them for inspiring me to bake this. The roasted red peppers were indeed a fabulous idea and gave it a lovely flavor, the pie itself was moist and fluffy; I served it with a hung curd dip.


Chicken and Roasted Red Pepper Pie
Ingredients:


Wheat flour (atta) - 3 1/2 cups
Egg whites - 6
Milk - 1 ¼ to 1 ½ cups
Boneless chicken cut into strips – 250gm
Baking powder – 2 ¼ tsp
Baking soda – 1 ¼ tsp
Mixed dried herbs – 2 tsp
Salt – ¾ tsp
Garlic cloves minced – 3
Roasted red peppers peeled and chopped – 2 cups (about 3 large peppers)
Cream cheese – 150gms
Olive oil – 4 ½ tbsp
Ajwain – ½ tsp
Chilli powder – 1 tsp
Crushed black pepper – 1-2 tbsp
Spring onions, fully chopped – 1 ½ cups separated into green and white part


1. Preheat oven to 180 C. Grease a large shallow pie plate or an oven proof glass platter with a depth of about 3-5 inches.
2. Heat 3 tbsp of oil in a non stick pan, add the ajwain and when it changes colour, add the garlic and the spring onions (only whites) and sauté for 5 minutes.
3. Add boneless chicken pieces and cook on high till it turns white (approx 5 minutes) and then cook on low for 2 minutes more, adding a splash of water if needed.
3. Remove the mixture from the pan and cool.
4. Beat eggs well; add the remaining 1½ tbsp oil, 1 cup milk and green part of the spring onions.
5. Add wheat flour, baking powder, baking soda, dried herbs, salt, crushed black pepper and chilli powder. Mix gently till smooth and add a little more milk if needed.
6. Add the chopped roasted red peppers and cream cheese.
7. Pour into the greased pie plate or a glass platter and bake at 180 C for 40-45 minutes. Test to see if a skewer comes out clean, cool.
8. Cut into wedges and serve warm or cold.

Wednesday, March 25, 2009

Carrot Coconut Muffins

A special family occasion always calls for something which warms the heart as well as the palate. And when we are talking about celebrating the joy that our little girl brings into our lives, her twinkling eyes and impish smile which make every day a new wonder - then it has to be something which screams "Sunshine"!


These carrot coconut muffins do just that - their warm orange colour seems to be a shade of happiness itself and their moist insides burst with the goodness of carrots and apples. I saw them first quite sometime back on the Joy of Baking website and later on Meeta's wonderful blog "Whats for Lunch, Honey".
These muffins are the easiest thing to bake and use ingredients which we usually have at hand. My daughter loved making it with me and couldn't wait for them to bake and then cool to see how they turned out - very much the way she pestered us that whole morning for mehendi and then as soon as it was on she wanted to take it off and see the colour "NOW"! :)

I didn't make the cream cheese frosting since I didn't think they were needed at all - warm them just a little in the oven and you're good to go. I used homemade unsalted butter instead of the oil in the original recipe and toned down the sugar a wee bit.These muffins are apparently also called "Morning Glory Muffins" - I can see why!


Carrot Coconut Muffins


1 1/2 cups maida
1/2 cup wheat flour
3/4 tsp baking soda
1.5 tsp baking powder

3/4 cup unsalted butter
1 cup sugar
3 eggs

2 cups grated carrots
1 apple, peeled and grated (should be crisp and not the mushy kind)
1 cup grated coconut (I used fresh coconut)
1/2 cup walnuts, lightly toasted, peeled and chopped
1 tsp vanilla essence
1/2 tsp cinnamon powder (For some reason everytime I combine cinnamon and salt, the dish seems to get over salted, so this time I did away with the salt in the original recipe,completely)

Method:
1. Sift the flours and the baking powder,cinnamon powder and soda together.
2. Beat the eggs and keep aside. In a large bowl, beat the butter and sugar together till creamy.
3. Mix in the eggs and vanilla essence into the butter and sugar and then add the flour, grated carrots, apples, chopped walnuts and coconut mixing just until combined.
4. The key to spongy muffins is not to mix the ingredients too much but just till they come together.
5. Spoon the batter into lightly greased muffin pans or you can line the muffin pans with muffin papers and then spoon the batter into them.
6. Bake in a pre heated oven at 180C (350F) for 22-25 minutes till a skewer inserted comes out clean. Rest for 10 minutes and turn out of the muffin pan and let it cool completely.

Thursday, April 29, 2010

Baked Fish with Phad Thai Noodles


Just back from some work travels and while it was bordering on insane to be travelling to the badlands of UP and the fields of Maharashtra in 45C weather, it was also immensely satisfying to be able to talk to farmers and be out and about on their fields. We had some visitors from abroad and they were mighty impressed by how much we do with so little on our hands. I am especially proud of the Maharashtrian farmers we met - progressive, enterprising, intelligent and so hardworking. And the women are equal in almost every sense of the word!!!

So, though I said my previous post would be the last one for a while, I have time to squeeze in just one more before I leave this weekend.

The meals I love best are the ones I plan at short notice - the ones that are cooked on the basis of what I feel like eating right then. Not as per the pre-planned menu made at the beginning of the week, not because there are some eggplants lying in the crisper which need to be used up right away and not because we have had three nights of rotis, so its time for rice!

A few weeks back, while Hubby was doing dinner with our daughter (which meant that the whole household got to hear The Three Billy Goats Gruff in a loud baritone!) I unwound after getting home from work. A conscious effort on my part to avoid treating the whole evening "routine" as well, a routine! and to make sure I get some "off" time of my own atleast once or twice a week.

Well, after a bit I decided to see if I could make something different for dinner (of course the idea of putting my feet up loses its sheen after the the first half an hour!). Got some fish out of the freezer to thaw and decided to bake it. So I pounded together coriander, green chillies, peppercorns and salt to marinate the fish in. Once that was done, I wondered if the fish fillets would be enough; remembered I had a packet of ready-to-cook Phad Thai somewhere and got that out. The idea was to bake the marinated fish and then serve it on the Phad Thai noodles. The fish was flaky and tender and went very well with the spicy sweet Phad Thai. I would definitely do this dinner again - especially on a week night - it hardly took about an hour from start to finish to make.

The Phad Thai I used was the Real Thai brand - they have sauces, rice noodles, rice vermicelli and even rice paper rounds with which I have made steamed Vietnamese rolls. The packet has flat noodles which need to be immersed in hot water for about 10 minutes till softened; also a packet of the spices for the Phad Thai - sweet and spicy and with the taste of peanuts. I sauteed some onions in oil and then added the Phad Thai spice mix to it, a splash of water before tossing the cooked noodles into it - adjust salt with care since the spice mix has salt in it. Perfect combination. And the perfect unwinder for my evening :)
Baked Fish with Phad Thai


2 fillets of fish (Feeds two) - I cut the fillets into two, but you can keep it whole.

Marinade - pound together
Coriander leaves - handful
Green chillies - 2-3
Peppercorns - 1/2 tsp
Coriander seeds - 1/2 tsp
Salt - 1/4 tsp
Mix with
Lime juice - of one lime
1 tbsp -olive oil

1. Apply the marinade on the fillets and marinate for 10-15 minutes
2. Pre heat oven to 180C (350F), bake the fish fillet in a covered oven proof dish for 35 minutes.
3. Meanwhile take One packet (130gm) Phad Thai noodles
4. Soak the noodles in hot water for 25 minutes. Drain, and keep aside.
5. Heat 1 tsp sesame oil in a wok, add half a cup of sliced onions and fry for 3 minutes.
6. Add the seasoning from the Phad Thai noodles and fry for a minute
7. Add 4 tbsp of water and heat through, add the cooked noodles and stir fry for 3-4 minutes.
8. Add a handful of chopped coriander and turn off the flame.
9. Portion out the noodles onto two plates. Place one baked fillet each on top of the noodles.
10. Pour the drippings from the oven proof dish over the fillets.

Thursday, December 25, 2008

White Chocolate, Cherry and Oatmeal Cookies


I have been baking a Christmas cake for the past two years and it has become nice way to bring in the holiday spirit - right from marinating the fruit to baking it on Christmas Eve. This was the first time in the last eight years we weren't at the our friend's house in Chennai for Christmas - but the cake still managed to please new friends. And the special part of baking it this year was that a couple of months back I got to meet my friend in London who had given me this recipe some years back. We have only been emailing each other for almost 8 years now so it was wonderful to actually get to meet her!


This year, I also baked some cookies - adapted this recipe which was itself adapted from this one
from Smitten Kitchen who adapted it from Cook's Illustrated. I love crispy cookies much more than the chewy ones so I loved the idea of these. They are actually not so much crispy rather than this kind of absolutely gorgeous vehicle to transport some rich chocolate and oatey goodness into your mouth!! I did away with the sea salt and reduced the oatmeal, threw in some dried cherries and Voila! - absolutely delicious cookies. I had to stop myself from eating the dough while waiting for the first batch to cook :)

Sending these cookies to Neivedyam's Cookie Baking Event which is being hosted by Sharmi.

White Chocolate, Cherry and Oatmeal Cookies

Ingredients:

Flour - 2 cups
Oats - 1 cup (I used quick cooking oats)
Baking powder - 3/4 tsp
Baking soda - 1/2 tsp
Butter - 200gms
White chocolate(chopped) - 170 gms
Egg -1
Vanilla essence - 1 tsp
Dried cherries - 50gms
Sugar - 1 cup

Method:

1. Cream the butter and sugar in a large bowl till smooth.
2. Put the chopped chocolate into a glass bowl and place it inside a bowl of heated water and microwave in 30 second intervals till melted and smooth.
3. Beat the egg and add to the creamed butter and sugar mixing lightly till combined.
4. Sift the flour with the baking powder and baking soda and then add gradually to the egg mixture.
5. Add the vanilla essence and the melted chocolate to the bowl and combine with a wooden spatula.
6. Refrigerate the mixture for about half an hour so that it can be shaped into balls - do not skip this step!
7. Pre heat the oven to 180C (350F), cut butter paper to size and spread on a baking tray.
8. Shape the cookie dough into balls, flatten slightly and place on the baking tray atleast 2 inches apart (they will spread and flatten as they bake). Don't handle the cookie dough for too long since the chocolate and butter will start melting.
9. Bake for 15 minutes. Remove the butter paper with the cookies on it and set aside to cool. They are very fragile before they cool so don't try to remove them from the butter paper when hot.
10. Bake more batches in the same way till the dough is used up.

Tuesday, April 8, 2008

Shallot and Garlic, Olives and Sesame Focaccia and a Blogger meeting


One makes the most unexpected connections while blogging - kindred spirits bond over stories of food events and falafel, cakes and bakes and the all consuming nature of food blogging. One such connection I made was with Deeba of Passionate about Baking - that delightful blog with the most mouth watering and scrumptious looking baked stuff - this beautiful chocolate strawberry combination even won a prize on the Serendipity Bake off!

So we exchanged notes and e-mails, Deeba made me part of the Arusuvai chain and we often talked of meeting up since we were in the same city (well not technically but atleast geographically!). And last week I actually did go over and meet her in her beautiful home - we chatted and laughed and then chatted some more between eating (read devouring!) a lovely chocolate cake and some chips with this amazingly creamy dip!! Thanks Deeba - it was wonderful meeting you and I hope we can do this again!

While over there, I told her I wanted to try out the focaccia bread she had made sometime back - in fact wanted to bake it for a party my neighbour was having that weekend. Tips and suggestions were noted and I set out baking this one day before (in case of any mishaps!). I also referred to this post by Susan of Farmgirl Fare which was based on Stephen's recipe for Quick Rosemary Focaccia.

I baked twice - the first time I made one big portion with olives and sesame seeds
and a smaller portion with shallots and garlic. The second time I repeated the big portion with olives and sesame seeds and braided the smaller portion into a plait which I kept for breakfast for ourselves the next day. Both times the dough rose beautifully and I thanked the yeast Gods LOL! These breads were meant to be served as finger food with three dips so I made them a bit crisp, the first time baking them at a higher temperature than the second time.

The braid came out beautifully and I spent a good deal of time admiring my handiwork....sigh "pride comes before a fall" my mother used to say....I made the cardinal mistake of trying to transfer it to another baking pan before putting it into the oven and it was a mess by the end :( Lesson well learnt.

Recipe here.

Changes/additions I made:


1. The shallot garlic topping I made by sauteeing one cup of sliced shallots along with 5-6 slice garlic flakes in olive oil and adding a dash of chilli powder and a pinch of cumin powder to it. Cool and spread evenly over the focaccia just before baking it.


2. For the other breads, I simply put in one slice of olive into each dimple and then sprinkled toasted sesame seeds.

Changes I will make next time:

1. Don't spread the dough as much as I did this time and bake it for a lesser time.

2. Shape the bread on the baking tray it is to be baked in!

The party by the way rocked - my friend A and her husband upstairs did a marvellous job hosting the 'do and it went on into the wee hours - long time since I have been up that late other than for nursing my daughter when she isn't well!!

Here is part of the spread with another of the cooks (she made the melt-in-your-mouth kababs, delicious brownies and two of the dips)


Mini idlis smeared with molagapodi, two types of focaccia, a cream cheese dip, a paneer and capsicum dip and a mayo,corn and tomato dip, pita bread with hummus (recipe to follow) and chocolate brownie pieces.

Wednesday, December 3, 2008

Carrot & Mustard Bread

It's funny how certain things you buy seem to acquire a vibe or a kind of reputation attached to them. Like that dress which you seem to be perpetually running late in or spilling things on or the car which always seems to be getting into scrapes while the other one you owned only reminds you of all the lovely, long road trips you have taken.

Of course, it could be that you always spend time looking for matching earrings for that particular dress, which is why you run late or you love wearing a particular dress for lazy lunches - and if you're anything like me that's a guaranteed recipe for splotches and stains!. And of course we took more road trips as a cozy couple and handed over the car to a driver when the kid came along!!

Inspite of all the rational explanations, these things seem to stick in our mind. The same thing happened with a lovely loaf tin my friend picked up for me when she saw a dealon while shopping. This was in June and immediately after that I somehow simply stopped baking! It had everything to do with the fact that I went back to full time work in July, but of course I blamed it on the poor loaf tin.

The best way to break that jinx? - bake something in it! So, I brought out my Sara Lewis book and saw this lovely Carrot & Mustard bread. I started quite late (around 7.30pm) and realised later it would only become colder as time wore on - definitely not ideal bread baking time. But I just can't seem to give up an idea once it takes hold, so I soldiered on. The yeast was fine and bubbled over, but when I kneaded the bread and left in a warm oven, it really didn't rise as much as it normally does. So I left it for almost an hour and 45 minutes before the second proofing. Kneaded it again and shaped the dough into three small buns and one oblong loaf.

30 minutes later it had not risen much at all and I was really sleepy and didn't think it was going to rise much anyway, so popped it into the oven to bake after glazing it. It baked quite beautifully and the glaze made it a nice golden top. But the inside of the bread, though cooked, was not the lovely spongy texture I look forward to....I guess, now that it's winter, I should stick to baking in the day when its a bit warmer. Or maybe it was the fact that I had used whole wheat flour instead of "granary flour" and plain flour instead of "strong white flour" and did not change the proportions. The flavours of the carrot and mustard were excellent though - definitely worth a second attempt.

Ah, well, atleast now the jinx has been broken and I can stop blaming the loaf tin........on the other hand, maybe I can blame the loaf tin for the bread!*evil grin*

This loaf of carrot bread specially to dear Cooker who is hosting this month's edition of JFI - where the ingredient is the Carrot. Jihva for Ingredients (JFI) is the brainchild of Indira and is probably one of the longest running Indian food blog events. Thank you Cooker for extending the last date!


Carrot & Mustard Bread
Recipe adapted from Sara Lewis's The Bread Book

Ingredients:
Wheat flour (atta) - 200gm (approx 2 1/4 cups)
Refined flour (maida) - 150gm (approx 1 3/4 cups)
Water - 200ml (1 cup)
Dried active yeast - 3 tsp
Sugar - 1 tsp
Honey - 1 tsp
Mustard - 2 tbsp
Carrots - grated, 1 cup
Salt - 1 tsp
Butter - 2 tbsp
Egg yolk - 1

Method:
1. Warm up the water, dissolve the sugar in it and when lukewarm add the yeast to it. Keep aside for about 15 minutes till it bubbles and froths.
2. In a large mixing bowl, mix the flours with the butter, rubbing till it resembles breadcrumbs.
3. Add the salt, honey, mustard, grated carrot and the yeast mixture and knead for 10 minutes to a smooth dough.
4. Cover with an oiled clingwrap and set aside in a warm place for about an hour or till it doubles in size.
5. Knead again and shape into an oblong loaf or form into a thick rope and twist from one side like a corkscrew.
6. Put into a greased loaf tin (I used a 1 litre loaf tin for the loaf and made the rest of the dough into three small rolls) and set aside for another 30 minutes till it rises to the top (depending on the height of the tin).
7. Pre heat the oven to 200C, brush the egg yolk mixed with 1 tbsp water on to the top of the loaf and then bake for about 30-35 minutes. If the top is browning too much after the first 15 minutes, cover with foil and continue baking.
8. Remove from oven, the bread should sound hollow when tapped. Remove from tin carefully and keep on wire rack to cool.


Tuesday, March 25, 2008

Cream Cheese and Coriander Spiced Bread


Its been a while since my first attempt at baking bread and this Sunday morning with an empty fridge staring me in my face, I decided to beat back the blues by getting out some yeast and flour. After all, it was Easter Sunday!

I also somehow got into my head to include cream cheese in whatever bread I chose to bake.....so while searching for recipes which would pander to my whims, I found this recipe adapted from the book Beard on Bread. And then I went a bit crazy....

I substituted the sour cream with cream cheese,grated cheddar cheese and fresh cream. Added lots of coriander and then remembering that lovely achaari bread loaf cooked up by J&B, spooned in a generous dollop of - hold your breath! - vathalkozhambu thokku!!! This is a fiery tamarind based gravy which is reduced to a thick consistency and it contains sun dried berries or vegetables (vatthal) which impart a distinctive flavour to it. Usually eaten with steamed rice, I had bought a bottle of this delicious Tamilian delicacy from that veritable institution - Grand Sweets - on my last trip to Chennai.

The other no-so-crazy touches to the recipe - I replaced part of the flour with wheat flour and also toned down the salt since both the pickle and the cream cheese had salt in it.

I sweated quite a bit while waiting for the bread to rise and then rise again and then finally bake. I had no idea how it would turn out and I regretted experimenting with something I was making for just the second time....

BUT, it wasn't a disaster - phew! It had a great crust though it didn't rise as much as I expected it to - I don't really think that that's because of the wheat flour since I have used a similar proportion for the poee before; I suspect the yeast - so out it goes. Its a pity we don't get smaller packets of yeast which we can use just once.

The aroma which came curling out of the oven was absolutely amazing - a mix of the typical yeasty smell of bread and the spice notes of pickle. And the taste matched it completely - a lovely mix of flavours which intensified overnight till the next day one could eat it - just.like.that. No need for any accompaniments. The oil from the pickle and the cream cheese seemed to make it really moist.


Couldnt even wait for the photo session to get over and I already had a bite out of it!


What I would do the next time around - cut down on the sugar mentioned for mixing the yeast and also cut down on the milk....I think the dough needed to be a tad firmer.
We had it with a simple masala omelet and it made a perfect Sunday breakfast.

This goes to the Bread Baking Day #8 being hosted over at Wild Yeast by Susan.
Celebration Bread and she says"For this month’s BreadBakingDay, you are invited to share your own spring holiday bread tradition, explore one you’re not yet familiar with, or start a new one".

While this is not a tradition in our home, it maybe the start of one for Easter every year; I used to get fresh buns and Easter eggs every year when I was a girl from the Anglo Indian family downstairs who doted on me and I hope my daughter does too! Here's to new beginnings then, especially in my brother's home - they have a lot to look forward this year!

Cream Cheese and Coriander Spiced Bread


Ingredients:

Wheat flour - 1.5 cups
Refined flour (maida) - 2 to 2.5 cups
Yeast - 3 tsp
Warm water - 1/4 cup
Sugar - 3 tbsp (2 tbsp should suffice)
Cream Cheese - 1 cup
Grated cheddar cheese - 1/2 cup
Indian spicy pickle - 2 tablespoons (I used vathalkozhambu thokku)
Milk - 1/2 cup
Salt - 1/2 tsp
Baking soda - 1/4 tsp
Chopped onions - 1/4 cup
Chopped coriander - 3/4 cup

Method:

1. Combine yeast and sugar in warm water and set aside for 5 minutes or till its foamy.
2. Take a large bowl, add the yeast mixture, salt, baking soda,cream cheese, grated cheese and pickle.
3. Mix in both the flours gardually adding the milk while kneading all the time. I added the milk all at once and had to add some more flour since it became too sticky. The flour should be fairly easy to handle and not too sticky.
4. Knead well and keep aside in a warm place, covered with cling film for about 1.5 hours till it doubles in size.
5. Lightly punch it down, knead again and divide into two parts. Shape into rounds and place on baking trays or put into loaf tins and set aside covered for another 30 - 45 minutes for the second rise.
6. Pre heat the oven to 375F or 190C and bake for about 25-30 minutes; if baking both together then swap the loaf tins after 15 minutes.