Friday, March 19, 2010

Strawberry Chocolate Mousse


The strawberry season is on its way out and luckily this year I had some lovely strawberries come my way - at the same time that I brought some home from this trip to Maharashtra, my upstairs neighbour also got us some from his trip to Pune - thanks D!

Of course, with this surfeit of juicy,red strawberries I had to do *something* with them - especially since 4 year old has major issues with fruits which go "squish" in the mouth (which rules out most of them) and hubby is also not a great fan. I can't eat too much of raw fruit at one go and keeping them for too long would see them going bad. So, I looked about for some nice recipes - done the upside down cake (and I see others have been grappling with the same problem!).
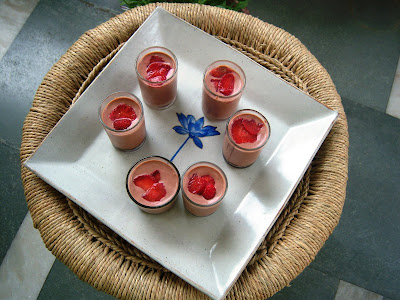
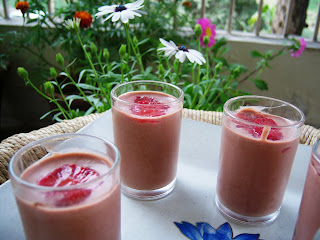
Simply Recipes by Elise is one of my favourite go-to sites when I am looking for something in particular and I wasn't disappointed. She has this gorgeous recipe for Strawberry Mousse made with white chocolate. I didn't have white chocolate - but when has that ever stopped my from trying something! I used dark chocolate and adapted the recipe and it was fine - a slightly sweetish, tart dessert. I did this silly thing of pouring a layer of chocolate at the bottom of the glass - but of course since I didn't mix it with cream, it stuck to the bottom once it was cold. So after finishing the dessert I would pop it into the microwave for about 10 secs and then eat up the dark chocolate!

Strawberry Chocolate Mousse


Strawberries - 700gm
Dark chocolate - 200gms
200ml fresh cream (I used Amul fresh cream, but heavy cream, if available, is preferable)
2 tsp gelatine
2 tbsp powdered sugar

1. Soak the strawberries in water for 3-4 minutes and clean well. Dry, hull and chop up the strawberries, reserving about 5-6 strawberries for garnish and puree the rest in a blender. Slice the reserved strawberries and keep aside.
Pass through a sieve to filter the puree and keep aside.
2. Meanwhile, chop the chocolate and melt over a double boiler - put the chopped pieces into a small vessel which can fit into a bigger,shallow bowl which has water in it and keep the flame so that the water is barely simmering till the chocolate melts and is smooth. Pour into a large bowl.
3. Take about 1/4 cup of room temperature water and sprinkle the gelatine over the surface of the water - keep for about 5 minutes and stir lightly till mixed in.
4. Pour about 1/3 cup of the cream into a heavy sauce pan, mix in the powdered sugar and heat on a low flame. Add the gelatine water into the sauce pan and stir till dissolved - about 2-3 minutes.
5. Pour the cream and gelatine mixture into the melted chocolate, add the strawberry puree and mix well till completely combined.
6. Beat the remaining cream with a blender on high speed till it thickens and forms peaks ( Since I used fresh cream I whipped it over a bowl of ice). Fold the whipped cream into the chocolate-strawberry puree mixture till just combined. Refrigerate for 1 hour.
7. Pour the strawberry chocolate mousse into shot glasses and garnish each one with a couple of the reserved strawberry slices. Chill in the refrigerator overnight after covering each glass with clingfilm.

Friday, March 12, 2010

Rapid Light Wholemeal Loaf - Sara Lewis


There's nothing better in my opinion, than a well made sandwich, to satisfy one's hunger - be it for breakfast or as a snack or even for lunch. The bread should be fresh and the fillings juicy - that's all that one needs! I especially love the toasted sandwich - no, not the grilled sandwich - the one you toast on those metal sandwich toasters over the gas flame.

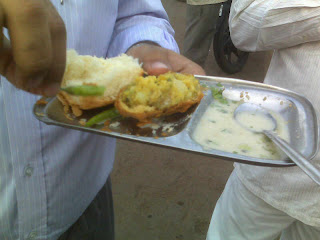
Having grown up in Mumbai, I simply love those fresh sandwiches the streetside vendors make - white bread (yeah, yeah I hear ya), a choice of plain butter or Amul butter, mint chutney and then the fillings - onions rings, slices of boiled potaotes and beet, raw tomatoes - a sprinkle of salt and pepper, quick cutting into 8 square towers you had to struggle to fit into your mouth - Heaven! We practically lived on Subhash's Rs.5 sandwiches when we were in college - it was so cheap and filling.


Some guys also had toasted sandwiches - while we used to make them regularly at home (probably the first thing I "cooked" in the kitchen) I had them outside only when I was doing my CA - the guy opposite Eros theatre in Churchgate was very good but I'm sure everyone has their favourite one.
I still love to have toasted sandwiches for breakfast - tomato, boiled potatoes or even eggs, coriander mint chutney, half a cheese slice - perfect start to the day. Haven't had a nice sandwich outside for a very long time - the apologies which pass for sandwiches in places like Coffee Day should be banned. Sitting in the display rack for ages, filled with some truly shocking stuff (once I got a sandwich with grated carrots and mayonnaise!) they are not worth half the money being charged.

Its been a long time since I baked bread - pizza base is what I have been experimenting with for some time. The cold temps till now also didn't help - now that the weather is turning, I thought it would be a good time to have a home made loaf of bread.

Picked a recipe from Sara Lewis's The Bread Book - it has half whole wheat and half white flour and I thought it would be a good halfway bread to have. It turned out well, even though I had to up the flour quantity since, by mistake, I poured all the water into the flour originally measured out. The bread had a nice crumb and was soft with a great crust - it was also soo easy to make. I definitely recommend this for someone who is trying to bake wholemeal bread for the first time.

Rapid Light Wholemeal Loaf - Adapted from Sara Lewis's The Bread Book


2 1/4 cups wholewheat flour
1 3/4 cups strong white flour
2 tsp sugar
1/4 tsp salt
2 tsp active dried yeast
1 tbsp vegetable oil
1 cup warm water

1. Heat the water till just hot and dissolve the sugar in it, wait for it to cool till just warm (shouldnt be cold or hot) and dissolve the yeast in it. Set aside for 10 minutes.
2. Mix the two flours, salt, oil - pour in the yeast mixture a little at a time and knead well for about 10 minutes till the dough comes together - smooth but not sticky.
3. Grease a loaf tin and put the dough into it. cover loosely with a lightly oiled cling film and leave in a warm place to rise - about an hour or till the dough reaches just above the top of the tin.
4. Slash with a sharp knife - the bread cooks well and looks good too.
5. Pre heat oven to 200c, remove the clingfilm and bake for 25-30 minutes - when tapped the loaf should sound hollow and the bread will be browned on top. The book recommends checking after 15 minutes and to cover with foil if it is overbrowning.
6. Loosen bread from the sides of the tin, transfer to wire rack and cool.

We had this for breakfast the next day - sauteed sausages, tomatoes, lettuce, vegetable patties, mint chutney, cheese, mustard - we mixed and matched. Whats your favourite way to have a sandwich?

Monday, March 1, 2010

Biryani - Big Fight!

I have been following Vir Sanghvi's discussion on the origins and evolution of biryani forthe past two years now (through his column Rude Food in Brunch and his show on television) and have been quite interested in all the opinions and theories he has managed to dig out from all over the country.

It is the theory in many quarters that, the biryani is descended from the Turkish pilaf (pulao) - a mildly spiced dish which is more reliant on the fragrance of the rice itself. The biryani on the other hand, Sanghvi argues, is more in keeping with Indian tastes and has a lot more spice in it. The other theory which some of the culinary experts he spoke to came up with (and one I tend to agree with) is that the difference between pucca biryani and kaccha biryani is actually the difference between pulao and a biryani. Pucca biryani being one where the meat is pre cooked and added to the rice when it is cooking and so essentially a pulao. Whereas a kachha biryani is the real biryani - where the meat is layered with the spice paste and cooked along with partially cooked rice.

The Lucknowi Biryani by this premise then, is basically a pulao - as is probably the one Vir Sanghvi ate in Delhi and came up with the same complaint I have - "The disappointment, however, was the biryani. We found it too dry and utterly lacking in subtlety of flavour." The Hyderabadi biryani, on the other hand, is often touted to be the true biryani since the meat is layered and cooked along with the rice - though going by Vir Sanghvi's experience in that city it seems very difficult to find the real Mc Coy.

But I think after all this research, Sanghvi seems to have reached a veritable mid point on the great biryani debate as evidenced by his latest column last week - which is actually a review of Pratibha Karan's new cookbook called - what else - Biryani! She says that Biryani is an Indian invention and most probably a one pot dish demanded by soldiers on the move - further, she says, it is most probably a South Indian dish.
"If you were to put together all the north Indian biryani recipes, you would end up with about four basic recipes and a few others with minor variations. If you go to the south however, the full richness of biryani dawns on you. It isn’t just the famous Hyderabadi biryanis, it is also the richly spiced biryanis of Kerala, the masaledar Andhra biryani (which is not the same as Hyderabadi biryani, but is a less refined, much earthier dish) and the biryanis of Tamil Nadu.The reason for this is simple enough.

The people of the north are essentially wheat eaters. It is the south that prefers rice and that is why south Indian biryanis frequently go beyond the north Indian obsession with basmati and use more interesting breeds of rice. In fact, wherever there is a community of rice-eaters, the biryani is likely to be more interesting. The biryanis of east Bengal (now Bangladesh) are delicious and unjustly ignored as is the mutton and potato biryani of Calcutta which delights everyone who eats in that city but which is hardly known outside of Bengal."

It gets more interesting with the conclusion that it is not so much the distinction between a biryani and pulao which is important as the many variations that lie between the two - even Sanghvi at this stage abandons the pucca vs kaccha debate! What interests Karan, Sanghvi says, is the regional variations we find in biryanis from all over India and that is what she has explored in her book. I have not seen any of Pratibha Karan's books before (nor have I been paid for this post!), but I am definitely interested in this book on biryanis - and encouraged by Sanghvi's words - "If you are interested in cooking, then this is the perfect book for you because unlike most cookbooks it is not written by a professional cook or a hotel chef. Pratibha does most of her cooking at home and therefore, her recipes are not difficult for the home cook to reproduce."


I guess this means this Coriander Chicken Biryani I made is actually a pulao :).


This recipe is very similar to this Brinji.
I didn't cook this in coconut milk though, the chicken was fried with the masala paste (coriander, mint, green chillies, ginger, garlic and whole spices) and then cooked with the rice. Perfect for a Sunday meal made in exactly one hour - served with a onion tomato raita on the side. (Edited to add - please mail me for exact recipes!)

Sunday, February 28, 2010

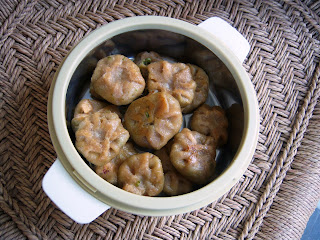
Somaas / Karanji (Baked Turnovers)


Spring is here!! Winter is almost done with, time to wrap up the woollies and get the T-shirts out....this is the first year I'm not doing war whoops and actually quite wistful about winter going away. Enjoying the cool mornings and the beautiful beautiful flowers which have sprung up all over the city - in roundabouts, parks and balconies.

And of course spring has to be heralded in with the fun colours of Holi!! I played Holi every year till I was 22 (in Mumbai) and then didn't play for 11 years after that(since I moved to Chennai. Now once again, I have been celebrating Holi for the past two years since we moved to Delhi.

This year Holi is on March 1st, Monday - so a long weekend for us. Which is a good thing since I had a really hectic week - overseas director visit, lots of number crunching and reports, a mini show as part of my jazz dancing class which meant last minute rehearsals and a visit from my best friend. So we have been chilling this weekend - a lazy Saturday with a huge lunch and a nap, a great jazz performance outdoors by a Norwegian band.

And then Sunday, my neighbour A, suggested breakfast at their place - who can refuse an offer of puri aloo sabzi? I decided to make some gujiyas - the traditional North Indian sweet which is made for Holi. These are basically rounds of dough, filled with evaporated milk and dry fruits, shaped into crescents and deep fried. But then when I woke up in the morning I realised that one needs khoya (evaporated milk) for the filling - so a quick change to somaas or karanjis - which are like gujiyas but have a coconut-jaggery filling.

And then a further change - decided to go the baked way (I'm such a wuz when it comes to deep frying! Just the thought of pouring that much oil into the kadai is enough to make me chicken out). I unearthed the Sanjeev Kapoor recipe I had filed away for just such an occasion, made a few changes and voila - baked karanjis in an hour!

I was a bit worried they wouldn't turn out as good as the fried ones we are used to eating - but really, they were good. Tasty and crisp but light on the stomach - especially after that deliciously huge puri sabzi breakfast we gorged on!! Thanks A - it was so good to chat and eat and chat and eat and.....you get the picture! ;)

Somaas / Karanji (Baked Turnovers)

1 1/4 cup flour
Ghee - 2 tbsp
Milk - 5 - 8 tbsp

salt - pinch

Filling
Freshly grated Coconut - 1 cup
Jaggery - 1/2 cup
Elaichi powder - 1 tsp

1. Mix the coconut and jaggery and heat over a low flame for 5-7 minutes till dry and flaky. Mix in the cardamom (elaichi) powder and set aside to cool.
2. Mix the flour, ghee, salt and milk and knead to smooth dough; cover and keep aside for about 5 minutes
3. Pre heat the oven to 180C. Make coin sized portions of the dough and roll out to thin circle - place 2 teaspoonfuls of the filling towards one side of the circle but not too near the edge - fold the circle over into a crescent shape.
4. Cut out the excess (leaving a little space all around the filling) with a pastry cutter or a sharp knife. Press down the edges with the tines of a fork to make a crimped edge.
5. Grease an oven proof tray and place the karanjis on it; Brush the tops of the karanjis with ghee and bake for 16-17 minutes.
6. The tops won't turn brown, but they will be cooked to a crisp and the base will have turned lightly brown.

The karanji is light and flaky and the filling too is just right - not cloyingly sweet and at the same time substantial enough not to make one feel like we are eating just a shell!


Holi itself was a perfect day weather wise; we went over to a back lane 200mts away from our house. Its maintained by the houses which overlook the back lane - one of our friends lives there so all us common friends usually go over and play along with the rest of them - about 30 people at any given time with friends dropping in and out. Besides the colours, the water dunkings and the balloon fights there are usually a potluck of snacks and drinks all laid out - its great fun!

My contribution was this masala baati from Tarla Dalal - apparently I made something similar in 2008 but for the life of me don't remember the recipe. This one wasn't as good as the other one -which I am told was only baked (not boiled and baked like this one) and also had a moong dal filling inside. But I do remember that it was also a Tarla Dalal one, so if someone has the recipe, do forward it.


Monday, February 22, 2010

Sugar Sugar....

I have been making bi-annual research trips to Kolhapur for the last two years and it has been a fascinating experience. The fact that I was born and brought up in Maharashtra (Mumbai) and am familiar with the culture and know the language, definitely helps. My brother also studied in Warana and I distinctly remember the hostel exploits he used to regale me with - seemed daring for my naive 12 year old self then, but actually quite tame as compared to the standards today's youth are setting.

Kolhapur is a town whose history can be traced back to the 9th century (and there have been excavations found which date to as far back as the First century BC). It is now quite prosperous - it reportedly is one of the towns with the highest sales of Mercedes cars in the country and we saw showrooms selling top end bikes costing more than a lakh of rupees (USD 2000) as also these "buggies" which are apparently bought for kids to drive around the "farmhouse" - price? another lakh of rupees. The wealth is mostly fuelled by the sugarcane industry - a co-operative industry (if you can call it that)which provides the cashflow as well as votes to many a successful politician from this region.

But other than the material wealth, there is also the richness of culture which this corner of south-west Maharashtra is steeped in. The Mahalakshmi temple is one of the famous landmarks - the legend goes that the Goddess vanquished the demon king Kolasur - and as his dying wish, the city was named after him. More than the temple, I love poking around those small shops around its periphery - the ones where you get those typical green bangles, the lovely vermillion powder (kumkum), small religious knick knacks -silver crowns for idols, tiny silk "sarees" in red, green and gold for the goddess in your home - , flowers and what not.

The people are warm and hospitable to a fault. Apart from the Kolhapuri chappals (hand stitched leather thongs) and Kolhapuri mirchi (chillies) which everyone usually hears of - Kolhapuri cuisine is quite distinct. Their tambda rassa (red curry with goat meat) and pandhra rassa (white mutton stock soup) are signature dishes of Kolhapur along with the sukka mutton (stir fried goat meat). Not being a fan of red meat (I find it far too difficult to digest) what I really enjoy in this part of the country is the simple Maharashtrian vegetarian fare - moogachi usal (whole green gram sauted with spices and coconut), amti, varan bhaat, bhakri (sorghum flour flat bread) and sol kadi (a tangy,mildly spiced drink made from coconut milk and kokum fruit extract). Then there's the snacks which beckon - wada pav, misal...


But what intrigued me most this trip is coming across huge green houses - 57 acres of horticultural operations run right next to a sugar mill by the second generation scion. They grow flowers for the export market as well as the domestic market and with huge investments and lot of technology have managed to make this a lucrative business while diversifying from the cyclical sugar industry. It also provides employment to the local population of women (who were traditonally restricted to ancilliary jobs in the sugar industry) who tend to the flowers with the requisite care and diligence. There were rows and rows of multi coloured gerberas, delicatedly shaded roses and the most exquisite orchids - the profusion of flowers dazzled our senses.


I marvelled at the sense of enterprise which fuels this part of the country - even the farmers here seem to be so much better informed than their counterparts in the North. While the cane production deficit is fuelling a steep rise in prices, it makes sense that the farmer should think of shifting to alternatives which will provide a better income to him - this is indeed a different way of thinking from the traditional mindset of cane being a "lazy" crop which requires hardly any tending and no need for marketing the produce which is all bought up by the co-operative at pre -fixed prices.

I will leave you with this picture of some wonderful strawberries which I found on the lane outside the Mahalakshmi temple while buying kandi peda (milk based sweet), bhadang (spiced puffed rice) and pohe chivda(spiced beaten rice) - sweets and snacks which are some of my childhood favourites!

Wednesday, February 17, 2010

Gajar ka Halwa (Carrot Pudding)


Gajar ka halwa is one of those famous Bollywood cliches of course, but is also undeniably one of the most popular dishes from Punjabi cuisine to seep into other parts of India.
It has always been a favourite with me - I remember eating it in my neighbour's house in Mumbai - their daughter and me were inseparable as kids; same age, same school, same everything - we would have to be puled apart at the end of the day howling and screaming when we were taken to our respective homes! They are Punjabis and Aunty A made the most amazing melt-in-your-mouth carrot halwa.

I made sure it was on the menu for my wedding - thats how much I love it! I guess its something about the lovely taste of almost caramelized carrots cooked into sweet nothingness in milk and sugar which makes me sigh with satisfaction. In Chennai I would have to wait for that fleeting month when the red carrots would make their appearance - here in Delhi they flood the markets from November to March.

No wonder then (especially when they are also cheap at this time) that the winter here sees me making this almost every other week. Its a great snack/dessert/breakfast - you name it :) I don't use khoya though and cook the carrots in the milk right down till it becomes khoya! I also don't add almonds or other nuts and nor do I serve it with ice cream - less is more.


Gajar ka Halwa

Peeled and grated carrots (preferable red, juicy carrots) - 2.5 cups
Milk - 6 cups
Sugar - 1 cup
Ghee - 3 tbsp
Cardamom powder - 1 tsp

1. Bring the milk to boil in heavy bottomed pan and continue to simmer till it reduces to half the quantity. Make sure you keep stirring once in a while, so it doesn't stick to the bottom.
2. Meanwhile, in another pan, heat the ghee and add the grated carrots.
3. Saute for about 5-8 minutes on a low flame till it loses its raw smell and softens.
4. Add the carrot to the reduced milk and continue cooking till the milk is completely absorbed and the carrot is just moist.
Once the carrot is cooked, add sugar and cook for 5 minutes, till the sugar dissolves.
5. Add the cardamom powder and remove from flame.
6. Serve warm

Wednesday, February 3, 2010

Upside Down Pear Cake


I'm back after a week in Ahmedabad at a learning program at IIM related to the field I work in. It was absolutely fascinating to be back in the classroom with 13 other individuals from different sections of the agri-business industry. The faculty was amazing and we had an excellent guest speaker; thought provoking insights, stimulating discussions and some heated arguments on the social aspects of the agri-business industry in India.

The other great bit about this trip was that I got to catch up with a close friend (and now a fellow blogger!) - Arch from the The Yum Factor. She was, as always, so warm and welcoming! We shopped, ate and chatted and then ate some more, in the very brief bits of time we got to spend together. When you reconnect with old friends, you come away recharged - Arch is this complete dynamo of energy - she has managed to design a beautiful and tasteful home for her family in a new city singlehandedly! An amazingly patient person, she is such a wonderful mother to her sweet 4 year old boy. And the food - delicious is the word. She even made pathrode - that Gujarati delicacy- at the last minute, steamed it and gave it to me barely 5 minutes before I left - its waiting to be eaten as a snack this evening!

But as always, good to be home - daughter insisted on accompanying Appa to the airport to pick me up but promptly fell asleep two minutes into the ride :) But was so nice to see her angelic (while asleep!) face when I landed. Childhood is a magical journey and I love seeing it through her eyes. I love upside down cakes - appeals to the child in me I guess. I think the first upside down cake I ate was a pineapple upside down cake made by my best friend's mother when we were in college. I still remember how heavenly it was.... I have made some more after that including this strawberry one.

So, when I saw this upside down cake made with caramelized pears and walnuts on Sig's blog, I was quite taken with the lovely, molten brown goodness it seemed to ooze. I also wondered at her comment about the 14tbsp of butter and 2 cups of sugar the recipe had and how it was difficult to expect the whole wheat to compensate for it in health terms. I decided to have a crack at the recipe and see whether I could come up with something which had a little less butter and sugar. When I started baking I never used to mess with recipes - of course, I went back to my bad ways of substitution pretty soon ;). But I was still a little bit concerned about tweaking this recipe.

I cut out the caramelized walnuts first since I don't really like nuts. That reduced a bit of the sugar,butter and maple syrup. For the caramelized pears I cut the butter and sugar as well as a little of the maple syrup. In the cake recipe as well, I figured since the caramelized sugar syrup would be sweet enough, some of the sugar could be reduced. I did increase the milk a little bit though since the batter seemed a little bit too thick. I had two pears and so I reduced the flour to 1.5 cups instead of 2cups; I used 1 cup of whole wheat flour and half a cup of all purpose flour. I used some ginger powder instead of the cardamom powder and substituted the maple syrup with golden syrup.

The cake turned out quite well and the pears were beautifully glazed. Next time I would probably use one more egg white or applesauce for some more moistness. Also I would bake it at 350 instead of 375C since the centre took some more time to be cooked though the rest of the cake was already done.

A beautiful cake and you can serve it warm in this season with some vanilla ice cream on the side.

Upside Down Pear Cake


Whole wheat flour (atta) - 1 cup
All purpose flour (maida) - 1/2 cup
Baking powder - 1 tsp
Ginger powder - 1 tsp
salt - pinch


1 egg (plus one egg white)
Butter - 150gm (or about 9 tbsp)
Sugar - 1/2 cup
vanilla essence - 1 tsp
Milk - 3/4 cup

For the caramelized pears:
Pears - 2, peeled, cored and sliced thin
Butter - 1 tbsp
Sugar - 4 tbsp
Golden Syrup - 6 tbsp

1. Heat the butter till just melted in a heavy pan, add the brown sugar and after 3-4 minutes, add the pear slices and saute till they turn brown - about 4 more minutes. Add the golden syrup and cook for another 4 minutes till the slices are soft but not falling apart. Cool.
2. Bring the butter to room temperature and beat in a large bowl along with the sugar on high(if using an electric mixer) till soft and shiny.
3. Add the egg, milk and vanilla essence and beat on low for 3-4 minutes till well combined.
4. Mix the flours, salt, ginger powder and baking powder and then add one third at a time, to the larger bowl and beat till just combined.
5. Grease a 8" pan and line with parchment paper 9or simply dust with flour). Grease the parchment paper too and the sides of the pan.
6. Arrange the slices starting from an inside circle and carrying on to the outside circle till the whole pan is covered. Pour the syrup on top.
7. Pour the batter (should be of dropping consistency) over the pear slices and smooth over with a wooden spatula, taking care not to press down too much.
8. Pre heat the oven to 350C and bake for 40-45 minutes till a skewer comes out clean. When completely cool, invert and serve.