Thursday, December 25, 2008

White Chocolate, Cherry and Oatmeal Cookies


I have been baking a Christmas cake for the past two years and it has become nice way to bring in the holiday spirit - right from marinating the fruit to baking it on Christmas Eve. This was the first time in the last eight years we weren't at the our friend's house in Chennai for Christmas - but the cake still managed to please new friends. And the special part of baking it this year was that a couple of months back I got to meet my friend in London who had given me this recipe some years back. We have only been emailing each other for almost 8 years now so it was wonderful to actually get to meet her!


This year, I also baked some cookies - adapted this recipe which was itself adapted from this one
from Smitten Kitchen who adapted it from Cook's Illustrated. I love crispy cookies much more than the chewy ones so I loved the idea of these. They are actually not so much crispy rather than this kind of absolutely gorgeous vehicle to transport some rich chocolate and oatey goodness into your mouth!! I did away with the sea salt and reduced the oatmeal, threw in some dried cherries and Voila! - absolutely delicious cookies. I had to stop myself from eating the dough while waiting for the first batch to cook :)

Sending these cookies to Neivedyam's Cookie Baking Event which is being hosted by Sharmi.

White Chocolate, Cherry and Oatmeal Cookies

Ingredients:

Flour - 2 cups
Oats - 1 cup (I used quick cooking oats)
Baking powder - 3/4 tsp
Baking soda - 1/2 tsp
Butter - 200gms
White chocolate(chopped) - 170 gms
Egg -1
Vanilla essence - 1 tsp
Dried cherries - 50gms
Sugar - 1 cup

Method:

1. Cream the butter and sugar in a large bowl till smooth.
2. Put the chopped chocolate into a glass bowl and place it inside a bowl of heated water and microwave in 30 second intervals till melted and smooth.
3. Beat the egg and add to the creamed butter and sugar mixing lightly till combined.
4. Sift the flour with the baking powder and baking soda and then add gradually to the egg mixture.
5. Add the vanilla essence and the melted chocolate to the bowl and combine with a wooden spatula.
6. Refrigerate the mixture for about half an hour so that it can be shaped into balls - do not skip this step!
7. Pre heat the oven to 180C (350F), cut butter paper to size and spread on a baking tray.
8. Shape the cookie dough into balls, flatten slightly and place on the baking tray atleast 2 inches apart (they will spread and flatten as they bake). Don't handle the cookie dough for too long since the chocolate and butter will start melting.
9. Bake for 15 minutes. Remove the butter paper with the cookies on it and set aside to cool. They are very fragile before they cool so don't try to remove them from the butter paper when hot.
10. Bake more batches in the same way till the dough is used up.

Saturday, December 13, 2008

Kozhi Vartha Curry


Secrets and scoops, clothes and coffee, wisdom and wine - girlfriends share it all. And what better way to do all this than over a long, lazy lunch on a lovely winter's day?! A mid week holiday is one of the best things to happen to a working woman trying to juggle half a dozen things. So when one came my way last week I started thinking of all the chores I could finish - the gas ordering, buying winter clothes, claims, bank work.

Midway I paused and thought to myself - life is too short to let a whole day pass by without enjoying it. I decided to spend time with my daughter and do something for myself too. Called up the usual suspects - girlfriends I have made in the past one year and who have become really good friends. Two of them couldn't make it but two others did. R's daughter is my daughter's best friend so she came along too and they had a ball while the three of us chatted and caught up over lunch.

I planned some simple home food - Sambar, cabbage porial, steamed rice and salad. I decided to make a spicy chicken curry. Kozhi Vartha Curry seemed to be the perfect dish to go with the Tamil meal, so I dug out my trusted recipe - it is heavily (very heavily) adapted from Sanjeev Kapoor's recipe and I have found it works best for me. Kozhi means chicken in Tamil, Vartha refers to frying the chicken pieces.

It turned out quite fiery and had the right amount of sourness to make it a perfect accompaniment to the steamed rice. The sambar ended up being slurped out of bowls in true non-South Indian style :) - the same as this one but with pumpkin in it.
It was one of those really nice afternoons when you really don't know how time passes - we discussed everything under the sun - school admissions (trying), the terrorist attack (outrageous and tragic), the Faberge exhibition on at the National Museum (fabulous), Dostana(terrible), the new Bond movie (disapoointing), pending book lists (long) - and before we knew it it was 5 pm!

I'm glad I picked the lunch over chores - my inbuilt guilt mechanism ensured I finished my chores over the weekend. So what would you have chosen - hope my story encourages some of you to treat yourself sometimes!


Kozhi Vartha Curry

Ingredients:

Chicken - 800 gms cut into 12- 14 pieces

Marination:
Red chilli powder - 1/2 tsp
Turmeric - pinch
Yoghurt - 1/2 cup
Salt - 1/2 tsp

Masala paste:
Ginger - 2 " piece
Garlic - 6-8 cloves
Red chillies - 4
Oil - 1/2 tbsp
Curry leaves - 5-6
Onions - 2 chopped fine
Tomatoes - 3 chopped fine
Coriander powder - 1 tsp
Crushed black pepper - 1/2 tsp
Garam masala - 1/4 tsp

Tamarind pulp - 2 tbsp or a juice extracted from a marble size ball.

1. Clean the chicken and marinate in yoghurt, red chilli powder, turmeric and salt mixture for atleast 2 hours.
2. Grind the masala ingredients to a smooth paste adding water as needed.
3. Heat oil in a heavy bottomed pan and add the curry leaves and the chopped onions and saute for 4 minutes on low.
4. Add the chicken pieces along with the marinade and masala paste and fry on high for 5-7 minutes allowing each side to sear till it turns a bit brown before turning it over.
5. Add the chopped tomato and fry till it is mushy, then add the coriander powder and salt and fry for about 2 minutes.
6. Add 1 cup water and bring to boil, reduce flame and cook covered for about 12-15 minutes till the chicken is tender.
7. Adjust the salt, add the tamarind pulp and cook for another 5-6 minutes.
8. Add the garam masala and crushed black pepper and remove from flame - serve with steamed rice.

Notes: the recipe is quite spicy, reduce a couple of chillies if you like it less spicy.
I also removed a couple of pieces from the marinade and grilled it for about 20 minutes at 180C - it was well flavoured and juicy.

Wednesday, December 3, 2008

Carrot & Mustard Bread

It's funny how certain things you buy seem to acquire a vibe or a kind of reputation attached to them. Like that dress which you seem to be perpetually running late in or spilling things on or the car which always seems to be getting into scrapes while the other one you owned only reminds you of all the lovely, long road trips you have taken.

Of course, it could be that you always spend time looking for matching earrings for that particular dress, which is why you run late or you love wearing a particular dress for lazy lunches - and if you're anything like me that's a guaranteed recipe for splotches and stains!. And of course we took more road trips as a cozy couple and handed over the car to a driver when the kid came along!!

Inspite of all the rational explanations, these things seem to stick in our mind. The same thing happened with a lovely loaf tin my friend picked up for me when she saw a dealon while shopping. This was in June and immediately after that I somehow simply stopped baking! It had everything to do with the fact that I went back to full time work in July, but of course I blamed it on the poor loaf tin.

The best way to break that jinx? - bake something in it! So, I brought out my Sara Lewis book and saw this lovely Carrot & Mustard bread. I started quite late (around 7.30pm) and realised later it would only become colder as time wore on - definitely not ideal bread baking time. But I just can't seem to give up an idea once it takes hold, so I soldiered on. The yeast was fine and bubbled over, but when I kneaded the bread and left in a warm oven, it really didn't rise as much as it normally does. So I left it for almost an hour and 45 minutes before the second proofing. Kneaded it again and shaped the dough into three small buns and one oblong loaf.

30 minutes later it had not risen much at all and I was really sleepy and didn't think it was going to rise much anyway, so popped it into the oven to bake after glazing it. It baked quite beautifully and the glaze made it a nice golden top. But the inside of the bread, though cooked, was not the lovely spongy texture I look forward to....I guess, now that it's winter, I should stick to baking in the day when its a bit warmer. Or maybe it was the fact that I had used whole wheat flour instead of "granary flour" and plain flour instead of "strong white flour" and did not change the proportions. The flavours of the carrot and mustard were excellent though - definitely worth a second attempt.

Ah, well, atleast now the jinx has been broken and I can stop blaming the loaf tin........on the other hand, maybe I can blame the loaf tin for the bread!*evil grin*

This loaf of carrot bread specially to dear Cooker who is hosting this month's edition of JFI - where the ingredient is the Carrot. Jihva for Ingredients (JFI) is the brainchild of Indira and is probably one of the longest running Indian food blog events. Thank you Cooker for extending the last date!


Carrot & Mustard Bread
Recipe adapted from Sara Lewis's The Bread Book

Ingredients:
Wheat flour (atta) - 200gm (approx 2 1/4 cups)
Refined flour (maida) - 150gm (approx 1 3/4 cups)
Water - 200ml (1 cup)
Dried active yeast - 3 tsp
Sugar - 1 tsp
Honey - 1 tsp
Mustard - 2 tbsp
Carrots - grated, 1 cup
Salt - 1 tsp
Butter - 2 tbsp
Egg yolk - 1

Method:
1. Warm up the water, dissolve the sugar in it and when lukewarm add the yeast to it. Keep aside for about 15 minutes till it bubbles and froths.
2. In a large mixing bowl, mix the flours with the butter, rubbing till it resembles breadcrumbs.
3. Add the salt, honey, mustard, grated carrot and the yeast mixture and knead for 10 minutes to a smooth dough.
4. Cover with an oiled clingwrap and set aside in a warm place for about an hour or till it doubles in size.
5. Knead again and shape into an oblong loaf or form into a thick rope and twist from one side like a corkscrew.
6. Put into a greased loaf tin (I used a 1 litre loaf tin for the loaf and made the rest of the dough into three small rolls) and set aside for another 30 minutes till it rises to the top (depending on the height of the tin).
7. Pre heat the oven to 200C, brush the egg yolk mixed with 1 tbsp water on to the top of the loaf and then bake for about 30-35 minutes. If the top is browning too much after the first 15 minutes, cover with foil and continue baking.
8. Remove from oven, the bread should sound hollow when tapped. Remove from tin carefully and keep on wire rack to cool.


Monday, November 24, 2008

Sweet Corn, Pepper & Pumpkin Stew

Winter evenings are magical, especially when you have a bowl of steaming "something" to warm your insides. No wonder people put on weight during the winter, my appetite seems to increase by leaps and bounds as the temperature drops. But winter is also when some of the best vegetables are available so it's also the best time to come up with healthy recipes.

I came across some fresh sweet corn on the cob at the local Mother Dairy and it was reasonably priced too - surprising considering even French beans are Rs. 40 a kilo!! So after my daughter polished off a couple of them - microwaved and buttered - I was wondering what to do with the rest.
I remembered a dish my friend made for lunch sometime back - it had sliced sweet corn on the cob in a thin gravy with coconut - apparently an African dish in origin. I also remembered seeing something with sweet corn and coconut on Cynthia's fabulous blog Tastes Like Home. I couldn't wait to ask either for the recipes - I wanted to cook it NOW!

So, I decided to make a stew. Stews are very forgiving....you can put pretty much anything you want in them, flavour and spice them as you like and it will turn into a dish you can peg into some kind of cuisine or the other.
I kept the spices to the minimum - bay leaf, garlic, chilli powder and thyme - and used a stock cube by Better than Bouillon. This is a brand which I have seen much recommended by Jai & Bee of Jugalbandi so when I was in London last month I made it a point to pick it up. It added lovely flavour to the stew and I don't think I will return to Maggi cubes till I run out of these!

Black eyed peas or chowli / karamani/lobia added some much needed thickness to the stew; I soaked them and cooked them in a pressure cooker for two whistles so that they would cook at the same pace as the vegetables in the stew. The sweet corn was simply amazing in the stew - juicy and dripping with flavour as you bit into the tender kernels. I served the stew with brown basmati rice. Perfect for the start of winter!


Sweet Corn, Pepper & Pumpkin Stew

1 big sweet corn-on-the-cob sliced
1 carrot chopped into big pieces
Pumpkin pieces - 1 cup
1 green pepper sliced
1 big tomato chopped
1 big onion chopped
3 cloves of garlic minced
1 bay leaf
1 tsp red chilli powder
1/2 tsp dried thyme
Salt to taste
Olive oil - 1 tsp
1 stock cube dissolved in 500 ml of water (I used Better than Bouillon vegetable stock cube)

1/4 cup of black eyed peas (chowli/karamani/lobia)
soaked for 1 hour and cooked in the pressure cooker for 5-7 minutes (1-2 whistles) till just done

1. Heat the oil in a large heavy bottomed pan. Add the bay leaf and after one minute add the garlic and onion and saute for 5 minutes.
2. Add the red chilli powder and the chopped vegetables (carrot, pepper, sweet corn,pumpkin) and the black eyed peas and the warm stock. Add salt and bring to boil.
3. Turn down the flame and cook covered on low for about 15 minutes till the vegetables are cooked.
4. Add the chopped tomatoes and some dried thyme and cook for another 10 minutes. Turn off and serve warm with brown rice.

Tuesday, November 18, 2008

Stuffed Bell Peppers

I know I have been away for too long - this post has been languishing in my drafts for a whole month!! Blame it on work, travel, school admission stress and having a life outside of the blog! To make up - here is a simple but favourite of mine.

This post on stuffed jalapenos triggered a long lost memory of some amazing stuffed capsicums my mother used to make when we had just bought our new OTG (Oven-Toaster-Grill) so many years ago. Then the novelty wore off and with it the oven recipes too. My brother and I loved those cheesy potato stuffed morsels encased in the roasted cup of a capsicum. There is something completely addictive in that combination.....

I instantly abandoned the baingan bharta plan I had in mind for dinner and switched allegiances to the bell peppers instead. Boiled some potatoes, mashed them along with spices, stuffed them into the peppers, topped the peppers with cheese and baked them. In half an hour, there was my childhood memory on a plate - still as delicious as ever! Called my mother and told her about it - she was surprised I even remembered, she says she hardly made it a few times....I wonder what my daughter's favourite memories will be.

I had some stuffing left over so I decided to add some tomatoes - they were good, but not as good as the peppers. Though I know some people like tomatoes better.

I am definitely going to try the recipe with the cheese stuffed jalapenos. The different cheeses and jalapenos may be a bit difficult though, so I might do some tweaking of my own. The egg wash and bread crumbs is a good idea though.

Stuffed Bell Peppers


Bell Peppers (Capsicum) - 6-8 small
Boiled potatoes - 4 medium
Red chilli powder - 1 tsp
Cumin powder - 1/2 tsp
salt to taste
Oil to smear on the peppers
Grated cheese - 1/2 cup

1. Mash the potatoes and mix with red chilli powder and cumin powder and salt.
2. With a sharp knife, cut the tops of the peppers out and scoop out the seeds and stalks from inside without damaging the pepper.
3. Fill the peppers with the potato stuffing and top with grated cheese.
4. Smear the outside of the peppers with oil and then bake in a pre heated oven at 350F or 180 C for about 30 minutes, turning once in between.
5. Its okay if the peppers don't stand upright, if properly stuffed, the stuffing won't fall out.

Thursday, October 16, 2008

Olive and Feta Cheese Spiced Rustic Bread


Haven't baked bread for a long long time now though I have been itching to get into the kitchen for a spot of baking. Oh the joys of full time work! It's worse when you know one of your birthday gifts was a book on breads by Sara Lewis and you have been using it as bedtime reading, drooling over the pics instead of sinking your teeth into one of them!

Well, though I had a very long Saturday (AGAIN!) I was determined to bake bread. So, broke out the yeast and set to work. The book had some excellent recipes for flavoured breads and I loved the Spiced Potato and Onion bread as well as the Olive and Tomato Tear and Share Bread. So what does this Gemini do when faced with making a decision - combine the recipes and modify them of course! :)

I didn't have time to boil the potatoes since it was already 7 pm. So I decided to use only the fennel and cumin from that recipe and stick to the olive bread for the most part. Since I didn't have any sun dried tomatoes at home, I decided to use feta cheese instead. I know, I know - bear with me - it gets better, I promise. Then to stir things up some more, I fried some chopped onions with the fennel and cumin seeds and kneaded it into the bread and replaced two thirds of the flour with whole wheat flour.

I was a bit worried after this whether the bread would even rise with the different proportions I had used, but I needn't have worried; the flour didn't know about my penchant for experimentation. It doubled beautifully the first time and when I added the olives and feta cheese and kept it for the second proofing, it rose again.

I baked it for 25 minutes and then covered it with foil to prevent it from browning too much and continued baking for another five minutes. The crust was beautiful and the insides were nice and soft. The flavours were really nice - the fennel and the feta cheese being a great combination!

I an sending this to the 3rd World Bread Day being hosted over at Zorro's in celebration of World Bread Day '08 which falls on October 16th this year.
The original World Bread Day - an event created by UIB International Union of Bakers and Bakers-Confectioners - wants to provide an opportunity to talk about bread and bakers, to find out about their history, their importance as well as their future.


Olive and Feta Cheese Spiced Rustic Bread
(Adapted from The Bread Book by Sara Lewis)


Whole Wheat flour - 3 cups
Refined flour - 1 cup and upto half a cup more if needed
Active dried yeast - 2 1/2 tsp
1.5 cups water
1 tsp sugar
3/4 tsp salt
2 tbsp olive oil

Chopped Olives - 1/2 cup
Feta Cheese - 1/2 cup crumbled


1 big onion chopped fine
1 tsp fennel seeds
1 tsp cumin seeds
Chilli flakes - 1 tsp
1 tsp oil

1.Warm the water and mix in the sugar and yeast and leave for about 15 minutes till it froths and bubbles.
2.Heat the oil in a pan, add the cumin and fennel seeds and when they crackle, add the onions and chilli flakes and fry on low for 5 minutes till soft and browned.
3. Mix both the flours along with the yeast, onion mixture and salt and knead well for about 10 minutes to a smooth dough. Cover with plastic wrap and keep in a warm place for about an hour till it rises and doubles in size.
4.Punch the dough down and knead again for about 5 minutes. Shape the dough into a ball 8" inch in size, place on an oiled baking tray and pat in the chopped olives and sprinkle crumbled feta on top.
Keep aside for another half an hour to 45 minutes till it rises again.
5. Bake in a pre heated oven at 180C or 350F for about 25 minutes. If the crust is getting too brown in the last 10 minutes, cover with aluminum foil till done.
6.Remove from the tray and cool on a rack till completely cool.

Tuesday, October 7, 2008

Eral thokku (Prawns in spicy tomato sauce)


I cook prawns at home about four times a year....and the frequency has gone down even more after moving to Delhi. One of the reasons is that I like my prawns delivered home, fresh and cleaned. A rather difficult combination - you usually get frozen prawns cleaned and delivered, fresh prawns are not that easy to get delivered. The other reason is that we tend to order prawns for our meals if we go out to a seafood restaurant and not being big meat eaters don't really miss it all that much.

So, I was more than a little surprised when Hubby suggested we have prawns for Sunday lunch at home. At first I thought he was joking, then closer to lunch time when I asked him again, he said the same thing. Well, I decided then, that at such short notice we would have to do with frozen prawns from the local frozen meats guy. C R Park has an amazing sea food market and is just 5 minutes away from home, but there was no way I was going to negotiate that smelly territory, bargain with the guy and then wait there while it was cleaned!

I usually choose medium sized prawns - I have found that the Jumbo prawns, while they look great aren't as tender as the smaller ones. Marinated them and then stepped out for some grocery shopping. Back after an hour, an onion - tomato base sauteed with spices and the prawns added at the end for about 5 minutes and presto! one lip smacking dish ready for lunch!

I'm sending this dish to this month's edition of Monthly Mingle - Sensational Sides - being hosted by Ruth. Monthly Mingle is the brainchild of Meeta of What's for Lunch Honey.

Eral thokku
Prawns - 300gms
Onions - 2 big finely chopped

Tomatoes - 2 big finely chopped

Garlic cloves - 2-3

Chilli powder - 1 tsp

Coriander powder - 1 tsp

Curry leaves - 6-8

Mustard seeds - 1 tsp

Oil - 1 tbsp

1. Clean the prawns (devein and shell if not already done) thoroughly, making sure they don't have any veins left.

2. Marinate with half a tsp of tumeric powder and a little salt and refrigerate for about half an hour.

3. Heat the oil in a heavy bottomed pan, add the mustard seeds and when they splutter, add the curry leaves.

4. Put in the chopped onions and garlic and saute for about 5-7 minutes till it is translucent.

5. Add the chopped tomatoes and saute till they become pulpy.

6. Put in the chilli powder, coriander powder and salt and fry for 3-4 minutes. Add 1/4 cup of water and bring to boil.

7. Reduce flame and simmer, add the marinated prawns and cook covered for 3-4 minutes. Prawns when overcooked tend to get rubbery. If they are fresh they can be cooked for about 5 minutes, frozen prawns may be pre cooked and require lesser cooking time.

8. Turn off the heat, serve warm with rice or rotis.

Saturday, September 27, 2008

Soup and Salad Lunch - Tomato Carrot Soup

I made two soups and a salad for lunch on Janmashtami after a heavy festive breakfast. One of the soups was this creamy Spinach soup and the other one was this delicious tomato carrot soup. The salad was my usual roasted salad with lots of mixed vegetables.

Shredded carrots and peeled tomatoes, cooked along with some herbs and spices and then pureed for a quick, tasty bowl of warm goodness! You can add a small grated potato to this for some thickness. This time though, I went with a small piece of pumpkin - it not only adds texture but also a beautiful orange colour.

Tomato Carrot Soup

3-4 tomatoes, blanched and peeled
(immerse the tomatoes in boiling water for 5 minutes, remove and plunge into cold water. Peel)
2 carrots, peeled and grated
1 onion finely chopped
1 clove garlic minced
1 bay leaf
small piece of pumpkin, peeled and roughly chopped
1/4 tsp red chilli powder
1/2 tsp cumin powder
salt and pepper powder to taste
a sprinkle of mixed dried herbs
oil - 1 tsp

1. Chop the peeled tomatoes. Heat the oil in a heavy bottomed pan, add the bay leaf and garlic.
2. Toss in the chopped onions and saute for 5 minutes till transluscent.
3. Add the grated carrots, chopped pumpkin and tomatoes and saute for about 3-4 minutes.
4. Add the chilli powder, salt and cumin powder and after a minute, add 3-4 cups of water and bring to boil.
5. Reduce flame and simmer covered for about 10-15 minutes till the vegetables are cooked.
6. Cool, remove the bay leaf and puree the mixture. Add a little water if needed and return to the fire. Adjust salt and pepper, put in the mixed herbs and pepper and remove from flame.
7. Serve warm with a crusty bread.


Sunday, September 21, 2008

Celebrating100 posts!


My creation
Originally uploaded by rajishanker
And what a delightful journey it has been since that first post in November, last year. Since then, I have found an amazing food blogging community, participated in blogging events, met one fellow food blogger, been part of a secret ingredient food chain, had baking days at home with kids, tried out new recipes and new ingredients like Goda masala and Rosematta rice, started baking bread and most importantly - broadened my horizons about cooking and eating healthy.


My favourite picks from the past 100 posts:

A soul satisfying Thai Noodle Soup

One of my first attempts at baking bread - Poee (Goan Pav) with Chicken Xacuti

A beautiful Shallot,Garlic, Olives and Sesame Focaccia

My daughter's third birthday spread

My version of fusion cooking - Lemon Coriander Chicken with a Coconut Mango sauce

A nutritious and delicious Eggless Pumpkin Walnut Bread

A Lebanese meal - Chickpeas, Raw mango and Apricot Tagine with Couscous

Traditional Christmas Cake

Home cooking posts - Kozhambu, Avial, Urulai Roast, Kozhukattai (Modak), Poriyal

Posts on regional dishes - Kadhi, Sindhi Sai Bhaji, Vankaya Poornam, Amti, Kadala Curry, Shaak


I have learnt so much along the way and an enjoying being a part of this vibrant and enthusiastic community (how do y'all do it!). Thank you so much for being part of this wonderful journey and your comments. Special thanks to my husband for encouraging my passion in his own way(what can I say, we can't eat sometimes till the photo has been clicked!) and to my dear neighbour A for cheering me on and being a willing guinea pig!

Saturday, September 13, 2008

Soup and Salad Lunch - Spinach Soup


Krishna Jayanthi or Janmashtami arrives bang in the middle of the monsoons in India (atleast in the North and the West) and reminds us of the story of Krishna's birth. "It was a dark and stormy night..." seems particularly apt here! I still remember the classic Amar Chitra Katha illustrations (sorry, no fond memories of Grandma recounting the story to us!) which showed Vasudeva crossing the river in spate to make sure his newborn baby had a chance to survive.

I found that while in the South, the festival celebrated the evening before, in the North it is celebrated the next evening - I decided to go the North Indian way, simply because it was more convenient since it was a Sunday. The small footprints leading from outside to the pooja room fascinated my daughter and she did her own spot of painting while I drew the kolam outside. After a heavy breakfast of vadai, semiya payasam, pongal, chatni and sambar there was no way we could have a full meal for lunch.

So we decided on soup and a light salad. Husband was happy to have a spinach soup while I preferred a tomato carrot soup - recipe to come next.

The spinach soup is a very simple one - takes about fifteen minutes to make - the cleaning of the spinach probably takes more time than the actual preparation. But if you have spinach already separated from the stalks (I store them in Tupperware or other airtight containers) it makes it much easier.

Spinach Soup


3 bundles of spinach - separated from the stalks, cleaned in several changes of water and chopped
1 medium onion chopped
3 cloves garlic chopped
1 bay leaf
salt to taste
1 tsp butter
1/2 green chilli
Freshly crushed pepper powder
2 tbsp cream

1. Heat the butter in a heavy bottomed pan, add the bay leaf and then the garlic and onions. Saute till onions are transluscent.
2. Add the green chilli and the chopped spinach and cook for 4-5 minutes till the spinach wilts and is just cooked.
3. Remove from the pan and cool. Discard the bay lead and puree in a blender.
4. Return the pureed spinach to the pan, add water or vegetable stock and bring to boil.
5. Add salt, reduce flame and cook for about 4 minutes.
6. Add crushed pepper and one tablespoon of cream and remove from heat.
7. Serve warm with cream drizzled over.

Monday, September 8, 2008

Kozhukattai - Steamed dumplings filled with coconut and jaggery


Growing up in Mumbai, I think there are few people who remain untouched by the singular devotion to Lord Ganesha - on display for a full 10 days with serpentine queues in front of the bigger "mandals" which compete to have the biggest idols. While the "sarvanjanik" part of the mandals have become very commercialised over the years, the fondness with which the smallest of idols are brought into homes and decorated and worshipped, has remained unchanged.

I remember this part and also the fun part which was a huge part of my childhood - the 10 day "culturals" our colony hosted. Dance, drama, music, fancy dress, film screenings, rangoli competitions - it was an amazing 10 days we looked forward the whole year. Some of the teenagers who used to put up a Marathi play (complete with three acts!) every year are now full fledged theatre actors and I am proud to have seen them first!

What has changed now is that I cringe at the sight of those huge idols going in procession for the immersion ritual and think of the polluted sea water at the end of it. There are many people who now buy only clay idols and shun the plaster of paris one with toxic colours, but unfortunately not too many of them as yet to really make a difference.

The Ganesh festival isn't very big in Delhi and I had to go into work since it wasn't a public holiday. Which meant that I had to finish the pooja by 9! Kozhukattais - which are steamed rice flour dumplings with a coconut-jaggery filling - are a traditional offering for this festival in Tamil Nadu. The Maharashtrian version is called "ukadiche modak". I also made "kunnuku" - deep fried fritters made from mixed lentils. Then there was idli, sambar and chutney - a filling breakfast and I'm sure Ganesha was as satisfied as we were :) Ganpati Bappa Morya!

Kozhukattai


Rice flour - 3/4 cup
Water - 1/2 cup
salt to taste

Filling:
Grated coconut - 1 cup
Grated jaggery - 1 cup
Cardamom powder (elaichi) - 1 tsp

1. Heat the jaggery in a heavy bottomed pan with 2 -3 tbsp of water and heat till it dissolves. Add the grated coconut and cook till it becomes a thick mixture but not completely dry (about 5 minutes). Add the cardamom powder and switch off the flame. Transfer to another bow and cool.
2. Heat the water in a heavy bottomed pan and add a pinch of salt and a few drops of oil. When it is just about simmering, add the rice flour a little at a time, constantly stirring to avoid lumps.
3. Keep some extra rice flour and hot water on hand to add to the pan in case either is needed. The consistency should be like that of a smooth dough which can be kneaded.
4. Allow it to cool a bit but not completely. As soon as you can handle it, break of bits of the dough, roll into a ball. Smear some oil on your hands, flatten the ball in the palm of your hands and with your thumb and index finger make a shallow cup. Fill it with a small ball of the coconut jaggery mixture and seal it into a conical shape. Break off any excess dough at the top and reshape into a cone. You can also use moulds available in the market.
5. The trick is not to have too much dough so that the dumpling becomes very thick but not so thin either that the filling oozes out. Keep some oil in a cup to dip your fingers so the flour doesn't stick. Reheat the filling if it hardens.
6. When all the dough and filling is used up, grease an idli plate or a steamer, arrange the kozhukattais on it and steam for just 5 minutes.


This goes to the Sweet Series - Deep Fried or Steam Cooked Sweets , being hosted by Paajaka Recipes.


Thursday, September 4, 2008

Moong Dal - Chilkewali (Split mung lentils with skin)


Moong (also called mung or green gram) is one of the most popular lentils in and also native to India. Widely used in other Asian cuisines too (munggo or monggo in Philippines and đậu xanh in Vietnam.) this lentil goes by the name moog, paasi payirru, hesaru bele and pesalu in different states in India.

It is known to be the most easy to digest lentil - especially the split lentil - and is often one of the first weaning foods given to babies. A rich source of protein, it is also used in recipes for people recovering from illnesses since it is light on the stomach.

In our kitchen the yellow split lentil without the skin (moong dal) is used atleast twice a week - moong ka cheela and pongal for breakfast, dals and kootu for our meals and a spoonful thrown in to thicken and nourish some soups. It is a versatile lentil and I find it takes on different flavours - from garlic to cloves - very easily.

But this recipe uses the split moong dal with the skin on (Moong dal chilka) and I find it to be a refreshing change from the usual skinless version. It has more character to it and retains its own flavour instead of blending in namelessly into the dish du jour. This recipe is a very simple one with a simple tadka of onions, tomato and garlic. Perfect with hot phulkas and can even hold its own with rice.


Moong Dal - Chilkewali (Split mung lentils with skin)


Split Moong dal with skin (green gram) - 3/4 cup
Onion - 1 chopped fine
Tomato - 1 big chopped fine
Garlic - 2-3 cloves chopped fine
Chilli powder - 1/2 tsp
Cumin powder - 1/2 tsp
Turmeric powder - 1/4 tsp
Asafoetida (hing) - pinch
Oil - 1 tsp

1. Cook the moong dal with skin in a pressure cooker in 3 cups of water. Cook along with turmeric powder.
2. Drain the stock and reserve.
3. Heat the oil in a kadai, add the asafoetida and garlic and fry for half a minute.
4. Add the onions and saute for about 3-4 minutes till translucent.
5. Add the chilli powder and cumin powder and cook for another 3 minutes.
6. Add the tomatoes and fry for 3-4 minutes till they turn just soft.
7. Add the cooked moong dal, salt and as much as stock as you prefer.
8. Bring to boil, simmer for 5 minutes and remove from flame.
9. Serve hot with chapatis or steamed rice.

Sunday, August 31, 2008

Chocolate Brownies


Brownies have been one of my favourite kinds of dessert for some years now and I try not to pass up a chance to have good warm brownies with cold vanilla icecream. But some of the versions I have tasted (especially in those godawful coffee cafes which abound in every nook and cranny) have been really bad. Dry, barely-there chocolate versions which you wish you never tried in the first place.

A good chocolate brownie is one which is moist and fudgy, holds together well but doesn't crumble and of course has some good dark chocolate in it.

For some reason I didn't try making brownies - didn't want to end up with one of those terrible versions I despised....until I saw this recipe at Jugalbandi. The pictures screamed gooey delectable squares of heaven. And of course, as anyone who knows Jai and Bee will tell you, if it's on their blog and looks like its delicious - it *is* delicious!

Jugalbandi was most certainly an inspiration when I wrote my first post - and I made that sweet beginning with one of their recipes - seems fitting then that almost a year later and close too 100 posts, I post yet another recipe from their amazing blog!

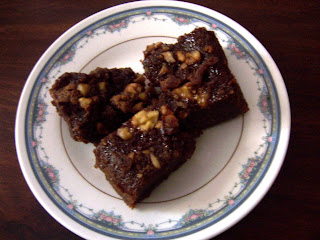
I made this Chocolate Brownie from J&B's recipe for Chocolate Almond Brownie and it was absolutely delicious. I added walnuts to the original recipe, used three eggs instead of four and used all butter instead of apple sauce. Verdict - chocolate brownies just the way I like them - moist, chocolately and not cloyingly sweet!

This is going to Zlamushka's event Tried and Tasted - Jugalbandi's blog is this month's pick and I am looking forward to seeing what's everyone's favourite recipe from their blog!! Recipes inspired from their blog:

Chicken & Red Pepper Crustless Pie
Rosy Tomato Risotto
Poee and Xacuti

Wednesday, August 27, 2008

Creamy Chicken Curry

With all the debates and opinions on what exactly constitutes a curry, I hesitated before calling this a curry. But then decided, I would go ahead and call a curry a curry!

I had been making South Indian curries the last few times I had made it and decided it was time to make something from the North. One of my dear friends made a delicious Punjabi chicken curry some years back when she visited us in Chennai. I have made that a few times and this time decided to tweak it a bit.

I wanted it a bit more creamier, so I added some cashew and almond paste to the original tomato onion base. As always, I marinated the chicken for about 2 hours; I find it makes the chicken much more tender and able to absorb the flavours of the curry better. Don't mistake the creaminess of the curry for blandness though; this curry is spicy and nothing like the non- descript sweetish tomato and cream curries one finds in most restaurants these days.

The best part of the curry though was the freshly ground cinnamon powder which I added at the end. Though I used whole spices in the beginning, the cinnamon powder gave a distinctive taste to the curry instead of the generic garam masala taste which most curries have. I'm going to do this more often I think, replace the garam masala powder with just one spice powder.

This dish goes to celebrate the first anniversary of Think Spice - that wonderful brainchild of dear Sunita - come join the fun at Sunita's World!


Creamy Chicken Curry


Chicken - 500gms

Marinade:
Yoghurt - 1/2 cup
Ginger Garlic paste - 1 tbsp
Red chilli powder - 1/2 tsp
Cumin powder - 1/4 tsp
Turmeric powder - 1/4 tsp
Salt - 1/4 tsp

Onions - 2-3 grated
Tomatoes - 2-3 pureed
Coriander powder - 2 tsp
Cumin powder - 1/2 tsp
Red chilli powder - 1 tsp

Cashews - 8-10
Almonds - 5-6

Whole spices:
Cinnamon - 1 " stick
Cardamom pods - 2
Cloves - 2

Cinnamon powder - 1/2 tsp
Cream - 2 tbsp
Oil - 1 tbsp
salt to taste

1. Mix the marinade ingredients and soak the chicken pieces in it for atleast an hour or two.
2. Soak cashews and almonds in warm water for fifteen minutes, skin the almonds and grind to a smooth paste.
3. Heat the oil in a heavy bottomed pan, add the whole spices and saute till they change colour.
4. Add the grated onions and saute for about 5-6 minutes till it changes colour.
5. Add the red chilli powder, coriander powder and cumin powder to the onion paste and saute for another 5 minutes.
6. Add the marinated chicken pieces and stir fry on high for 5 minutes. Lower flame, add the cashew almond paste and tomato puree along with salt and a cup of water and bring to a boil
7. Lower flame, cover tightly and simmer for about 15 minutes till the gravy comes together and the chicken is cooked.
8. Add the cinnamon powder and cream and turn off the flame.

Sunday, August 24, 2008

Coconut Lemon Cake

I'm sure most of the Indian (and other) food blogging community knows about Meeta's fabulous blog What's for Lunch Honey - an incredible space for some brilliant recipes as well as breath taking photography.

I especially love her baking recipes and frequently find myself being drawn from one post to another marvelling at the ease which she puts together combinations of flavours and tastes, colours and textures.

One such unbeatable combination was Mum's Coconut Lemon Cake - I just had to try it out the moment I saw it. It also had some lovely memories of her childhood and the special bond she shares with her mother which made it a delightful post to read.

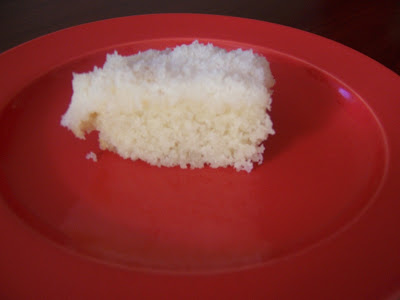
Well, I baked it in two moulds with the idea that I would take the larger one to a lunch at my friend's place and the other smaller one to keep at home. The larger one fell apart for some reason (maybe I turned it out too soon and it wasn't cool enough) and I was quite dismayed but I was in a hurry and just took it as it was - crumbs and all. I needn't have worried - the cake was so delicious that my friend asked if she could keep the rest!

The one at home was also very difficult to take out in one piece but I was more careful this time and managed better. But it got polished off really fast and I hardly had a couple of pieces left to click!

The taste of lemon along with the coconut was just pure brilliance - thanks Meeta (and Mum) for this lovely recipe! This goes to Monthly Blog Patrol (MBP) - Fruit Fare Yyes I know coconuts and lemons do not fit the usual concept of fruit - but they are fruits, so there! ;)

MBP was started by Coffee of The Spice Cafe and is being hosted this month by dear Aparna of My Diverse Kitchen

Saturday, August 16, 2008

Hot & Sour Soup

A hectic Saturday finishing up chores, bank work, grocery and veggie shopping, dealing with carpenters who don't have a clue what they are supposed to do.......all this in the morning half. Spending time with my daughter, making lunch and attending a kiddie birthday party(thankfully just upstairs and all friends around) was the second half. We were tired and also stuffed on the delicious snacks at the birthday party, so didn't really want a full meal for dinner.

Soup sounded like just the ticket for the evening and I was in the mood for something really tongue tickling, but a clear soup since I didn't want it to be too heavy. What followed was my "look at what's in the 'fridge, throw most of them into a pot and let's see what happens" kind of cooking!
The clear soup condition meant that it was going to be Oriental so that pretty much led me to where I was going. Mixed veggies, minced garlic and chopped ginger (so hubby can take them out if he wants to), stock cubes, lemon juice and fragrant Gandhraj lemon leaves - and within 15 minutes we had ourselves steaming bowls of absolutely refreshing and filling soup. Not to mention tangy and tongue tickling!
You can add shredded boneless chicken pieces if you want, or shrimps or even tofu cubes; lemon grass is a great addition too instead of the Gandhraj lemon leaves. Home made vegetable stock or chicken stock and a dash of thai chilli paste are other ideas.

This post goes to AFAM - Lemon being hosted this month by Simple Indian Food. A Fruit A Month was begun by Maheshwari of Beyond the Usual.

Hot & Sour Soup

1.5 cups mixed vegetables cut into thin long strips (carrots, mushrooms, beans, babycorn, bell peppers)
4 cloves garlic - minced
1 " piece of ginger - chopped big
2 slit green chillies
2 onions sliced (spring onions can be used)
2 soup cubes dissolved in 2 litres of warm water
salt to taste
1 tsp oil
juice of 1 small lemon
2 Gandhraj leaves
1. Heat the oil in a heavy bottomed pan, add the minced garlic and chopped ginger and saute 1 minute.
2. Add the sliced onions and sliced green chillies and saute till translucent. The chopped vegetables go in next, stir fry on high for 4 minutes.
3. Lower flame and pour in the stock, add salt and bring to boil.
4. Cook covered on a low flame for about 10 minutes, till the vegetables are all just cooked but still retain their colour.
5. Put the Gandhraj leaves in and switch off the flame. Add the lemon juice and serve hot.

Sunday, August 10, 2008

Murgh Biryani (Chicken Biryani)

My beloved blog hasn't been getting as much attention as it used to, as some of you may have noticed (and pointed out!!) I have just returned to full time work, its been three weeks now and with a full day at work and trying to spend as much time as possible with 3 year old, its been tough to spare much time for blogging.
BUT, I hope to be better organised and keep up with it - I definitely don't want to give it up. Thank you A for prodding me on and reminding me that there ARE people (even if they are only a handful :) ) who read this blog and making me want to make that effort!
This post for example, I did write it on the weekend, but just didn't end up uploading the pics....well, this morning I did. I have also decided to schedule my posts in advance so they get published regularly and I don't have to find time during the week to post.
Your comments are much appreciated, do keep them coming; they inspire me to blog!

Biryani – the name conjures up images of aromatic Basmati rice, each grain cooked to perfection yet retaining its indivudality. The saffron tinted rice hides within its bosom succulent pieces of lamb which have been marinated in a mixture of yoghurt and spices and then cooked along with the rice till the meat falls apart from the bone. Visions of huge "degchis" being cooked on "dum" (slow cooking) for feasts for special occasions come to mind.

Though these images are probably more nostalgia than reality, things haven’t really changed much where the biryani is concerned. Sure, now they can be had anywhere - from a dhaba to a five star restaurant without waiting for a wedding, but authentic recipes, freshly ground masala and the slow cooking have not been completely forgotten.
The Biryani has a rich history –it is supposed to have originated in Persia and come to India via Afhanistan, brought by the Mughals (Taimur is usually credited with this) as part of the rich heritage they brought with them when they invaded Northern India. After that, it seems to have taken on a life of its own, going South from the Avadhis to the Nizams of Hyderabad and morphing into even more different varieties. Read more about its history here

For me, a good Biryani has always been more about the flavours than the meat - I know, sacrilege! Chitrita Banerjee in her book "Eating India" - writes about the difference between the rich Avadhi Biryani and the "kucchi" Hyderabadi Biryani and prefers the former over the latter.

Well, for me its, the other way - Biryani in the North has always seemed to be less flavourful than the Hyderabadi Biryani or even the biryani made down south in Tamil Nadu. Maybe its to do with the fact that Avadhi biryanis rely more on the flavours from the meat itself(which is precooked and added). I love the Hyderabadi biryani because the meat when cooked with the rice in its rich marinade, imparts a heavenly flavour to the rice.

In Mumbai, there was nothing , according to me, to beat Lucky's biryani - a small joint in Bandra which had the most amazing biryani ever; I still remember ordering it for my 22nd birthday, my last one as a Mumbai resident. On later vists I have had biryani from Urban Tadka and it was passable, in an assembly line kind of way.

I have had more biryani since then, mostly in Chennai. Crescent in Nungambakkam was a favourite with my boss, he ate it practically every day;then there was Deluxe - a hole-in-the-wall in Pondy Bazaar, T. Nagar which served up a mean prawn biryani as well as a Deluxe special which was a favourite with out-of-towners because of the fried chicken pieces in it. Amravati's biryani was a hit-and-miss affair and depended on the day you went while Anjappar's was quite good. Ponnuswamy's biryani was overrated according to me while I have heard the biryani in Velu's Military Hotel is quite good.

Often while driving on the highway to Ooty or Kodai, we would see these signs at roadside dhabas "briyani ready" and I would wonder how these would taste if only we had the time and inclination to stop by. While waiting in the car in Mylapore one day, while my husband ran an errand, I saw this small shop which had a huge "degchi" (vessel) of biryani right outside the cash counter. As people would come and pay up, the guy manning it would take a quarter plate and just plunge it into the vessel and remove a plateful of biryani which he would shape into a heap with another plate, making sure it had the requisite three to four pieces of meat in it with one boiled egg. He served a cool 5 plates in the fifteen minutes I was parked...

The best biryanis I have had till date are:
1. Biryani catered by this lady in Kilpauk for my last birthday - it was the first time there were no leftovers.
2. Biryani at a small eating joint in Egmore (Marhaba Thirumana Biryani) which served only biryanis - nothing else.
And now coming to the biryani I made this Sunday. It was chicken biryani (I know, sacrilege again, but we prefer chicken to red meat!) ; hubby "felt like eating biryani" and I didn't feel like going out and experimenting in Delhi (haven't yet found a place which we like, have heard a lot about Andhra Bhawan though and need to check it out).

So I made it at home - the chicken was really tender and the rice loaded with the taste of spices and the marinade. It took me just about an hour to make, not counting the marination time for the chicken which was about another hour and a half; I actually marinated the chicken, went out grocery shopping and then came back and made it in time for lunch.
So, you can try this simple version when you are in the mood. You can add biryani masala which is available under different brands, if you want the restaurant taste.

Murgh Biryani

Chicken - 8 pieces

Marinade:

yoghurt - half a cup

red chilli powder - 1 tsp

coriander powder - 1 tsp

turmeric powder - 1/4 tsp

ginger garlic paste - 1 tbsp

salt 1/4 tsp

Basmati rice - 1.5 cups

few strands of saffron soaked in warm milk

Cardamom - 4

Cloves 6

Cinnamon - 1 " stick

Tej patta - 2

Onions - 2 sliced

Oil - 1 tbsp

Ghee - 1 tbsp

salt to taste

1. Mix the marinade ingredients and marinate the chicken in it for about an hour and a half atleast. Soak the basmati rice in three cups of water for about half an hour.

2. Heat the ghee in a heavy bottomed pan, add half the whole spices and fry one minute till they change colour.

3. Add the sliced onions and fry till well for about 5 minutes.

3. Add the chicken pieces along with the marinade and fry on high heat for about 5 minutes turning mid way so that both sides get seared. Lower flame, add 2 cups of water and simmer for another 10 minutes till the chicken is cooked.

4. Remove the cooked chicken pieces from the pan and strain the stock and keep aside.

5. Heat the remaining oil in the same pan, add the other half of the whole spices and when they change colour, drain basmati rice (reserving the water) and add to the pan. Fry for three minutes, then add the chicken pieces.

6. Measure the chicken stock you have reserved and add the basmati water and saffron milk to it to make 4 cups.Add it to the pan along with salt, bring to boil and then cover with a tight fitting lid (or seal with atta dough) and cook for about 10-12 minutes, till the rice is cooked but stays separate.

Switching it off a bit earlier helps since it will cook further with the lid closed.


Tuesday, August 5, 2008

Araichu Vitta Kozhambu (Gravy made with freshly ground spices)


Most of you must have figured out now that I love kozhambu (South Indian curries), the spicier and tangier the better! There is this one with okra, another one with pumpkin and yet another one with sun dried berries

A week of dals, roti, subzi or even pasta, pizza and tortillas and there will be this gnawing feeling at the back of my mind (or is tongue) and eventually I figure out I can't wait to shake up my palate with a lip smacking kozhambu. It took some time for me to get the proportions right, but when I did, making this seemed even more easier than sambar - atleast one didn't have to wait for the dal to cook.

This Sunday morning was one such day. I woke up feeling quite in the mood for something different than the usual tomato or onion chutney or sambar we have with dosai. It helps if you have a stock of tamarind extract or if you are using tamarind paste.

But even if you don't, pour some warm water over a small ball of tamarind. By the time, you cut the veggies and boil then, roast the masala and grind it, it would have soaked for about 20 minutes - long enough to extract the juice. Boil with the freshly ground masala, add the cooked vegetable half way through and in a bit you have some great tasting kozhambu ready to go with dosai, idli or rice.

This dish goes to Srivalli's Curry Mela which she is hosting on her blog Cooking 4 all Seasons.

Araichu vitta kozhambu


Half a cup chopped pumpkin (drumstick, brinjal or okra can be used; brinjal and okra need to be fried a bit before adding to the gravy and not cooked in water)
Small lime size ball of tamarind soaked in 3 cups of water

Masala:
Red chillies - 5
Coriander seeds - 1 tbsp
Fenugreek - 1/4 tsp
Chana dal - 2 tsp
1/4 cup grated coconut

Tempering:
Oil - 1/2 tbsp
Mustard seeds - 1/2 tsp
asafoetida - pinch
curry leaves - 5-6

1. Extract juice of tamarind and keep aside
2. Cook the pumpkin pieces in about 2-3 cups of water till just done.
3. Roast the spices in half a tsp of oil and then grind to a paste with the coconut.
4. Heat oil in a kadai, add the mustard seeds; when they splutter, add the asafoetida, curry leaves and saute for half a minute.
5. Add the masala paste and fry for a minute
6. Pour the tamarind extract, add salt and bring to a boil. Cover and simmer for about 15 minutes
7. Add the cooked vegetables and simmer for another 5-10 minutes till the gravy is a bit thick and the flavours have blended well.
8. Serve with idli, dosai or rice.

Sunday, July 27, 2008

Lobia Masala (Cowpeas in Spicy gravy)


When a particular language does not have a name for a vegetable or legume, it's usually because it's not locally grown or not become a popular part of the regional cuisine. Karamani/Lobia/Raungi/Chowli - all different names for cowpeas or black eyed beans - goes to show that this is one legume which has penetrated many parts of India; unlike say, rajma or kabuli chana.

I was used to preparing karamani kozhambu in Chennai, a spicy tamarind and tomato based gravy from MIL's recipe. In Delhi, I learnt this recipe from Tara, our help at home.

She says its the Punjabi way of making it and she learnt it from the household she worked at last. It certainly uses the very Punjabi way of "bhuno" or frying the tomato-onion-masala mixture on slow heat till it comes together and becomes dry and dark. But what makes me think that the original recipe may have been adapted is that she grinds the tomato-onion-masala mixture after it has been fried, something which I don't think is very traditional.

Now, this recipe is the slow version when you have had the time to soak the cowpeas for about 3 hours.
When you haven't been able to soak the cowpeas for long, simply soak it for half an hour or so and then pressure cook the lobia for about 15 minutes on low. Cool and add to the masala made below and cook for about 10 more minutes.

Lobia, I have found, needs quite a bit of condiments to add taste to it, by itself it can make the dish pretty bland. So, cooking it along with the masala makes it much more flavourful than adding the lobia at the end.

This makes for a great accompaniment to rotis as well as rice and since it doesn't need to be soaked overnight, its perfect for a quick meal. Here, served with sticky potato (arvi) - recipe to follow.

Lobia Masala


Lobia - 1 cup, soaked in water for 3 hours

Tomatoes -3
Onions -2 medium
Chilli powder - 1 tsp
Coriander powder - 1 tsp
Cumin powder - 1/2 tsp
Garam masala - 1/2 tsp

Cumin seeds - 1 tsp
Chopped coriander - 2 tbsp
oil - 1 tbsp
salt to taste

1. Heat 1/2 tbsp oil and saute the onions till they are brown.
2. Add the coriander powder, cumin powder and chilli powder and fry for about 5 minutes on low flame.
3. Add the tomatoes and saute for about 10-15 minutes till they become pulpy, then dry out to a brownish onion tomato mixture.
4. Remove from the pan and cool. Blend to a smooth paste.
5. Add the remaining 1/2 tbsp oil and put in the cumin seeds. When they change colour, add the fried tomato onion paste and saute for half a minute.
6. Drain the lobia and add to the pan, add salt and 6 cups of water and bring to a boil.
7. Simmer on a low flame, covered, till the lobia is soft and well cooked.
8. Add the garam masala at the end and cook for a minute before removing from flame.
9. Garnish with chopped coriander.


Friday, July 18, 2008

Banana Muffins


We had another baking session with the kids during the holidays. This time with three 3 year olds and one six year old. Decided to bake muffins this time, these individual cakes always manage to thrill the little ones! I had a couple of ripe bananas lying around so I decided to make Banana Muffins and also throw in some walnuts.


The bananas, milk, honey, eggs and walnuts make for a power packed treat for the little ones - rich in calcium, iron, Vitamin A, protein, essential fatty acids and potassium. It takes hardly anytime to prepare and my little helpers gave me a hand with mixing the ingredients and pouring out the batter.


The muffins when they were baked were really moist and soft, though they turned out a tad salty....not sure whether it was more salt or the combination of cinnamon and salt. Will cut down on both the next time.

The banana muffins are on their way to the Think Spice...Think Nutmeg event being hosted this month by Aparna of My Diverse Kitchen. Think Spice was originally hosted by Sunita's World.


Banana Muffins


1/2 tsp cinnamon (can be replaced with vanilla essence)

1/2 tsp nutmeg (grated)

1 cup whole wheat flour (atta)

1½ cups refined flour (maida)

2 tsp baking powder

¼ tsp baking soda

½ cup honey

1 egg

½ tsp salt (would change it to 1/4 tsp next time)

1 cup milk

3 tbsp oil

3 ripe bananas, mashed

Half a cup of chopped walnuts (lightly toasted)


1. Preheat oven to 180C.

2. Mix the wheat flour, refined flour, baking soda, baking powder, salt, nutmeg and cinnamon together in a bowl.

3. In another bowl, mix the honey, egg, milk, oil and add the dry ingredients until just combined. At the end mix in the chopped walnuts.

4. Grease a muffin pan or line cupcake moulds with cupcake papers.

5. Fill the muffin moulds or cupcake liners till the top and bake for 35-45 minutes till they are golden brown and a toothpick inserted comes out clean.

6. Remove to a rack and cool completely before unmoulding.

For a superb eggless version, take a look at Vaishali's recipe.

Sunday, July 13, 2008

Amti (Daal - Maharashtrian style)


I have mentioned before how Amti was one of my favourites while growing up in Mumbai. This midly flavoured lentil dish is so simple but at the same time so satisfying! And ever since I got my hands on some Goda masala, it's been wonderful to be able to make this at home and have a delightful variations to all the dals and parrupu kootus we make at home.

This time I made Chincha-goola-chi Amti (Daal with tamarind and jaggery) borrowing the Cooker's recipe.

Have you visited the Cooker's delightful blog? - simple and satisfying is what it is, just like the amti I made. I guarantee you that any recipe you would pick up would not have more than 5-8 ingredients at the most, and definitely not more than 10! I tried her cupcakes for my daughter's birthday and they were perfect in everyway.


So what better place to choose from than her blog for this month's edition of MBP (Monthly Blog Patrol) where the theme is Less is More. MBP was started by Coffee of Spice Cafe and July's MBP is being hosted by Nupur of One Hot Stove. Nupur has specified that the theme means that the recipes chosen must have only five ingredients or less.


Check here for this recipe from the Cooker which has just the minimum number of ingredients with maximum taste!. The tamarind and jaggery give a distinctive taste to this dish while goda masala leaves you wondering what the smoky flavour is....