Showing posts with label wheat flour. Show all posts

Monday, January 3, 2011

Poori Bhaji - Breakfast Heaven


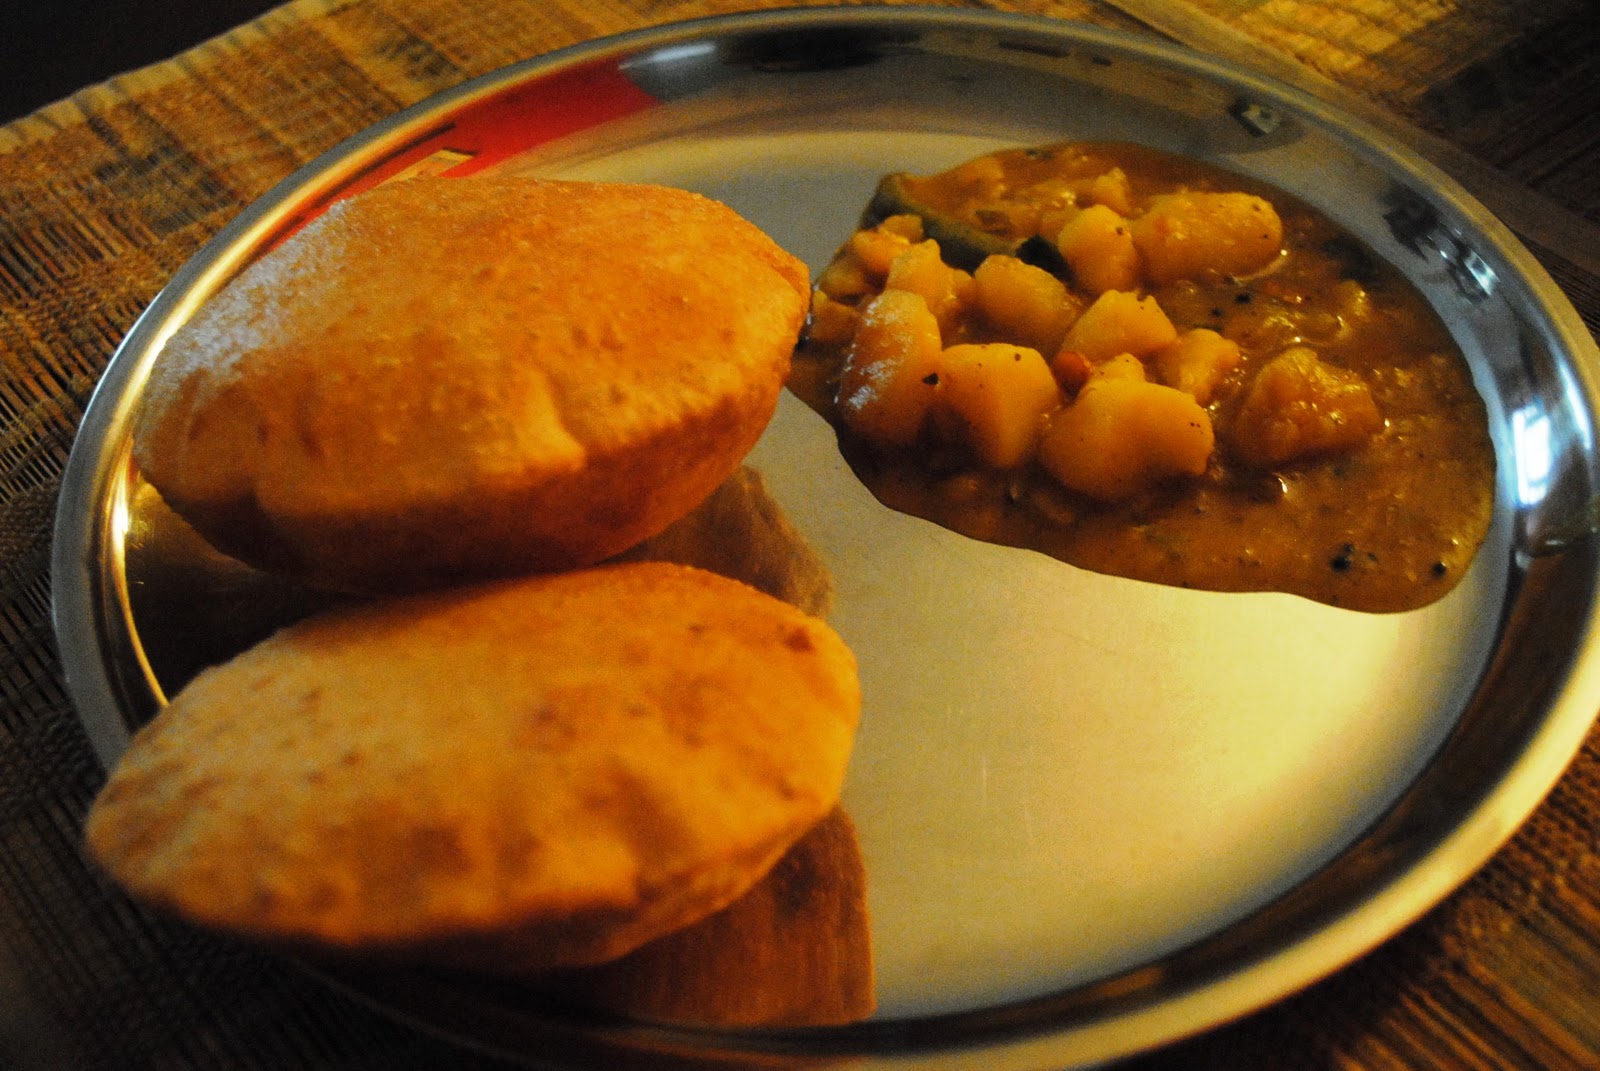
Is Poori Bhaji everyone's weakness? It is in this house atleast. My 5 year old loves her puris....Hubby too goes weak in the knees when he thinks of a plate of poori aloo - yes the bhaji in Poori Bhaji is all about the potatoes isn't it! I don't make it that often because of the deep frying involved - but it usually finds its way to our table about once in two months and especially when we have guests staying with us over the weekend. It is wonderful to have a leisurely breakfast, one puri after the other, ladling some more of the silky, potato gravy to finish up the "last" piece of puri and then having one more puri to finish the "last" portion of gravy! The puffed up puris are light as air and that lulls you into a false sense of comfort; till suddenly you discover you've eaten so much you can't even move from the table! So, you roll over to the couch and lie there in a sleepy torpor.

The winter months are especially nice to have steaming hot puris straight from the kadhai, along with the carb comfort of potatoes cooked in a mild gravy. Add a the weekend edition of your favourite newspaper and you have the recipe for a perfect Saturday morning. I must say this though - having help in the kitchen to make the puris for you so you can have it piping hot (without getting annoyed about how this one turned out flat and that one didn't puff up) is a luxury. I am definitely enjoying it while it lasts!


The potato gravy though I like to make myself - I keep changing the dish depending on what I feel like eating that day. One version is the Tamil one we have grown up eating - a tempering of chana dal, urad dal, green chillies, asafoetida (hing) and ginger. Followed by crumbled, boiled potatoes mixed with turmeric and simmered in water till the starch in it breaks down to make a slightly thickish gravy.And a squeeze of lemon at the end. Then there is the dry bhaji which you get at railway stations and which is what we ate in BB Dadar in Mumbai, growing up - I can still taste that amazing combination of sunshiny yellow potatoes mixed with green chillies and coriander.

The one I made this weekend is a recent favourite - its modelled on a dish I had at my SIL's place - which in turn had been made by her neighbour who is from Bihar. I didn't meet her and my SIL didn't know the recipe, but the version I make now is an approximation based on how it tasted. In this venture, I was helped by Tara - my girl Friday - who is from Jharkhand (the state which was carved out of Bihar). So there is tamarind juice, red chilli powder, dhania powder, onions and kasoori methi. The tempering however, remains the same as the Tamil recipe since we like the crunch of the dals. The gravy turns out with a nice tang to it and the lovely flavour of kasoori methi underlying everything. The tamarind juice melds with the starch in the potatoes and the gravy thickens up quite quickly. It takes just 20 minutes of simmering and its done.


Poori Bhaji

Poori
Atta (wheat flour) - 2 cups
Oil - 1 tbsp to knead,
salt - a biggish pinch
Water - about 3/4th of a cup to 1 cup
Oil - 1.5 cups to fry the puris

1. Mix the atta with the salt and oil (1 tbsp) and then add as much water as needed to fashion a dough which is a little firm. Firmer than the dough for rotis (Indian flat breads).
2. Rest the dough for about 10-15 minutes. It is preferable not to knead the dough too much in advance, it may dry out and absorb too much oil.
3. Pour the oil into a kadhai (wok) and heat - but not till smoking, else the pooris will brown too fast before being cooked and become crisp.
4. Take a small piece of the dough (the size of a small lemon), roll into a smooth ball and flatten with the rolling pin. Roll out to 2.5 to 3 inch disc dabbing a little oil on first - it shouldn't be too thin, but not too thick as well.
5. Slide the poori into the kadai - it should rise to the top - if it doesn't, the temperature of the oil isn't right and it may need to heat up some more.
6. Carefully splash a little of the oil with a slotted spoon, on top of the poori and it will puff up. Turn it over once it is golden brown (about 3 minutes) and then cook the other side as well till it is brown.
7. Remove with a slotted spoon and drain on some tissue paper to absorb the excess oil.
8. Repeat with the rest of the dough - serve piping hot with Aloo Bhaji.

Aloo Bhaji

Potatoes - 5-6 - boiled, peeled and crumbled roughly into medium sized chunks
Tempering 
2-3 tsp oil
Chana dal - 1 tsp
Urad dal - 1 tsp
Hing - pinch (asafoetida)
Green chillies - 2

1 onion chopped
1 tomato chopped into 6 pieces
red chilli pd - 1 tsp
Coriander powder - 1/2 tsp
Turmeric powder - 1/4 tsp
Kasoori methi -  1/4 tsp

Tamarind extract - 1 marble sized ball soaked in 1 cup of water or 1 tsp tamarind paste
salt to taste
Coriander leaves for garnish

1. Heat the oil in a pan and add the tempering ingredients. When the dals turn light brown, add the onions
2. Saute the onions till translucent.  Add the red chilli powder, coriander powder, turmeric powder and kasoori methi and fry for about a minute.
3. Add the tomatoes and fry for half a minute. Pour in the tamarind extract, add salt and the potatoes and bring to boil. Add half a cup more of water and continue simmering for about 15-20 minutes till the gravy thickens, the tamarind loses its sharpness and the potatoes thicken the gravy.
4. Garnish with the coriander leaves and serve hot with pooris.

Wednesday, March 31, 2010

Baked Diamond Cuts (Whole Wheat Crackers)


I remember having this snack in my childhood, both at home and other people's homes. They seem to have taken a backseat with the introduction of packaged snacks, so much so I haven't seen them even on occasions like Diwali (why would I, when there are pre packaged hampers of Kurkure available! *roll eyes*). I used to especially like the sweet diamond cuts which is made by lightly dipping the fried pieces into a sugar syrup. Growing up in Mumbai, while we called them diamond cuts, they are called Shankarpale in Marathi and we used to gorge on them during Diwali.

So, when I had some kids coming over for a playdate, I thought of making these for them - lest they never know that something like this existed. Of course, the wuz that I am, couldn't think of deep frying them as per the traditional recipe and so I looked for a recipe where I could bake them. I found a simple recipe from one of my favourite chefs - Sanjeev Kapoor.

This one is made out of half whole wheat flour and half refined flour - not sure if that is the reason why the diamond cuts didn't puff up the way they usually do. I don't think its to do with the fact that they were baked instead of deep fried, so maybe next time I will experiment with the ratio of flours. Or maybe chill them the way you do for pastry dough.

The crackers were fine though - a nice, savoury snack which the kids and moms both enjoyed - crisp and light. My daughter really liked it so I will definitely be making them again. The flavour of the carom seeds was subtle but brought back some great memories. We had the crackers with a dip and paired it with some gooey chocolate brownies (which I will post later).

Baked Diamond Cuts (Whole Wheat Crackers)


3/4 cup whole wheat flour (atta)
3/4 cup refined flour (maida)
3/4 tsp baking powder
1/3 cup ghee
salt to taste (1/2 tsp was enough for me)
Ajwain/omam (carom seeds)
1/2 cup chilled water

1. In a medium sized bowl, mix the refined flour and the whole wheat flour with the baking powder and salt.
2. Add the ghee and mix together till it resembled bread crumbs.
3. Add the carom seeds and then knead into a dough adding just as much water as is needed to make it pliable but not sticky or soft.
4. Cover with a cloth and keep aside for about half an hour.
5. Pre heat oven to 180 C. Divide the dough into 4 equal parts and roll out thinly on a lightly floured surface. I rolled it out to a little thicker than a roti (about 1/8th of an inch).
6. Prick all over with a fork; with a sharp knife or pastry cutter make diagonal lines at equal intervals on the rolled out dough and then once again cut again crosswise to give diamond shapes.
7. Place in batches on a lightly greased tray and bake for 15-16 minutes at 180C, checking to see that it doesn't over brown. Cool and store in air tight containers.


Friday, March 12, 2010

Rapid Light Wholemeal Loaf - Sara Lewis


There's nothing better in my opinion, than a well made sandwich, to satisfy one's hunger - be it for breakfast or as a snack or even for lunch. The bread should be fresh and the fillings juicy - that's all that one needs! I especially love the toasted sandwich - no, not the grilled sandwich - the one you toast on those metal sandwich toasters over the gas flame.

Having grown up in Mumbai, I simply love those fresh sandwiches the streetside vendors make - white bread (yeah, yeah I hear ya), a choice of plain butter or Amul butter, mint chutney and then the fillings - onions rings, slices of boiled potaotes and beet, raw tomatoes - a sprinkle of salt and pepper, quick cutting into 8 square towers you had to struggle to fit into your mouth - Heaven! We practically lived on Subhash's Rs.5 sandwiches when we were in college - it was so cheap and filling.


Some guys also had toasted sandwiches - while we used to make them regularly at home (probably the first thing I "cooked" in the kitchen) I had them outside only when I was doing my CA - the guy opposite Eros theatre in Churchgate was very good but I'm sure everyone has their favourite one.
I still love to have toasted sandwiches for breakfast - tomato, boiled potatoes or even eggs, coriander mint chutney, half a cheese slice - perfect start to the day. Haven't had a nice sandwich outside for a very long time - the apologies which pass for sandwiches in places like Coffee Day should be banned. Sitting in the display rack for ages, filled with some truly shocking stuff (once I got a sandwich with grated carrots and mayonnaise!) they are not worth half the money being charged.

Its been a long time since I baked bread - pizza base is what I have been experimenting with for some time. The cold temps till now also didn't help - now that the weather is turning, I thought it would be a good time to have a home made loaf of bread.

Picked a recipe from Sara Lewis's The Bread Book - it has half whole wheat and half white flour and I thought it would be a good halfway bread to have. It turned out well, even though I had to up the flour quantity since, by mistake, I poured all the water into the flour originally measured out. The bread had a nice crumb and was soft with a great crust - it was also soo easy to make. I definitely recommend this for someone who is trying to bake wholemeal bread for the first time.

Rapid Light Wholemeal Loaf - Adapted from Sara Lewis's The Bread Book


2 1/4 cups wholewheat flour
1 3/4 cups strong white flour
2 tsp sugar
1/4 tsp salt
2 tsp active dried yeast
1 tbsp vegetable oil
1 cup warm water

1. Heat the water till just hot and dissolve the sugar in it, wait for it to cool till just warm (shouldnt be cold or hot) and dissolve the yeast in it. Set aside for 10 minutes.
2. Mix the two flours, salt, oil - pour in the yeast mixture a little at a time and knead well for about 10 minutes till the dough comes together - smooth but not sticky.
3. Grease a loaf tin and put the dough into it. cover loosely with a lightly oiled cling film and leave in a warm place to rise - about an hour or till the dough reaches just above the top of the tin.
4. Slash with a sharp knife - the bread cooks well and looks good too.
5. Pre heat oven to 200c, remove the clingfilm and bake for 25-30 minutes - when tapped the loaf should sound hollow and the bread will be browned on top. The book recommends checking after 15 minutes and to cover with foil if it is overbrowning.
6. Loosen bread from the sides of the tin, transfer to wire rack and cool.

We had this for breakfast the next day - sauteed sausages, tomatoes, lettuce, vegetable patties, mint chutney, cheese, mustard - we mixed and matched. Whats your favourite way to have a sandwich?

Sunday, July 6, 2008

Making Memories - Cookies


Today is the last day of the summer holidays for my daughter and most of her friends. My respect for my parents has gone up a notch or two - they managed to keep us occupied in an age when there was no TV, no Barney DVDs and not many options outside of home.

Of course, they weren't helicopter parents either and didn't believe that their children had to be kept "meaningfully" occupied every minute of the day and their intellectual capabilities honed to the best from age two!

But I did manage (with some other VERY resourceful mothers) to get through the vacation without enrolling her in a "summer camp". I did, however, spend 2 weeks with my brother and best friend, so maybe that helped a bit.
For the rest of the time, she was either at her friends' house upstairs or down the road or they were over here - finger painting, block painting, doing puzzles, having doll parties, building Lego towers, crayon colouring books, dancing to music, dressing up in costumes and having pretend plays, eating competitions at lunch,running around in the park every evening and generally enjoying herself. AND she hardly had time to watch any TV!

When it was just the two of us on a hot afternoon, we cuddled up and I read to her in bed - I even found some original A.A. Milne, Winnie-the-Pooh books - remember those? - the ones with those amazing line drawings by E Shepard - not the Disneyfied versions which is all that is available today!

One of those days 2 weeks back, my dear friend A (and Regular Reader Number 1 of my blog!) came downstairs with her kids and we set to work baking cookies. The little ones stood on stools to reach the kitchen platform and were most excited about choosing and cutting out the shapes from the dough and then decorating "their" cookies with sprinkles and icing.


It was quite hot that day and we both were bushed by the end of it BUT the kids could hardly wait for the cookies to come out of the oven....AND then cool down.....it was so precious to watch them crowding around the table, just standing there and waiting for the cookies to cool down! LOL!
(It was a bit gruesome though to watch the Gingerbread Man being devoured head first with a wicked smile!) ;)

I hope we all made some wonderful memories for the children that day and these summer days we are leaving behind!

Sugar Cookies

Refined Flour - 1 cup
Wheat flour - 1/2 cup
1 egg white
Butter - 1/4 cup + 2 tbsp
Castor sugar - 1/2 cup
Milk - as needed
pinch of salt
1 tsp vanilla essence
1/4 tsp baking powder

1. Beat the butter and sugar till light and creamy in a large bowl.
2. Beat the egg separately and add the vanilla essence to it.
3. Sieve the refined flour, wheat flour, baking powder and salt together.
4. Add the beaten egg to the butter sugar mixture.
5. Fold in the flours into this and combine with a clean hand to make a smooth cookie dough.
6. If it is a bit dry, you can add milk a tablespoon at a time till it comes together.
7. Cover with cling wrap and chill in refrigerator for about 10 minutes.
8. In the meantime, preheat the oven to 190C.
9. Grease a baking tray and keep aside.
10. Roll out the chilled dough on the counter which has been sprinkled with a bit of flour - about 1/4th of an inch thickness.
11. Cut out cookie shapes with the cookie cutters (easily found in most utensil shops today or even the ubiquitous Dollar store)
12. Roll out the remaining dough and then cut out shapes again, repeat till all the dough is used up.
13. Decorate the shapes with sprinkles, icing and even chocolate drizzles - use your imagination or better still let your child take the lead!
14. Bake in the preheated oven for about 13 minutes till it just turns brown. Let it stay for about 2 minutes in the oven and it will become a bit crisper.

Monday, June 2, 2008

Coriander Pesto Yogurt Bread


I finally managed to buy a lot of baking stuff I needed and I'm quite happy that for keeping to my New Year's Day resolution of increasing my baking proficiency! One of my buys was a loaf tin (I know, some baker I am, didn't even have a loaf tin for so long!) I a

I had to use it right away of course; suddenly I couldn't find all those loaf recipes which would haunt me when I didn't have a loaf tin- there were all kinds of free form breads but hardly any loaves. One can use the same recipe of course, but I didn't want to take a chance...

Finally, I gave up and decided to just tweak the recipes I have already tried out. A bit of coriander walnut pesto remaining from this dish went into the bread and also yoghurt I had seen so many recipes using buttermilk (different from our "mor" or "chaach").

I was quite worried when the liquid proportion seemed too much and the dough was much stickier than anything I had handled before. After almost 4 cups of flour totally, I finally stopped and just put it aside to rise. Good thing I had a loaf tin, since a free form bread would have been a small nightmare!

The dough rose beautifully both the times; I left it for almost 2 hours and 15 minutes the first time and the second time for about 50 minutes.

Hubby though, was a bit worried that he wouldn't get a "tall bread" and insisted we should have bought a taller tin - I was already a bit stressed about the dough being so sticky so I told him the comments section was closed at this time!!.

The bread was fine though, I needn't have worried; this is how I have always wanted my bread to be - those lovely holes and soft insides.
This is a nice bread - good crust and crumb and just the right texture - not too dry and crumbly and not too dense. The pesto wasn't enough to make a mark on the bread (though the bread did look greenish) but I could taste the faint hints of coriander. Next time I won't rely on leftovers and make the pesto for this dish itself!

We had the bread for breakfast - as many versions as the people at home - plain with cheese spread for my daughter, sandwich with green chutney, potato and tomato slices for the husband and toasted with home made butter and strawberry and mint conserve for me.

I don't think there's anything to compare with the aroma of freshly baked bread and the pleasure of cutting your own thick slices - I am definitely going to be baking more bread!


Coriander Pesto Yogurt Bread


Ingredients:
Active dried yeast - 2.5 tsp
Warm water - 1 cup ( I would cut this down to half a cup and then add more water to the dough later if needed.)
Sugar - 1tsp

Wheat Flour (atta) - 1 cup
Refined flour (AP/maida) - 2.5 -3 cups
Yogurt - 1/4 cup
Coriander Walnut Pesto - 1/4 cup (can increase it to 1/2 a cup)
Salt - 2 tsp
Veg oil - 3 tsp

Method:

1. Dissolve the sugar and yeast in the warm water and set aside for 10-15 minutes till the mixture is foamy.

2. Take the wheat flour, salt, yoghurt, yeast mixture, pesto, oil and 2 cups of the refined flour in a bowl and mix till well combined. Add refined flour a tablespoon at a time till the dough comes together.

3. Knead the dough till smooth and springy (5 minutes), transfer to a lightly oiled bowl and cover with plastic wrap. Set aside for about 1.5 hours till it doubles in volume.

4. Transfer the dought to a lightly floured bowl or surface and lightly flatten. Put into a lightly greased and floured loaf tin or shape into a free form loaf; cover with a damp kitchen towel and set aside for another 45 minutes to an hour for the second rise.

5. Pre heat the oven to 190C and bake the loaf for 30-35 minutes.

Monday, February 4, 2008

Upside down Strawberry Yoghurt Cake


I bought some strawberries hoping that my daughter would like to try a new fruit (I dont remember ever buying strawberries in Chennai when she was younger, considering they cost the earth and then some) - she took a small bite and then very firmly told me "No berry amma!" shaking her pint sized head from side to side for added emphasis.

So that was that, as any mother of a 2.5 year old will tell you - and I was left holding a box of strawberries.
Both hubby and I are not strawberry lovers and we no longer live near a certain friend of ours who just loves strawberries in any form - even in her drinks!!! :)

Coincidentally,a few days later while searching for something else, I came across this recipe on Happy Burp which Vaishali made sound so simple, I just had to try it!

So I did, though instead of using strawberry yoghurt, I used plain yoghurt and added the fresh strawberries I had .
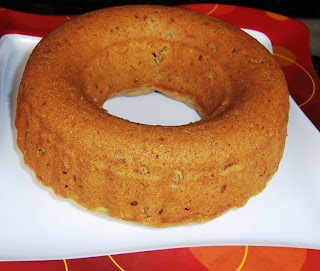
I reserved some to put on the base of the ring mould as a sort of an upside down cake and it made it look very pretty when it was done.
It seemed to remind me of those jam tart biscuits we used to get when we were young (pre Jurassic era!) - does anyone remember them? I haven't seen them at all since.

The proportions I used were exactly the same as the original recipe except that I didn't use a yoghurt pot but instead used one of my steel katoris (cups) which holds about 150ml of curd.

So 3 cups of flour (2 cups wheat flour and 1 cup refined flour) :2 cups of sugar:1 cup of yoghurt: 1/2 cup veg oil: 1 egg - as in the original recipe.

To this I added - 1 cup of chopped fresh strawberries and 1.5 tsp of baking powder and 4-5 tbsp of milk, since the batter seemed a bit too thick.

I reserved about 2 tbsp of the chopped strawberries and laid them out on the base of the greased cake tin and poured the batter over it.

Baked in a pre heated oven set at 180C/350F for about 35 minutes. Let cool for 5 minutes in the oven and then remove to a wire rack and let it cool completely.


The cake was moist and really soft. Since I had divided the cake batter into two portions, the second time around I left it in the oven for another 10 minutes after it was turned off, so that it was a bit more browned.

There was a faint aftertaste though and I'm not sure where that came from - accomplished bakers any ideas?.....but I would definitely make this again...

Thanks Vaishali - this recipe is a keeper!

This recipe is going to Bindiya's event "Few of my Favourite things" which she hosts on her blog In Love with Food and the month's theme is cakes and muffins

Thursday, January 24, 2008

Rasbhari Cake (Cape Gooseberries Cake)


Rasbhari - the name itself conjures up plump juicy succulent images! This warm golden berry lives up to its name and I love the tart sweet taste it has....
I made my acquaintance with this delicious fruit very recently and was instantly smitten. Have you read those messages in the newspapers? - atleast the ones in Delhi have them - "Dear Girl in a blue suit,you were ahead of me in the queue for PVR tickets for "Welcome", I became yours then and there - please tell me who you are, Sunny"

Well, I did something like that too - trying to figure out what this fruit was and what I could do with it! The answers poured in from all you friendly bloggers who told me that this was the cape gooseberry - locally called "rasbhari". I hope Sunny was as lucky!

I found this lovely recipe for an upside down cake on The Cooks Cottage.....but I had too little of the fruit left to make it, so I adapted the recipe and made a cake by pureeing the berries and mixing it in with the batter. I used wheat flour instead of refined flour.

I was intrigued by the jaggery used in the original recipe and decided to keep it - that along with the berry puree gave this cake a lovely colour and crust and it tasted equally delicious!

Rasbhari Cake

Ingredients:

Cape gooseberries - 3/4 cup
Unsalted butter - 1/3 cup at room temperature
Jaggery - 2 tbsp grated.
Sugar - 1/3 cup
Wheat flour -1 cup
Rava - 1/2 cup
Baking powder - 1 tsp
Egg -1
Vanilla essence - 2 tsp

Method:

1. Pre heat the oven to 350F/180C, lightly grease a 6" cake tin, sprinkle the grated jaggery over the greased base and keep aside.
2. Cream the butter and sugar together till smooth and creamy.Beat the egg well.
3. Gently cook the berries in a pan with water just about covering it, when it softens and the skins start separating, take off the flame. Put the berries in cold water and peel carefully. Puree the fruit.
3. Sift the flour with the baking powder; add the vanilla essence and the pureed berries to the butter cream mixture and then mix in the flour and rava. Fold in the beaten egg with a cutting motion and combine into a dropping consistency batter.
4. Pour into the prepared cake tin and bake at 180C/350F for about 20-25 minutes - check at 20 minutes to see whether a skewer poked in comes out clean.

Friday, November 9, 2007

Walnut & Ginger Bite Ring

One of my close friends gifted me the Baby & Toddler cookbook by Tarla Dalal, just prior to the arrival of our daughter. I dug out this cookbook a good six months later,when I started weaning her off milk and into more of solids and made quite a few of the finger food recipes like cheese straws made of whole wheat flour etc since the alternatives readily available in the market (like bread sticks and Glucose biscuits ugh!) were usually made of plain flour which I wanted to avoid.
The other foods like dal,khichdi, soup and the like were our everyday food which I didn't need recipes for, and as she started eating more and more of what we were eating and I stopped cooking separate meals for her, the book lay forgotten.

While doing a spot of Diwali cleaning, I came across it lying with my other cookbooks and started leafing through it. I found this recipe for a Spiced Walnut Ring which I decided to make for a Diwali dinner we had been invited to and for which I had volunteered to get dessert. The evenings have just started turning chilly in Delhi and I thought this cake, with its spicy notes,would be apt for the occasion.

I did a fair amount of tweaking to the recipe and substituted the ginger powder (soonth) with chopped pieces of candied ginger. The spicy sweet pieces of ginger are a nice surprise when one bites into the cake.

I also cut down on the condensed milk and sugar quantities which I figured might be burnt off by active toddlers, but probably not by us!

I served it warm with a bit of vanilla icecream on the side, but some people also had it with chocolate sauce drizzled over. The warmth of the spices and the bite of ginger and walnut made it a delightful ending to a festive evening.

You can find the original recipe here


Walnut & Ginger Bite Ring

Serves 8

Ingredients:

1 1/2 cups whole wheat flour
3/4 teaspoon baking powder
1/2 cup chopped candied ginger pieces
3/4 teaspoon cinnamon powder
3/4 cup white butter (unsalted)
1/4 cup brown sugar
1/4 cup condensed milk
3/4 - 1 cup milk
1/2 cup chopped walnuts


1. Bring all ingredients to room temperature. Preheat the oven to 180 C (350 F). Grease a ring mould and keep aside.

2. Sift the flour,baking powder and cinnamon powder together.
3. Whisk the butter and sugar together till soft and creamy.
4. Add the flour mixture, the chopped walnuts, chopped candied ginger, condensed milk and combine till mixed together.

5. Add 3/4 cup of milk and mix till you reach a cake batter consistency, add some more milk if it's too thick.
6. Spoon the batter into the greased ring mould and shake to settle evenly. Bake for 30 minutes till done and a skewer inserted into it comes out clean.
7. Remove from oven and let cool for 5 minutes and then turn out of the ring onto the rack and let it cool further.

This is my entry for November for the Think Spice.... event hosted by Sunita's World
where this month's spice is Ginger.

This is the first food blogging event I'm participating in and I thought this versatile spice would a good place to start!.