Showing posts with label breakfast. Show all posts

Monday, January 16, 2012

Herbed Dinner Rolls


Its been a long time since I baked bread - what with all the cookies and cakes which happened in the last couple of months, bread baking took a backseat. Woke up one morning last week, with a yen to bake and when I asked my daughter what she would like to bake, she said bread. I was immediately excited , though felt it might be completely mistimed considering how cold it is right now. I wasn't even sure whether the bread would rise with such a cold wind blowing outside.


But K hauled out the Bread Book by Sara Lewis (from which I have previously made an Olive and Feta Cheese bread, Carrot & Mustard Bread, Stuffed Mushroom and Garlic Baguette and Rapid Light Wholemeal Loaf) and we pored over the recipes on each page - she finally picked the Fancy Dinner Rolls, "because of the shapes". So dinner rolls it was then. She was thrilled to be kneading the dough for the first time and considering how fussy she is otherwise about getting icky stuff on her hands, didn't seem to mind the mess at all sticking to her fingers!  I finished up with the rest of the kneading and we set out the bowl of dough in the balcony to double. And it rose beautifully!

She then shaped half the dough into pull apart rolls - basically , you make small balls of the dough and arrange them in the baking tray or dish in a kind of circle so that they touch each other. They stick together when they prove for the second time so that after they bake, you have to "pull them apart". The remaining dough I shaped into a simple coil and a knot.

The shaped rolls rose for second time and after brushing them with a simple egg wash, I sprinkled the round rolls with sesame seeds and fennel seeds while the coiled ones were topped with some fresh basil from my potted plant. The rolls baked for about 10-15 minutes each and the baking bread filled the house with that heavenly, yeasty aroma which makes you want to grab the freshly baked bread and slather it with some butter and eat it just like that!


Herbed Dinner Rolls
All purpose flour (maida) - 475g (4 1/2 cups)
Butter - 2 tbsp
Sugar - 1 tsp
Salt -1 tsp
Fast action dried yeast - 1.5 tsp
Warm Water - 275ml

Egg yolk - 1 to glaze
water - 1 tbsp
sesame seeds, fennel seeds, fresh basil (one can also use poppy seeds, paprika and fresh rosemary)

1. Put the flour into the bowl and rub the butter into it till it resembles fine breadcrumbs.
2. Add the sugar, salt and yeast and then slowly incorporate as much warm water as is needed to make a soft dough.
3. Knead well for 5 minutes until dough is smooth and elastic but not too sticky. Put the dough into the bowl and cover loosely with an oiled plastic wrap and leave in a warm place to rise till doubled in size - about an hour
4. Knead the dough again on a lightly floured surface and divide into 12 pieces. Grease a baking sheet or 2 trays
For pull apart rolls: - take 2 pieces of dough and divide each into 3 small balls. Arrange into a circle or 2 triangles so that they touch each other.
For coils - take 2 pieces of dough and shape each one into a rope 10 inches long and then coil each rope into a spiral.
For knots - take 2 pieces of dough and shape each one into a rope about 9 inches long. Loop one end of one rope and then thread the other end through the loop to make the knot. Repeat
5. Cover the shaped rolls with loosely oiled plastic wrap and leave in a warm place to rise for 20 minutes to half an hour.
6. Brush the tops of the rolls with egg yolks mixed with 1 tbsp of water and sprinkle with the seeds or herbs.
7. Bake in a pre heated oven at 200C for 10 -15 minutes until the tops are golden and the base sounds hollow when tapped with the fingertips. Transfer to a wire rack and cool completely.


Wednesday, October 12, 2011

Vadai Curry (Fried Lentil Dumplings in a Coconut and Fennel Spiced Curry)

Remember the fabulous coconut milk infused rice dish Brinji and the delicious golden crusted Roast Potatoes? Well this is another of MIL's specialities which I was introduced to after I got married - I have adapted it to my taste over the years and it remains a favourite at home though doesn't get made as often as we would like. It's not very time consuming, just that you need to remember to soak the lentils for the vadais beforehand. And these vadais are so tasty, I always make more vadais to eat on their own as a snack - either before lunch or at tea time.

The flavour of the curry as well as the vadais depend on the addition of fennel seeds (saunf). MIL roasts whole spices and grinds them into the spice paste, but that's too strong a flavour for me. I prefer tempering the curry with the whole spices instead and also adding a dash of garam masala powder.

Also, one could steam the vadais (and call them urundais - dumplings- instead of vadais!) and then put them into the curry - but really, since we don 't make this very often I find it worthwhile to have the fried vadais when I do make it. The taste of the crisp lentiil vadais soaked in the curry is absolutely amazing. Not to mention that we get to eat the crunchy vadais on their own for a snack!

I made this for lunch on a Saturday and served it with rice and then we had the leftovers with idlis the next morning. Idlis and vadai curry is a classic combination and hard to beat.

P.S I have made a few additions to the widgets on my blog - a long overdue Search button which many had been asking for. Also, a book list of the books I have been reading - I know there are many avid book readers out there and I know we are always looking out for some good recommendations. Feel free to mail me to check on any book you see in my list, I will be happy to share my impressions of the book. There are also widgets for some of the most popular posts on this blog as well as Subscribe via email button at the bottom. Do let me know if you have any feedback on the blog. Thank you!

Vadai Curry
Ingredients:

For the Vadai

Chana Dal (Bengal Gram Dal) - 1 heaped cup, soaked for 1.5 to 2 hours
Fennel seeds (saunf) - 1 tsp
Onion - 1 small, finely chopped
Curry Leaves - 8
Dried red chillies - 3-4
Salt
Oil to fry the vadais

For the Curry
Masala paste:
Coconut - 3/4 cup grated
Green chillies -2-3
Fennel Seeds (saunf) - 1 tsp

Cinnamon - 1 stick
Cloves - 4
Onion - 2 small chopped
Tomatoes - 2 chopped
Green chillies - 2 slit
Ginger Garlic paste - 1 tsp
Chilli powder - 1/2 tsp
Turmeric powder - 1/4 tsp
Coriander powder - 2 tsp
Garam Masala powder - 1/2 tsp
Coriander leaves chopped - 2 tbsp
salt to taste
Oil - 1 tbsp

1. For the vadais, grind the chana dal along with the red chillies, saunf and salt. Grind to a coarse consistency adding minimal water and do not make into a fine paste. It is fine if there are pieces of lentil showing. Add the finely chopped onions and curry leaves into the batter and mix well.
2. Heat a deep wok with oil in it - enough to cover the vadais when they are fried. Shape the vadais into small balls and deep fry in batches on a medium high flame, till golden brown and crisp. Drain on absorbent paper and keep aside.
3. For the curry, grind the ingredients for the spice paste finely.
4. Heat oil in a pan and add the cinnamon and cloves followed by the chopped onions - fry till transparent and then add the ginger garlic paste and the green chillies and fry for 2 minutes.
5. Put in the chopped tomatoes, red chilli powder, turmeric powder, coriander powder and fry for 5-8 minutes till tomatoes are pulpy and the spices are fried.
6. Add the freshly ground spice paste, salt and one cup of water, bring to boil and then simmer gently for about 15 minutes.
7. Add the garam masala powder and some water if too thick, adjust salt and then add the fried vadais to the curry - simmer for 3-4 minutes and then turn off the heat. Garnish with coriander leaves.
8. Serve with rice or as an accompaniment to idlis or dosais.

If you would like to steam the lentil batter instead of frying them, simply shape into balls, place on an idli steamer and steam (in a pressure cooker without the weight or in a large vessel) for 15 minutes till they are cooked and look a little shiny on the outside. Add to the curry as mentioned in the recipe.

You could also use a  mixture of tur dal and chana dal in the lentil batter or only tur dal (pigeon pea lentils)

Sunday, July 24, 2011

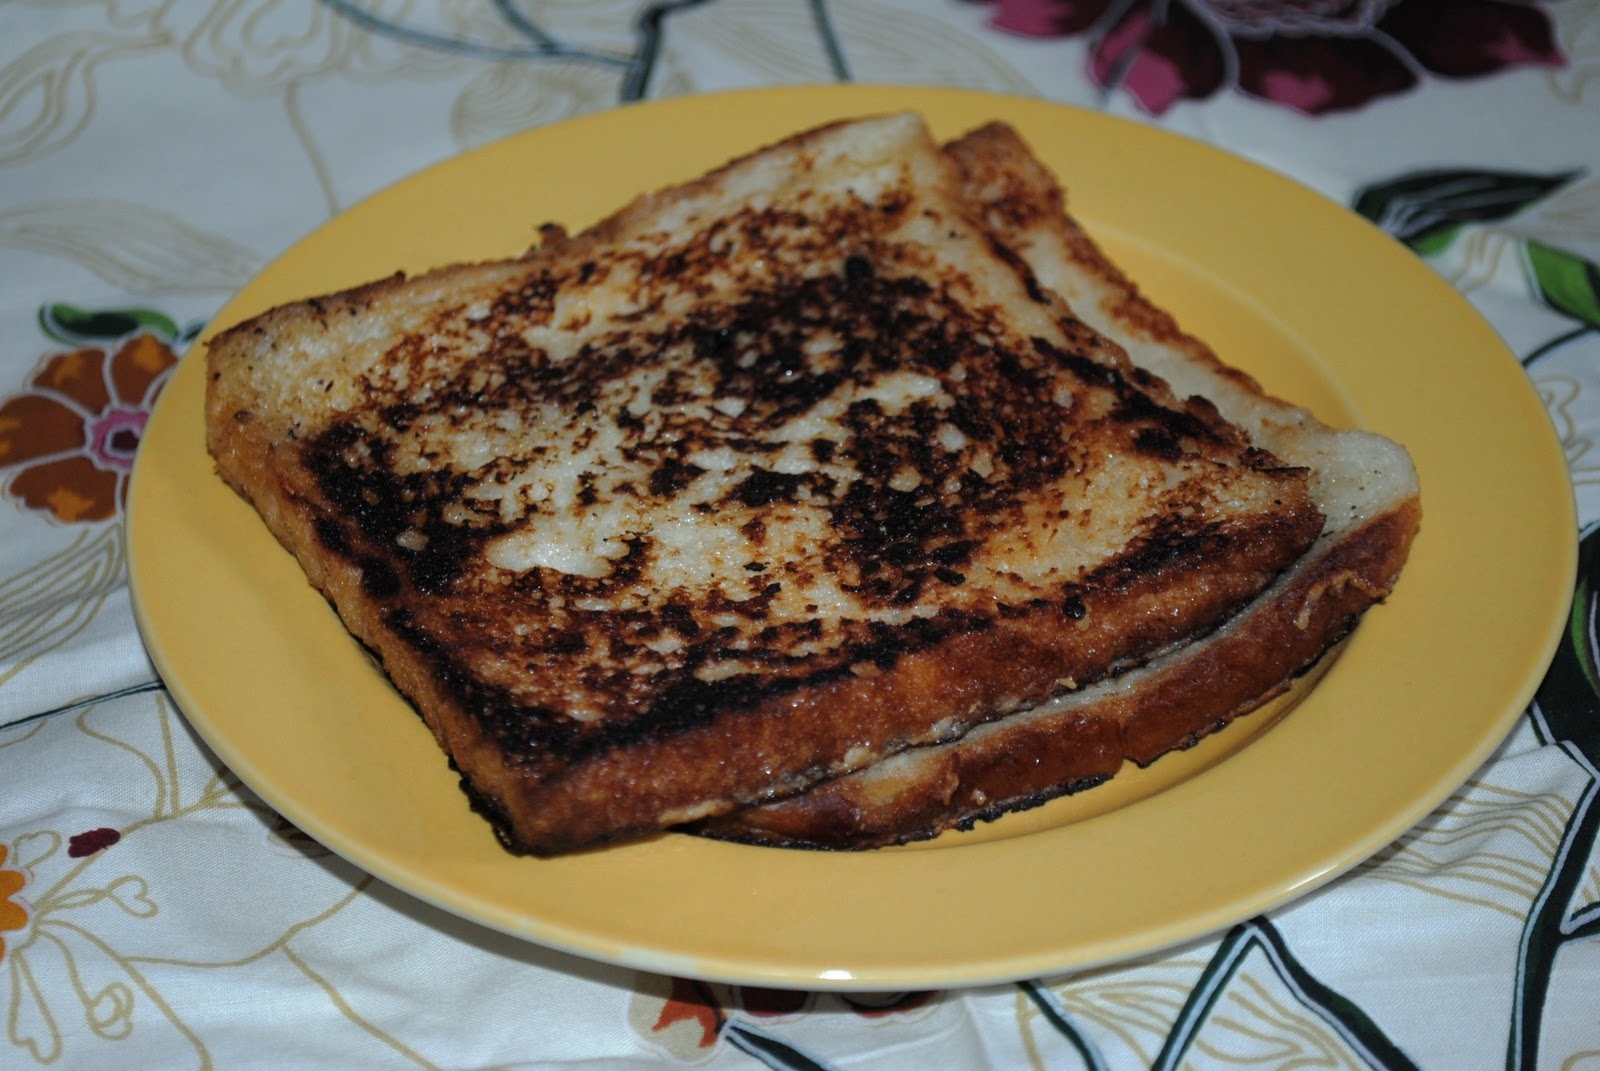
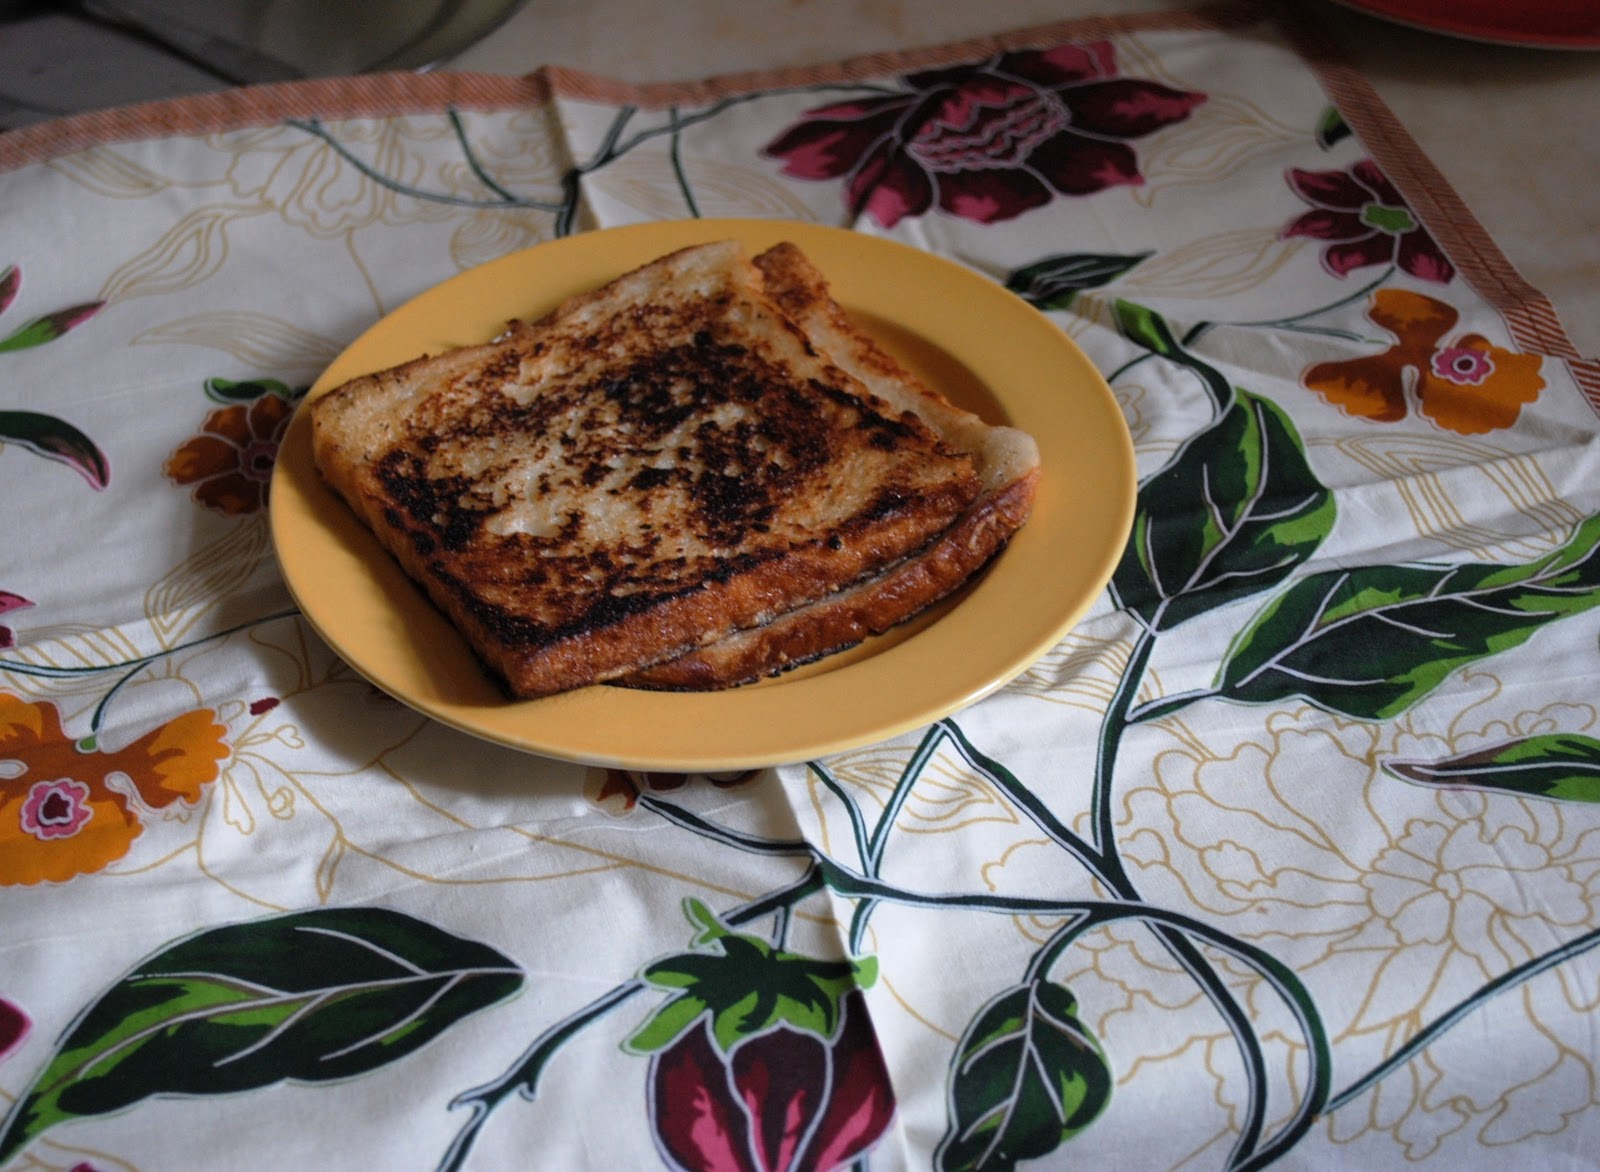
French Toast


Another dish which holds fond memories of my childhood is of Dad making us breakfast on a Sunday. Dad still makes the best French toast - gently soaking the bread in a custard mixture of egg, milk and sugar and then shallow frying it on a griddle till is golden brown.

I now make it for myself and lately for my daughter who has come to enjoy it -especially when she heard the story of how her Thatha used to make it for me. Everytime she eats it though, she stoutly insists that "Your French Toast is the best, Amma!" And so the story continues.


There's really not much to actually warrant a recipe - one egg, about 1 cup of warm milk and 5 tbsp of sugar.

1.Dissolve the sugar in the milk and then lightly beat the egg into it. Pour the egg milk mixture onto a shallow dish.

2. Heat a heavy non stick skillet and melt some butter in it (about a tsp per slice of bread).

3.Dip a bread slice into the milk and soak for about 30-40 seconds before turning and soaking again. Gently moisten the edges as well and then cook on the hot skillet on a medium flame turning till each side is golden brown.

Masala French Toast

This was my adaptation of French Toast for hubby who can't abide by sweet things for breakfast - I myself don't like sweet stuff in the morning - French Toast is the exception.

Replace the sugar with a mixture of salt and green chilli-coriander paste. (Grind 2 green chillies with a a cup of cleaned coriander). Go through steps 2 and 3 as above.

Fried Cheese Sarnies

A recipe I found in a 2002 edition of Good Housekeeping magazine and have tried a couple of times as part of brunch.Very decadent, though savoury.


Bread - 8 slices - crust removed,
Eggs - 2
Mozarella cheese - 4 slices. (mozarella melts well, but you could use cheddar)
olive oil

1. Put a slice of cheese between 2 pieces of bread and cut diagonally into a sandwich.
2. Mix the eggs with salt and put into a large shallow bowl and beat. Add the sandwiches and leave them to soak for 30 minutes, turning them once over, halfway through.
3. Heat 1 tbsp of oil in a frying pan, press the edges of the sandwich firmly together and fry till golden brown.


Friday, March 11, 2011

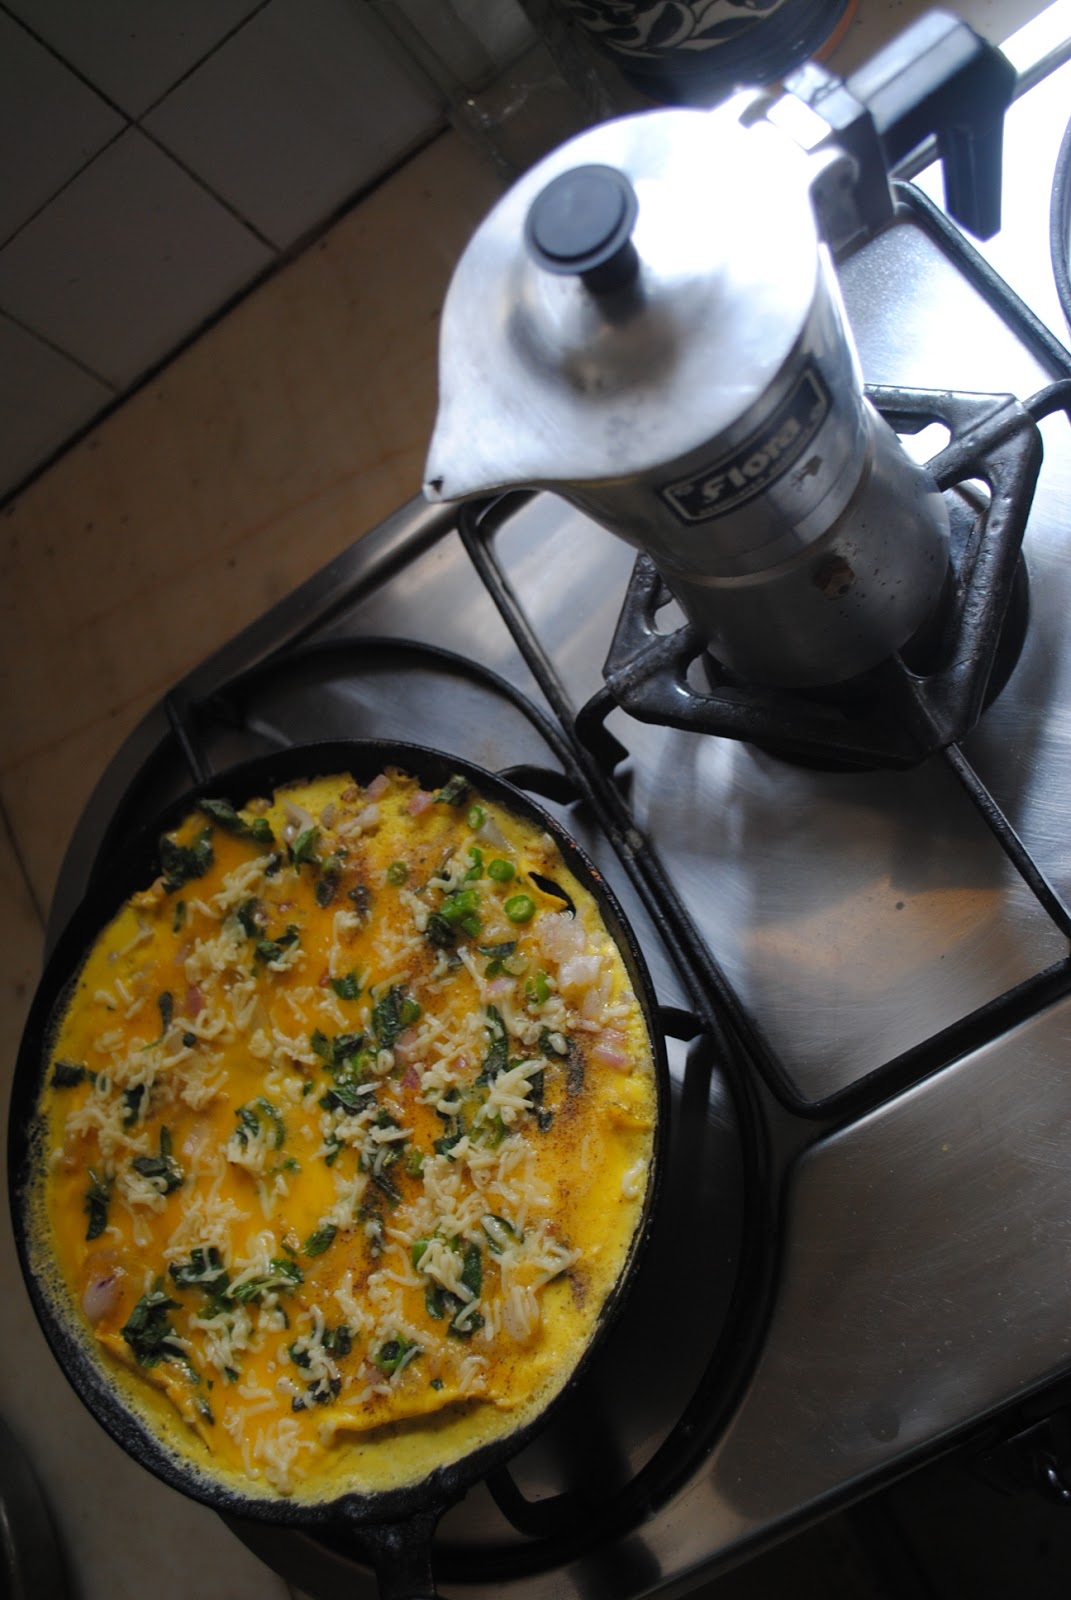
My Perfect Omelette


Disclaimer - this is my perfect omelette - not THE perfect omelette - so feel free to write in with Your perfect omelette. Even if it was made by someone else - like that uncle who lives in Belgium. Or that dishy chef at the Taj breakfast buffet. Just saying.

Dad makes the best Spanish Omelette  or frittata- but over the years, I have perfected the kind of omelette we like - 2 or 3 eggs max, non greasy, fluffy, soft and perfectly salted. I hate it when omelettes are undersalted - as they often are in hotels (something pointed out by Vir Sanghvi as well).

I add a little milk to the eggs - it makes the omelette softer. The eggs are well beaten and then seasoned with salt and pepper. The green chillies should be cut just so- not finely minced so that the chilli seeds spices up every inch of the omelette -but in rounds so that they can be picked out by the people who don't want to bit into them (me) and eaten by the extra spice lovers (hubby). I don't fry the chillies, instead sprinkling them over the omelette, except for one quarter of it which is for K since she can't pick the chillies out and may bite into one. She enjoys this omelette, so it makes sense to make the same one for her rather than a separate one.

The onions are fried till soft and not brown, so that we can enjoy their sweetness. I add a pinch of salt while frying the onions and this balances the salt. The cheese is optional and depends on my mood - but just a cube of grated cheese is enough for 3 eggs - any more than that, it will turn into a cheese omelette - which is not a bad thing, just not what we are looking for. Fresh mint or coriander leaves to finish.

And it should be eaten fresh off the skillet - that way I'm a bit like the Soup Nazi from Seinfeld. No wandering around/checking mail/reading newspaper and then coming over to eat my omelette after its been cooling on the table for five minutes. You preferably have to be at the table, with buttered toasts ready (for me), a good 3-5 minutes before the omelette arrives. Yes, hubby has been trained well in the art of eating our perfect omelette ;).

This omelette takes only about 10 minutes to make from start to finish - and worth every minute if you like a well made omelette. Have your coffee perking at the same time, and you will have a lovely cuppa Joe ready, at the end of it all as well!


Our Perfect Omelette
Ingredients:
 Eggs - 3
Milk - 1 tbsp
Onion - 1 chopped fine
Green chillies - 2 chopped in thin rounds
1 cheese cube about 20 gms(grated) - optional
salt - about 1/4 of a tsp - a pinch with the onions and rest
pepper
Butter - 1 tbsp
Mint - 3 tbsp chopped

1. Melt the butter on a non stick skiller on low heat and then saute the chopped onions on a medium flame till just soft. Add a pinch of salt to the onions while sauteeing
2. Meanwhile, beat the milk with the eggs, salt and pepper till its frothy
3. Spread the softened onions over the skiller and then pour the beaten egg evenly. Sprinkle the chopped chillies and cook on a medium low heat for about 3 minutes or till the omelette is set at the bottom.


4. Gently bring the edges of the omelette inwards and tilt the skillet outwards so that the uncooked egg settles at the bottom. Sprinkle the mint and the omelette over the omelette and cook on a low flame for a minute.

5. Fold the omelette over and cook for half a minute, then turn over and cook for half more a minute. Serve warm - we had the omelette with a herbed bun.

Friday, February 25, 2011

Idlis with Chicken Curry


The "Pure Vegetarian" tag for all South Indians is a misnomer - just like all South Indians are not Madrasis. (Yes, Mr Haldiram - please stop calling your product "Madrasi Mixture"?) Husband's maternal side for instance is quite the meat eating family (except for his mother who is a pure vegetarian and hence he - like me- was vegetarian growing up). In many families, meals are not complete with "atleast" an egg - thus leading to the queer combination of (for me) rice, sambar, rasam, porial and omelette!!
Sunday meals then, are usually the ones which have a variety of meat, chicken and fish dishes in . I didn't understand for a long time, why everyone from my in-laws side who used to call us up on a Sunday would enquire about the lunch menu - were they worried about my husband's diet?. I realised later, that it was a blanket question - a way of keeping in touch - if you know what's cooking, you can judge whether everything is fine....or something like that. Well, anyway, there never was meat at Sunday lunch for a very long time in our home (even now its probably just once or twice a month), so not sure what they thought about that.

Growing up, idlis in our vegetarian home, always went with sambar and chutney.  I was quite taken aback therefore when I moved to Chennai and learnt that chicken curry was an option too. I'm still quite happy with our largely vegetarian breakfasts but some Sundays, if I'm organised enough to have ground the batter for the idlis AND have chicken in my fridge at the same time, we have a nice, big breakfast of soft,steaming idlis with chicken curry.

The chicken curry however, can't be any generic curry - it has to be mild enough so that I'm not put off by too many spices in the morning. But it also has to be delicious and not just taste of the chicken in it. Enter a coconut based curry - more specifically, the restaurant style sidedish (try this for a vegetarian option which is equally delicious)I posted before. I had adapted it from Sailu's Kitchen in the first place and now its been modified some more. Its still delicious though and is the perfect accompaniment to idlis or even dosais.


Idli (feeds 4 for two days)

Parboiled Rice - 2 cup
Urad Dal (whole, skinned) - 1 cup
I usually make dosais on the second day from the same batter, so add a pinch of methi seeds to the rice while soaking 

Soak the rice and dal separately overnight or for 4-5 hours

Grind the rice, leaving it a little bit coarse. 
The urad dal needs to be ground till really smooth and fluffly. So grind slowly and adding water only as needed.
If grinding in a blender, grind in batches and give breaks so that it doesn't overheat.
Blend the rice batter and the urad dal batter together incorporating air into it while doing so. I usually use my hands to do this. Add salt to the batter to taste. 

Keep in a vessel double the volume of the batter, because it will double as it ferments. Leave overnight to ferment.

The next day, grease an idli stand and fill each mould 3/4ths of the way up with the idli batter (for idlis, I don't mix the batter and just skim from the top of the risen batter). 
Steam in a pressure cooker without the whistle or in an idli maker or any other big vessel which can accomodate the idli stand - 5 minutes on high and 5 minutes on a low flame. Rest for 5 minutes and then unmould.


Chicken Curry (with coconut and tomatoes)
 Ingredients
2 onions, sliced
3 medium tomatoes, in 4 pieces
Chicken - 300 gm, boneless, cut into 1" pieces. I like to marinate the chicken for about an hour in turmeric powder(1/4tsp), salt and ginger garlic paste (1 tsp) - a tbsp of yoghurt is great too

Dry roast and grind:
poppy seeds (khus khus) - 1 tsp (soaked in warm water for 15 minutes)
2-3 cashewnuts (soaked in warm water for 15 minutes)
1/4 cup grated coconut

Grind to a paste :
1 " ginger piece
3 green chillies
4 garlic cloves

1 tsp red chilli powder
1/2 tsp coriander powder (dhania)
1/4 tsp turmeric powder (haldi)
1/4 tsp cumin powder (jeera)
pinch of garam masala powder

1tbsp oil
curry leaves
1 cinnamon stick
3 cloves
2 cardamom pods (elaichi)

Method:
1 Heat oil in a pan and add cloves, cinnamon,curry leaves and cardamom. When they change colour (about 2 minutes) add onions and fry till transparent.
2.Add the ginger, garlic and green chilli paste, fry for 2-3 minutes. Add red chilli powder, turmeric,coriander and cumin powders and mix well.
3. Add the marinated chicken and stir fry on high for 5 minutes.
4. Add the chopped tomatoes and fry for 3 minutes. Put in the coconut-cashew paste and fry for 5 minutes on a low flame, stirring from time to time.
5. Add salt, 2 cups of water and bring to boil; lower flame and simmer for 20-25 minutes till the chicken is cooked and the curry turns creamy. Remove from flame and serve with idlis.

Monday, January 3, 2011

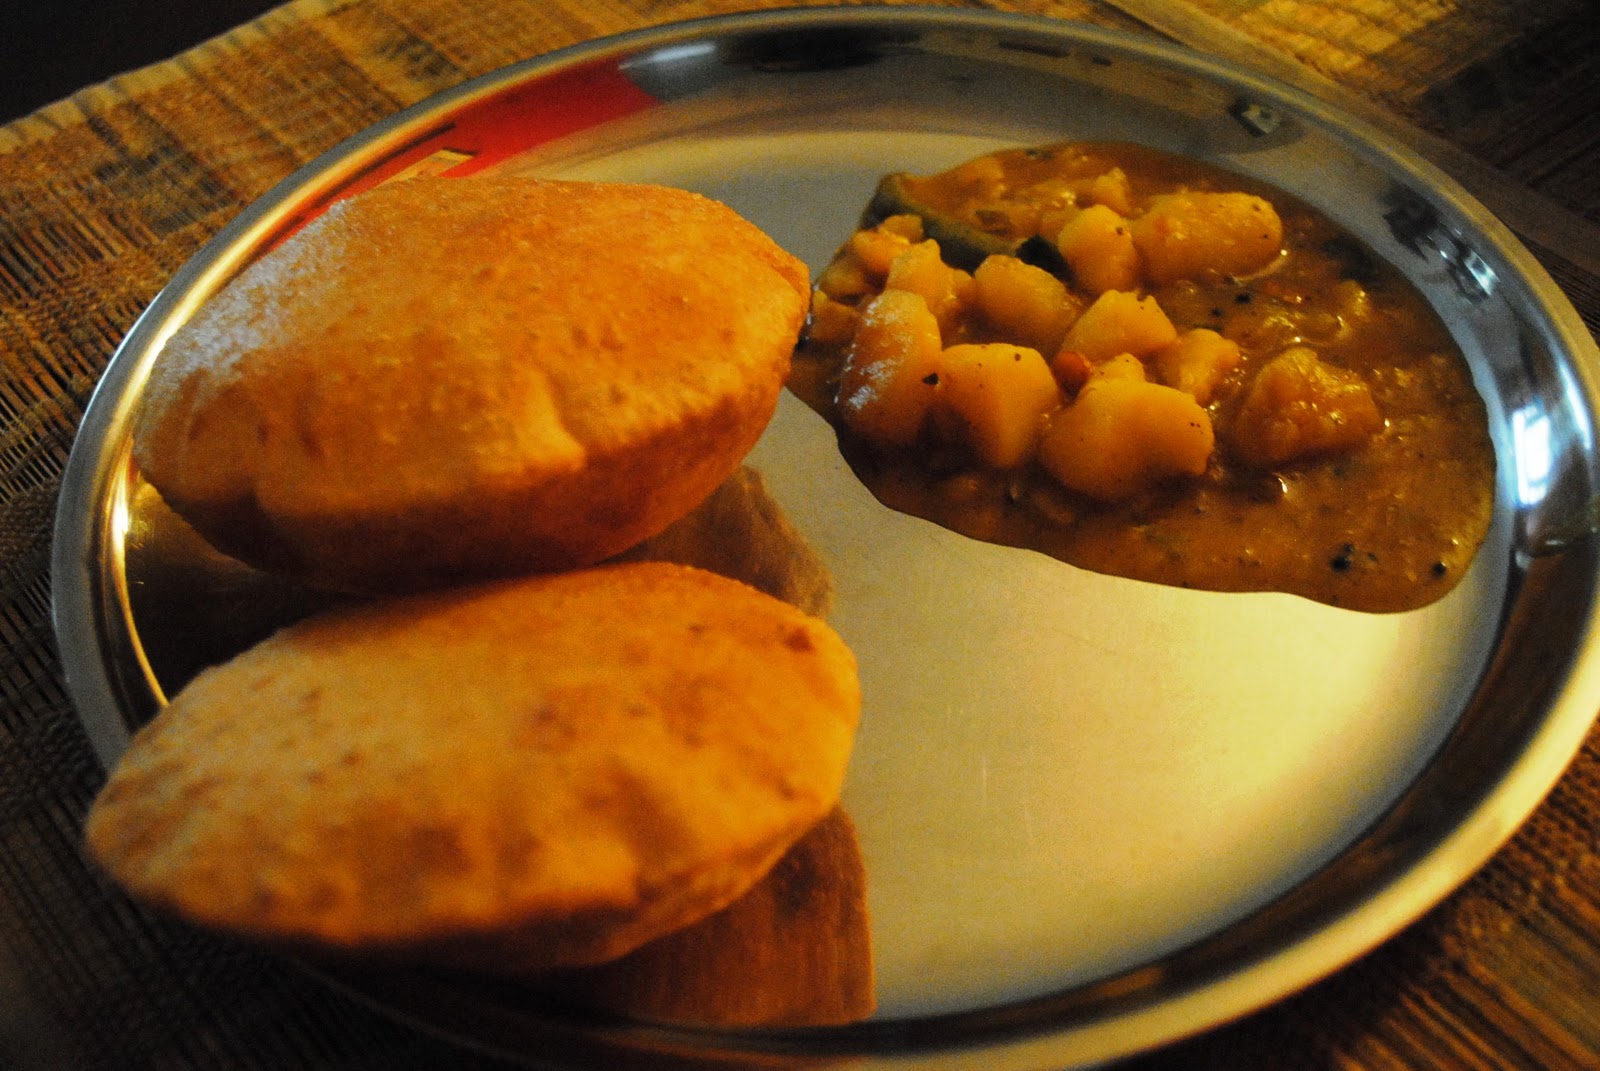
Poori Bhaji - Breakfast Heaven


Is Poori Bhaji everyone's weakness? It is in this house atleast. My 5 year old loves her puris....Hubby too goes weak in the knees when he thinks of a plate of poori aloo - yes the bhaji in Poori Bhaji is all about the potatoes isn't it! I don't make it that often because of the deep frying involved - but it usually finds its way to our table about once in two months and especially when we have guests staying with us over the weekend. It is wonderful to have a leisurely breakfast, one puri after the other, ladling some more of the silky, potato gravy to finish up the "last" piece of puri and then having one more puri to finish the "last" portion of gravy! The puffed up puris are light as air and that lulls you into a false sense of comfort; till suddenly you discover you've eaten so much you can't even move from the table! So, you roll over to the couch and lie there in a sleepy torpor.

The winter months are especially nice to have steaming hot puris straight from the kadhai, along with the carb comfort of potatoes cooked in a mild gravy. Add a the weekend edition of your favourite newspaper and you have the recipe for a perfect Saturday morning. I must say this though - having help in the kitchen to make the puris for you so you can have it piping hot (without getting annoyed about how this one turned out flat and that one didn't puff up) is a luxury. I am definitely enjoying it while it lasts!


The potato gravy though I like to make myself - I keep changing the dish depending on what I feel like eating that day. One version is the Tamil one we have grown up eating - a tempering of chana dal, urad dal, green chillies, asafoetida (hing) and ginger. Followed by crumbled, boiled potatoes mixed with turmeric and simmered in water till the starch in it breaks down to make a slightly thickish gravy.And a squeeze of lemon at the end. Then there is the dry bhaji which you get at railway stations and which is what we ate in BB Dadar in Mumbai, growing up - I can still taste that amazing combination of sunshiny yellow potatoes mixed with green chillies and coriander.

The one I made this weekend is a recent favourite - its modelled on a dish I had at my SIL's place - which in turn had been made by her neighbour who is from Bihar. I didn't meet her and my SIL didn't know the recipe, but the version I make now is an approximation based on how it tasted. In this venture, I was helped by Tara - my girl Friday - who is from Jharkhand (the state which was carved out of Bihar). So there is tamarind juice, red chilli powder, dhania powder, onions and kasoori methi. The tempering however, remains the same as the Tamil recipe since we like the crunch of the dals. The gravy turns out with a nice tang to it and the lovely flavour of kasoori methi underlying everything. The tamarind juice melds with the starch in the potatoes and the gravy thickens up quite quickly. It takes just 20 minutes of simmering and its done.


Poori Bhaji

Poori
Atta (wheat flour) - 2 cups
Oil - 1 tbsp to knead,
salt - a biggish pinch
Water - about 3/4th of a cup to 1 cup
Oil - 1.5 cups to fry the puris

1. Mix the atta with the salt and oil (1 tbsp) and then add as much water as needed to fashion a dough which is a little firm. Firmer than the dough for rotis (Indian flat breads).
2. Rest the dough for about 10-15 minutes. It is preferable not to knead the dough too much in advance, it may dry out and absorb too much oil.
3. Pour the oil into a kadhai (wok) and heat - but not till smoking, else the pooris will brown too fast before being cooked and become crisp.
4. Take a small piece of the dough (the size of a small lemon), roll into a smooth ball and flatten with the rolling pin. Roll out to 2.5 to 3 inch disc dabbing a little oil on first - it shouldn't be too thin, but not too thick as well.
5. Slide the poori into the kadai - it should rise to the top - if it doesn't, the temperature of the oil isn't right and it may need to heat up some more.
6. Carefully splash a little of the oil with a slotted spoon, on top of the poori and it will puff up. Turn it over once it is golden brown (about 3 minutes) and then cook the other side as well till it is brown.
7. Remove with a slotted spoon and drain on some tissue paper to absorb the excess oil.
8. Repeat with the rest of the dough - serve piping hot with Aloo Bhaji.

Aloo Bhaji

Potatoes - 5-6 - boiled, peeled and crumbled roughly into medium sized chunks
Tempering 
2-3 tsp oil
Chana dal - 1 tsp
Urad dal - 1 tsp
Hing - pinch (asafoetida)
Green chillies - 2

1 onion chopped
1 tomato chopped into 6 pieces
red chilli pd - 1 tsp
Coriander powder - 1/2 tsp
Turmeric powder - 1/4 tsp
Kasoori methi -  1/4 tsp

Tamarind extract - 1 marble sized ball soaked in 1 cup of water or 1 tsp tamarind paste
salt to taste
Coriander leaves for garnish

1. Heat the oil in a pan and add the tempering ingredients. When the dals turn light brown, add the onions
2. Saute the onions till translucent.  Add the red chilli powder, coriander powder, turmeric powder and kasoori methi and fry for about a minute.
3. Add the tomatoes and fry for half a minute. Pour in the tamarind extract, add salt and the potatoes and bring to boil. Add half a cup more of water and continue simmering for about 15-20 minutes till the gravy thickens, the tamarind loses its sharpness and the potatoes thicken the gravy.
4. Garnish with the coriander leaves and serve hot with pooris.

Sunday, August 29, 2010

Pesto Crepes


One evening as I stopped by at my friend's place on the way back from work, she mentioned to me that she had a huge amount of basil and was wondering what to do with it. So as we chatted over coffee, I suggested she use it to make pesto and freeze it. So as I called out the ingredients, she made the pesto right then; she gave me the other half to take home and so I did the same as soon as I reached.

Very simple to make this pesto - basil, walnuts, garlic and olive oil. Thats all you need. Really. Once it was ready, I froze it in three separate boxes so I could pull them out as needed.

And thats what I did the next Sunday morning, using a recipe I had seen in Nigella Express. That recipe was for pesto crepes with ham. We don't really eat ham that much- so all I had was chicken sausages and after cutting them fine and lightly sauteeing them, I added them to the batter itself instead of rolling them up inside the pancakes as the recipe did with ham.

This recipe makes about 8 medium sized crepes or 5 large ones. Took me about 5 minutes to mix everything together, another 5 minutes to rest and then 12 minutes to make the crepes. I put some shredded cheese into them, just before rolling them up to serve, but you could also put the cheese into the batter itself. A really quick breakfast option and very very delicious. The pesto made the crepes very flavourful and you don't need anything to accompany them.

P.S - I've been doing some spring cleaning around the blog - on the right are updated links to some of my favourite blogs; still some more blogs to add.
I have also updated the Recipe Index - so please feel free to browse through older recipes and do let me know if you have any requests in a particular cuisine/meal/food group.

For the Pesto: (adapted from a Jacques Pepin recipe)


4 cups basil leaves
6 tbsp olive oil (extra virgin is good for this)
3/4 cup walnuts, lightly toasted
1 green chilli chopped
4 cloves garlic

1.Bring a vessel of salted water to boil and put the basil leaves into it for just 20 seconds. Drain and rinse in cold water. Pat dry slightly
2. Puree the basil leaves along with the walnuts, green chilli and garlic adding half of the olive oil at first and then the rest slowly.
3. Remove and freeze.

For the Crepes: (adapted from Nigella Express)
1/2 cup pesto
3/4 cup flour
1- 1 .5 cups milk
salt to taste
1 egg
pinch baking powder

1 sausage finely chopped and sauteed for 2 minutes
Grated cheese - 1 cup

1. Mix all the ingredients together (except baking powder, sausages and cheese) and blend till smooth.
2. Add chopped sausages and rest for 5 minutes.
3. Heat a griddle and put a few drops of oil or butter on it.
4. Pour a big ladle of batter on the pan and swirl till it spreads into a circle - if too thick, add some more milk.
5. Cook on a low medium flame for 3 - 4 minutes, then add some of the grated cheese in the middle and roll up with a spatula. Turn the roll over and cook for a minute before removing from flame.

Serve warm.


Saturday, July 31, 2010

Rava Idli


I don't lose my cool that often (so she says!) but when I do get upset my mind can churn over it for hours. The best way to calm me down is to plonk me in a bookshop. Of course, there will be a dent in my wallet when I come out, but atleast (her South Indian sensibilities say), it won't be because of adding more clothes to my wardrobe ;).

So, some weeks back when I was fuming because of the spouse's tendency to procrastinate, I walked into a bookshop and started browsing through the shelves. And as usual ended up at the cookery section. Found two youngsters who had parked themselves right in front of the measly three shelves of cookery books and were leafing (and I use this term very loosely) through some coffee table books - one on Interior Design and one on French Cuisine. Reminded me of the episode in Friends where Ross discovers that the section in the library which has the book he has authored, is frequented by young lovers wanting to make out, because no one ever goes there. My mood had only improved very slightly by then and I was annoyed that I had to reach over them to look at the books; they weren't fazed though, kept talking about this and that, the while turning the pages quite aimlessly.
After a few more attempts at browsing, I took a deep breath and decided not to let my own surly mood interrupt these two - didn't we all catch so many stolen moments in the most incongruous of places? I smiled as I thought of my own rendevous with hubby and how we used to wait for them - so what if today that might mean I would have to wait till he actually got around to making it on time ;).
Just as I straightened up to leave however, one title on the bottom shelf caught my eye. Chandra Padmanabhan's Dakshin - a book I had seen praised on many blogs. I picked it up immediately and after going through it for a few pages, decided to buy it. I left the store feeling much happier. She seems to have covered most of my favourite dishes and the recipes are just the home made versions we are used to. Simple instructions, basic ingredients and no complex, tweaked recipes. I agree though that its more Tamilian recipes as compared to South Indian recipes - there's not much representation from the other states here. But what she does do is describe classic Tamil recipes very well.

Last Saturday, while wondering what to do for breakfast, I got the book out and leafed through her tiffin recipes. And found the recipe for rava idli - now I have only ever had the MTR mix version and since it is so good, I never bothered trying to make it from scratch. For the past couple of months however, it hasn't been available in the markets, so I decided to try the recipe.

The end product exceeded all my expectations - I guess I didn't think it would turn out as good as a product which had been perfected after extensive lab tests. But I can't believe I could forget about the magic of fresh ingredients! The idlis were soft and oh-so- flavourful! Though the recipe didn't call for it, I let the semolina soak with the yoghurt and other ingredients for about an hour, so maybe that helped too. Rava idlis are also my 5 year old's favourite tiffin item and I often send it in her snack box to schoo, so its great the recipe worked.

Had the idlis with a hotel style "sideish" - a lovely tangy, spicy, curry made with tomatoes coconut - recipe to follow. Nirvana on a weekend.


Rava Idli (Chandra Padmanabhan - Dakshin)

Made 12-15 idlis

2 tbsp ghee
1 cup semolina (rava/sooji)

1/2 cup sour yoghurt (beaten a bit)
2 green chillies chopped
1 cup coriander leaves chopped
salt to taste

2 tbsp chopped cashew nuts

Tempering:
3 tsp ghee
1 tsp mustard seeds
1 tsp cumin seeds (jeera)
curry leaves

1. Heat 2 tbsp ghee and roast the semolina till golden. Cool
2. Mix the semolina with green chillies, yoghurt,salt and coriander leaves. Add about 1/2 cup water to make a thick batter of pouring consistency.
3. Heat 1 tsp ghee, fry the cashews and keep aside.
4. Heat the remaining 2 tsp ghee and add tempering ingredients. After the mustard seeds splutter, add the tempering and the cashew nuts to the batter.
5. Pour into an idli mould and steam in a pressure cooker (without the weight on) or in a large vessel, for 15 minutes.
6. Remove the mould from the cooker, cool and remove idlis. Serve hot with tomato curry (thakali kozhambu) or sambar or chutney.

Saturday, June 26, 2010

Kuzhi Paniyaram

I hadn't tasted paniyarams till I moved to Chennai - growing up in Mumbai, I never had an opportunityto taste this snack/breakfast preparation. Not only is this a regional speciality, even in Tamil Nadu itself it comes from the Chettinad region and was not something my own family made at home. The first time I had it, was in Grand Sweets - that landmark institution of Chennai which has been around, for ever it seems, making fresh sweets and savoury preparations of the best quality. In the evenings (atleast on the weekends when we went) there would be a huge queue to purchase and while we waited we often had a bite of the freshly made snacks being made outside of the main store - adai, paniyaram, vadais - it was absolutely, lip smackingly delicious.

Following an old tradition, this store provides opportunities to women in an initiative I haven't seen in many places. Right from the cashier to the staff who pack the orders and the ones who make the snacks outsides (and the sweets inside the main kitchen I imagine) are all women. And despite the immense pressure of handling the huge crowds and impatient customers, I haven't ever seen a rude word or a frown from any of them nor any mistakes in the orders themselves. They would go about their work efficiently and without much of a fuss - the token system here works beautifully and with a little patience, you know you will be served. Compare this to your average mobile provider's customer service and you will know what I mean.

Kuzhi paniyarams (kuzhi means hollow in Tamil) are steam cooked (or shallow fried depending on how you look at it) dumplings made by pouring batter into a cast iron pan with hollows and cooking them till they are crispy on the outside and soft on the inside. The batter itself can be made in different ways - the most common one is to use left over idli or dosai batter (adding chopped green chillies, onions etc). Semolina and rice flour is a combination which works well to make an instant snack. There is a sweet version of this called Vella Paniyaram which uses jaggery (vellam). Other regional variations of the same dish include Gundappa (Karnataka), Paddu/Appe (Konkani), Unniappam (Kerala), Ponganalu (Andhra).......

Once I entered the food blogging world, I saw a lot of these around but never even thought of making it since I didn't have the pan to make it - its called appe chatti, paniyaram maker (and in the West the aebleskiver has turned out to be a perfect replacement). A couple of weekends back I had accompanied a friend on her hunt for a futon - we didn't find it but as soon as I spotted this in the utensils section of the store (who by the way had labelled it as an idli maker!) I knew I had to buy it! And the very next day decided to make these for breakfast - didn't have leftover idli batter, so just went ahead and mixed up a batch of semolina and rice flour batter (pretty much like the one I use sometimes for instant dosais). The sweet batter I didn't have a clue - so I looked it up and used this recipe for unniappams. I also had some leftover adai batter which I used. All three versions turned out really well; its a non stick pan so didn't have to contend with it sticking to the pan. Just a few drops of oil for the first round and then it was smooth going after that -I loved the unniappams with the taste of banana and jaggery but my daughter for whom I made them in the first place, preferred the other two savoury versions.

Below is a look at how I made these - make sure the first side cooks on a medium low flame for atleast 5 minutes (covered with a lid) before you try turning them over. If they stick, wait a bit more, once they are cooked and a little brown, they will turn over quite easily. Cook the other side for another 3-4 minutes and then remove. I served these with a tomato chutney - coconut chutney goes well too.


Kuzhi Paniyaram

Savoury
Semolina (sooji/rava) - 1/2 cup
Rice flour - 1/2 cup
Yoghurt - 2 tbsp
1 small onion - chopped
3 green chillies - chopped
1 tsp cumin seeds (jeera)
1/4 tsp baking soda
coriander leaves
salt to taste
Water - 1 to 1.5 cups

Sweet
Semolina - 1 cup
Rice flour - 1/2 cup
Jaggery - 1/2 cup
1 banana
cardamom powder
1/4 cup water
salt a pinch

1.Mix all the ingredients for the two batters, adding just enough water to make it a little thicker than pancake batter or dosai batter.
2. Heat the griddle and drizzle a few drops of oil in each hollow.
3. Pour about a tbsp of batter in each hollow, filling it up to about 3/4 of the way.
4. Reduce the flame to medium low, cover with a lid and cook for about 5 minutes.
5. With the wooden turner (it comes with the griddle), gently check that it has been cooked and brown and then turn over. Cook for another 3-4 minutes covered.
6. Remove from flame and serve warm with chutney.

Tuesday, June 15, 2010

Stuffed Mushroom and Garlic Baguette

One of my friends spent last weekend with us - she was in Delhi for an important meeting (which went well - YAAY!!) and we had a great time sitting down in the evenings and chatting on every topic under the sun. She is a friend I made quite recently, but we share a lot in common, including our love for food and cooking. She had very generously sent me a few packets of fast action yeast which one of her friends had sent her. And though it came a couple of months back, I coincidentally used it for the first time, that very week.
What a difference from the active dried yeast that I have always used! No more coddling the dough and waiting with bated breath wondering whether it will rise. The dough just rose so beautifully - twice!!! Thats it - I know whats going to be on the shopping list of everyone who goes abroad now ;) I am never going to go back to active dried yeast if I can help it.

I chose to bake a mushroom and garlic stuffed baguette from Sara Lewis's - The Bread Book. I have previously made an Olive and Feta Cheese bread, Carrot & Mustard Bread and Rapid Light Wholemeal Loaf from this book which was a gift I got two years back. Didnt have a problem with any of them so I can definitely recommend her recipes.
The filling was very simple and since there was no worrying about the dough, it took me just half an hour of kitchen time to get this together. I did this after coming back from work and my daughter had great fun adding all the ingredients into the dough. Of course, as soon as she saw the mushroom filling going in, she became very suspicious (she can't stand bits and pieces which come into her mouth without her knowledge and permission LOL) and her enthusiasm waned a bit. The dough proved by the time she was done with her dinner and I shaped it and left it to prove again for half an hour and then it went into the oven. By the time we finished our dinner, I had some beautiful bread ready for next day's breakfast.

Since the baguette was too big to go into my oven, I broke off the ends and shaped them into rolls - which is why the baguette doesn't taper off at the ends like it should. Also, I think it could have baked for a little bit longer than the specified 30 minutes - it was a softer and paler than usual. Next time I am also going to try an egg wash on top for a better crust. The bread itself was really nice and I enjoyed having it with a hunk of cheese and some mint chutney. It wasn't as thin as a baguette though, since it kept rising - reminded me of The Magic Pot! Thanks Nina!

Stuffed Mushroom and Garlic Baguette


Refined flour (maida) - 475g or 4 1/3 cups
1 1/2 tsp sugar
1 tsp salt
1 tsp chilli flakes
2 tsp dried mixed herbs
1 1/4 tsp fast action dried yeast2 tbsp olive oil
275mln or 1 cup water

Filling
100gm mushrooms, washed and sliced2/3 cup wine
2 tbsp olive oil
1 onion, chopped
2 garlic cloves chopped
salt

1. Put the flour into a large bowl, add the sugar, dried yeast, salt, chilli flakes and gerbs. Add oil, enough water and knead well for about 10 minutes into a smooth and elastic dough. It should be soft and shiny but not too wet. Cover with oiled clingfilm and leave to rise for 1 hour or until doubled in size.
2. Heat oil in a pan and saute the onions and garlic for 5 minutes. Add the sliced mushrooms and fry on high heat for 2 minutes, add the red wine and salt and simmer till the liquid boils away.
3. Take the dough out from the bowl and knead well. Roll into a rectangle about 17 X 19 inches ( I will make two rectangles next time, since this one was too big for the oven).
4. Spoon the mushroom filling over the rectangle in a thin layer, then roll up the dough starting from one of the longer sides of the rectangle.
5. Put the dough on a greased baking sheet or tray, brush with oil, cover loosely with clingfilm and let it rise for a second time for about 30 minutes.
6. Bake in a pre heated oven, 200C for 30 minutes or until golden brown. Transfer to a wire rack to cool.

Friday, April 23, 2010

Rava Pongal and Kathirikai Gothsu (Semolina Breakfast Dish with Eggplant)


Pongal is a traditional South Indian breakfast - in fact some people consider it to be completely Tamilian in origin. The way I have always had it at home is with rice and split moong lentils cooked together till just mushy and tempered in ghee with cracked pepper, cumin seeds and cashews and served with coconut chutney.
It was only after moving to Chennai in my 20s that I discovered other versions of our usual breakfasts at home. So, there was rava khichdi - which was basically the usual upma made with semolina, but with vegetables, tomatoes and garam masala added to it which made it different from the lighter version we made basic tempering of mustard, gram dal and onions along with maybe peas or carrot.

And then there was the rava pongal which I tasted on the way to Kodaikanal in 1996 - we had stopped at one of the TTDC (Tamil Nadu Tourist Development) restuarants just outside Trichy. It was a brand new car, two people newly in love - and the keys locked inside the car.

Since it was a new car, the duplicate key wasn't in its usual place, the wallet - so while we sweated and tried to get the central locking open (why is it that there are always 10 people around you giving advice on things while not actually doing anything concrete to help?!) it was getting hotter and more frustrating. Finally we gave up and my to-be hubby very sadly got out his trusty Swiss knife to cut out the quarter glass. Long story short, we reached Kodai with the window held together with duct tape and 13 years later, the love story is still going strong while the car went out of our lives after 9 years and some memorable road trips.

But this story is actually about the rava pongal and gothsu we ate at that TTDC restaurant - I had never tasted anything like that before and the combination of soothing semolina with a tangy eggplant was an immediate hit. And while I have often thought of it, have never got down to replicating it - after all what if the taste was enhanced by the flush of first love ;)

Nupur's event Blog Bites #2 - the Copy Cat edition made me think of it once again and I decided to make it for a weekend breakfast. The semolina and moong lentils make this quite filling and I would even suggest this as a brunch idea. The gothsu recipe I have adapted from Suganya's recipe from her blog Tasty Palette - my go-to blog for authentic Tamil cuisine recipes as well as some amazing ideas for baked and healthy vegetarian goodies. While her recipe has mixed veggies in it, I restricted mine to eggplants alone in order to recreate the dish I had so many years back.

The rava pongal recipe I retrieved from Red Chillies - again, thanks to RC's food blog aggregator I keep in touch with much of the blog world as I can. The recipe is truly "simple and easy" and got done in minutes - but I must warn you, don't get fooled by the quantity, less is more here and its quite a filling meal. Together the pongal and gothsu were a delicious combination!

So Thank you Suganya and Soma for helping me to go back in time and savour a piece of history - we smiled as we at the table day and thought back to that day and all those shared memories we have - isn't that what makes a relationship strong at the end of the day?

PS - Taking a small break now - am on a work trip till the 6th May and then on vacation till the 17th May. So, see you when I am back - be good people!!

Sunday, April 11, 2010

Wheat Pancakes - Doddak


My best friend is from Mangalore and I have literally lived in that house while in college and then my post grad studies. I have not met more warm and welcoming people and everytime I go back to Mumbai, its in their house I feel like I have come home.

Konkani food differs a from region to region as well as between the various communities ; but I love the coconut based, mild flavours of "amchi" food. Aunty S is a wonderful cook and I have some great memories of her randayi, dali, taak, ambat, sukke preparations. Batata song is one of my favourites and I make it at home quite often. I tried this version of saasam and it was good too.

Raaga from the Singing Chef is part Amchi and part Tamil so its great to read her blog with the mix of both cuisines. She lives in Gurgaon (where I work) so we have managed to connect on mail and phone, though we are still working on actually meeting in person! She has some great cupcake recipes and meal in a jiffy ideas - perfect for working women!

Singing Chef was the blog of the month for the Tried and Tasted event hosted by Divya of Dil Se but by the time I finally got around to making the wheat flour dosai I have been planning for a long time, the deadline was over...ah, well. The one at S pachhi's house, my friend told me when I was speaking to her today, is made of semolina and grated coconut. This one is made of wheat flour, coconut and a little semolina and is called Gave Pitye Doddak. Took just minutes to make and was a really filling breakfast, served with green chutney.


Friday, March 12, 2010

Rapid Light Wholemeal Loaf - Sara Lewis


There's nothing better in my opinion, than a well made sandwich, to satisfy one's hunger - be it for breakfast or as a snack or even for lunch. The bread should be fresh and the fillings juicy - that's all that one needs! I especially love the toasted sandwich - no, not the grilled sandwich - the one you toast on those metal sandwich toasters over the gas flame.

Having grown up in Mumbai, I simply love those fresh sandwiches the streetside vendors make - white bread (yeah, yeah I hear ya), a choice of plain butter or Amul butter, mint chutney and then the fillings - onions rings, slices of boiled potaotes and beet, raw tomatoes - a sprinkle of salt and pepper, quick cutting into 8 square towers you had to struggle to fit into your mouth - Heaven! We practically lived on Subhash's Rs.5 sandwiches when we were in college - it was so cheap and filling.


Some guys also had toasted sandwiches - while we used to make them regularly at home (probably the first thing I "cooked" in the kitchen) I had them outside only when I was doing my CA - the guy opposite Eros theatre in Churchgate was very good but I'm sure everyone has their favourite one.
I still love to have toasted sandwiches for breakfast - tomato, boiled potatoes or even eggs, coriander mint chutney, half a cheese slice - perfect start to the day. Haven't had a nice sandwich outside for a very long time - the apologies which pass for sandwiches in places like Coffee Day should be banned. Sitting in the display rack for ages, filled with some truly shocking stuff (once I got a sandwich with grated carrots and mayonnaise!) they are not worth half the money being charged.

Its been a long time since I baked bread - pizza base is what I have been experimenting with for some time. The cold temps till now also didn't help - now that the weather is turning, I thought it would be a good time to have a home made loaf of bread.

Picked a recipe from Sara Lewis's The Bread Book - it has half whole wheat and half white flour and I thought it would be a good halfway bread to have. It turned out well, even though I had to up the flour quantity since, by mistake, I poured all the water into the flour originally measured out. The bread had a nice crumb and was soft with a great crust - it was also soo easy to make. I definitely recommend this for someone who is trying to bake wholemeal bread for the first time.

Rapid Light Wholemeal Loaf - Adapted from Sara Lewis's The Bread Book


2 1/4 cups wholewheat flour
1 3/4 cups strong white flour
2 tsp sugar
1/4 tsp salt
2 tsp active dried yeast
1 tbsp vegetable oil
1 cup warm water

1. Heat the water till just hot and dissolve the sugar in it, wait for it to cool till just warm (shouldnt be cold or hot) and dissolve the yeast in it. Set aside for 10 minutes.
2. Mix the two flours, salt, oil - pour in the yeast mixture a little at a time and knead well for about 10 minutes till the dough comes together - smooth but not sticky.
3. Grease a loaf tin and put the dough into it. cover loosely with a lightly oiled cling film and leave in a warm place to rise - about an hour or till the dough reaches just above the top of the tin.
4. Slash with a sharp knife - the bread cooks well and looks good too.
5. Pre heat oven to 200c, remove the clingfilm and bake for 25-30 minutes - when tapped the loaf should sound hollow and the bread will be browned on top. The book recommends checking after 15 minutes and to cover with foil if it is overbrowning.
6. Loosen bread from the sides of the tin, transfer to wire rack and cool.

We had this for breakfast the next day - sauteed sausages, tomatoes, lettuce, vegetable patties, mint chutney, cheese, mustard - we mixed and matched. Whats your favourite way to have a sandwich?

Monday, October 5, 2009

Handvo - Spiced Savoury Lentil Cake

,I love to cook from scratch - there I said it. In this world of convenience food and TV dinners, it may seem like a complete waste of time to do things from scratch, but I have to admit I like the whole process of shopping for the ingredients, getting them together and then creating something out of it.

I would be the first one to protest against spending a minute more than necessary in the kitchen on a daily basis. But as someone who loves cooking, there are times when you are in the kitchen by choice rather than by compulsion. Those are the times when I love to experiment and try new things, sample new flavours and play around with textures and tastes.

So, though I have made this "instant" handvo a lot of times and love the fact that it's so easy to rustle up a tasty breakfast, I always wanted to make the handvo from the traditional mix of whole grain flours. Well, thanks to my dear friend Arch, who has the delightful blog The Yum Factor, I got a goodish amount of the flour used to make handvo - straight from Ahmedabad. Her poor hubby was made to cart the flour along with drumsticks and fresh sweetcorn - the things we foodies do!! Hopefully the evening spent with us made up for the courier service :)

The handvo made this way is markedly different from the instant version, not to mention that it is that much more healthy because of the whole grain flour used. I added grated bottlegourd (dudhi/ghiya) and carrots as well as some of the fabulous sweet corn. I baked some of the batter (without the green chilli paste) in muffin tins, to send in my daughter's lunch box and she loved it! And the fact that it is baked makes it a must-have on my list atleast!

I followed the recipe from Arch and it turned out beautifully! Cut into squares and served with green chutney.

Tuesday, July 21, 2009

Dad's Spanish Omelette

Sunday breakfasts cooked by Dad were really special. While he was in Iran, he learnt to make a mean Spanish omelet from the Swedish engineers he worked with there. The last time he made this for me was on my birthday 4 years back and he hadn’t lost his touch. It was simply delicious – thick wedges layered with potatoes, stuffed with slowly browned onions and capsicums, topped with cheese. Hmmm… reminds me, I should ask him to make it again the next time he visits.

When I grew up and started reading more about food, I found that in Spain this is called a “tortilla” and is widely served as a snack or a light meal in Spain – especially in Tapas bars. Quite a different concept from the breakfast dish I had always known it as. In Britain it is called Spanish omelet, while in Italy there is a version which is called “Frittata”. They are all flat open faced omelets with a large variation in the fillings and while the bottom is cooked on the stove top, the top is finished in the oven. Read more here.

I made this recently on a Sunday morning (for some reason I can’t wrap my head around making this on any other day! I guess the tradition continues...) Along with the potatoes I also tossed in some sliced sausages and topped it with feta cheese, dried herbs and fresh coriander. The combinations for a frittata are endless - feel free to experiment with bell peppers, mushrooms and any other ingredient you fancy.

Frittata cooking on the stove top

Go easy on the salt if you are using feta cheese since it is naturally salty. Even my daughter gets to share this lovely breakfast because I sprinkle the crushed pepper and some chilli flakes only on 3/4th of the frittata leaving one wedge for her to enjoy.

Frittatas usually use anywhere between 6 to 10 eggs - thats how you get those thick wedges which you can cut. Which is why I usually make these when we have friends staying over with us....makes for a nice brunch of sorts without too much time spent in the kitchen. This time, since it was just the three of us (2.5 actually!), I used 3 eggs. I don't have a smaller non stick pan so I used the normal one which is why it is much thinner than usual.

When making the frittata with 6 eggs or more, I use a round oven proof tin - first on the stovetop and then later in the oven to set the top. This time I put the non stick pan inside the oven - not a good idea at all.
a. Non stick pans are as such a bad idea because of the teflon coating (am trying to find some good cast iron frying pans I can season and use) and one inside the oven isn't a good idea either.
b. I kept in there for about 3-4 minutes, but it might melt the plastic handle of the frying pan.

So, what I'm going to do in future (and would suggest the same for anyone trying this) is to use an oven proof pan which I can also use on the stove top. Think pie pans, roasting tins....

I am sending this recipe on to Family Recipes - the event which brings memories of family, food and fun - the brainchild of Shelby and Laura.

Dad’s Spanish Omelet

Ingredients:

Eggs - 6

Milk - 1 tbsp

salt and pepper to taste

Potatoes - 2, sliced thin and cooked in water for about 8 minutes, till almost done

Mushrooms/sausages/bell peppers - 1/2 cup sliced thin

Red chilli flakes/paprika powder - 1 tsp

Fresh coriander & mint - 1/4 cup chopped

Dried herbs (optional) - 1/4 tsp

Feta cheese - 100 gm

Oil - 1 tbsp


Method:

1. Heat oil in an oven proof tin and arrange the parboiled potato slices at the bottom of the tin and cook each side till golden, about 5 minutes.

2. While that is cooking, beat the eggs and the milk along with the salt and pepper. When the potatoes are almost done, add the mushrooms/sausages/bell peppers to the pan and cook on low for about 5 minutes till they wilt.

3. Pour in the egg mixture and wait till it spread evenly. Sprinkle the fresh herbs, dried herbs, red chilli flakes and feta cheese. Pre heat the oven to 180C

4. After about 2-3 minutes, the egg would have set and the bottom would be almost cooked; Put the tin into the oven (or under the grill) and bake for about 5 minutes till the top is cooked and golden. The cheese will also have melted. Serve warm, cut into wedges along with a hunk of bread on the side.

Sunday, July 5, 2009

Udipi Sambar


One of the things I missed most when I moved out of Mumbai was something I had taken for granted all those years when I was growing up - Udipi restaurants. They dotted the landscape, especially the King's Circle and Matunga neighbourhood where we lived, and we loved the food they dished out. Clean, efficient and cheap - these were places we went to whether we wanted an early morning South Indian breakfast on a Sunday morning or a pav bhaji in the evenings. College saw us practically camped in one of these places as our burgeoning appetite never matched our wallets - we enjoyed their paper dosais and masala uttapams, their thick milkshakes and cold juices.
Anand Bhavan was a particular favourite of my Dad's for their rasam wadas, while I preferred the AC Udipi Cafe. Mom loved the South Indian "meals" at the Udipi place near Matunga station - unlimited food for Rs. 40!. Shree Sundars came much later when I had just started my degree in Podar and it became an instant favourite with our gang. Then there were the die hard fans of Mani's behind Ruia college where they literally drank the chutney! What is your favourite Udipi place to eat in Mumbai?

When I moved to Chennai and ate my first idli outside of home at Saravana Bhavan - I didn't like it! Because they didn't have the Udipi sambar to go with it, nor the flat, large, coarse idlis. The sambar at the eating places in Chennai were almost like what we made at home - there was no tantalising hint of sweetness at the edges nor was there coconut in the masala. The sambar at Udipi restaurants have their own fan following - on Sunday mornings in Anand Bhavan we found it amusing to see people coming and ordering plates of idlis and dosais as take away; they would bring those steel many-tiered dabbas to fill up extra "sambhur"!

It was then that I got hold of this recipe and whenever the urge struck, I would make Udipi Sambar at home. I love this sambar and often serve it with idlis or dosai or just with rice for lunch. Its the jaggery and the coconut which make all the difference. I used drumsticks and small onions - but feel free to substitute with pumpkin, ash gourd or even just small onions alone.

Everytime I go back to Mumbai, I make it a point to visit our old haunts. A visit to Udipi itself is on my travel list, but don't know when that will happen. This month though we are likely to have a virtual food tour of Udipi & Mangalore courtesy this month's RCI theme - Udipi & Mangalorean cuisine - being hosted by Sia of Monsoon Spice.
This event was originally the brainchild of Lakshmi of Veggie Cuisine.

Udipi Sambar


Ingredients:

Tur dal - 1/2 cup (cooked in 3-4 cups water in a pressure cooker till soft, then whipped or mashed till smooth)
Tamarind - small lime size ball soaked in 1 cup water and pulp extracted
Small onions - 10-12, soaked and peeled
1 tsp jaggery
1-2 drumsticks, chopped into 2-3" batons

Masala paste:
1/4 coconut grated (fresh)
1/2 tsp fenugreek seeds (methi)
1/2 tsp urad dal seeds
1.5 tsp coriander seeds (dhania)
dried red chillies -6
curry leaves - handful
1 tsp oil

Roast all ingredients, keeping the coconut and curry leaves to the last few minutes. Cool and grind to a paste

Tempering:
mustard seeds (rai) - 1 tsp
urad dal seeds - 1tsp
green chilli - 1 slit
curry leaves - handful
asafoetida (hing) - pinch
2 tsp oil

Method:
1. In a heavy pan, add the oil and when it is hot the tempering ingredients. Saute the onions and then add the drumstick pieces and cook in half a cup of water till just tender.
2. Pour in the tamarind pulp, salt to taste and jaggery - add 1.5 cups water and bring to a boil. Lower flame and simmer for about 10-15 minutes till the raw smell disappears.
3. Add the mashed dal and the masala paste and simmer for another 5 minutes, adding some more water if it is too thick.
4. Transfer to a serving dish and serve with idlis.

Tuesday, April 21, 2009

White Chocolate Muffins (Eggless) and a Breakfast Picnic

Yes, you heard that right! A Breakfast picnic is what we did a couple of weekends back - the weather had been absolutely brilliant in the early am that whole week, so four families with 6 kids and a dog set out at 7 30 am to Lodhi Gardens (Delhi).
We have "our" spot, right under a big old tree with some benches nearby, which we use during the winters (we did two last year and one the year before) but since it was so early in the morning, that was taken over by people doing yoga and stuff. Winters we normally reach around 11 30 when the sun is out and there are fewer people at that time.

So we picked another spot a little further away - we were shaded by the big tomb and some trees cool breeze blew all around us - it was perfect! We spread our dhurries, poured out the tea from the thermos and brought out the food. The cheese sandwiches and rava idlis with gun powder came out first along with a whole bottle of freshly squeezed orange juice. So fortified, the kids went adventure hunting looking out for tunnels, ponds and "secret hiding" places along with some of the adults and the dog. The rest of us, lay back and chatted looking at the blue skies and the spring flowers and almost dozing with our eyes half-closed.

The children were back in no time chattering on about all the "treasures" they had unearthed and dived right back into the food - aloo parathas and gobi parathas, bananas and grapes. Games of catch followed and then turned into a quest for finding ladybugs in the bushes and flowers accompanied by squeals of delight when one would land on a tiny hand. It was worth all the "effort" of waking up on a Saturday morning and getting the kids ready in time - and I treasure these times so much because I have never had the chance to do these things in Mumbai or Chennai. Delhi is blessed with these wide, open spaces which are so easily accessible and I'm glad to be making the most of it while we are here.

Besides the rava idlis, I brought along these white chocolate muffins which I had made the previous day. I made them without eggs since MIL is visiting and she doesn't eat eggs. I added the banana to make up for the moisture content and consistency. And to complete my itch for one weird ingredient per recipe I threw in some chopped candied amla (gooseberry) into the batter. The muffins were nice and moist; some of you might want to add a bit more sugar if you prefer your muffins sweeter. You could also chop more walnuts and add them right into the batter. Replacing the white chocolate with dark chocolate is another option.

This goes to Joelen's Tasty Tools event - where this month's tool of choice is Muffin Pans.

White Chocolate Muffins (Eggless)

Wheat Flour (atta) - 1.5 cups
Refined flour - 3/4 cup
Baking powder - 1.5 tsp
Baking soda - 1/2 tsp
Castor Sugar - 1 cup

1/2 cup unsalted butter
1/2 mashed banana
white chocolate - 100gms, chopped into pieces
1/2 - 3/4 cup milk
1 tsp vanilla essence

Walnuts - 6, broken into halves
Candied amla - 2 tbsp, chopped (optional)

1. Sieve both the flours with the baking powder, soda and the powdered sugar. Keep aside.
2. Melt the white chocolate pieces in a microwave at 30 second intervals till soft. You can also put the chocolate into a steel bowl which goes into another vessel half filled with water and then heat it on the stove, stirring till it melts.
3. When the chocolate cools a bit, add it to the mashed bananas along with butter and vanilla essence.
4. Mix the flour into this mixture and whip with a blender. Add the milk a little at a time till the mixture is thick and creamy, but not too runny.
5. Add the chopped candied amla, mix and drop spoonfuls of the batter into muffin covers or a greased muffin tray, taking care to fill only three fourth of the mould.
6. Place half a walnut into the top of each muffin and then bake for 14 minutes in a pre-heated oven at 180C. Cool completely.