Monday, September 20, 2010

Buttermilk Roast Chicken - Nigella Express


I have managed to try quite a few recipes from Nigella Express in just 2 months - a testament in my opinion, to any cookbook. At first glance, I thought the book would be more of a coffee table acquisition to drool over, than one which I could actually use on an everyday basis. This, especially in the context of Nigella's style of cooking as seen on her television show, where we see liberal lashings of butter and cream being used - something which I just can't seem to get myself to replicate.

To be fair, it is usually the Nigella Feast episodes and the Christmas specials where the calorie laden desserts seem to hold sway. The Nigella Express recipes are lighter and more practical: even where the recipe calls for a little more calories than I would normally use, its easily adaptable to a low fat version. Like I did for this recipe for roasted chicken.

The recipes in the On the Run section are particularly helpful when you are looking for a quick fix but flavourful meal - or even something you can pack for lunch. Her Sesame Peanut Noodles  for example - as easy as mixing together cooked noodles with peanut butter (yes peanut butter!) and some sliced peppers and chopped herbs - I added some chilli flakes to spice it up and it was a great work week dinner with the leftovers perfect for the lunch box a day or two later.

This recipe for roasted chicken though, turned out to be just right for a light lunch on Sunday after a heavy breakfast. The best part about it is it suits my style of marinating meat or fish into different portions as soon as its bought. Some for curry, others for grilled or baked recipes and so on. So, when its time to cook, you just have to thaw and cook the way you want it.

For this recipe, you need chicken drumsticks to be marinated in a very simple combination of buttermilk, maple syrup and garlic for anywhere between 2 hours to overnight or more. It literally takes less than an hour to put together a meal with these drumsticks. I had initially marinated this in preparation for my brother and family visiting us to celebrate my Dad's 70th Birthday. But in all the confusion that followed their arrival (and the fact that with my parents here, we were eating mainly vegetarian meals) I forgot about them!

So once they had left, and the house came back to just the three of us, I poked around the kitchen missing Mom's cooking and then came across these. I had substituted honey for the syrup and cut down the amount of oil in the recipe and it was delicious. The next time I made this, I used some golden syrup and a sprinkling of Mexican spice powder and it was even more delicious. My daughter loves chicken drumsticks and was thrilled with these. I served it with a lightly spiced Pulao (pilaf) and some Tomato Carrot Soup.

Buttermilk Roasted Chicken (Adapted from Nigella Express)

Ingredients:

6 chicken drumsticks (I used skinless)

1 cup buttermilk - Buttermilk when used in Western recipes, refers to the whey left behind after curdling milk with vinegar or some other souring agent (like cream of tartare). I used, what we refer to as buttermilk in India - a little home made yoghurt whipped with 2-3 three times the water.

4 tbsp + 1 tbsp olive oil

2-3 garlic cloves minced

1 tbsp black peppercorn crushed

2 tsp salt

1/2 tsp chilli powder

1 tsp cumin powder

1/2 tbsp honey

1. Whisk together 4 tbsp of olive oil with the buttermilk, honey, crushed garlic, chilli pwd , pepper and the cumin powder.

2. Toss the chicken drumsticks in the marinade in a freezer bag.

3. If cooking in the next 2 hours, leave in the refrigerator, else freeze till you are ready to cook later. Remove from the 'fridge (or if removing from the freezer than thaw for half an hour to 45 minutes). Drain the marinade and reserve for making a sauce or jus for another dish.

4. Pre heat the oven to 190C, toss the drumsticks in 1 tbsp of oil and cook the chicken for 25-30 minutes till it is brown and crispy on the outside and completely cooked on the inside (you can check with a fork)

Sunday, September 12, 2010

Jhaal Jhol - Mixed Vegetables in a Spicy Mustard Curry and Mustard, Lemon and Coriander Grilled Chicken


I follow Bong Mom's Cookbook very closely - seem to identify with the general disregard for rules where cooking is concerned, her penchant for adaptation and the close relationship she shares with her daughters. Plus she spins some fabulous golpo :)

I have been able to try more than a few recipes from her repertoire - especially Bengali cuisine. I have made a couple of the fish recipes, but the vegetarian recipes fascinate me with their lilting names - Charchari, Tara Tari Paanch Mishali, Shorshe Begun.....they call out to me to discover what they must taste like. So, one Sunday afternoon, while we were lying sprawled around the house after a heavy breakfast of puris and kurma - "pythonish" - as the household idiom goes; I wondered what to cook for lunch. Something light...hmm, maybe rasam, rice and a porial. Naah....not porial today - too bland for what I was craving right now this cool, rainy day in September. No coconut based masalas after the kurma in the morning....so what else can I make. I open the refirgerator and meditate in front of the crisper until the 'fridge beeps indignantly at being left open for so long. I look at the summer vegetables we have - now restricted to the gourd family since we have already eaten cauliflower, potato and carrot in the kurma.

And then I think of the other cuisine with a penchant for using as much of a variety of vegetables as we do in the South - ridge gourd, bottle gourd, bitter gourd, radish, pumpkin - Bengali cuisine. And not only do they love all the variety but they also like to mix it up together into one dish - all the better to have a perfect melange of sweet, sharp, bitter and sour flavours.

I remember my Bong friend here making a maacher jhol- a thin, light curry which had the pungency of mustard underlying it. And then I thought of the Charchari on Bong Mom's blog as well. As always I wanted everything; I wanted the mixed vegetables in a jhol like curry rather than the semi-dry consistency of the Charchari and I wanted the pungency of the mustard as well. So I adapted this recipe  - Borar Jhol/Jhaal Whatever (her title, not mine!)- secure in the knowledge that since she herself had adapted the recipe from her Mom's repertoire, she wouldn't mind. Especially, since I did stick to her Mom's tweak to the original recipe to make it jhaal (spicy) - so what if the daler bora (lentil fritters) were replaced with mixed vegetables? Wasn't the bora itself a replacement for the fish in Macher Jhol?

Armed with these justifications, I ground the mustard paste (shorshe bata) - managed to avoid the bitterness that she cautions may happen while using a blender. My theory is that a low wattage blender (like a coffee grinder) may overheat if run for too long and therefore turn the paste bitter. So if you are using one, grind it on slow, with breaks in between.
I also used yellow mustard seeds since I find that black mustard seeds tend to be bitter sometimes. I used 4 tbsp of yellow mustard seeds soaked for 20 minutes in warm water along with 1.5 tbsp of poppy seeds (khus khus) and ground together with 2 green chillies to a smooth paste adding two tsp of water at a time. Be patient.

For the vegetables, I diced raw bananas, egg plant, bottle gourd and ridge gourd - didn't have pumpkin or bitter gourd which I would have loved to include. I did not steam them separately and instead cooked them in the curry itself after frying them for 3 minutes - this way they didn't get overcooked and mushy, as gourd vegetables sometimes do, and also absorbed the spice paste beautifully.

The jhaal jhol was amazingly flavourful - the mustard-chilli paste gave the right amount of heat to the dish for us; though for people who find it too spicy, they can omit the red chilli powder - Bong Mom says she usually doesn't use red chilli powder for preparations with the mustard paste. The mustard paste in this case was an addition made later by her mother to the dish - something which according to me, takes this dish from simple to sublime! We had this mixed with rice and it was lip smackingly delicious. This one is going to become a staple in our house.

Recipe adapted from this one


Tempering of nigella seeds and asafoetida as per the recipe, then the onion and tomato (I used 1 medium one each, chopped fine) and 1 tsp of ginger garlic paste (since I didn't have ginger paste).
Skipped the potato and turmeric and went straight on to the coriander, chilli and cumin powders.
Then the diced vegetables (eggplant, bottle gourd(lauki/sorakai/dudhi),smooth ridge gourd (turai) - about 2 cups) fried for 3 minutes and then cooked cover in 1.5 cups of water and salt to taste for about 8-10 minutes. The vegetables should be cooked through and soft but not mushy.

Remove from flame and serve warm with rice.

This goes to Nupur's event Blog Bites 7 - the Iron Chef Edition - where we have to pick one ingredient and cook it two ways using recipes from other food blogs. My ingredient of choice for this event is Mustard - something we take for granted in Indian cooking, but one that has many more uses than the basic tempering we are used to.

The other recipe I have picked is Kalyn's Mustard, Lemon and Coriander Grilled Chicken Breasts - something which I knew would go down very well with us, having cooked similar recipes before. This was the first time I was including mustard though, but seeing that this was from Kalyn's Kitchen, I didn't have a shred of doubt on how it would turn out.


Kalyn's recipes are all tried and tested and beautifully healthy as well. Her blog is a treasure trove of information on healthy recipes, especially suited to the South Beach diet. Her step by step instructions are a testimony to the time andenergy she spends creating these menus/recipes and meals.

Her casseroles are a favourite at home and I have tried many of her other one pot meals. This recipe is no exception - the marinade of mustard,olive oil, coriander and lemon juice worked beautifully on the chicken and I also mixed in about a half a tablespoon of the mustard paste which was made for the dish above. I used English mustard instead of Dijon mustard and added a tsp of black peppercorns while grinding the coriander leaves for a little more heat.

Breast pieces with bone were used instead of boneless pieces. The preparation was also a bit different - I flash fried the chicken breasts for 3 minutes on each side in a frying pan and then baked it in an oven for 35-40 minutes at 180C, turning once half way. The top was nice and crispy while the insides were beautifully cooked and tender. Served this with pasta tossed in a light, sauce with tomatoes and herbs.

A must try.

Sunday, September 5, 2010

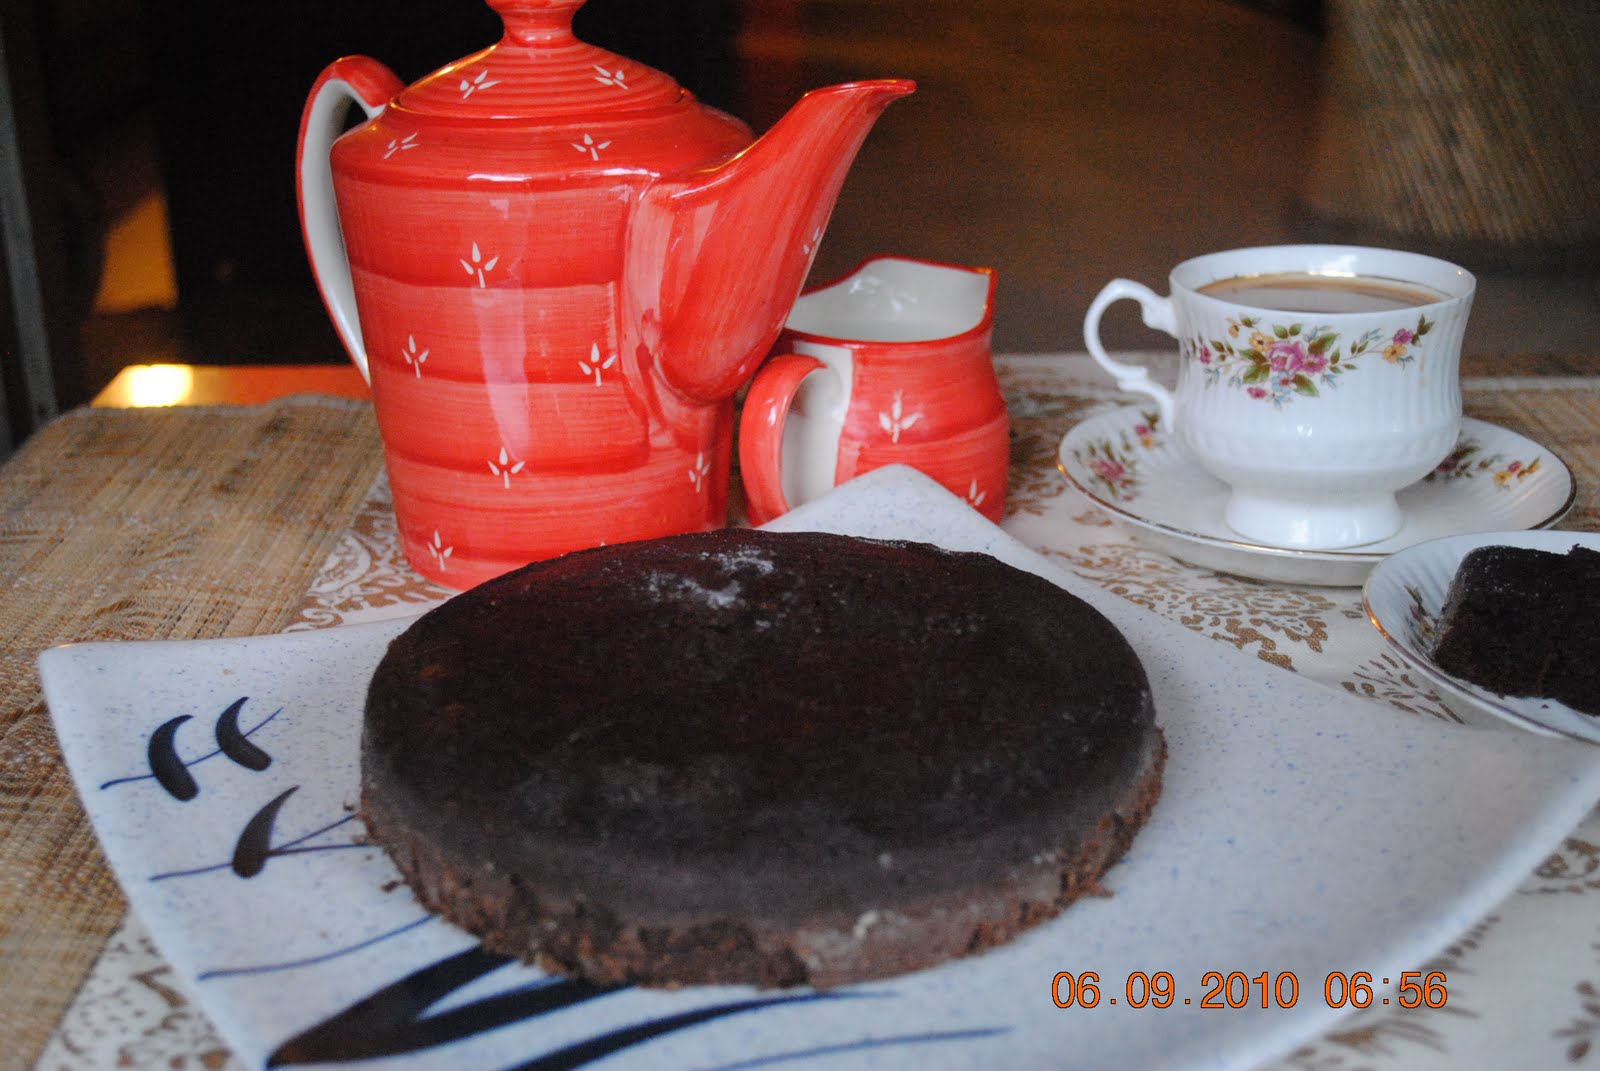
The Best Chocolate Cake for a Tea Party


For Anita's Tea Party celebration, the only fitting thing I could think of was this divine Chocolate Cake which I have blogged about before. This time though, I made it so my daughter's teachers could have a tea party celebration for Teacher's Day!

I have seen previous Teacher's Days in Delhi and the gifts and flowers it seems to entail in this showy city.....I don't subscribe to the idea at all. My mother has been a teacher all her working life and I know for sure that the one thing they do like is genuine appreciation for all the hard work they put in - the one upmanship among parents is, to say the least, annoying and sometimes embarassing.

My daughter is still very young though and it is a little difficult to explain to her why we don't necessarily have to do what everyone else is doing. So, I thought of involving her in baking a homemade chocolate cake instead, as a token of her love and appreciation - something which the other teachers could partake in as well, instead of making it a personal gift. She was happy to do all the mixing and measuring (and licking of bowl!) and took genuine pride at the end of it all in the soft, pillowy cake which emerged out of the oven. Lets raise a toast to freeing ourselves from the pack and doing what's right instead.

This time around, I added some whole wheat flour and cut back on the butter (as promised the last time) and it didn't make a difference. It is still a gorgeous chocolate cake - one you should try the next time you want someone to know, they're special.

 Chocolate Cake


Ingredients:
Refined flour (maida) - 1 cup
Whole wheat flour - 1/4 cup
Baking soda - 1/2 tsp
Baking powder - 1/2 tsp
1/2 cup cocoa powder, (I used Cadbury's)
1/2 tsp coffee powder (instant)
1 cup boiling water
Vanilla essence - 2 tsp
Butter at room temperature - 1 cup
Castor sugar - 1 cup
Eggs - 2

Method:
1. Take a large bowl and beat the butter in it with an electric mixed on medium for about half a minute.
2. Add the sugar gradually and cream together till shiny and fluffy, about 5 minutes. Add the eggs one at a time and beat the first well before adding the second one.
3. Meanwhile, heat the water till it is boiling and then pour over the cocoa powder in a bowl. Mix well till dissolved. Cool and then mix in the vanilla essence.
4. Sieve the flour, baking soda and baking powder together. Add the flour mix a little at a time to the butter sugar egg mixture, alternating with the cocoa mixture, beating continuously with the mixer on medium continuously. When it is combined well, beat on low for another half a minute.
5. Pour the cake batter into 2 pans (I used a 8" round pan and a smaller rectangular pan) which have been lined with parchment paper on the bottom and greased and floured on the sides.
If not using parchment paper on the bottom (I didn't have any this time), grease and flour the bottom well, instead. This cake is very soft and if not lined or greased, may break when you try to turn it out.
6. Pre heat the oven to 190C and bake for about 25 minutes - a toothpick inserted should come out moist but not uncooked. Cool completely before attempting to take it out - this is very important.
7. Warm slightly before serving.

Sunday, August 29, 2010

Pesto Crepes


One evening as I stopped by at my friend's place on the way back from work, she mentioned to me that she had a huge amount of basil and was wondering what to do with it. So as we chatted over coffee, I suggested she use it to make pesto and freeze it. So as I called out the ingredients, she made the pesto right then; she gave me the other half to take home and so I did the same as soon as I reached.

Very simple to make this pesto - basil, walnuts, garlic and olive oil. Thats all you need. Really. Once it was ready, I froze it in three separate boxes so I could pull them out as needed.

And thats what I did the next Sunday morning, using a recipe I had seen in Nigella Express. That recipe was for pesto crepes with ham. We don't really eat ham that much- so all I had was chicken sausages and after cutting them fine and lightly sauteeing them, I added them to the batter itself instead of rolling them up inside the pancakes as the recipe did with ham.

This recipe makes about 8 medium sized crepes or 5 large ones. Took me about 5 minutes to mix everything together, another 5 minutes to rest and then 12 minutes to make the crepes. I put some shredded cheese into them, just before rolling them up to serve, but you could also put the cheese into the batter itself. A really quick breakfast option and very very delicious. The pesto made the crepes very flavourful and you don't need anything to accompany them.

P.S - I've been doing some spring cleaning around the blog - on the right are updated links to some of my favourite blogs; still some more blogs to add.
I have also updated the Recipe Index - so please feel free to browse through older recipes and do let me know if you have any requests in a particular cuisine/meal/food group.

For the Pesto: (adapted from a Jacques Pepin recipe)


4 cups basil leaves
6 tbsp olive oil (extra virgin is good for this)
3/4 cup walnuts, lightly toasted
1 green chilli chopped
4 cloves garlic

1.Bring a vessel of salted water to boil and put the basil leaves into it for just 20 seconds. Drain and rinse in cold water. Pat dry slightly
2. Puree the basil leaves along with the walnuts, green chilli and garlic adding half of the olive oil at first and then the rest slowly.
3. Remove and freeze.

For the Crepes: (adapted from Nigella Express)
1/2 cup pesto
3/4 cup flour
1- 1 .5 cups milk
salt to taste
1 egg
pinch baking powder

1 sausage finely chopped and sauteed for 2 minutes
Grated cheese - 1 cup

1. Mix all the ingredients together (except baking powder, sausages and cheese) and blend till smooth.
2. Add chopped sausages and rest for 5 minutes.
3. Heat a griddle and put a few drops of oil or butter on it.
4. Pour a big ladle of batter on the pan and swirl till it spreads into a circle - if too thick, add some more milk.
5. Cook on a low medium flame for 3 - 4 minutes, then add some of the grated cheese in the middle and roll up with a spatula. Turn the roll over and cook for a minute before removing from flame.

Serve warm.


Monday, August 23, 2010

Kale Chanechi Amti - Black Chickpea Curry


Black Chickpeas are a regional speciality in Indian cooking - their preparation varies from one state to another. In Kerala, there is kadala curry with its distinctive coconut flavour, in Tamil Nadu, it is prepared as sundal - a lightly tempered savoury preparation of chickpeas tossed with grated coconut.

In Delhi, kala channa is a favourite accompaniment with kulchas which are sold as streetside fare. This is a popular cottage industry with the dish typically sold from the back of a bicycle - lightly baked flat breads are warmed up and served with a spicy semi-dry preparation of black chickpeas. My MIL was very taken with the idea when she visited us last year!

I have used these black chickpeas to make one of my favourite Maharashtrian dishes, amti - a spicy curry made with lentils or sprouted legumes. This reminded me a lot of Usal which is a spicy curry made with sprouts and is also used in making the popular snack misal - where the usal is mixed with other ingredients like boiled potatoes, peanuts, chopped onions, coriander, tamarind chutney, farsaan (fried snacks made out of chickpea flour) and even yoghurt to make a delicious filling snack.

I have used this recipe before for cooking black eyed beans to make chawlichi amti. For this version, I didn't sprout the chickpeas and used copra (dessicated coconut) and garlic to make a spice paste and added red chilli powder, cumin powder and coriander powder along with some tamarind pulp to the cooked chickpeas and cooked everything down to a delicious gravy. The only thing to remember for this dish is to soak the chickpeas overnight. It then has to be cooked till soft - in a pressure cooker that takes about 15 minutes and another 20 minutes of simmering with the spice paste.

This recipe is a heavily adapted version of Sanjeev Kapoor's recipe for amti made from sprouted black peas (kale watane) - but the amazing smell of coconut and garlic, mixed with the pleasure of biting into the plump chickpeas, brought back some pleasant memories.

This lovely, savoury curry goes to Susan's My Legume Love Affair #26 which is being hosted by Simona of Briciole.

(E of Evolving Tastes has kindly pointed out to me that kale watane (which is what I had called this earlier) is different from kale chane - so I have modified it accordingly)

Kale Chanechi Amti - Black Chickpea Curry

Black chickpeas (sprouted or plain) - 1 cup
Copra (Dessicated coconut) - 1/4 cup
Garlic - 5 cloves
Onions - 2 - 1 sliced, 1 finely chopped

Chilli pd - 2 tsp
Coriander pd - 1 tsp
Cumin pd - 1 tsp
Turmeric powder - 1/2 tsp
Hing - pinch
Tamarind - marble sized dissolved in 1/2 cup of water
oil - 2tsp
salt to taste
coriander leaves - 2 tbsp

1. Slice one onion and finely chop the other onion.
2. Heat 1 tsp oil and saute the sliced onions for 3-4 minutes, add the dessicated coconut and garlic cloves and roast for another 2-3 minutes. Cool and grind to a paste.
3. Heat 1 tsp of oil in a pan, add asafoetida and finely chopped onions; fry for 3-4 minutes.
4. Add the turmeric powder, chilli powder, coriander powder and cumin powder and fry well for 3 minutes.
5. Add the boiled chickpeas, salt and 2 cups of water and bring to a boil. Simmer, covered, on low for another 10 minutes.
6. Add the coconut-garlic-onion paste, tamarind paste and simmer for another 10 minutes.
7. Add coriander leaves for garnish and remove from flame.

Sig of Live to Eat has a giveaway on her blog - so if you want to win some goodies, take a peek!

Saturday, August 14, 2010

Chocolate Chip Cookies


My daughter has been asking me to bake cookies with her for the past couple of weeks now. I finally remembered yesterday to buy the unsalted butter I like to use for baking as well as spied on some chocolate chips in the local store. So, of course I had to make chocolate chip cookies!

I had seen some really amazing look choco-chip cookie in Nigella Express, but really there was chocolate *and* chocolate chips *and* cocoa powder as well as 2 cups of sugar in it and 125gms of butter. So, I decided to take the recipes I have used before and tweak it a bit - after all cookies are quite forgiving. I usually use a ratio of 1:2 for the butter to flour ratio and one egg for this amount is usually enough - don't like the smell when I put more than that- in fact for sugar cookies, I use only the egg white.

I added oats to the cookies to add some fibre, since I haven't used whole wheat flour in it. I powdered the oats though before adding it to the batter - my daughter (like many young kids) sometimes hates different textures in one food and I wanted her to enjoy her first home made chocolate chip cookie.

The cookies were rich and dark with the lovely bite of chocolate chips - they were soft and chewy too. I like my cookies crisp so I am going to experiment some more to see how I can make them crisper - would baking them for more time burn them? time to find out!


Chocolate Chip Cookies


Flour - 1 1/4 cup
Rolled Oats - 1/2 cup (I powdered it)
Baking powder - 1/2 tsp
Baking Soda - 1/2 tsp
Cocoa powder - 1 tbsp

Brown Sugar - 1 cup
Butter - 1/2 cup (about 60gms)
Egg - 1
Milk - 1 tbsp
Vanilla essence - 1 tsp
Chocolate Chips - 3/4 cup

Makes 15-18 cookies.

1. Cream butter and sugar together till smooth and shiny - 3 minutes with an electric mixer.
2. Add the egg, milk and vanilla essence and beat for another 3 minutes.
3. In another bowl, mix together the flour, baking powder, baking soda, cocoa powder and the oats. Pre heat oven to 180C (350F)
4. Add the dry ingredients to the butter, egg mixture - one third at a time and fold in gently.
5. Add the chocolate chips last.
6. Take a teaspoonful of the batter (not tablespoon) and drop on a greased tray leaving enough space in between two; the batter will flatten and spread so leave enough space. In my trays that means only 5-6 at a time.
7. Bake for 10-11 minutes - they will be a little soft, but will become firm as they cool. Transfer to a wire rack to cook.

Saturday, August 7, 2010

Restaurant Style Biryani/Thali "Sideish"

This was the beautiful "sideish" which went with the rava idlis in my last post. The food blogging world is such a boon to foodies like me - you think of a remembered taste, an imagined flavour, a cherished dish and you can find out how to recreate it in your home. That weekend, I didn't want to make the usual sambar to go with the idlis, nor a kurma - which is usually my favourite. I wanted something more tangy and spicy - not a tomato chutney, can't drown the idlis in it! Puli Kozhambu is too fiery to have first thing in the morning, unless it has already been made a day before and has had some time to mellow.

With father and daughter out swimming, I had all the time to ponder such earth shattering issues on a Saturday morning. I switched on my laptop and started looking at some of my favourite blogs for inspiration. And I found it on Sailu's Kitchen - a recipe for the accompaniment to biryani which is served in restaurants. Its amazing that she has gone to the trouble to recreate this dish which is served in small portions (but one can ask for refills) in biryani joints and even more amazing that she has got it spot on!

I didn't add the thick coconut milk in the original recipe because I didn't want it too creamy (and well I didn't think the joints I had eaten at, had bothered to splurge on coconut milk!). It was still a very beautiful, slightly creamy gravy with just the right amount of spice and the tangy flavour of tomatoes finishing it. Once I made it I realised that this was also the dish which is served in small quantities with "NV meals" in small Chettinad style joints in Chennai - and which we end up asking for refills. We recently had lunch for two consecutive Sundays at Gunpowder - that amazing restaurant in Delhi which serves authentic Kerala cuisine at reasonable prices, such a rarity!-and the accompaniment served with the kotthu paratha was something we ate with our appams and rice as well! I think it something about the combination of whole spices, coconut, poppy seeds and tomatoes that does the trick.

This dish is a keeper - as my husband said appreciatively - write this one down!! We couldn't get enough of it and kept slurping it up long after the idlis were done with.

Recipe for Restaurant Style Biryani/Thali "Sideish" - from Sailu's Blog. This dish goes to the latest edition of Nupur's Blog Bites event - BB6 Potluck

P.S - I have received quite a few emails asking me to post the recipe I used (without coconut milk) so I am posting this here. Also, some people were not able to check the link included above.

Recipe

2 onions, sliced
3 medium tomatoes, in 4 pieces
Publish Post


Dry roast and grind:
poppy seeds (khus khus) - 1 tsp
2-3 cashewnuts
1/4 cup grated coconut

Grind to a paste: (or crush in mortar)
1 " ginger piece
3 green chillies
4 garlic cloves

1 tsp red chilli powder
1/2 tsp coriander powder (dhania)
1/4 tsp turmerice powder (haldi)
1/4 tsp cumin powder (jeera)
pinch of garam masala powder

1tbsp oil
curry leaves
1 cinnamon stick
3 cloves
2 cardamom pods (elaichi)

Method:
1 Heat oil in a pan and add cloves, cinnamon,curry leaves and cardamom. When they change colour (about 2 minutes) add onions and fry till transparent.
2.Add the ginger, garlic and green chilli paste, fry for 2-3 minutes. Add red chilli powder, turmeric,coriander and cumin powders and mix well.
3. Add the chopped tomatoes and fry for 3 minutes.
4. Put in the coconut-cashew paste and fry for 5 minutes on a low flame, stirring from time to time.
5. Add salt, 2 cups of water and bring to boil; lower flame and simmer for 10-15 minutes and turns creamy. Remove from flame and serve warm.